Improved dashboard lighting
The VAZ 2112 dashboards have always had one problem: dim lighting. This was especially noticeable at night. So the first thing tuning enthusiasts do is change the light bulbs in the instrument panel. Initially, there are simple and extremely weak incandescent lamps. They are being replaced by white LEDs, which have two advantages: some are durable and economical. Here's what you'll need to get started:
- 8 white LEDs;
- medium sized flathead screwdriver.
Sequence of operations
To remove incandescent lamps from the VAZ 2112 instrument unit, you will have to unscrew it and pull it out.
- The steering wheel moves down all the way.
- Above the dashboard there is a visor into which a pair of screws are screwed. They are removed using a screwdriver.
The location of the screws holding the panel is shown by arrows - The visor is pulled out from the panel. To do this, you need to slightly push it towards you, and then pull it forward and up.
- Under the visor there are 2 more screws, which are unscrewed with the same screwdriver.
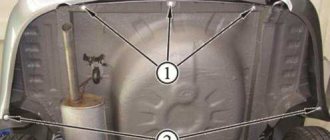
- The block with instruments is removed from the niche. The wires located on the rear wall of the unit are disconnected. There are also light bulbs there. They are unscrewed and previously prepared LEDs are installed in their place.
Light bulbs are unscrewed from the printed circuit board by hand, their location is shown by arrows - The wires are connected to the block, it is installed in a niche and screwed together with a decorative visor.
Video: removing the instrument panel on a VAZ 2112
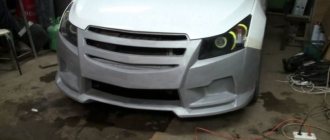
More about airbrushing
This term hides the process of artistic painting using a special tool - an airbrush.
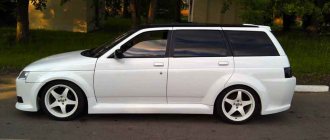
With its help, paint is applied with compressed air supplied by a compressor. Cars began to be decorated with airbrushing in the second half of the last century. It all started with bikers who wanted to stand out among the gray mass with their motorcycles. This is how they emphasized their individualism. Owners of the Lada 2112 also love to decorate their cars and emphasize their personal style.
In airbrush, the design is applied in three ways:
- traditional method: using an airbrush, drawing is done by hand;
- stencil: the design is sprayed with a spray gun;
- The film with the finished pattern is glued to the body.
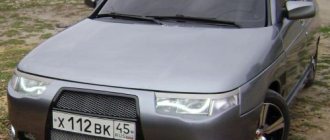
Airbrushing on cars
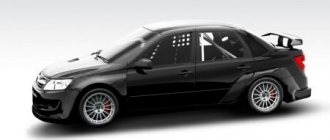
Experienced airbrush specialists say that the method of airbrushing is not so important. It is much more difficult for the vehicle owner to decide on the theme of the drawing. For example, the owner of a VAZ 2112 Coupe needs to combine the desired layout theme with the design of the car.
The traditional airbrush painting process has remained the same for many years: outlines are drawn by hand, and then paint is sprayed. Using an airbrush you can do delicate work that cannot be done with a regular painting tool.
This method has many advantages over others: quality and durability, a huge selection of images, and when cleaning and polishing the body, the image is not damaged.
Drawing
The disadvantages include significant cost, the need for a highly qualified artist (since it is impossible to correct inaccuracies), and difficulties with the future sale of the car. Using a stencil reduces the cost of the procedure. But there is a huge risk that exactly the same pattern will be on several more cars.
The film method involves gluing painted films onto the car. Photographs, scanned and enlarged, are usually used as drawings. This method of airbrushing has the main advantage of low cost of work, less time consuming to complete it, and quick removal of the picture if you get tired of it. Its disadvantages: fragility, rapid destruction under the influence of environmental factors.
Panel modernization
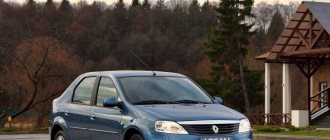
The appearance of the dashboard on the very first Twelves was very far from ideal. In 2006, AvtoVAZ engineers tried to correct this situation and began installing “European”-style panels on these cars. And today, owners of old cars are modernizing their cars by installing Europanels on them.
Europanels began to be installed on the VAZ 2112 only in 2006
Sequence of work
To remove the panel you only need a couple of tools: a knife and a Phillips screwdriver.
- The instrument unit is removed along with the decorative visor as described above.
- The car glove compartment opens. There are 3 self-tapping screws inside; they are unscrewed with a Phillips screwdriver.
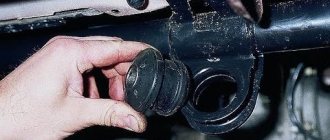
To remove the VAZ 2112 panel, you only need a knife and a screwdriver - There are 4 plugs located near the central control unit. They are pryed with a knife and removed. The screws located under them are unscrewed.
- The safety block opens. Inside there are 2 self-tapping screws. They also get out.
- The old dashboard trim has been removed from its fasteners. All that remains is to remove it by pulling it towards you and up.
- The removed trim is replaced with a new europanel, the fastening screws are returned to their places (all the mounting holes for the old and new trims match, so there will be no problems).
Suspension
Often the object of tuning on the VAZ 2110 and related cars is the suspension. The following manipulations are performed with this VAZ design element:
- Lowering the car. Despite the possibility of purchasing new lowered springs, many owners of the “ten” prefer to limit themselves to shortening the factory units, sawing off several turns from them.
- Installation of helical suspension and adjustable shock absorbers - coilovers. Such a suspension has a high price, however, making coilovers with your own hands is difficult if you lack experience.
- To increase the stiffness of the springs and increase the ground clearance of the car, interturn spacers - buffers - are installed.
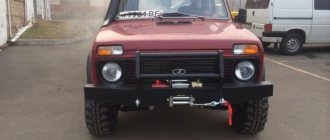
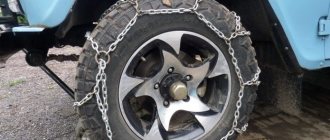
- To give the “ten” an extravagant look, wheels with a negative camber angle are installed.
- Manufacturing of independent rear or front suspension.
Despite the ban on most of these modifications, tuning enthusiasts make the following changes to the car’s braking system:
- installation of rear disc brakes;
- installation of multi-colored pads on the caliper;
- installation of brake pads with a modified appearance.
Ceiling covering
The material from which the ceiling covering in the VAZ 2112 is made gets dirty very quickly. Over time, a dark spot appears on the ceiling, directly above the driver's seat. Similar spots appear above the heads of passengers (but, as a rule, later). Re-upholstering the ceiling covering on your own is not an easy task. But finding a reupholstery specialist is not easy, plus his services are not cheap. So VAZ 2112 owners do it simpler and simply paint the ceilings of their cars using universal paint in spray cans (to paint the ceiling of a “two-wheeler” you need 6 of them).
Sequence of work
Painting the ceiling directly in the salon is not an option. First, the coating must be dismantled.
- The ceiling covering in the VAZ 2112 is held on by 10 screws and 13 plastic latches located around the perimeter. To remove the screws, use a Phillips screwdriver. The latches are opened manually.
The material of the ceiling covering on the VAZ 2112 gets dirty very quickly - The removed covering is removed from the passenger compartment through one of the rear doors (to do this, the covering will have to be slightly bent).
- The selected paint is sprayed from a can onto the ceiling covering (no preliminary primer is required - the universal paint is well absorbed into the material).
- After painting, the ceiling needs to be dried. It takes 6-8 days for the smell to completely disappear. Drying is carried out only in the open air.
The coating needs to be dried in the open air for 6–7 days. - The dried coating is installed back into the interior.
Interior renovation costs
And everyone is healthy again!