Tools:
- Straight box spanner 13 mm
- Curved box spanner 24 mm
- Hex key 12 mm
- Driver for 3/4 socket bit
- Knob attachment 24 mm
- Large flat screwdriver
- Syringe for filling transmission units with oil
- Waste oil container
- Small hammer
- Torque wrench
Parts and consumables:
- Transfer case shaft seal
- Transmission oil
- Sealant
- Litol-24 lubricant
Note:
We carry out the work on an inspection ditch or overpass.
1. We replace the shaft seals of the front and rear axle drives by disconnecting the cardan shaft flanges from the shaft flanges, as described here. We change the transfer case drive shaft oil seal only after removing the intermediate shaft, as described here. The operations for replacing all three oil seals are the same - we will show them using the example of a rear axle drive shaft oil seal.
2. Drain the transfer case oil as described here.
3. We insert two bolts into the holes in the flange and screw the nuts onto them.
4. Using a 24mm socket, unscrew the flange mounting nut, holding it from turning with a screwdriver or a mounting spatula inserted between the bolts.
Warning:
Self-locking nuts must not be reused; replace them with new ones!
5. We remove the washer.
6. Remove the flange.
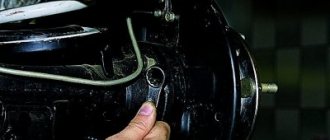
7. We pry off the oil seal with a screwdriver.
8. We remove it from the transfer case cover socket.
9. Apply sealant to the seating surface of the housing in the crankcase under the oil seal. Apply Litol-24 lubricant to the working surface of the new oil seal.
10. We press in the oil seal with a piece of pipe or a tool head of a suitable size.
Helpful advice:
You can use an old oil seal as a mandrel.
Warning:
The transfer case shaft seals have the same mounting dimensions, but have oppositely directed oil drainage notches. When installing, follow the direction of shaft rotation indicated on the oil seal.
11. We install the dismantled parts in the reverse order. Apply sealant (threaded) to the threads of the flange nut and tighten the nut with the prescribed torque H*m(kgf*m)96–117.6 (9.8–12.0), using a torque wrench.
We check the oil level in the box as described here and, if necessary, top up.
The article is missing:
- Photo of the instrument
- Photos of parts and consumables
- High-quality photos of repairs
Source: Chevrolet niva device, operation, maintenance and repair. Publishing house "Behind the Wheel".
Reg.: 12/06/2004 Threads / Messages: 628 / 51730
Reg.: 12/06/2004 Threads / Messages: 4031 / 23190 From: Moscow Age: 65 Car: 21214M, 2013
When replacing, the oil seal must be placed on sealant. I've written about this many times, try searching for ABRO.
Before you shoot anything, find out what the sound is and where it comes from. I doubt it's a bearing. Maybe some shield is resonating, maybe it’s touching something.
Alexey aka ALER.
Reg.: 12/06/2004 Threads / Messages: 628 / 51730
Reg.: 12/06/2004 Threads / Messages: 4031 / 23190 From: Moscow Age: 65 Car: 21214M, 2013
Alexey aka ALER.
Reg.: 12/06/2004 Threads / Messages: 628 / 51730
Thank you. Today I installed oil seal 2121-2302052 on the rear axle flange. I hope this is true? Otherwise, the first time I put 2101-2402052 there from the classics and it drained my oil in a terrible way. By the way, is it really possible to change the oil seals in the front and rear axles on a lift without a torque wrench? One service center told me that the shank nuts are tightened very cleverly. And what if they are not tightened correctly, then you can safely change the gearboxes
NIVA oil seals
1. NIVA gearbox seals:
-Oil seal for the input shaft of the gearbox (gearbox) NIVA-2121, -21213, -21214, -2131, -2123:
Catalogue number: 2101-1701043
oil seal dimensions: 28x47x8mm
- Seal of the secondary shaft of the gearbox (shank) VAZ-2121, -21213, -21214, -2131, -2123:
Catalogue number: 2101-1701210
oil seal dimensions: 32x56x11mm
2 . NIVA front axle oil seals:
-Oil seal for the front axle gearbox NIVA- 2121,-21213,-21214,- 2123,-2120
catalog number: 2121-2302052
-Drive seal -2121,-21213,-21214,-2131,-2123, universal (without direction)
Catalog number: 2123-2303120 / 121 2 pcs.
seal dimensions: 57.15 x 40 x 9mm
But it is better to install seals with a notch (left, right):
Left drive oil seal -2121,-21213,-21214,- 2123
Catalog number: 21213-2301035 1 piece.
Oil seal dimensions: 57.15 x 40 x 9mm
Right drive oil seal -2121,-21213,-21214,-2123
Catalog number: 21213-2301034 1 piece.
Oil seal dimensions: 57.15 x 40 x 9mm
3. Transfer Case Seals 3pcs:
2 identical oil seals are installed on the valve:
catalog number: 2101-2402052-01 (this is the rear axle gearbox seal on the VAZ-2101 and NIVA-2121 of right rotation),
one is installed on the drive shaft of the RK:
(in the lower diagram), the second is on the front shaft of the RK differential (see the upper diagram - highlighted in red)
Dimensions of these seals in mm: 35.8 x 68 x 10(12) 2 pcs.
An oil seal is installed on the rear shaft of the RK differential - this is the 3rd oil seal (highlighted in blue in the top diagram)
with catalog number: 2121-2302052 left rotation 1 pc.
Dimensions in mm: 35.8 x 68 x 11(12)
4. Rear axle gear oil seal :
catalog number: 2101-2402052-01 (rear axle gearbox VAZ-2101) 1 pc.
5. Axle shaft seals for Chevy NIVA-2123:
Seals for VAZ-2110 drives of right and left rotation are installed
catalog numbers of oil seals: 2110-2301034 right - 1 piece
gland dimensions in mm: 57 x 35 x 9
In the photo: VAZ-2123 axle seals (BRT) red-left, black-right.
The arrow on the oil seal indicates the direction of rotation of the shaft (when the vehicle is moving forward).
Source
Advice on how to remove drives without dismantling the Niva front gearbox
- To dismantle the drives, it is necessary to unscrew the fastenings of the gearbox (in this case, some kind of stop is placed under it).
- Then the steering knuckles are released. To do this, simply unscrew the shock absorber mount from the lower arm and the lower ball joint.
- To relieve the load, jack up the lower suspension arm.
- Unscrew the hub nut and remove the centering ring. The nut is too tight, so we use a wrench extension (for example, a metal pipe).
- We move the steering knuckle to the side. The drive can then move freely.
- To ensure free movement of the drive during removal, the gearbox must be moved back slightly.
- We remove the drive, being careful not to damage the anthers. If the boot is torn, it must be replaced.
- The procedure for removing the right and left CV joint drives is similar.
Before dismantling, it is necessary to mechanically remove dirt from the inside of the steering knuckles and from the bottom of the car above the work area. The best option is to wash the bottom with a high-pressure apparatus one day before carrying out work.
Driving at high speeds with broken universal joint crosspieces does not go without consequences. The rear axle gearbox on the classic and Niva is designed in such a way that when the car moves forward, the shank seems to be unscrewed from the engagement of the main pair. The drive gear of the main pair (also known as the shank) rotates on two bearings: front and rear. The distance between them is elastically fixed by the pretension created by the spacer sleeve when the shank nut is tightened. The vibration of the cardan, transmitted to the rear axle gearbox, gradually unscrews the shank nut. Radial play appears in the shank - especially on the front bearing, because When moving forward, the shank is unscrewed from the joint of the main pair and the front bearing is freed for play. Radial play wobbles the unfixed spacer sleeve and oil flinger washer, gnawing out metal fragments that fall into the tapered bearing. After the fragments cut “patterns” on the rollers and bearing race, noise begins, which continues even after the shank nut is tightened or the spacer is replaced. In theory, in such cases, repair of the rear axle gearbox is required. Repair with complete disassembly, troubleshooting and assembly. The last stage is not performed by anyone in a city of millions at a reasonable price. Everyone just replaces the gearbox with a new one and moves on.
Replacing the front shank bearing.
I decided to go a different route. Replace the front tapered shank bearing without disassembling the gearbox. I calculated the distance between the shank and the front bearing race, which was exactly 13 mm. It is necessary to select a puller into this distance, the clamping tab of which can squeeze through. We searched for a long time at the service station, but found a puller with a suitable jaw width size - 13 mm. Only the puller was external, but we managed to twist the legs for internal removal. We started working with this tool.
The flanges were uncoupled. We tightened the nut, took out the bearing, bushing and washer.
Now all that’s left to do is pull out the outer race of the front shank bearing.
How to determine when it's time to change?
Under the influence of temperature and aggressive substances contained in the oil, the elastic cuffs become rigid. Rotating shafts gradually wear out rubber or silicone. As a result, the connection loses its tightness. This manifests itself in the form of oil leaks. If there is severe wear after parking, you can find oil drops under the car in the area of the gearbox.
If the input shaft seal is damaged, lubricant leaks onto the clutch disc. As a result, the oil begins to burn, as evidenced by a characteristic odor. In this case, the clutch may slip under heavy load.
Important! Seal wear is also indicated by a drop in oil level. In this case, the parts must be replaced with new ones.
Changing the oil in Niva Chevrolet transfer case
According to the service book, the oil in the transfer case must be replaced every 45,000 km. To change or add oil to the transfer case, you will need a 12mm hexagon, a syringe for filling transmission units, and a container for used oil.
Unscrew the drain plug and drain the oil, then tighten the drain plug and turn out the filler
Using a syringe, fill in fresh oil to the level of the lower edge of the filler hole and tighten the filler plug. This completes the oil change in the Chevrolet Niva transfer case.
Replacing the secondary shaft oil seal
To work, you will need a standard set of wrenches, a hammer, a mandrel and a screwdriver. The materials you will need are sealant and kerosene for washing spare parts.
Replacing the secondary shaft oil seal of the Niva Chevrolet gearbox requires preliminary dismantling of the oil seal. After this you need to do the following:
- Remove the centering ring seal.
- Unscrew the nut holding the shank flange.
- Remove the centering ring.
- Pull out the lock washer.
- Remove the flange.
Using a screwdriver, remove the oil seal from the mounting hole.Apply a thin layer of sealant to the outer surface of the body of the new part.
Using a mandrel, press the part into the gearbox cover.
After this, all that remains is to check the oil level and install the flush valve in place.
To replace the input shaft seal of the Niva Chevrolet gearbox, it is necessary to dismantle the gearbox. After this, all that remains is to wipe its body with a rag and get to work. To replace a worn part, you must:
Using a 13mm wrench, unscrew the nuts and remove the clutch housing cover.
When the replacement is complete, you need to put the box back in place.
Replacing the drive gear oil seal of the Chevrolet Niva front axle gearbox
Tools:
- Straight box spanner 13 mm
- Driver for 3/4 socket bit
- Knob attachment 24 mm
- Large flat screwdriver
- Small hammer
- Torque wrench
- Mounting blade
- Flange puller
Parts and consumables:
- Front axle gearbox drive gear oil seal
- Sealant
- Litol-24 lubricant
- Self-locking nut for flange fastening
Notes:
Replace the oil seal with a new one if an oil leak is detected. We carry out the work on an inspection ditch or overpass.
1. We disconnect the driveshaft from the front axle gearbox, as described here. We remove the housings of the internal hinges of the front wheel drives from engagement with the gears of the front axle reducer drives, as described here.
2. Using a dynamometer, we turn the drive gear clockwise by the flange mounting nut and determine the moment of its resistance to rotation (similar to the operations given in the article “Replacing the drive gear oil seal of the Chevrolet Niva rear axle gearbox”).
Note:
For clarity, we show the work with the clips and pads securing the lower cover of the gearbox housing to the anti-roll bar bar removed.
3. Insert bolts into two adjacent holes in the flange and screw nuts onto them.
4. Using a 24mm socket, unscrew the flange nut, holding it from turning with a mounting blade.
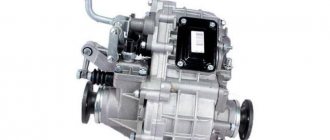
Transfer case device
The Chevrolet Niva transfer case redistributes engine torque between the drive axles and, if necessary, changes the gear ratio and locks the center differential. The parts of this assembly require significant force. Therefore, RK gears and bearings operate in an oil environment.
To prevent oil leakage from the transfer case, oil seals are installed at the joints of the housing and rotating drive shafts. They consist of two parts: a metal body and a rubber cuff, tightened by a spring. The latter ensures sealing of the connection due to the tight fit of the rubber to the shaft.
Front axle structure.
To replace the oil seal, it is not necessary to dismantle the front axle. When replacing oil seals yourself, it is not recommended to use a lift; it is better to carry out the work on an inspection pit or overpass. The rear wheels must be secured with supports. The gearbox and transfer case levers must be adjusted to the neutral position. When using a jack, it is better to hang the front part on special supports.
First, the replacement area is cleaned of drips and traces of technical fluids. After this, the crankcase plug is unscrewed and the oil in the gearbox is drained into a special container. After this, the plug is installed in place.
To carry out the replacement, you need to stock up on the following set of tools:
- set of socket wrenches and hexagons
- hammer and pry bar
- Screwdriver Set
- puller with two or three legs
- pipe sections equal to the diameter of the seals
- Liquid for removing oil residues, such as kerosene
- metal mesh
- rags
Article, size and manufacturers of reinforced cuffs
Initially, oil seals with an outer diameter of 68 and an inner diameter of 35.8 mm were installed in the transfer case. two types:
- 2121-2302052 — one oil seal. A similar part is installed on the drive gear of the front axle;
- 2101-2402052-01 — two oil seals in the Republic of Kazakhstan. The same part is located on the drive gear side of the rear axle.
The installation of different seals is explained by the different directions of rotation of the drive shafts.
Useful! Nowadays oil seals with article number 2123-1802120-12 are installed in the RC and axles of the Niva Chevrolet. They are designed for shaft rotation both clockwise and counterclockwise.
Spare parts from the Balakovo plant (Rosteco) are popular. According to reviews from Chevrolet Niva owners, they are characterized by high wear resistance at an affordable price.
How to replace the oil seal on a Chevrolet Niva
Most Chevrolet Niva owners, due to the simplicity of the design, can independently repair their car. This is especially true for a large number of consumables, including those in the chassis of the car. One of the parts that requires periodic replacement is the Chevrolet Niva front axle oil seal. The need for repairs arises when an oil leak occurs from the axle housing and a knocking noise occurs. The main cause of grease leakage is due to a clogged breather.
It is necessary to monitor at what stage the oil leak occurs. If, after intensive movement, while the gearbox is still hot, and after it cools down, it stops, then it is necessary to clean the breather. It may be clogged with dirt, which prevents the heated air from escaping outside. Therefore, it is possible to squeeze out fluid from the gearbox, even if the gaskets are in good condition.
If the breather is working properly, but oil still comes out, then most likely you will need to replace the cover gaskets and o-rings. Typically, the design of the front axle provides for the presence of three rings: an oil seal located on the axis of the drive gear, axle bearings and oil seals for the right and left drive - the axle shaft hinge.
It is important to remember that the left and right oil seals are designed for different directions of rotation, so when purchasing, you should carefully check the package. The direction can be determined by the marked arrow. If installed incorrectly, there may be increased oil leakage outward due to the location of the oil scraper notches.
When and how do you need to change the seals of the VAZ 2123 transfer case?
Reference! Parts must be replaced if transmission oil leaks occur at the interface between the drive shafts and the transmission housing.
If this is not done, the transmission will leak. Without lubrication, transfer case parts will quickly fail.
Step-by-step instructions for replacing the oil seal of the Niva Chevrolet
To work, you need to have free access to the bottom of the car. Therefore, replacement of the oil seals will be carried out on an inspection ditch, overpass or lift.
You will need the following tool:
- hexagon 12;
- open-end or socket wrench 24;
- waste container;
- flat screwdriver;
- hammer;
- mandrel;
- syringe for filling transmission oil;
- new self-locking nuts for fastening the flanges.
The algorithm for replacing the Niva Chevrolet transfer case oil seal is as follows:
- drain the oil from the transfer case into the prepared container;
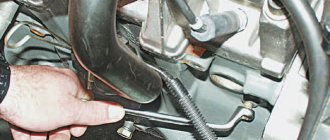
- unscrew the bolts securing the cardan, the drive shaft oil seal of which is to be replaced;
- engage the gear, lock the differential and put the car on the handbrake;
- Unscrew the nut securing the propeller shaft drive flange.
- remove the washer;
- pull the flange off the shaft;
- use a screwdriver to remove the old oil seal;
- clean the seat and apply sealant;
- lubricate the rubber seal of the new oil seal with oil;
- using a mandrel and a hammer, press the part into place;
- install the flange and washer, tighten them with a self-locking nut;
- secure the cardan.
Important! The self-locking design does not allow for reuse of parts. Therefore, the flange nuts must be replaced with new ones.
After completing the work, it is necessary to fill the transfer case with fresh transmission oil.
Replacing the rear axle gearbox seal of a Chevrolet Niva
Replacing the oil seal
rear axle
gearbox on a
Chevrolet Niva
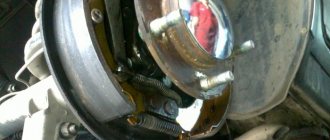
. Checking the breather. Oil seal no.: .
- We disconnect the driveshaft from the gearbox by unscrewing the bolts securing it to the flange.
- We separate the internal CV joint housings from the drive gears.
- Using a dynamometer, we determine the moment of free rotation of the drive gear
. To do this, turn the flange mounting nut until the gear begins to rotate. We fix the magnitude of the moment. - We tighten the bolts into two adjacent flange holes (for fixation).
- We insert a mounting spade between the bolts, hold the flange from turning and unscrew the fastening nut.
- Remove the washer and flange from the spline joint. If it is impossible to remove it by hand, use a universal puller.
7. Remove the oil seal using a flat-head screwdriver. 8. Rinse and thoroughly wipe the replacement area. 9. Replacement of the front axle is carried out only with original Chevrolet spare parts. To facilitate pressing, any grease (litol, grease) is applied to the sealing ring. 10. Press in the ring using a pipe of suitable diameter. 11. Place the flange on the spline connection and put on the washer. 12. Tighten the nut to the torque determined when unscrewing. 13. Fasten the cardan shaft.
- We remove both drives (or the one that requires replacement)
- Remove the retaining ring and spring washer;
- Using a hammer, carefully knock down the bearing. If removal is difficult, treat with a penetrating lubricant, such as WD-40.
- Remove the bearing cap with the old seal.
- Using a pipe, knock the oil seal out of the cover;
- Lubricate the new spare part with any grease and press the o-ring into the cover.
7. We assemble the unit. We fill the gearbox with oil in accordance with the maintenance instructions, do a test drive , and check for oil leaks.
Transfer case device
The Chevrolet Niva transfer case redistributes engine torque between the drive axles and, if necessary, changes the gear ratio and locks the center differential. The parts of this assembly require significant force. Therefore, RK gears and bearings operate in an oil environment.
To prevent oil leakage from the transfer case, oil seals are installed at the joints of the housing and rotating drive shafts. They consist of two parts: a metal body and a rubber cuff, tightened by a spring. The latter ensures sealing of the connection due to the tight fit of the rubber to the shaft.
Replacing the Chevrolet Niva front axle oil seal.
- First you need to remove one or two drives, depending on where replacement is needed.
- After this you need to remove the locking ring
- Using a hammer, knock out the bearing. If you have problems with removal, you can use WD-40 lubricant
- The cover is removed, the old oil seal is knocked out using a pipe.
- The installation site is lubricated and a new O-ring is installed.
- the unit is reassembled.
Article, size and manufacturers of reinforced cuffs
Initially, oil seals with an outer diameter of 68 and an inner diameter of 35.8 mm were installed in the transfer case. two types:
- 2121-2302052 — one oil seal. A similar part is installed on the drive gear of the front axle;
- 2101-2402052-01 — two oil seals in the Republic of Kazakhstan. The same part is located on the drive gear side of the rear axle.
The installation of different seals is explained by the different directions of rotation of the drive shafts.
Useful! Nowadays oil seals with article number 2123-1802120-12 are installed in the RC and axles of the Niva Chevrolet. They are designed for shaft rotation both clockwise and counterclockwise.
Spare parts from the Balakovo plant (Rosteco) are popular. According to reviews from Chevrolet Niva owners, they are characterized by high wear resistance at an affordable price.
How to change transfer case seals on a Chevrolet Niva
Niva Chevrolet transfer case design: 1 – driven gear; 2 – differential bearings; 3 – spring washer; 4 – retaining ring; 5 – differential lock clutch; 6 – gear ring of the differential housing; 7 – gear ring of the front axle drive shaft; 8 – front axle drive shaft bearing; 9 – oil deflector; 10 – dirt deflector; 11 – front axle drive shaft; 12 – flange; 13 – oil seal; 14 – oil drain plug; 15 – driven gear of the speedometer drive; 16 – speedometer drive drive gear; 17 – hole plug for filling and checking the oil level; 18 – front cover of the transfer case; 19 – roller bearing of the intermediate shaft; 20 – transfer case suspension bracket; 21 – drive shaft bearing cover; 22 – thrust ring of the bearing; 23 – drive shaft bearings; 24 – overdrive gear; 25 – gearshift clutch hub; 26 – gear shift clutch; 27 – transfer case housing; 28 – reduction gear; 29 – low gear bushing; 30 – drive shaft; 31 – back cover; 32 – ball bearing of the intermediate shaft; 33 – intermediate shaft; 34 – differential housing; 35 – thrust washer of the rear axle drive gear; 36 – rear axle drive shaft bearing; 37 – rear axle drive gear; 38 – satellite; 39 – satellite axis; 40 – retaining ring of the satellite axis; 41 – transfer case suspension axis; 42 – spring washer; 43 – front axle drive gear.
Transfer case drive Niva Chevrolet:
1 – differential lock clutch fork; 2 – differential lock clutch; 3 – fork locking bolt; 4 – rod protective cover; 5 – lever spring; 6 – differential lock fork rod; 7 – front axle drive housing cover; 8 – lock washer; 9 – bushing of the lever axis; 10 – lever axis; 11 – differential lock lever; 12 – gear shift fork rod; 13 – control lever fork; 14 – control lever; 15 – differential lock lever rod; 16 – gear shift clutch; 17 – gear clutch fork; 18 – spacer sleeve; 19 – locking ball; 20 – retainer spring bushing; 21 – clamp spring; 22 – switch for the differential lock warning lamp; 23 – axis of the control lever fork; 24 – fork mounting bolt.
The Chevy Niva transfer case is designed to vary the torque in magnitude and distribute it between the front and rear drive axles. The car is equipped with a two-speed transfer case with a center differential lock. The transfer case is controlled (selecting a higher or lower gear, turning on/off the differential lock) with one lever through a mechanical lever drive.
When and how do you need to change the seals of the VAZ 2123 transfer case?
Reference! Parts must be replaced if transmission oil leaks occur at the interface between the drive shafts and the transmission housing.
If this is not done, the transmission will leak. Without lubrication, transfer case parts will quickly fail.
Step-by-step instructions for replacing the oil seal of the Niva Chevrolet
To work, you need to have free access to the bottom of the car. Therefore, replacement of the oil seals will be carried out on an inspection ditch, overpass or lift.
You will need the following tool:
- hexagon 12;
- open-end or socket wrench 24;
- waste container;
- flat screwdriver;
- hammer;
- mandrel;
- syringe for filling transmission oil;
- new self-locking nuts for fastening the flanges.
The algorithm for replacing the Niva Chevrolet transfer case oil seal is as follows:
- drain the oil from the transfer case into the prepared container;
- unscrew the bolts securing the cardan, the drive shaft oil seal of which is to be replaced;
- engage the gear, lock the differential and put the car on the handbrake;
- Unscrew the nut securing the propeller shaft drive flange.
- remove the washer;
- pull the flange off the shaft;
- use a screwdriver to remove the old oil seal;
- clean the seat and apply sealant;
- lubricate the rubber seal of the new oil seal with oil;
- using a mandrel and a hammer, press the part into place;
- install the flange and washer, tighten them with a self-locking nut;
- secure the cardan.
Important! The self-locking design does not allow for reuse of parts. Therefore, the flange nuts must be replaced with new ones.
After completing the work, it is necessary to fill the transfer case with fresh transmission oil.
Front axle shank oil seal Niva Chevrolet
Tools:
- Straight box spanner 13 mm
- Driver for 3/4 socket bit
- Knob attachment 24 mm
- Large flat screwdriver
- Small hammer
- Torque wrench
- Mounting blade
- Flange puller
Parts and consumables:
- Front axle gearbox drive gear oil seal
- Sealant
- Litol-24 lubricant
- Self-locking nut for flange fastening
Notes:
Replace the oil seal with a new one if an oil leak is detected. We carry out the work on an inspection ditch or overpass.
1. We disconnect the driveshaft from the front axle gearbox, as described here. We remove the housings of the internal hinges of the front wheel drives from engagement with the gears of the front axle reducer drives, as described here.
2. Using a dynamometer, we turn the drive gear clockwise by the flange mounting nut and determine the moment of its resistance to rotation (similar to the operations given in the article “Replacing the drive gear oil seal of the Chevrolet Niva rear axle gearbox”).
Note:
For clarity, we show the work with the clips and pads securing the lower cover of the gearbox housing to the anti-roll bar bar removed.
3. Insert bolts into two adjacent holes in the flange and screw nuts onto them.
4. Using a 24mm socket, unscrew the flange nut, holding it from turning with a mounting blade.
5. We remove the washer.
6. Remove the flange from the drive gear shank.
7. If there is difficulty, press it with a puller.
8. Use a screwdriver to pry off the seal.
9. Let's take it out.
10. After applying Litol-24 lubricant to the working surface of the new oil seal, we press it in with a suitable piece of pipe. We install the flange and tighten the flange mounting nut, checking the moment of resistance to rotation of the drive gear (similar to the operations given in the article “Replacing the drive gear oil seal of the Chevrolet Niva rear axle gearbox”).
11. We carry out further assembly in reverse order.
The article is missing:
- Photo of the instrument
- Photos of parts and consumables
- High-quality photos of repairs
Replacing the suspension cushions of the Niva Chevrolet transfer case
To replace the transfer case cushions on a Chevy Niva, you will need a key 13 and 17. Before starting work, install a support under the transfer case.
Unscrew the nuts securing the cross member of the transfer case rear support to the body
Unscrew the nut and remove the bolt
Remove the cross member (popularly called a helicopter) assembled with the support pad
To replace the cushion, unscrew the two nuts that secure it and, if necessary, also replace the rubber bushings of the cross member
To replace the transfer case side mounting cushion, unscrew the nut of the box mounting axis and the two nuts securing the cushion to the body
Remove the pillow. The second pillow is removed in the same way. Installation of Niva Chevrolet transfer case cushions is carried out in the reverse order of removal.
How to remove the transfer case on a Chevrolet Niva video
Withdrawal. Place the car on a lift. Release the parking brake and place the transfer case and transmission shift levers in neutral. Disconnect the negative terminal from the battery. Unscrew the handles from the transfer case and gearbox levers and remove the outer covers. Unscrew the fastening screws and remove the hatch cover of the transfer case control lever. Then remove the inner sealing cover.
Press down on rod 7 (Fig. 3-32) of control lever 4 and use a screwdriver or other pointed tool to remove locking sleeve 12 from the groove on the lever rod. Remove the rod.
Disconnect the wiring harness connector from the speed sensor connector and the wires from the differential lock warning lamp sensor. While rotating the driveshafts, disconnect the driveshaft flanges from the transfer case shafts, and the intermediate driveshaft flange from the transmission output shaft flange.