When is replacement required?
The replacement operation is carried out when oil leaks from the axle housing. A clogged breather causes lubricant to squeeze out.
If grease drips immediately after stopping (while the gearbox is hot), and then the flow stops, the breather must be cleaned. When it is clogged with dirt, the heated air is not released outside during movement. Under pressure, the working fluid of the gearbox will be squeezed out even through serviceable gaskets and seals.
If the breather is in order, but oil still leaks, you will have to replace damaged cover gaskets or O-rings. of them in the front axle, and they are different:
The oil seal that seals the drive gear axis is located at the rear of the axle, at the location where the front propeller shaft is attached. Oil seals for the right and left drive (inner axle joint).
Attention! The left and right oil seals are not the same; they have a direction of rotation. This must be taken into account when purchasing.
Important! The left and right oil seals are not the same; they have a direction of rotation. This must be taken into account when purchasing.
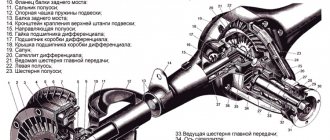
The direction of rotation of the wheel when moving forward is indicated by the arrow. If the oil is installed incorrectly, the removable notches will drive the lubricant out. To understand the device, here is the layout of the front axle:
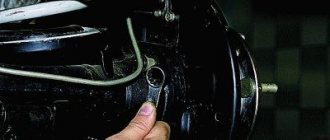
The oil seal is replaced without removing the front axle. If the work is carried out independently, and it is not possible to use a lift, the car is placed on an inspection hole or overpass . We tighten the hand brake and install supports under the rear wheels. Gearbox and transfer case levers in the “Neutral” position. The front part is lifted with a jack and fixed on stops.
Attention! It is dangerous to work under a car that is only supported by a jack!
We clean the bridge from dirt and leaks of technical fluids. Unscrew the crankcase drain plug and drain the oil from the gearbox. Screw the plug into place.
Useful video
Watch information about the design and operation of Chevrolet Niva mechanisms in the video below:
Most Chevrolet Niva owners, due to the simplicity of the design, can independently repair their car. This is especially true for a large number of consumables, including those in the chassis of the car. One of the parts that requires periodic replacement is the Chevrolet Niva front axle oil seal. The need for repairs arises when an oil leak occurs from the axle housing and a knocking noise occurs. The main cause of grease leakage is due to a clogged breather.
It is necessary to monitor at what stage the oil leak occurs. If, after intensive movement, while the gearbox is still hot, and after it cools down, it stops, then it is necessary to clean the breather. It may be clogged with dirt, which prevents the heated air from escaping outside. Therefore, it is possible to squeeze out fluid from the gearbox, even if the gaskets are in good condition.
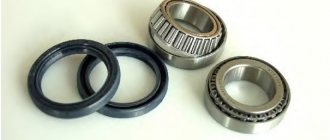
If the breather is working properly, but oil still comes out, then most likely you will need to replace the cover gaskets and o-rings. Typically, the design of the front axle provides for the presence of three rings: an oil seal located on the axis of the drive gear, axle bearings and oil seals for the right and left drive - the axle shaft hinge.
It is important to remember that the left and right oil seals are designed for different directions of rotation, so when purchasing, you should carefully check the package. The direction can be determined by the marked arrow. If installed incorrectly, there may be increased oil leakage outward due to the location of the oil scraper notches.
Replacing the oil seal sealing the drive gear axis
- We disconnect the driveshaft from the gearbox by unscrewing the bolts securing it to the flange.
- We separate the internal CV joint housings from the drive gears .
- Using a dynamometer, we determine the moment at which the drive gear begins to rotate freely. To do this, turn the flange mounting nut until the gear begins to rotate. We fix the magnitude of the moment.
- We tighten the bolts into two adjacent flange holes (for fixation).
- We insert a mounting spade between the bolts, hold the flange from turning and unscrew the fastening nut.
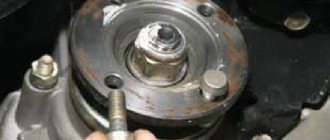
- Remove the washer and flange from the spline joint. If it is impossible to remove it by hand, use a universal puller.
- Remove the oil seal using a flat-head screwdriver.
- We rinse and thoroughly wipe the replacement area.
- Replacement of the front axle drive gear oil seal is carried out only with original Chevrolet spare parts. To facilitate pressing, any grease (litol, grease) is applied to the sealing ring.
- We press the ring using a pipe of a suitable diameter.
- We place the flange on the spline connection and put on the washer.
- Tighten the nut to the torque determined when unscrewing.
- We fasten the cardan shaft.
Transfer case device
The Chevrolet Niva transfer case redistributes engine torque between the drive axles and, if necessary, changes the gear ratio and locks the center differential. The parts of this assembly require significant force. Therefore, RK gears and bearings operate in an oil environment.
To prevent oil leakage from the transfer case, oil seals are installed at the joints of the housing and rotating drive shafts. They consist of two parts: a metal body and a rubber cuff, tightened by a spring. The latter ensures sealing of the connection due to the tight fit of the rubber to the shaft.
The process of replacing the front axle oil seal on a Chevrolet Niva
- We remove both drives (or the one that requires replacement).
- Remove the retaining ring and spring washer.
- Using a hammer, carefully knock down the bearing. If removal is difficult, treat with a penetrating lubricant, such as WD-40.
- Remove the bearing cap with the old seal.
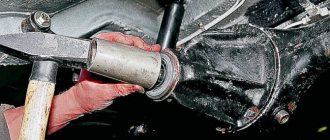
- Using a pipe, knock the oil seal out of the cover.
- Lubricate the new spare part with any grease and press the o-ring into the cover.
We fill the gearbox with oil in accordance with the maintenance instructions, do a test drive , and check for oil leaks. As you can see, replacing the front axle oil seal is not an operation requiring a visit to a car service center. However, you should be careful and attentive when working. For convenience, when dismantling the unit, take photographs of each action. This will help avoid assembly errors.
Lateral clearance in GP and differential bearing preload
According to the instructions, the lateral clearance and preload on the bearing are adjusted using tool A.95688 / R.
In its absence, a caliper of the appropriate size will perform this role.
To ensure the required preload, the distance to the bearing caps is recorded at the beginning and end of tightening. The required difference in values is 0.2 mm.
The side clearance is adjusted by moving the driven gear towards the drive until it disappears. First, one of the nuts is in a loose position, the other (working) is tightened. After eliminating the gap, gradually tighten the feed nut until the caliper jaws are 0.1 mm apart. The backlash adjustment stops when the teeth click slightly. Then both nuts are tightened evenly to a distance of 0.2 mm. Correct operation is indicated by uniform play in any position of the gears.
Advice on how to remove drives without dismantling the Niva front gearbox
Before dismantling, it is necessary to mechanically remove dirt from the inside of the steering knuckles and from the bottom of the car above the work area. The best option is to wash the bottom with a high-pressure apparatus one day before carrying out work.
Design and operating principle
Let's look at a more detailed design and operating principle of CV joints using the example of a VAZ-2199 car.
This car has front-wheel drive, so CV joints are used in the drive design.
The external element of this car is made according to the “Birfield” type.
At the end of the drive shaft coming from the gearbox there is an internal race with 6 grooves.
The outer race has grooves on the inner surface. The race itself is connected to a shaft, which has splines that are inserted into the wheel hub.
The inner race fits into the outer one, and metal working balls are placed in the existing grooves of both races. To prevent the balls from falling out, they are inserted into a separator.
This CV joint works like this: when driving, the wheel, due to the independent suspension, constantly moves relative to the car body, while the angle between the drive shaft and the shaft inserted into the hub constantly changes due to road unevenness.
POPULAR WITH READERS: Is it possible to adjust the speedometer with your own hands?
The balls, moving along the grooves, ensure constant transmission of rotation when changing angles.
The design of the internal “grenade”, which in this car is of the GKN type, is the same as the external one, but the outer holder is slightly longer, which ensures a change in the length of the drive shaft.
When hitting a bump, the angle on the outer CV joint changes, and the wheel itself goes up. In this case, changing the angle affects the length of the drive shaft itself.
In the case of using a GKN CV joint, the inner race together with the balls can go deep into the outer race, thereby changing the length of the shaft.
The design of ball joints with dividing grooves is very reliable, but under one condition. They are very sensitive to pollution.
If dust and sand get inside the “grenade,” it leads to accelerated wear of the grooves and balls.
Therefore, the internal elements of this joint must be covered with anthers.
Damage to the boot will result in CV joint grease leaking out and sand getting inside.
It is very easy to identify a problem with these elements - when the wheels are turned completely and the drive wheels begin to move, characteristic clicks will be heard.
IMPORTANT TO KNOW: Why the CV joint crunches, diagnostics and troubleshooting
Malfunctions
There are three main signs of problems in the operation of the node:
- A crunching sound that occurs from the front axle, which intensifies when the steering wheel is turned to its extreme position. It occurs when constant velocity joints wear out. These parts cannot be repaired, so they should be replaced with new ones.
- Vibration and noise in the area of the front axle, which occurs when the wheel drive shaft is deformed. It can only be eliminated by replacing the damaged part.
- Leakage of lubricant from CV joints. The cause of the malfunction is a damaged boot, which must be replaced immediately. If this is not done in time, you will also have to change the CV joint, which quickly wears out when dirt gets in.
Auto parts for foreign cars, auto repair
Chassis Replacement of CV Joints on a Chevrolet Niva Every car has equal angular joints, which are called grenades; they have this name because of their similarity to a military object.
Thanks to it, when turning while driving, torque is transmitted from the engine to the inner CV joint. This element in the car appeared when they began to produce cars with front-wheel drive, and before that, torque was transmitted through a conventional cardan.
Further, it will intensify even with small turns of the steering wheel. Replacement procedure: A set of wrenches, pullers, and plumbing experience will be required.
Replacing the Inner CV Joint Niva Chevrolet Video
The body is raised with a car jack, a reliable stand under the car and wheel chocks are installed. This helps protect the repairman from possible injuries.
Before lifting the car body, loosen the hub nut. Initially, torque was transmitted to the drive wheel using a conventional cardan. At the same time, the service life of the hinge was short, since it was constantly working under load.
Inner right CV joint on a Chevrolet Niva - how much does it cost to replace a grenade
This problem gave impetus to the invention of a special CV joint unit that could transmit torque to the wheels at different angles of rotation. It's mostly front-wheel drive. Due to the CV joint, there is a uniform transmission of torque, taking into account the fact that the wheel is located under the corner of the car.
On a Chevrolet, a grenade can be: Outer CV joint Inner CV joint Like all other parts in the car, this unit has its own specific service life.
The cost for spare parts was rubles. And by the way, it’s also cheap, I called 3 stores in our city in advance and the prices are different everywhere. So don’t rush to run to the first store you come across.
For example, I saved rubles on these same spare parts if I bought them in a store; the Chevrolet Niva inner CV joint is closest to service. Photo of the entire set: By default, the oil that is poured into the automatic transmission during the production of Opel Astra N cars is designed entirely for its service life.
Russian conditions, climate, quality of roads, etc. Replacing the Timing Belt Logan 1.
You just need to look at what exactly is coming in years. And according to the regulations, the Chevrolet Niva inner CV joint with the belt always changes a few more parts, not all of them are related to m Replacing the Rear Hub of a Skoda Fabia Replacing the rear hub bearings Replacing the rear hub bearings Hub assembly of the rear wheel 3 - Brake drum 7 - Bolt securing the trunnion to the lever 11 - Castle washer 1.
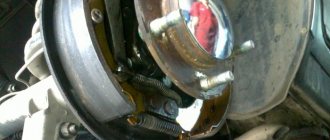
Remove the brake drum, see Chapter Brake system.
Using a flathead screwdriver, remove the oil seal from the brake drum assembly - try How to replace the cabin filter in Ford Focus 1, 2 and 3 Replacing the Ford Focus cabin filter is an integral part of the technical work of each car of this line.
Typically, failure of this component indicates a problem with your furnace or air conditioning. At the same time, they begin to work much weaker than the inner CV joint.
In addition, the filter is broken
Replacement
Before carrying out work, it is necessary to provide access to the lower part of the car by installing it on an overpass or inspection hole.
To change drives you will need:
- Balloon wrench.
- Jack.
- Keys for 13, 17 and 27.
Replacing the drive is done as follows:
- Unscrew the cardan from the front gearbox.
Remove the protective cap from the front wheel hub and unscrew the nut.
Remove the centering sleeve.
Raise the front lower control arm by compressing the suspension spring.
Unscrew the fastening and move the exhaust pipe away from the exhaust manifold (this operation is necessary when replacing the right-hand drive).
Installation is performed in the reverse order of removal.
Important: when tightening the wheel hubs, it is necessary to adjust the clearances in the wheel bearings.
Replacing oil seals
To change the drive seals, in addition to the listed tools, you will need:
- mount;
- wooden block;
- hammer;
- hex wrench 12;
- puller (two- or three-legged);
- mandrel (a piece of pipe whose diameter corresponds to the size of the seals);
- circlip puller;
- dynamometer.
flat screwdriver;
Before replacing the seals, the drives will have to be removed.
To replace the drive gear seal, you must perform the following steps:
- Using a dynamometer, measure the starting torque of the drive gear.
- Fix the flange: screw a couple of bolts into its holes and insert a pry bar into them.
- Unscrew the fastening nut.
- Remove the washer and flange from the splines (here you will have to use a puller).
- Using a flathead screwdriver, remove the oil seal from the mounting hole.
Replacing the drive oil seal is done as follows:
- Remove the retaining ring and spring washer.
Using a hammer, knock the bearing out of its seat.
Remove the cover together with the oil seal
Knock out the old part using a pipe.
Considering the low price and high labor intensity of replacing the oil seal, during repairs you should not skimp on components and use parts from trusted manufacturers.
When and how do you need to change the seals of the VAZ 2123 transfer case?
Reference! Parts must be replaced if transmission oil leaks occur at the interface between the drive shafts and the transmission housing.
If this is not done, the transmission will leak. Without lubrication, transfer case parts will quickly fail.
Step-by-step instructions for replacing the oil seal of the Niva Chevrolet
To work, you need to have free access to the bottom of the car. Therefore, replacement of the oil seals will be carried out on an inspection ditch, overpass or lift.
You will need the following tool:
- hexagon 12;
- open-end or socket wrench 24;
- waste container;
- flat screwdriver;
- hammer;
- mandrel;
- syringe for filling transmission oil;
- new self-locking nuts for fastening the flanges.
The algorithm for replacing the Niva Chevrolet transfer case oil seal is as follows:
- drain the oil from the transfer case into the prepared container;
- unscrew the bolts securing the cardan, the drive shaft oil seal of which is to be replaced;
- engage the gear, lock the differential and put the car on the handbrake;
- Unscrew the nut securing the propeller shaft drive flange.
- remove the washer;
- pull the flange off the shaft;
- use a screwdriver to remove the old oil seal;
- clean the seat and apply sealant;
- lubricate the rubber seal of the new oil seal with oil;
- using a mandrel and a hammer, press the part into place;
- install the flange and washer, tighten them with a self-locking nut;
- secure the cardan.
Important! The self-locking design does not allow for reuse of parts. Therefore, the flange nuts must be replaced with new ones.
After completing the work, it is necessary to fill the transfer case with fresh transmission oil.
