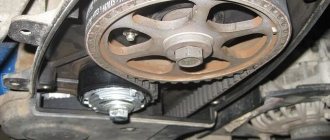
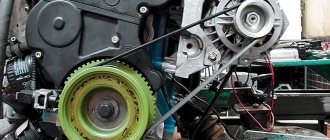
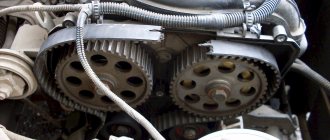
The popular VAZ 21116 (11186) engine is also installed on the Lada Granta. This engine doesn’t have enough stars in the sky, but it’s nice because you can easily carry out its maintenance and repairs with your own hands in a garage. He has several problems, however, they can be solved with careful and timely care. Replacing the timing belt on an 8-valve Granta with your own hands will not cause any problems if you change the belt according to technology, not forgetting about choosing a high-quality belt.
There are quite a few tales about what will happen if the timing belt breaks while the engine is running. Unfortunately, regarding the VAZ 21116 engine, most of them are not far from the truth. For this engine, a broken camshaft drive belt is more than critical. The meeting between pistons and valves, as a rule, does not end very well: bent valves, torn connecting rods, punctured cylinder blocks and torn pistons - all this can really happen if the timing belt is not replaced on time.
Bent valves in the block head
In order for the engine to serve for a long time and reliably, it is simply enough to inspect the drive belt once every 10-15 thousand kilometers.
camshaft and if alarming symptoms are detected, do not be lazy and change it immediately. Signs that the strap is asking to be retired are clear even to a teapot:
- Cracks, cuts, nicks, and other mechanical damage are clearly visible on the surface of the belt.
- The teeth may be damaged or even cut off.
- The belt has traces of contact with operating fluids - oils, gasoline, antifreeze, brake fluid. But before changing the belt, you need to find and eliminate the cause of fluid leakage.
- Delamination of rubber material.
- Belt stretch.
Therefore, replacing the belt under normal conditions, when all other units and systems work well and do not cause complaints, is carried out every 40-50 thousand km
, and check the condition of the belt at least
once every 10-15 thousand km
. In this case, the VAZ 21116 engine will cover its service life of 180-200 thousand before overhaul without any problems.
The same applies to engines with an 8-valve head VAZ 11186, which are absolutely identical to the VAZ 21116, but have a cylinder-piston group from Federal Mogul.
Which belt is better to buy for a Grant and for which engine?
Gates belts are installed from the factory on all VAZ engines.
.
The replacement kit for 8-valve heads is part number K015670XS
.
We have dwelt in some detail on the topic of choosing the best timing belts for VAZ and VAZ engines, so there is no point in repeating ourselves. There you can also find out how to distinguish a fake from a good quality kit for replacing a timing belt, as well as all the necessary part numbers to search on local sites selling VAZ spare parts. The Italian-Chinese brand Trialli with article number GD 790 received good reviews from owners
More good belts. Which one fits the 8-valve Granta?
As for our Granta, the difficulty in choosing belts for an eight-valve engine is that the ancient but reliable eight-valve VAZ 11183
, analogue of VAZ 21083. This engine is good because the valves in it do not bend if the belt breaks.
For it you need to buy a belt
with catalog number
2108-1006040-10
, and a tension
roller 2108-1006120
.
New Gates belt
For two other Grant engines with 8-valve block preparation (these are VAZ 11186 and VAZ 21116
) we buy the following replacement parts:
- camshaft drive belt 21116-1006040
; - tension roller 21116-1006226
; - If you wish, you can buy a special key for the convenience of adjusting the belt tension 67.7812.9573-01
.
Belt from Continental
Of course, for this motor there are analogues from other manufacturers and there are quite a lot of them. Most Popular:
- GATES – 5670XS, like the original, but in its original box;
- Trialli GD 790, Italian brand, Chinese assembly;
- CONTITECH – CT1164, an excellent belt from Continental, if not a fake;
- QUARTZ with catalog number QZ-5670XS, German belts of good quality;
- INA 530053610, one of the highest quality and most expensive kits;
- DAYCO KTB944, a good Italian kit;
- Set manufactured by BOSCH 1987 948 286.
It is important that the belt corresponds to the geometric parameters - belt length 1305 mm, number of teeth 113, belt width 17 mm.
Changing the timing belt on a Grant with your own hands
When we check the condition of the belt or are going to change it, it is necessary that the engine cools down after the trip. The optimal temperature for replacement is about 20 degrees. According to AvtoVAZ, replacement is critically necessary at the 75th thousand mileage, but, according to drivers, it is necessary to change more often. To replace, we need a standard set of tools and a special key for tightening the roller.
If you have all this, let's get to work.
The Lada Granta liftback is equipped by default with one of four types of engines with a gasoline power system:
- 82 hp / 8th grade
- 87 hp / 8th grade
- 98 hp / 16 grades
- 106 hp/16 cl.
On the Grant with a 16-valve mechanism, two camshafts are pre-installed, and an additional roller is a tensioner. In the 8-valve design, the listed mechanisms are included in a single configuration.
At the stage of selecting a timing belt, many inexperienced motorists make one significant mistake - the catalog part number does not correspond to the actual one. As a result, the belt is either shorter or longer than the required size.
Where is the roller tensioner located on the Lada Grant?
In the Lada Granta “Lux” modification, as well as the customized “Norma” and “Standard” versions, the roller tensioner (hereinafter referred to as NR) is installed at the end of the engine in the lower part. The location of the alternator belt pulley on the Lada Granta with air conditioning is identical.
Purpose of the timing belt
Ensuring synchronized operation of the power unit mechanisms for cyclic supply of the fuel mixture into the combustion chamber with subsequent ignition.
Violation of the tact, operation, and cyclicity leads to instability in the supply of a lean / rich mixture. As a result, the engine does not operate at full power, and detonation can be seen at idle. The previous article () discussed in detail the purpose of the timing system. For additional information, use the provided link.
Timing belt replacement interval
The manufacturer indicates an interval of 60,000 km, after which the Granta liftback timing belt needs to be replaced. At the same time, every 15,000 km, it is necessary to carry out diagnostics of the drive belt in order to detect defects, delamination, and possible damage.
If the car is operated in rough, dusty terrain, under systematic loads, reduce the replacement interval by a third. Obviously, this is just a recommendation and not a commitment. In order to increase the service life, it is still better to listen to the advice of professionals.
In what cases does a belt break?
- Exceeding the permissible replacement interval without carrying out intermediate prevention;
- Systematic operation of the power unit under loads for which it is not designed;
- Defects in the manufacture of a part or component;
- Frequent contact with the surface of oil, chemical reagents, compounds that cause a reaction, delamination of rubber;
- Drive tension exceeds the permissible norm;
- Insufficient drive tension;
- Tooth wear, deformation, damage.
The duration of the engine operation after time “H” is also an important factor. The faster the driver turns off the ignition, the less disastrous the consequences and vice versa. Service station mechanics know of cases where the rocker arm and valve bases literally pierced the wall of the cylinder block and came out.
Diagnostics and replacement of the timing belt on an 8-valve engine
Before replacing it yourself, do not forget to carry out comprehensive diagnostics in order to study the general technical condition of the car, identify breakdowns and other malfunctions. To analyze mechanisms without preliminary diagnostics is the height of unprofessionalism.
Diagnostic stages:
- We jack up the right side of the car and hang it at a sufficient height so that the wheel rotates freely by hand;
- We activate fifth gear;
- In the engine compartment, remove the plastic casing and turn the drive belt. We assess its condition and decide whether replacement is necessary.
After the final decision on replacement has been made, we begin dismantling. We first prepare a set of automotive tools, rags, a new belt, and a roller bearing. Bearing replacement is required. The service life is approximately equal to that of the drive belt.
Replacing the timing belt Lada Granta liftback 8 valves
- We place the car within the perimeter of the repair area, squeeze the handbrake, open the hood, and the gearshift lever in the “neutral” position;
- We reset both terminals from the battery to avoid a short circuit in the network;
- Remove the decorative plastic panel in the timing belt area;
- Using a flat-tip screwdriver, make marks on the outer perimeter of the gear and the cylinder body (block);
- By rotating the crankshaft pulley, we align the actual mark with the dead center;
- We tear off the crankshaft pulley mounting nut;
- Unscrew the tensioner pulley mount, reduce the belt tension, unscrew the generator mount, remove the belt from its seat on the pulley;
- We carry out troubleshooting and assess the condition of the teeth. If there is no deformation, replace it with a new belt. We will also inspect the cooling system pump; its operation should be quiet, without noise or wedge. The presence of the opposite indicates a malfunction and the need for prevention;
- Upon completion, we assemble the structure in the reverse order with the obligatory installation of new components.
To make sure that the process was completed successfully, turn the crankshaft pulley 1 - 2 turns. The rotation should be relatively easy. We check the matches of the marks. A deviation of 1 - 2 mm is allowed, no more. Self-replacement of the timing belt Lada Granta liftback is over.
We replace the belt tensioner with our own hands
The procedure for replacing the alternator belt tensioner is not difficult to carry out yourself. The only thing you need to have is a high-quality tool for installing the tensioner. The Grant generator belt tensioner is changed in the following order:
— disconnect the contacts on the battery terminals;
— then we weaken the tension force of the roller and remove the generator belt;
— unscrew the bracket nuts and remove the bracket itself;
— install a new bracket with a roller installed on it;
Where and how to choose quality spare parts
A wide range of products, lack of awareness of owners, fraud by sellers - this is not a complete list of factors that can mislead an inexperienced owner.
To minimize possible risks and prevent the purchase of low-quality goods, we strongly recommend using the services of trusted suppliers, official representative offices, and dealers. To a lesser extent, buy components from unverified sellers, parts at unreasonably low prices.
Make it a rule to check catalog numbers and search indexes for spare parts with the actual data specified in the operating instructions for your car.
Timing drive diagram: 1 – crankshaft toothed pulley; 2 – toothed pulley of the coolant pump; 3 – tension roller; 4 – rear protective cover; 5 – camshaft toothed pulley; 6 – toothed belt; A – boss on the rear protective cover; B – mark on the camshaft pulley; C – mark on the oil pump cover; D – mark on the crankshaft pulley.
Use a 5mm hex to unscrew the four screws securing the front upper timing cover.
Remove the cover.
We hang the right front wheel and engage fifth gear in the gearbox. By rotating the wheel clockwise, we turn the engine crankshaft and inspect the timing belt. With normal belt tension...
...cutout 1 of the outer disk of the tension roller must coincide with the rectangular protrusion 2 of its inner sleeve.
The surface of the toothed part of the belt should not have folds, cracks, undercuts of teeth and separation of fabric from rubber. The reverse side of the belt should not have wear, exposing the cord threads, or signs of burning. There should be no delamination or fraying on the end surfaces of the belt. If defects are found on the belt or there is a significant discrepancy between the belt tension control elements (see photo above), the belt must be replaced. You should also replace the belt with a new one if traces of engine oil are found on it (before installing a new belt, the cause of oil getting on the belt must be eliminated) or when replacing the coolant pump.
Attention! Failure of the timing belt (breakage and cutting of teeth) can lead to valves sticking into the pistons due to mismatch of the rotation angles of the crankshaft and camshaft and, as a result, to expensive engine repairs.
We replace the timing belt in accordance with the maintenance regulations every 75 thousand km or if defects are detected on the belt.
To avoid damaging the crankshaft position sensor, it must be removed.
With the ignition off, release the clamp of the wiring harness block and disconnect the block from the sensor connector.
Use a 10mm socket to unscrew the sensor mounting bolt.
We remove the sensor from the oil pump cover boss hole and put it in a place where there are no steel filings that could subsequently disrupt the operation of the sensor.
Before dismantling the belt, it is necessary to check the engine valve timing - set the piston of the 1st cylinder to the TDC (top dead center) position of the compression stroke.
Using the “17” head, turn the crankshaft clockwise by the bolt securing the generator drive pulley...
...until mark 1 on the camshaft sprocket aligns with boss 2 on the rear timing cover.
To ensure that the crankshaft is in the correct position, remove the rubber plug for the inspection window at the top of the clutch housing.
Mark 2 on the flywheel should be located opposite the slot 1 of the scale on the upper cover of the clutch housing.
Before removing the generator drive pulley bolt...
...we ask an assistant to secure the crankshaft from turning by inserting a screwdriver through the window in the clutch housing between the flywheel teeth.
Using a 17mm socket, unscrew the bolt securing the generator drive pulley...
...remove the pulley...
...and the puck.
Use a 5mm hex to unscrew the three screws securing the front lower timing cover
Remove the cover.
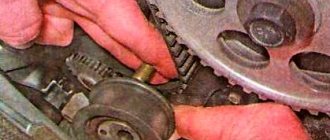
Using a 15mm spanner, loosen the tension roller mounting bolt.
At the same time, the tension roller will rotate and the belt tension will weaken. Remove the timing belt from the crankshaft and camshaft pulleys.
Remove the belt from the engine compartment.
Attention! After removing the timing belt, do not rotate the crankshaft and camshaft to avoid the pistons sticking into the valves.
Marking of the timing belt (width 17 mm, number of teeth 113).
All the latest models of front-wheel drive cars produced by the car plant located in Tolyatti have a timing belt in the gas distribution mechanism. Lada Granta fully applies to these models.
The machine is equipped with several modifications of engines, which can have 8 or 16 valves in the cylinder head. Many owners service and repair this model themselves, so it will be useful for them to learn how to change the timing belt on a Lada Granta with 8 valves.
Lada Granta engines with 8 valves in the cylinder head are indexed 11183 and 11186. The first of them began to be produced in 2004, the second later, namely in 2011. The power of the “83” unit is 82 horses, with 87 hp for the “86” modification. Motor 11186 is an improved engine of the “83” model. It uses a lightweight connecting rod and piston group. It was possible to achieve a reduction in the mass of the piston group by almost 30%. The cylinder head is subjected to specific heat treatment, which increases its strength and wear resistance.
The cooling system of the power unit also received some changes. The skirts of lightweight pistons are coated with graphite lubricant, this avoids the appearance of scuffing on the cylinders of a cold engine. The compression ratio of the “86” engine became 10.5 versus 9.6 for the “83” modification. The cylinder head gasket of the new engine is now thinner, it is 0.43 mm versus 1.2 on the old model. The diameter of the intake valves was increased, which improved the filling of the cylinders with the air-fuel mixture.
Does the valve bend?
Unfortunately, this problem exists for the Lada Grant. It appeared from the moment the production of the first cars with front-wheel drive, the VAZ 2108, began. Subsequently, the working volume of the power unit of this model was increased, it became equal to 1.5 liters. The engine index became 21083, in which the pistons have a recess in the head. This made it possible to prevent the pistons from meeting the valves if the timing belt in the timing drive breaks or is installed incorrectly. This particular power unit was taken as the basis for the engine for the Granta, so there were no valve bends.
Upgrading this engine to model 11186 involves installing lightweight parts of the connecting rod and piston group. The pistons have become shorter in height, which does not allow making recesses in the head to prevent them from meeting the valve. Therefore, a toothed belt break is always accompanied by damage to the valves on an 8-valve Grant, sometimes to connecting rods and pistons. This problem accompanies all subsequent modifications of engines for the Lada Grant.
We change the belt ourselves
Replacing the timing belt after the specified period on Lada Granta engines of 16 and 8 cl is a simple process, and even a novice motorist can do it with his own hands. The main thing is to carefully follow all the instructions and not miss anything.
Required Tools
- keys for 10 and 17;
- mounting spatula;
- roller tension key;
- Jack;
- sets (gears) and TORX heads;
- pliers.
Stages of work
- First, remove the negative terminal of the battery.
- Remove the generator belt drive.
- We fix the car using stops; we determine for ourselves what is best for this.
- When we jack up the car, remove the right front wheel.
- Remove the cover of the gas transport mechanism.
- The piston of the 1st cylinder should be located at the highest point.
- We loosen the belt tension using a tension roller or bolt.
- Loosen the tensioner pulley nut.
The next important step is the correct tension of the Lada Granta toothed belt drive with 16-cell and 8-cell units.
- First of all, you need to warm up the engine, the coolant temperature should be 20-25 ° - this is a certain norm. In particular, this temperature must be such that the roller tracks coincide. If you warm up more to 80-90 °, the mark will shift by 5-6 millimeters. Important! Use rollers that are recommended for Lada Granta 8 or 16 cl, otherwise the results may be different, even the belt may break.
- Next, you need to align the marks on the camshaft pulley and the marks on the rear cover.
- We repair pulleys using the device described above.
Attention! The tensioner pulley should not move or deviate much in one direction or another, this will be evidence that it is in good condition and functioning properly. This means that its rupture is excluded.
Replacement procedure
Many owners of this car prefer to carry out this operation in specialized workshops, but some do it themselves. There is nothing overly complicated in this procedure; there is no need to purchase special equipment or devices. You can replace the timing belt yourself in the garage. You will need to prepare a set of wrenches, a mounting shovel, a jack, a stand for the body, wheel chocks, gloves, and rags. Round nose pliers with curved ends are suitable as a key for adjusting the tension roller.
Replacing the timing belt on a Lada Grante is performed in approximately the following sequence:
- The car is placed above the inspection hole or on a flat surface, the handbrake cable is tightened, and wheel chocks are installed under the rear wheels.
- Open the engine compartment hood and disconnect the terminals from the battery.
- The generator set drive belt will interfere with work, so it is removed.
- Now, using the hex number “5”, remove the four screws that secure the front protective cover of the gas distribution mechanism drive.
- To avoid accidentally damaging the crankshaft position sensor, it should be removed from the cylinder head and set aside. Do not allow metal filings to come into contact with the sensor; they may further distort its readings.
- Next, you need to set the piston of the first cylinder to the top dead center position.
- Removal of the toothed belt is hampered by the generator drive pulley on the crankshaft, which must be removed. To do this, tear off the wheel bolts of the right front wheel and raise the body with a car jack.
- A stand is installed under the body, the wheel is removed, and the protective shield is on the mudguard.
- An assistant is needed to remove the crankshaft pulley. Ask him to engage fifth gear and press the brake pedal hard. Some experts insert a powerful screwdriver into the hatch on the transmission housing between the teeth of the flywheel.
- Applying some force to the head “17”, unscrew the bolt and remove the pulley from the crankshaft.
- You will again need the fifth hexagon number, with which you need to unscrew the three screws of the lower protective casing of the timing mechanism, after which you can remove the protection.
- Now you need to loosen the tension roller fixing bolt; a 15 mm spanner is best suited for this. After this, the roller will rotate and release the tension of the drive belt, which is easily removed from the gears and taken out of the engine compartment.
Important! After this, you cannot turn the engine crankshaft to prevent the pistons from meeting the valves.
Typically, the belt is replaced together with the tension roller and coolant pump, so they must be removed from the cylinder block. There is an adjusting washer under the roller, which is installed back during assembly. When removing the pump, pour a certain amount of antifreeze into a previously prepared container. Installation of a new timing belt is carried out in the reverse order. Please note that you need to check the position of all installation marks on the crankshaft and camshaft, cylinder block and timing belt guard.
Setting marks
This is an important procedure when replacing the timing belt, so it must be taken seriously. This engine has four timing marks in the timing drive. Two on the crankshaft and camshaft gears, one on the cylinder block in the crankshaft area, the last one is on the metal protective casing. Two more marks are located on the flywheel and gearbox housing. They will be clearly visible when the rubber plug is removed. It is the marks of the flywheel and the box casing that will indicate the position of the piston of the first cylinder at top dead center.
Turn the crankshaft with a key to “19” clockwise until all the marks of the mechanism coincide. The camshaft pulley mark in the form of a conical recess or boss will be in a horizontal position and coincide with the protrusion on the protective casing. The mark on the crankshaft pulley will look strictly vertical and coincide with the mark on the cylinder block.
Tension
The installed new timing belt must be tensioned to the required parameters. Before doing this, be sure to check the position of the installation marks again; if everything is in order with them, you can tension the drive. To do this, you need to turn the tension roller counterclockwise until the marks on it match. There is one mark in the form of a cutout on the outer frame, the second on the inner one in the form of a protrusion. You can turn the tension roller with a special wrench or pliers.
Some craftsmen insert drills of suitable diameter into the holes on the moving part of the roller. Use a screwdriver between them as a lever and turn the clip until the marks match. After this, you can tighten the screw securing the tension roller. After all the work is done, you need to manually turn the crankshaft a few revolutions, making sure that the marks have not moved. After this, you can install the protective cover.
Preparatory operations, all engines
First, remember a simple rule: the 11183 engine cannot bend its valves, so you can rotate the crankshaft and camshaft pulley separately. For motors 11186 and 21116 this would be unacceptable! Read more about engine 21116 in this material.
Before carrying out any work, disconnect the battery terminal (key 10), as well as the DPKV sensor. But first you need to remove the protective cover.
Unscrew the 4 bolts and remove the protection
To remove protection you need:
- 11186/21116 - using a “5-point hexagon”, unscrew the 4 bolts on the upper part, which is then removed. And the lower part is also dismantled;
- 11183 – use a 10mm wrench to unscrew the 3 fastening bolts.
It will not be difficult to cope with what is said above.
Disconnect the connector, unscrew one screw
The crankshaft position sensor (CPS) is disconnected from the connector (see photo). Then the fastening screw is unscrewed with a “10” wrench. The sensor itself must be removed.
Installation of all shafts according to marks
First check that the gear is in neutral. There is a rubber cover on the crankcase body closer to the clutch assembly. It needs to be removed.
Inspection window and rubber plug
The point is to achieve alignment of the marks on the flywheel and in the scale slot. When this is done, fix the flywheel with a screwdriver.
Of course, it is easier to perform such an operation with two people. Know that the desired position of the shaft corresponds to the alignment of marks AB and CD (see figure).
How long does it take to replace it?
The factory operating instructions for the vehicle recommend replacing the timing belt after a mileage of 75 thousand km. This standard is not always followed by owners, and there are good reasons for this. How long the drive lasts before replacement depends on many factors. This is the quality of the parts used, the operating conditions of the vehicle, and the technical condition of the engine. During each maintenance, the tension and condition of the timing drive should be checked. If cracks, peeling, or other damage appears, the belt should be replaced.
With a high mileage of the car, natural wear of the crankshaft and camshaft pulleys occurs, this significantly reduces the service life of the entire timing drive. The drive is also afraid of engine oil getting into the belt operating area. It softens its structure, the teeth are easily cut off. If the car has been sitting idle for a long time, it is also better to replace the drive due to its aging. Most owners and experts recommend changing the belt after a mileage of 50 thousand km.
How to determine that a break may soon occur
Urgent replacement of the timing belt for a Granta car of 8 and 16 cl. may be necessary if the following phenomena occur:
- Decrease in vehicle power. A poorly tensioned or worn drive can make the engine difficult to start and reduce power output.
- Incomprehensible noises from the timing belt on the Grant, emanating from the engine compartment. Clunking, ticking or strange rustling noises often indicate that the Granta timing belt is damaged and rubbing against the casing or other parts under the hood
- Visible damage. The part may have abrasions, cracks and “shaggy” areas that are visible to the naked eye.
If, upon careful inspection, it is discovered that the teeth on the Grant timing belt have been cut off or at least one of the other listed problems, it is necessary to urgently replace the part with a new one, which is quite possible to do yourself.
Which kit to buy
In addition to the toothed belt, a tension roller and a coolant pump are purchased. The main supplier of rubber products is the RTI plant in Balakovo. Products from GATES, BOSCH, DAYCO, CONTITECH have proven themselves well. If the pump in the engine cooling system is replaced, antifreeze will be needed to top it up.
The gas distribution mechanism is one of the most important systems of an internal combustion engine. The timing belt controls the engine valves, ensuring the normal functioning of intake and exhaust. During intake, the fuel-air mixture enters the combustion chambers as a result of the opening of the intake valve. The next phase opens the exhaust valve, and the gas distribution mechanism removes exhaust gases from the combustion chamber. The VAZ 2190 uses a standard gas distribution unit, differing only in the number of engine valves.
Characteristics of Lada Granta timing belt
The Lada Granta gas distribution mechanism is driven by a belt. This type of device has been familiar to car enthusiasts for a long time. After all, the timing belt design migrated from the VAZ 2108 engine, which became the basis for all subsequent modifications of VAZ power plants. The Grant is equipped with two types of engines: an 8-valve engine and a 16-valve engine. The gas distribution system of the 16-valve power unit has a complex structure and increased dimensions compared to the 8-valve one. Accordingly, replacing the Granta timing belt becomes more complicated.
The main feature of the 16-valve device is the presence of two camshafts operating synchronously, in parallel with the crankshaft. The structure is located in the cylinder head. All three shafts are synchronized via a toothed belt. The main disadvantage of a timing belt drive is the unreliability of the belt itself. When it breaks or jumps, the valves meet the pistons and bend. The structure of the 16-valve timing belt is clearly shown in the photo.
16 valve unit
- Installation mark on the drive cover.
- Lid.
- Intake camshaft pulley.
- Phase disk (sensor).
- TDC mark on the camshaft.
- Exhaust camshaft pulley.
- Support roller.
- Tensioner roller.
- Drive belt.
- Pump pulley (coolant pump).
- Installation mark on the oil pump.
- Crankshaft alignment mark.
- Crankshaft pulley.
You can change the timing belt kit yourself. The main thing is to know about the presence and correct placement of installation marks. By the way, most foreign cars do not have such marks, so in this case VAZ cars have the advantage.
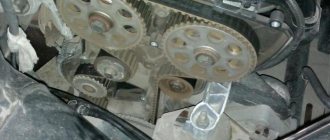
The eight-valve timing drive of the Lada Granta, compared to previous modifications of the car, looks simpler. The scheme is simple, because there is no idler roller and there is only one camshaft. The 8-valve timing device can be seen clearly in the photo.
If you have doubts about your own abilities, you should not try to replace the timing belt yourself, as you can cause even more damage. In addition, in a car service center such a procedure, performed on an 8-valve engine, is inexpensive. But in the case of a 16-valve engine, the price tag is usually much higher.
Replacing the timing belt on a 16-valve Granta engine
Access to the gas distribution device drive is covered with a plastic casing. To remove the cover, you need to unscrew five screws with a 5mm hex key. Pay special attention to the location of these screws. In the photo, number 1 shows the fastening screws of the top cover, and number 2 shows the fastening screws of the bottom cover. After unscrewing the five screws, the top cover must be lifted and removed from the engine.
If the car has a manual transmission, you need to engage fifth gear, lift the right front wheel and turn it clockwise. At the same time, it is necessary to inspect the belt for cracks, abrasions, delamination, etc. If the car is equipped with an automatic transmission, you need to remove the right front wheel and the boot (protective shield) on the right. Using a 17mm head, rotate the bolt securing the drive pulley for additional equipment (air conditioning, generator) and inspect the belt. If various defects and damage to the belt are diagnosed, it must be urgently replaced. Replacement will also be required if oil leaks, a malfunction of the water pump or tensioner roller are detected.
On a 16-valve engine, a broken belt drive will lead to a discrepancy in the angular position of the crankshaft and camshafts. As a result, the piston group will come into contact with the valves. As a result, repair work will be required.
Consequences of a broken toothed belt. Is everything really that scary?
The manufacturer installs several types of power units on Grant cars.
There are 5 of them in total:
- VAZ-11183-50
- VAZ-11186
- VAZ-21126
- VAZ-21127
- VAZ 21126-77
The first two are eight valve, and the rest are 16. Sad consequences in the form of damaged valves due to a broken timing belt on Grant threaten all of these engines, with the exception of the VAZ-11183-50.
It goes like this. When the timing belt breaks on a Grant car at high speeds, this leads to the connection between the engine shafts being lost. The camshaft stops abruptly, but the crankshaft continues to move as the engine is running. As a result, the piston hits the stationary valves sharply, which can bend and even break. Such damage threatens with expensive repairs of the entire gas distribution system, and if the piston is also damaged during the impact, then replacement of the piston group, which is even more expensive.
