03/02/2022 6,273 Light and sound devices
Author: Ivan Baranov
The DRL controller is a device used to monitor the performance of daytime running lights. With the help of this device, more stable and optimal operation of the optics is ensured, which allows optimizing the functionality of the electrical network as a whole. You can learn more about how to build such a device at home from this article.
[Hide]
DIY options
If you decide to build a daytime running lights controller for your car, then first we suggest you familiarize yourself with several options for manufacturing the device.
Photo gallery “Schemes for manufacturing”
1. Relay based controller circuit
2. Controller based on ATmega8 board
- Relay-based DRL controller. Many vehicles have standard fog lights, but not all motorists use them. The reason may be the lack of need for operation, high voltage consumption of the optics, or its inefficiency. Alternatively, if necessary, the fog lights can be converted into daytime running lights, only the lighting sources will need to be replaced with diode ones. You will also need to slightly change the standard connection diagram; most likely, in this case you will need to dismantle the bumper and control panel. When you can access the on-board network, the connection procedure is carried out according to the diagram above. In this case, you need to ensure the correct operation of the optics - that is, the running lights should automatically turn on when you start the engine and turn off when you turn on the dimensions or high or low beam. To ensure this, the signal from the side lights can be taken from the button illumination, thanks to this you will not forget to deactivate the DRLs.
- Using ATmega8 board. This option is more preferable if access to the wiring in the car is difficult. The daytime running lights themselves are purchased separately; you do not need a control unit. You need to install the DRL into the bumper yourself; to do this, make the appropriate holes and fix the optics. After completing these steps, you will only have to work with the controller itself. It should be noted that this board also allows you to implement other, no less useful functions, for example, indicating the operation of the engine heater. In this case, the operating algorithm will be as follows: when the vehicle is not started, the voltage on the battery will be less than 13.5 volts. Accordingly, when the engine starts, the battery will be recharged, which means that the voltage will be more than 13.5 volts. The DRLs themselves will be activated automatically. To make the connection, two wires must be connected to the battery, and two to the optics itself.
What types of DRLs are there?
Typically, daytime running lights in turn signals are an LED unit that is installed instead of the standard turn signal lamp. But unlike a regular lamp, such a block can switch into two modes - blink like a regular turn, and simply shine with white light. To do this, it has orange and white LEDs, as well as a control unit that switches them according to the situation. Therefore, there are no problems with lighting.
There are other designs that also consist of bright LEDs. For example, a DRL with a running turn signal function is a flexible bar with LED blocks that can be mounted above or below the headlights. When turning on the turn, the LEDs simulate running lights in the direction of the turn, and when turned off, they light up all at once. Such flexible DRLs with a turn signal function are not suitable for all car models.
Some have a tracking function, when the brightness is reduced by half when the driver leaves the cabin, and illuminates the path in front of the car, and goes out after a few minutes.
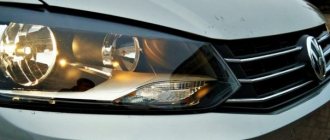
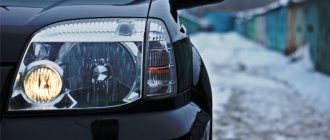
Daytime Running Lights
Instructions for manufacturing the DRL regulator
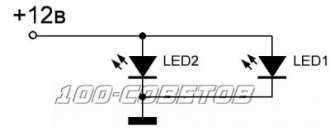
Scheme for making a device at home
Let's consider the process of making a regulator for DRLs at home in accordance with the diagram given above.
The operating logic of this device is as follows - the unit activates the daytime running lights only in this case:
- if the car’s power unit is started;
- if the side lights and high and low beams are turned off.
Actually, these conditions are mandatory and meet all the requirements for the operation of daytime running lights. When you turn on the side lights or low beams at night, the regulator will automatically turn off the running lights.
To make a block according to the diagram you will need the following elements:
- two bipolar transistors, designated in the diagram as VT1 and VT6;
- three rectifier diode elements, marked as VD1, VD2, VD3;
- two 1 kOhm resistor components R1 and R2;
- you will also need two 5.1 kOhm resistors - marked as R3 and R4;
- one 10 kOhm resistor element - R5;
- one 15 amp fuse and one 10 amp relay, marked K1 in the diagram.
All these spare parts can be purchased at any radio market, in the appropriate store or ordered online. There should be no problems finding the constituent elements of the circuit. The process of manufacturing the device itself should not cause problems - you just need to connect all the elements on the board in the manner shown in the diagram. The connection procedure is carried out using soldering. If you do not know how to solder, then it is better to contact a qualified electrician - any specialist with experience can solder such a regulator without any problems.
DIY DRL controller
When soldering, be careful not to damage the components of the controller, as this may lead to its further inoperability. All parts must be securely soldered, since vibrations may occur when the car moves, and they, in turn, have a destructive effect on any moving elements. Especially when it comes to electronics.
After the device is made, it must be connected correctly:
- DDM - must be connected to the engine fluid pressure controller or to the parking brake;
- the +12 volt output must be connected to the generator device or the ignition switch, in particular, you need to connect it to the contact where voltage appears when the engine is running;
- dimensions - as you might guess, in this case we are talking about the positive contact of the side lights, the specific connection location does not matter;
- GND is the mass or body of the vehicle;
- DRLs are daytime running lights themselves with halogen or diode lighting sources (the author of the video about the connection is Vitaly Novakov).
As for setting up the manufactured controller, this process consists of diagnosing the operating algorithm as a result of applying simulation pulses to it. When 12-volt voltage is supplied to the parking light input, the relay should automatically turn off. It will also turn off if the oil pressure controller input is shorted to ground.
Price issue
If for some reason you do not want to make a controller at home, then you can always buy it on the market or order it on the Internet. Costs may vary by store, with price differences ranging up to 40%. On average, the cost of a DRL controller today ranges from 650 to 1000 rubles.
A little theory
Stable salary, stable life, stable state. The last one is not about Russia, of course :-). If you look in an explanatory dictionary, you can clearly understand what “stability” is. On the first lines, Yandex immediately gave me the designation of this word: stable - this means constant, stable, not changing.
But most often this term is used in electronics and electrical engineering. In electronics, constant values of a parameter are very important. This can be current strength, voltage, signal frequency and other characteristics. Deviation of the signal from any given parameter can lead to incorrect operation of electronic equipment and even to its breakdown
Therefore, in electronics it is very important that everything works stably and does not fail.
In electronics and electrical engineering, voltage is stabilized. The operation of electronic equipment depends on the voltage value. If it changes to a lesser extent, or even worse, to an increase, then the equipment in the first case may not work correctly, and in the second case it may even burst into flames.
In order to prevent voltage spikes and drops, various voltage stabilizers were invented. As you understand from the phrase, they are used to stabilize the “playing” voltage.
LEDs
How to make a spray gun for whitewashing with your own hands How to make a spray gun with your own hands Types of paint spray guns
There are two options: either buy LEDs and assemble the lamp yourself, or purchase a special design in which the diodes are already installed in an aluminum board.
It is worth noting that it is possible to assemble the lamp yourself, but you need absolute confidence in your actions. LEDs can easily be damaged during installation, and you will have to purchase new ones. If the DRLs are installed incorrectly, there is a possibility of damaging important vehicle systems or harming its appearance. Also, if the running lights do not meet the necessary requirements, the visibility of the car on the road for other drivers is reduced, which can lead to an accident. In addition, homemade DRLs may not have sufficient protection from adverse environmental influences, which will greatly reduce their service life.
It is better to take light sources from popular manufacturers; these companies most often provide guarantees for their products, and the buyer, if necessary, can always contact the customer service center. The best DRLs are Osram devices, for example, OrsamLed Riving FOG. Philips brand devices have also proven themselves well. If you lack funds, you can use cheaper equipment from Korean manufacturers, for example, Samsung or Seoul Semiconductor, but it is better not to use Chinese diodes, especially those that have a suspiciously low cost.
You can assemble an LED lamp provided that you know exactly what to do
It is recommended to use LEDs with a power of 1-1.2 W; four such elements are enough to create light with an intensity of 400-800 Cd (this is the aperture ratio indicated in official standards). It is worth noting that sometimes three diodes are enough. No more than four elements can be installed in series, this is due to the fact that the circuit is powered by a battery. You can turn on several chains of 4 LEDs in parallel, but this does not make much sense, since the power of one such circuit is quite enough.
After installing the last light bulb, it is necessary to seal all contacts so that they do not collapse under the influence of adverse external factors. Then you need to install the board in place. It is recommended that before turning on the running lights for the first time, you should once again check all connections for any errors or inaccuracies made during installation.
Connection via 5-pin relay
Now it's time to learn how to connect running lights via a five-pin relay. The scheme is the most universal, and was assembled to eliminate the disadvantages of previous options.
First, about connecting the relay for DRLs:
- 30 – to the positive terminals of LED modules;
- 85 – to the positive wire of the side lamp;
- 86 – on the car body;
- 87a – to “+” from the ignition switch;
- 87 – do not connect (isolate).
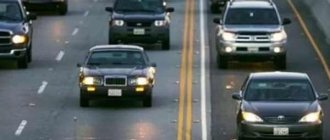
The circuit with a five-contact relay works as follows. When you turn the key, +12 V is supplied to the DRLs, thereby turning them on. If you turn on the side lights or headlights, the relay will open contact 87a and close inactive contact 87. As a result, the DRLs will go out and the side lights will turn on. The circuit fully complies with the requirements of GOST and traffic regulations and can work with side lights even based on LEDs.
However, the circuit still has one negative point - the DRLs will turn on immediately after turning the ignition switch. That is, if you turn the key in the ignition but do not start the car, the DRLs will light up.
Despite the existing drawback, the circuit is quite successful, but in order to correctly connect the DRL via a five-pin relay, you will need to supplement the circuit with a voltage stabilizer.
This switching option is interesting because the path of current flow through the running lights is independent. This allows you to install light sources of any type and power in headlights and DRLs.
Types of DRL controllers
In most cases (about 95% of cars), the headlight bulbs are turned on with positive voltage. This explains such a variety of “plus” controllers. However, some manufacturers use “minus” control - in this case, a “minus” controller is used when connecting.
Appearance of DRL controllers
The brightness of the lamps for DRL controller 'a and DRL 2+ controller 'a is regulated by a trimming resistor on the back of the housing.
All settings of Max DRL 2+/- controllers and Start-Stop 3-in-1 devices (in DRL mode) are changed by a pulse sequence at the “Dimensions” input (by the size switch after connecting to the car).
The simplest one - Lite DRL controller - does not have adjustable settings.
You can evaluate the capabilities of the controllers using the table below. More detailed information can be found on the product description page for the relevant device.
Main functions of DRL controllers
- Automatic switching on of headlights. The DRL controller will automatically turn on the low or high beam headlights after the engine starts. The startup process is monitored by the signal at the “On”
, or by the voltage in the vehicle’s on-board network. - Brightness adjustment. DRL controllers provide brightness adjustment. Reduced brightness reduces the load on the generator and allows you to avoid blinding oncoming drivers when connected to high beam lamps.
- Delay for turning on headlights in DRL mode. The DRL controller can be configured so that the headlights in DRL mode do not turn on immediately after starting the engine, but after some time. The start delay can be useful if you use remote engine starting or regularly warm up the engine before driving.
- DRL controller does not affect the operation of standard equipment. When the headlights are turned on, the DRL controller stops working, thereby not affecting the operation of the low or high beam headlights at night. If a light sensor is installed on the car, when it is triggered, the DRL controller will also stop working.
What is DRL controller?
DRL controller (or DRL controller)
is a device that automatically turns on the car's headlights.
The DRL controller only turns on the headlights. The side lights, license plate and instrument lights do not turn on. When the side lights are turned on (at night), the DRL controller stops working. Also, using the DRL controller, you can set the brightness of the light bulbs. Reduced brightness reduces the load on the generator, thereby saving fuel and having less impact on vehicle dynamics.
[Sometimes the “dRL controller” is understood as a device that controls the operation of additionally installed DRL headlights. All DRL controllers presented on our website do not require the installation of additional optics. Our controllers connect directly to standard halogen high or low beam lamps, or to fog lamps ].