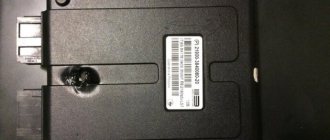
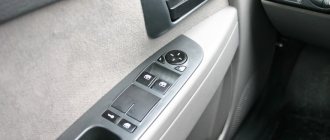
Lada Kalina comfort block
The most complete classification of CBKE.
There are 15 types of them. You can see which one is installed on which car. 1) 21900-3840080-20 Priora 2, Granta, Kalina 2 (in luxury trim levels), Datsun Ondo (Dream 1-2) 2) 21900-3840080-10 Priora 2, Granta, Kalina 2 (in standard trim levels) 3) 21900 -3840080-11 Priora 2 in the Standard configuration. Until 2022, they installed on Priora 2 in the standard configuration 4) 21900-3840080-21 Priora 2 in the Lux configuration early (2021-2021), did not install on the Norma, but will fit 5) 21900-3840080-15 Priora 2 in the Standard configuration, Kalina 2, Granta in the Comfort package 6) 21900-3840080-30 Datsun Mido in the Trust 1-3 package until 2022 7) 21900-3840080-40 Datsun Mido in the Dream 1, Dream 2 packages until 2020
21900-3840080-50 new block to replace 21900-3840080-10 (does not burn out) 9) 21900-3840080-60 new block to replace 21900-3840080-20 (does not burn out) 10) 8450100527 Grant from 2022 11) 84 50100534 Kalina 2 from 2022 12) 8450100535 Datsun Ondo from 2022 13) 8450100536 Datsun Mido from 2022 (Trust 1-3, dream 1-2) 14) 8450101126 Granta FL in the comfort and standard package 15) 8450101145 Granta FL in the package ations luxury
Now regarding the connectors. Many people burn out 2 TsBKE on Kalina, some even burn out the wiring. Previously, no one could find connectors for these blocks, so I did it!
After restyling, instead of fuses and numerous relays, the Lada Kalina is equipped with a central body electronics control unit (CBEC). The device is available in “Lux” and “Norma” trim levels.
Alarm and central locking in Lada Kalina
When installing an alarm system, they most often make mistakes with connecting the central locking system. Standard central locking is now installed on many cars, and the Lada Kalina of generation “1” was no exception. But the fact is that in the “Norma” configuration one scheme for connecting locks is used, and in the “Lux” this scheme is different. And the connection of the signaling, of course, is also done differently. Let's consider how alarm and alarm systems can be combined if we are talking about any of the specified configurations.
Two configurations and two schemes
In the “Norma” version, if it has a central locking system, you can use two control wires. Ground is supplied to one of them if the locks need to be opened, and to the second one if the locks need to be closed. The period of connection to ground should take 0.7 seconds, and most alarms have such a setting.
Control cables, threshold harness
If we talk about the “Lux” configuration, the control wires will not help us here. The relay contacts built into the alarm will have to be connected to the breaks in the power cords. Despite all the complexity, there were no complaints about this scheme, and we will consider it right now.
The “luxury” option is the most complex
First you need to make sure that the central locking system in the car is really connected according to the “Lux” scheme. The control button located on the door must be trigger (non-latching). If you have exactly this type of car, you will have to tinker. It will be necessary to extend 4 power cables to the signaling unit. These cords, in turn, must go from the break point of the two standard wires (yellow-white and yellow-black). Find them in the bundle under the threshold.
Is the comfort block on the luxury grant being treated or is it only for replacement?
01/14/16 11:37 Reply to the message Is the comfort block on the Grant Luxury being treated or only for replacement? by Wild Tourist
I may blurt out off-topic, what is wrong with it, either the relay is jammed - change it if it is done on the relay, which I am 99% sure. or the relay control is faulty. If you want, I’ll look behind the scenes, the main thing is that without this module the turn signals don’t light up)))
and if there is a diagram for connecting the wires, it will also not be superfluous. PM contacts.
01/14/16 11:59 Reply to the message Is the comfort block on the Grant Luxury being treated or only for replacement? by Wild Tourist
Only a pawn can become a queen. Hitler, why don’t you shoot the officials who steal from the treasury? Why, let them steal, - They brought me to power.
Only a pawn can become a queen. Hitler, why don’t you shoot the officials who steal from the treasury? Why, let them steal, - They brought me to power.
Corrected by user sdw (01/14/16 12:11)
01/14/16 13:01 Reply to message Re: Is the comfort unit on the Grant Luxury being treated or only for replacement? user Pavel Sergeevich
In response to: I may blurt out off-topic, what is wrong with it, either the relay is jammed - change it if it is done on the relay, which I am 99% sure. or the relay control is faulty. PM contacts.
If only it were that simple. In the luxury version of this car, there is no turn relay on the seat (in the steering column relay/fuse block, F5 is empty), as I understand from the Internet, it is “tied” to the comfort block (the link to which was given above).
PS: I didn’t get through to the number indicated in the personal message.
01/14/16 22:59 Reply to message Re: Is the comfort unit on the Grant Luxury being treated or only for replacement? by Wild Tourist
I don't regret anything, Donkey foundation, strong house
01/14/16 23:33 Reply to the message Is the comfort block on the Grant Luxury being treated or only for replacement? by Wild Tourist
In response to: Actually the question is on topic, a question for auto electronics engineers. Diagnosis: three yellow left turn signals are on (constantly) (both when the car is running and when the car is turned off), so far I solve the problem solely by removing the terminal and closing the car manually with the key. The dealer (the car is under warranty) does not have this unit in stock, they sing about the uncertain delivery times from AvtoVAZ, they are ready to solve the problem at their own expense, the issue is the price. You can do it in person or publicly.
01/15/16 00:32 Reply to message Re: Is the comfort unit on the Grant Luxury being treated or only for replacement? by Kosyan
In response to: Welcome!
01/15/16 12:12 Reply to message Re: Is the comfort unit on the Grant Luxury being treated or only for replacement? Counteract user
In response to: Welcome!
you started working on Russian cars.
this is what is being done.
01/15/16 13:00 Reply to message Re: Is the comfort unit on the Grant Luxury being treated or only for replacement? Counteract user
01/15/16 14:48 Reply to message Re: Is the comfort unit on the Grant Luxury being treated or only for replacement? Counteract user
In response to: Welcome!
you started working on Russian cars.
this is what is being done.
When will you start reading carefully?
Control units, chip keys, speedometers, wheel alignment and some mechanical stuff have never been in a bathhouse
Yesterday there were only two engine ones from the Zhuguli.
I don't regret anything, Donkey foundation, strong house
TsBKE connectors
- XP1 connector - Molex 34729-0080
- XP2 connector - Molex 31372-1000
- connector X3 - Molex 34729-0200
- connector X4 - Molex 31372-1100
Lada Granta control units and their problems
ECU – electronic control unit. It processes information about the state of the car and controls the operation of all systems. Data for processing comes from sensors that are installed in different components of the machine. The comfort of travel and the power of the car depend on how the unit’s software works. In fact, the ECU is the brain of the car.
At StoVesta you can have your car serviced and also purchase all the necessary spare parts and accessories.
What blocks are installed on the Lada Granta?
ECUs M74.5, M74 and M74M are installed on Lada Granta. Which unit is included in the car depends on the year of manufacture and engine type.
Until 2022, units M74 and M74.5 were installed.
The software for the M74 was developed by AvtoVAZ. There are 5 block options and more than 50 software. But there are no fundamental differences for the driver in these blocks and software.
The software for the M74.5 block was developed by NPP ITELMA. This unit is installed only on machines with engine 21127. The differences with the M74 are in appearance and connectors.
Starting from 2022, the Lada Granta began to be equipped with an M74M ECU. The software was developed by AvtoVAZ and this unit became a clone of the M86, which is installed on Lada Vesta, Khrey and Largus.
The software of all blocks is different and it is impossible to upload, for example, M74 or M74M software into the M74.5 block.
Any of the software options provided by the Lada Granta manufacturer does not make the car settings optimal. For example, the gas pedal does not always respond quickly to driver inputs. Or gears change for a long time and with jerks. You can improve the car's reaction speed, its power and smoothness with the help of chip tuning.
Weaknesses of Lada Granta control units
Firstly, the weak point of any Lada Granta control unit is its leakage and installation location. The ECU is located under the glove compartment, behind the upholstery.
With this arrangement, there is a high probability that liquid will enter the block. In what cases can this happen:
- Antifreeze will get into the ECU if the interior heater leaks.
- Water from under the hood if the rubber plug dries out.
- Water if the drain hole at the bottom of the windshield becomes clogged.
If liquid gets inside the unit, it will fail. In this case, the car simply will not start. And if this happens during a trip, then anything can happen. But the unit will definitely not work correctly, and the trip will turn into torture.
Secondly, the weak point of any Lada Granta unit is poor protection against theft. This is especially true for the M74M block. It is easy for a hijacker to find the block and either reprogram it or replace it with a pre-prepared one.
New Lada: Optimal tire pressure for Lada Vesta Cross and wheel sizes
How to protect the ECU from liquid?
To avoid troubles with liquid getting inside the Lada Granta control unit, just do the following:
- Place the plug on the sealant that leads to the ECU from under the hood.
- Regularly clean the drainage holes located under the windshield.
- Move the control unit higher, closer to the passenger airbag. But we recommend doing this at our service center.
These actions are enough to protect the control unit from liquids.
How to protect the ECU from hacking
There are two directions of protection - mechanical and electronic.
In order to protect the ECU mechanically, it is enough to place it in a safe. The block remains in the same place, but access to it becomes much more difficult. An attacker will not be able to quickly replace the ECU or disable the standard alarm system. The safe will also seal the block from moisture, but such protection cannot be called reliable.
For electronic protection of the unit, we recommend chip tuning. This will not only prevent the ECU from being hacked electronically, but will also make the car more powerful and more comfortable to travel with.
Now the Lada Granta is a very popular car. And the more they buy it, the more they steal. Therefore, we advise you to take the safety of your car seriously and additionally protect it from theft.
Of course, a safe on an ECU will not provide 100% protection, but it will significantly increase the time it takes to bypass the anti-theft system. And for an attacker it is important to do everything quickly. Therefore, faced with such mechanical protection, the hijacker will most likely simply give up.
To further secure the car, you can install additional alarms and mechanical protection.
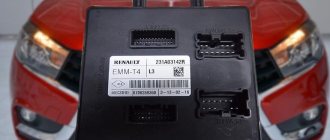
Central body electronics unit (CBEC) 8450100527, Lada Granta “Lux”.
Description:
TsBKE is used on luxury vehicles, in which instead of traditional relays, a central body electrical unit (CBE) is used to control electronics; the signal in such cars is transmitted via a can-bus.
Applicability:
- VAZ 2190, 2191 Lada Granta in the “LUX” configuration.
It's easy to place an order on our website. Simply add the selected items to your cart, then go to the Cart page, check that the items you ordered are correct, and click the “Checkout” or “Quick Order” button.
The “Quick Order” function allows the buyer not to go through the entire ordering procedure on their own. You fill out the form, and after a short time the store manager will call you back. He will clarify all the conditions of the order, answer questions regarding the quality of the product and its features. It will also tell you about payment and delivery options.
Based on the results of the call, the user either, having received clarifications, places an order independently, completing it with the necessary items, or agrees to the order in the form in which it is now. Receives confirmation by email or mobile phone and waits for delivery.
Placing an order in standard mode
If you are confident in your choice, you can place your order yourself by filling out the entire form step by step.
Filling out the address
Select the name of your region and locality from the list. If you did not find your locality in the list, select “Other location” and enter the name of your locality in the “City” column. Enter the correct index.
Depending on where you live, you will be offered delivery options. Choose any convenient method.
Choose the optimal payment method.
Enter your information: full name, delivery address, phone number. In the “Comments to the order” field, enter information that may be useful to the courier, for example: entrances in the house are counted from right to left.
Placing an order
Check that the information you have entered is correct: order items, location selection, customer information. Click the "Place an order" button.
Our service remembers user data, order information, and next time it will ask you to repeat the previous order data. If the conditions do not suit you, choose other options.
You can choose one of three payment options:
Cash payment
Cash payment is available for pickup from our retail store in Tolyatti. Come, we will be glad to see you in our store.
Sending orders by cash on delivery is possible after prepayment of delivery. This is due to the fact that cases of non-repurchase of parcels sent fully cash on delivery have become more frequent. In connection with this, we suffer losses by paying for Russian postal services for delivery in both directions.
The prepayment amount is calculated individually; the order amount must be at least 1,500 rubles.
Dear customers, goods can be sent to distant regions only with prepayment.
When placing an order in the cart, you can select the non-cash payment option. We accept Visa and Master Card.
After placing your order, expect a call from our manager to agree on payment and delivery terms.
The manager will send you payment details by email or phone via SMS after you agree on the price and delivery method over the phone.
Payment by invoice for legal entities
Information for organizations and individual entrepreneurs:
- On the website, information on prices is presented for individuals.
- The price of goods for legal entities will increase by 10-15%. We work without VAT.
The minimum order amount by bank transfer is 3,000 rubles.
Our online store offers several delivery options:
- post office;
- transport companies;
- courier;
- pickup from the store;
Express delivery*
Courier delivery is possible only within the city of Tolyatti.
Delivery price: 200-400 rubles (depending on the area).
Payment for goods is made in cash upon delivery of the order.
You can pick up the goods from a retail store in the city of Tolyatti. It is advisable to pre-order on the website or call to check product availability.
Postal delivery
You can order delivery through Russian Post. Immediately upon arrival of the goods, a parcel notification will be sent to your address. You will also be able to track the passage of your parcel using the track number, which will be sent to your phone by Russian Post when the item is accepted for delivery. Very large and heavy parcels are sent only by transport companies.
Delivery by transport companies
Delivery by a transport company is the most convenient and fastest delivery method. Delivery is possible if there is a representative office of one of the transport companies in your city - https://nrg-tk.ru
— TC “Business Lines” — https://dellin.ru
— TC “SDEK” — https://edostavka.ru
— TC “ZhelDorExpedition” — https://jde.ru
— TC “PEK” — https://pecom.ru
— TC “GTD” — https://gtdel.com (formerly KIT)
You can ask any question you are interested in about the product or the work of the store.
Our qualified specialists will definitely help you.
Replacement instructions
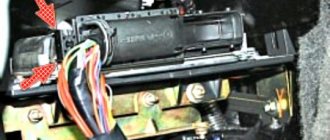
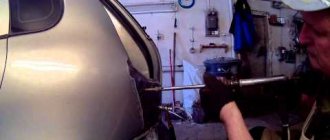
First you need to remove the instrument panel on the center console, then remove the lower part of the dashboard trim under the steering wheel. Now you need to unscrew the fuse box and turn it so that it takes a horizontal position. You need to stick your hand into the freed space until it comes into contact with the shelf on which the TsBKE is installed.
By unscrewing the fixing bolt, you can pull up the control unit and, after disconnecting the two electrical connectors, carefully pull it out. After dismantling the device, it is repaired or replaced with a new one. Installation of the device is carried out strictly in reverse order.
The introduction of modern technologies in the field of control of electronic equipment of a car makes the driver’s work easier, frees him from unnecessary loads and reduces the likelihood of road accidents. Along with the positive aspects of the implementation of CBKE, there are also a number of disadvantages associated with the unreliability of some nodes.
The electrical package control unit (pictured below) Kalina Lux does not work. Or rather, it does not respond to my clicks. It is illuminated, when I press the buttons, click, I hear a single short sound in the area of the speedometer/heater (you can hear it in the video below). This thing appeared in the morning, I walked away for an hour, everything worked.
https://www.youtube.com/watch?v=fiNLc65LEYs
Megapolis-Auto provides warranty and post-warranty support for professional anti-theft and security systems and AlarmTrade.
The company was awarded the status of “Industry Leader 2022”
Replacement features
Briefly about the procedure for replacing the control module on Kalina 2:
- First, the instruments are dismantled from the center console; there is nothing difficult about it.
- Then the lower part of the center console trim is unscrewed, the trim is removed, and you gain access to the fuse and relay box.
- The mounting block with safety devices can be unscrewed, but it cannot be removed because it is connected by wires. You can rotate it a little so that it takes a horizontal position.
- You can stick your hand into the gap formed as a result of turning. Having done this, you will be able to feel the shelf on which the TsBKE is installed. A little to the left there is a bolt with which this module is fixed - you need to unscrew it.
- After this, through the top, through the instrument panel, you will need to disconnect the two connected connectors. After completing these steps, you can carefully dismantle the CBKE and remove it by slightly moving the fuse box. Please note that you should not pull the device too hard, since there are two more connectors on the other side that will need to be disconnected. When the wires are disconnected, the CBKE can be completely dismantled and repaired or replaced.
Photo gallery “Assistance in replacing CBKE”
Price issue
The cost of CBKE will vary depending on the modification. On average, such devices cost from 4,500 to 6,000 rubles.
How to remove cbke? repair of faulty pulp and paper plant
So, CBKE (eng. BCM - Body Control Module) - the Central Unit of Body Electronics is located in the car interior, on the left, above the fuse box.
You can view the pinout of the TsBKE, a description of its functions and the diagnosis of its malfunctions by following the link - TsBKE - Purpose, Functions, Diagnostics (*.pdf format, size
To dismantle it, according to AVTOVAZ technological instructions, it is necessary to remove the instrument panel. Not the instrument panel, with gauges and indicators, but the entire panel! Something like this.
26.1MB). Information on removing the CBKE is on page 281.
On our own behalf, we can add that it is difficult to remove the TsBKE without removing the instrument panel. And installing it back in its place, securing it as it should be, is even more difficult, but possible. The Internet is full of instructions, everyone can make it up, just like we can in our own way.
We had to remove the body electronics unit because the left turn light was constantly on. All paths and electrical circuits led there. There was no turn relay in this Lada Granta.
Block number 21900-3840080-20.
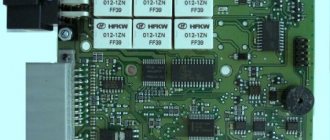
From the inside, the TsBKE board looks like this. Next to the large gray connector, the “culprit” of the constantly lit direction indicators is the BTS-5242-2L microcircuit (power key).
You can get acquainted with the “datasheet” of this microcircuit by following the link: Datasheet BTS-5 242-2L (*.pdf format, size
In general, in terms of repairs, there are no tricks. Either we order and change the microcircuit, or we order and change the TsBKE.
Regarding replacing the block. According to the document “CBKE - Purpose, Functions, Diagnostics”, there is also a unit with number 21900-3840080-10, but it does not control the electric drives of the side mirrors, does not have auto lights, does not control the rear windows and does not control the trunk lighting.
Attention! We moved. New address st. Vysotskogo, 33/3 (on the territory of the Research and Production Enterprise “Engineer”).
Our car service becomes the official Partner of ARS ADAKT LLC.
Our car service has been certified and received permission to install, repair and maintain WEBASTO heaters.
What is TsBKE and the main purpose of the device
The main goal of introducing TsBKE into VAZ family cars is to improve the functionality of electrical equipment. The block consists of an electronic board on which semiconductor elements (drivers, capacitors, resistors, relays) are located, assembled according to a specific circuit. Below is a photo of TsBKE Priora 2 in disassembled form.
Below we describe the functions that the body electronics unit performs on Priora cars of restyled versions. It is useful to know them if problems arise in the operation of certain electrical appliances.
Functionality of TsBKE Priora2
It would seem that such a useful device should really increase the convenience, and most importantly, the safety of car operation. However, this does not apply to cars of the VAZ family, where after the introduction of such units, various breakdowns began to appear. And sometimes it’s almost impossible to deal with them without an experienced electrician or even an electronics engineer. However, the worst thing about using such control units is that cars could and can catch fire without any reason. Although the reason is already known, and it lies in the fact that with a large current that passes through the block, the plastic begins to melt and the wires burn, which leads to fires and far from the most pleasant consequences. If you are interested, then below are the types of body electronics units that were installed on Priora2 cars.
Purpose and characteristics of pulp and paper
The central unit of body electronics Kalina 2 controls:
- alarm system;
- windshield wipers;
- heated windshield and rear windows;
- heated side mirrors;
- lighting system;
- direction indicators;
- central locking;
- trunk opening drive;
- electric windows;
- heated front seats;
- electric side mirrors.
When the alarm is turned on, an automatic check occurs, accompanied by a short flashing of the direction indicators. In security mode, the immobilizer light on the instrument cluster blinks. The security mode is disarmed by pressing the remote control button.
The central electronic unit automatically turns on the windshield wipers if:
- a signal was received from the rain sensor;
- sensitivity regulator in position from 1 to 4;
- The wiper switch is in the intermittent position.
If a malfunction is detected in the operation of the windshield wiper, TsBKE Kalina 2 switches it from automatic to manual control mode. When the windshield heating function is turned on, the body electronics monitor the on-board voltage and limit the heating duration to 6 minutes. When the voltage drops below 12 V, the CBKE switches off the heating mode.
When the voltage drops to 9.6 V, the central unit limits the operation of the rear window and side mirror heaters. This prevents the engine from going into emergency mode. When the voltage is restored to a level of 10.8 Volts, the heaters turn on automatically.
The driver is also assisted by body electronics when working with the lighting system. When the engine starts, the daytime running lights turn on, and when the engine stops, they turn off automatically. The low beam headlights and side lights turn on when a signal is received from the light and rain sensor.
Lada Granta Liftback [Almaz] › Logbook › Connecting the heated windshield via TsBKE.
The peculiarity of turning on the windshield heating through the TsBKE: - the heating is turned on for 6 minutes, - the heating is turned on only if the engine is running - the heating is turned on only if the on-board network voltage is more than 12.8 V. I repeated the entire switching circuit according to the principle diagram on the Granta Lux. I also added activation via an additional alarm channel
— so that you can turn it on remotely from home in the morning before leaving.
Diagram for turning on the heating (everything is taken from the circuit diagram for Granta Lux). I added activation via an additional alarm channel.
Necessary elements: - non-latching button. — two relay holders in the mounting block. - two 4-pin relays rated at 30A. — two 7.85 mm Lyra contacts for a large fuse (ordered here). - MAXI fuse 50A. — two contacts for connector XP1 TsBKE.
And so, first of all, we find the CBKE and remove the XP1 connector from it. This connector has two empty spaces for contacts - a signal from the button for turning on the heated windshield and control of the relays.
The XP1 TsBKE connector (black) has circles highlighting empty spaces for contacts.
Whatever contacts I tried to plug in there were either large or went inside (I tried from a cooler, from industrial connectors that I found). As a result, we came from the AUX cable of an old computer CD drive (Thanks to our neighbor NFadrenaline for recognizing the contact and for providing this cable)
These are the contacts from the AUX cable of the CD drive.
I inserted them into the connectors, tried to short-circuit one contact to ground briefly, a signal appeared on the second - yes! works. We can move on. And then this is what was done: - the contacts were installed in the mounting block for the MAXI fuse - the relay holders were installed - everything was connected according to the diagram (see above). — ran two wires to the button (the power-on signal and the wire for the light bulb in the button). — I ran a wire with a cross-section of 6 sq. mm to the windshield wires and another wire to the battery.
Contacts Lyra 7.85 mm for MAXI fuses in the mounting block.
Here I highlighted what I added to the mounting block: — 50A MAXI fuse. — Two relay holders.
How glad I was when I found a special place and a special bolt for connecting the ground of the windshield heater behind the ceiling lamp. Where was it connected?
This is where the button for turning on the heated windshield is located.
Outside -1*C. 10 seconds after turning on the heating.
In the end - HURRAY! Everything works: the heating is turned on both from the button and from the alarm key fob.
PS: Thanks again to comrade BlackNkZ for the idea and advice. PSS: Link to the blog where I wrote about replacing the windshield.
Non-specific types of services
Even if the rules for safe operation of the vehicle are observed, the heater control unit may require servicing or replacement. This happens as a result of sudden switching of the heating knob of the Lada Kalina car. The operating instructions indicate that you must wait until the system warms up to a minimum, otherwise expensive repairs will be required.
From a financial point of view, the stove control unit will not be cheap, so its careful operation will save the family budget.
The heater control unit cannot be replaced independently due to the need to use special equipment. Much less often problems arise at the level of the engine control system.
The need to visit a service station will be caused by driving on a gravel road, an accident, or the result of unprofessional maintenance. The engine management system is responsible for fuel injection, so any deviations in its operation immediately put the car on hold. How long it will take to replace the engine control unit will be decided by the technician after an inspection.
It is cheaper, but repairs take much longer when the body electronics unit comes under attack. The problem can only be diagnosed in a service center. The duration is due to the fact that if the engine control unit can be replaced as a single whole, then part of the wiring must be changed along with the electronics.
Voltage surges or a simple short circuit can damage a certain sector. The light control unit will be the first to tell you about this.
Incorrectly working turn signals or emergency lights are the first sign indicating a failure in the electronic component of the car. There is no point in delaying a visit to the service center. Otherwise, the ESP unit responsible for dynamic stabilization will come under attack. Even with minor problems, the driver will notice a decrease in the lateral dynamics of the vehicle.
New Lada: Lada Vesta AMT Stepway
Lada Kalina requires regular maintenance as prescribed by the manufacturer. If the specified deadlines are met, each element of the system will work properly.
back Why the hood on Kalina does not open - do-it-yourself repair work
Source
Possible breakdowns of body electronics and their elimination
CBKE allows you to free the driver from routine work and focus his attention on driving and managing the traffic situation. Despite this undeniable advantage, persistent failures of some nodes often occur. One of the most common malfunctions is the failure of turn signals and hazard warning lights. This most often manifests itself in the fact that the lamps simply burn continuously on the left side of the car. Before you begin repairing the TsBKE, you need to make sure that the lights are not burnt out, their contacts are not oxidized, the emergency stop button is working, and the wires are not charred.
The reason for the failure of the power windows may be a breakdown of the electronic control unit. There are other options: problems with the window regulator built into the driver's door, poor wire contact, incorrect installation of limiters.
You can repair the electronic unit yourself. To do this, you need to remove it from its regular place, open the cover and carefully inspect the circuit for the presence of soot or melted parts of the controllers. If you find obvious defects in the controllers, you should replace them and reinstall the software through a special connector on the electronic unit. In order to correctly replace burnt-out components, you need to have a “pinout” - information about connectors, wiring, input and output ports, various adapters and plugs.
Pinout of pulp and paper
The location of the TsBKE contact connectors is shown in the figure:
- Enter exit. CAN bus (L – line)
- Enter exit. CAN bus (H – line)
- Enter exit. Rear window heating control
- Exit. Heated windshield relay
- Entrance. Hazard switch
- Entrance. Trunk lock actuator switch
- Entrance. Windshield Wiper Switch (Intermittent Position)
- Entrance. Windshield Wiper Switch (Low Speed Position)
- Entrance. Windshield Wiper Switch (High Speed Position)
- Entrance. Windshield washer
- Exit. Seat heating relay
- Exit. Heated windshield switch
- Enter exit. Lighting control module (Automatic lighting mode) – for 21900-3840080-20 Not activated – for 21900-3840080-10
- Terminal 15
- Entrance. Engine compartment lamp switch
- Entrance. Light switch (Left side direction indicators)
- Entrance. Light switch (Starboard direction indicators)
- Enter exit. Headlight high beam relay control
- Exit. Low beam relay
- Entrance. Lighting control module (Low beam mode)
- Exit. Alarm sound
- Exit. Windshield Wiper Motor (Low Speed Mode)
- Terminal 30 (Turn signals, daytime running lights, low current signals)
- Exit. Turn indicators "Left side"
- Exit. Direction indicators "Right side"
- Exit. Daytime Running Lights
- Enter exit. Park position windshield wiper
- Exit. Windshield Wiper Motor (High Speed Mode)
- Terminal 30 (Windshield wiper motor, interior lighting)
- Terminal 30 (Power windows, door and trunk locks)
- Exit. Trunk lighting – for 21900-3840080-20 Not activated – for 21900-3840080-10
- Exit. Power window switch power supply
- Entrance. Rear left door power window switch - for 21900-3840080-20 Not activated - for 21900-3840080-10
- Entrance. Rear right door power window switch - for 21900-3840080-20 Not activated - for 21900-3840080-10
- Entrance. Front right door power window switch
- Exit. Electrically controlled mirror right (Mode “Up / Down”) – for 21900-3840080-20 Not activated – for 21900-3840080-10
- Exit. Electrically controlled mirror right (Mode “Right / Left”) – for 21900-3840080-20 Not activated – for 21900-3840080-10
- Enter exit. LIN bus
- Housing (Low Current Loads)
- Exit. Trunk lock drive
- Exit. Interior lighting unit
- Entrance. Airbag activation signal
- Entrance. Rain sensor sensitivity regulator – for 21900-3840080-20 Not activated – for 21900-3840080-10
- Entrance. Trunk light switch
- Enter exit. CAN bus (L – line)
- Enter exit. CAN bus (H – line)
- Entrance. Front right door switch
- Entrance. Rear passenger door switch
- Autostart (for Lada Connect system)
- Entrance. Front left door switch
- Exit. Car interior lighting (Energy saving mode)
- Exit. Driver's door lock motor
- Exit. Front left door power window
- Exit. Front right door power window
- Exit. Rear left door power window – for 21900-3840080-20 Not activated – for 21900-3840080-10
- Exit. Rear right door power window – for 21900-3840080-20 Not activated – for 21900-3840080-10
- Housing (High Current Loads)
- Exit. Passenger door lock motors
- Exit. General "starboard"
- Exit. General "left side"
Description of CBKE
Unlike the first Kalin models, the second versions and Luxury equipment use an electrical package control unit instead of traditional relays to control the electronics. This device combines many functions, we suggest you familiarize yourself with them in more detail.
Connection diagram of elements and outputs of the CBEK
Functions
The electrical package control unit is designed to perform the following functions:
- Alarm. If the car's anti-theft system detects a break-in attempt, thanks to the CBKE, it will transmit information about this to the car owner's control panel.
- Windshield wiper system control. Moreover, we are talking about both manual and automatic control (if the car is equipped with an electrical package control unit marked 21900-3840080-20).
- The device performs the function of controlling the windshield and rear window heating systems. This unit also controls the heating elements of the side rear-view mirrors.
- The electrical control unit also monitors the performance of the optics, both in manual and automatic control modes. In particular, we are talking about low-beam headlamps, side lights, and DRLs.
- Separately, we should highlight the function of ensuring the functionality of the high-range lighting.
- Turning lights, as well as light signaling.
- Vehicle interior lighting.
- The device monitors the performance and energy saving of devices belonging to the category of internal lighting of the car.
- Monitoring the state of the central lock, as well as performing the functions of locking and unlocking the locks themselves from the key, from buttons installed in the car interior, as well as in the doors.
- Another option is to open the luggage compartment lid using a button installed in the cabin.
- An equally important function is the control of electric drives, in particular, we are talking about power windows, as well as side rear-view mirrors.
- Heating system for driver and passenger seats.
- Luggage compartment lighting unit (video author - Vladimir Kostyuchenkov).
Relays and fuses lada granta
Fuse and relay box in the passenger compartment
To access the mounting block, pull the bottom left corner of the cover to release the left locking point 1, then release the middle bottom point 2 and the two right locking points 3 and 6, then release the top locking points 4, 5 and remove the cover.
Installation of the cover is carried out in the following order: first snap the right fastening elements of the cover at points 6 and 3, then snap the lower fastening elements of the cover at points 2 and 1, then the upper ones at points 4 and 5.
| № | A | Protected Circuits |
| F1 | 15 | Ignition coils Injectors Engine control system controller |
| F2 | 25 | Norma, Lux: Central body electronics unit Driver door module |
| F2 | 5 | Standard: Daytime running lights |
| F2 | 30 | Window lifters |
| F3 | 15 | Norma, Lux: Automatic gearbox control controller Automatic gearbox control drive |
| F3 | 10 | Standard: Hazard Alarm |
| F4 | 15 | Airbag system controller |
| F5 | 7.5 | Terminal 15 devices |
| F6 | 7.5 | Reversing light VAZ-2190 Turn indicators (Standard) Automatic gearbox control controller (Norma, Luxury) Safe parking system control unit (Norma, Luxury) |
| F7 | 7.5 | Canister purge valve Mass air flow sensor/pressure sensor Phase sensor Oxygen concentration sensors |
| F8 | 25 | Rear window heater Heated exterior mirrors (Normal, Lux) |
| F9 | 5 | Side lights on the starboard side |
| F10 | 5 | Side lights on the left side Illumination of instruments and keys License plate lights Luggage compartment light Glove box light |
| F11 | 5 | Rear fog lights |
| F12 | 7.5 10 | Low beam, right headlight Electrical corrector for right headlight |
| F13 | 7.5 10 | Low beam, left headlight Electrical corrector of the left headlight |
| F14 | 10 | High beam, right headlight |
| F15 | 10 | High beam, left headlight |
| F16 | 10 | Right fog lamp |
| F17 | 10 | Left fog lamp |
| F18 | 20 | Front seat heaters Cigarette lighter |
| F18 | 10 15 | Cigarette lighter |
| F18 | 15 | Front seat heaters |
| F19 | 5 | Norma, Lux: Anti-lock brake control unit |
| F19 | 20 | Standard: Door locking motors |
| F19 | 15 | ABS Lada Granta |
| F20 | 15 | Sound signal |
| F20 | 15 | Horn Trunk lock Gearbox Cigarette lighter Diagnostic connector |
| F21 | 15 | Fuel pump |
| F22 | 25 | Windshield washer Central body electronics unit Rear window washer Rear window wiper |
| F22 | 15 | central locking |
| F23 | 5 | Instrument cluster Diagnostic connector |
| F23 | 10 | Daytime Running Lights |
| F24 | 7.5 | Norma, Lux: Air conditioning compressor clutch Automatic climate control system controller |
| F25 | 7.5 | Brake lights Interior lighting (Standard) |
| F26 | 10 | Norma, Lux: Central body electronics unit |
| F26 | 25 | ABS/ESC |
| F27 F31 | 25 | Anti-lock brake control unit |
| F28 F32 | 30 | Electric heater fan Automatic climate control system controller Electric power steering3) |
| Relay | ||
| K1 | Radiator cooling fan relay | |
| K2 | Window lifter (standard version) Minimum cooling relay for cooling module (luxury version) | |
| K3 | Starter relay | |
| K4 | Ignition switch unloading relay | |
| K5 | Turn signal and hazard warning relay | |
| K6 | Windshield wiper relay (standard version) Seat heating relay (luxury version) | |
| K7 | High beam relay | |
| K8 | Horn relay | |
| K9 | Low beam relay | |
| K10 | Heated rear window relay | |
| K11 | ECM relay VAZ-2190 | |
| K12 | Fuel pump relay | |
| K13 | Additional alarm relay | |
| K14 | Additional alarm relay | |
| K15 | — | |
| K16 | — | |
| K17 | — | |
New mounting block
Fuse box in the engine compartment under the hood
| № | A | Protected Circuits |
| 1 | 50 | Heated windshield |
| 1 | 30 | Low beam |
| 2 | 60 | Generator |
| 3 | 60 | Generator |
| 4 | 30* 40 | Electric radiator cooling fan |
| 5 | 50 | Electromechanical power steering |
| 6 | 40 | Anti-lock brake control unit |
Please note that there are different variations of this block.
Connection option 1
- 30A Low beam headlights or main relay, circuits protected by fuses F1 and F21 of the mounting block in the passenger compartment 50A Windshield heater
- 60A Generator VAZ-2190
- 60A Generator
- 30/40A Heater fan (heater fuse grants)
- 50A Electromechanical power steering
- 60A ABS block
Connection option 2
- 60A Generator
- 60A Generator
- 30/40A Electric radiator cooling fan
- 40A ABS/ESP
- 25A ABS/ESP
- 50A Electric Power Steering Controller
Connection option 3
- 30A Low beam headlights or main relay, circuits protected by fuses F1 and F21 of the mounting block in the passenger compartment
- 60A Generator
- 60A Generator Lada Granta
- 30A Heater fan (heater fuse grants)
- 50A Electric power steering
New Lada: HBO on Lada Vesta
Dashboard diagram of Lada Granta
1-block wiring harness of the wiring panel to the block of the front wiring harness; 2-block of the wiring harness of the wiring panel to the block of the front wiring harness; 3-block of the wiring harness of the wiring panel to the block of the rear wiring harness; 4-block of the wiring harness of the wiring panel to the block of the wiring harness rear;
5-lighting control module;6-ignition switch VAZ-2190;7-on-board computer mode switch;8-windshield wiper switch;9-instrument cluster;10-light alarm switch;11-trunk lock drive switch;
12-diagnostic block; 13-instrument panel wiring harness block to the air supply box wiring harness block; 14-rear window heating switch;15-hazard warning switch; 16-brake signal switch; 17-instrument panel wiring harness block to the radio;
18-block of the instrument panel wiring harness to the radio; 19-rotating device;20-driver airbag module;22-mounting block;23-electric power steering;24-cigarette lighter;25-heater control panel backlight lamp;
26-illuminator;27-instrument panel wiring harness block to the ignition system wiring harness block;28-controller;29-clutch pedal position signal switch;30-electronic accelerator pedal;31-additional resistor;32-electric heater motor;33-electric motor switch heater; 34-door lock system control unit.
Relay:
K1-relay for the electric fan of the engine cooling system;K2-relay for turning on the door lock;K3-additional starter relay;K4-additional Lada Granta relay;K5-relay-breaker for direction indicators and hazard warning lights;K6-windshield wiper relay;
Typical faults
If the electrical package control unit fails for some reason, this can lead to the following problems:
- Failure to operate power windows. Of course, before disassembling the control module, you should make sure that the window regulators do not work precisely because of it. It would be logical to first check the safety element, as well as the lift control unit, which is built into the driver's door. In practice, it often happens that the cause of power window failure is poor wiring contact on the unit itself.
- The optics stopped working - low beam, turn signals, etc. In this case, the safety elements, light sources and steering switch are first checked. There is a possibility that the reason lies in a broken contact directly on the switch; if this is the case, then they should be re-soldered. If the reason is that the unit is not working, it will need to be dismantled and disassembled in order to find the burnt-out element and re-solder it. If soldering does not help solve the problem, the device will have to be replaced.
- Some of the equipment has stopped working, while the devices, as at first glance may seem, are in no way connected with each other. The fact is that the module itself includes many elements and controllers, each of them is responsible for performing certain functions. If two or more controllers fail at once, it can cause serious damage. For example, the optics, heated rear and front windows, the trunk door and the window regulator will immediately refuse to work. It is necessary to locate the failed controller and replace it by re-soldering.
- A fairly common problem that can occur is a break in the wiring of the unit. It is installed in a virtually inaccessible place, but if electrical work is being done, for example, installing an anti-theft system, then most likely the car owner will encounter a TsBKE. And if the wiring is damaged during the work, of course, this will affect the functioning of the device and, accordingly, the performance of certain functions.
- Oxidation of contacts on module connectors. If you encounter such a problem, we recommend paying attention to the humidity in the cabin. Often, oxidation at the outlets occurs precisely as a result of high humidity. The contacts can be cleaned, this is not a problem, but the problem of humidity must be addressed, since otherwise it can lead to failure of the microcircuit as a whole.
- Board failure. The most terrible problem for the car owner, because because of this the device simply will not be able to work normally. Accordingly, it will need to be replaced, and this, in turn, costs a lot of money (author - Alexander Fisher).
Source
Solution
If such a problem happens to you, it is recommended to contact the Lada dealership. In this case, you should not count on warranty service, since in this case there is no fault of the plant.
The thing is that the resistance of the diodes is greater than that of standard lamps, which is why the electronics unit burns out. In this case, there is a reckless decision by AvtoVAZ designers, who abandoned fuses and installed an electronic unit from the Renault Trafic model in Vesta.
Vesta’s design uses this electronics unit.
To restore the operation of the electrics, it is necessary to replace the additional body electronics unit of the Lada Vesta.