Driving a car with inoperative “dimensions” is prohibited by the rules - any traffic police officer who records such a violation has the right to issue a fine to the driver. To replace a side light bulb that has burned out and gone out, you do not need to visit a car service center - every car enthusiast can perform this operation. The following instructions describe how to make the replacement correctly.
General information
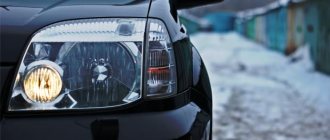
To indicate the vehicle at night when parked, the design provides side lights. They are present both in front and behind the car. Usually these are low-power lamps, which, unlike the head light, are not in the focus of the reflector. For this simple reason, it makes no sense to install more powerful halogen or LED lamps. Moreover, this can lead to melting of the wiring, which is not designed to withstand such a large load.
As for the reasons for the failure of side lights, there are several of them. Firstly, the light bulb has a limited lifespan. The original shines longer and better, but it is more expensive. Chinese analogues are cheap, but very often burn out. Another reason is a malfunction in the electrical circuit, as well as a leak in the headlight, which causes moisture to get inside the housing. Well, now let's figure out how to replace the side light bulb on a Kalina.
Replacing side lights on domestic cars, using the example of Lada cars
First of all, you need to find the negative terminal on the car battery and disconnect it. Many drivers make the mistake of ignoring this rule, but for safety reasons this rule should not be ignored. In this case, baseless bulbs are suitable; there should be no problems with finding and purchasing them; they are sold in almost every car store and are in wide demand.
Naturally, replacing light bulbs occurs with the hood open, so the next step is to remove the protection - the headlight housing of the car. The protective cover is located exactly opposite the section responsible for the high beam. It will be necessary to remove the yellow cartridge. Finding the cartridge should not be difficult; after removing the casing, it will be immediately visible. The maximum difficulty will be that the location is not very convenient, and dismantling the cartridge will be a little problematic, but you can do it. And if you remove the brown high beam chip, then there will be a little more space, and it will be more convenient to work with your fingers. You should not use pliers in your work, because the cartridge can easily be broken, and you will have to look for a new one, so you should still limit yourself to working with just your hands.
Sometimes it may take more effort to get the cartridge out, and if it doesn’t give in, you just need to twist it a little left and right, slightly pulling it towards you, and then it will definitely come out. After the socket is in your hands, take out the burnt out light bulb and install a new one. Then, you need to return the socket with a new light bulb to its place, inserting it back into the seat until it clicks. If the high beam chip was removed for dismantling, you must remember to return it to its place. Next, you will need to check the light bulb by turning on the light. If everything went well, the light bulb works, then we return the headlight housing to its place, close the hood, and you can get ready to hit the road again, now your side lights are fully operational.
The replacement scheme in this case is quite simple, and no difficulties should arise. You can consider another example of replacing side lights on a foreign-made car.
Required Tools
Replacing side lamps on a Renault Logan will require the use of the following tools and materials:
- clean fabric or rubber gloves;
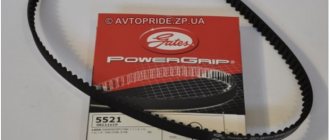
- 4 pieces of halogen bulbs with W5W base;
- alcohol for cleaning flasks;
- a screwdriver with a cross blade;
- keys for 8 and 10;
- to remove the battery you will need a 13mm socket;
- extension;
- rags.
The presence of gloves allows you to keep the bulbs of halogen devices clean. Oily hand stains cause rapid formation of dark spots and lead to failure of the light bulb. The light becomes dim and uneven, quickly losing brightness. In this case, the service life is reduced by 5-10 times from that declared by the manufacturers.
Crafts from incandescent lamps
Let's look at examples of using an incandescent lamp. Many decorators use an old lamp to make a mini-terrarium. Some DIYers have learned to convert a standard lamp into an economical LED lighting device.
Original mini-terrarium made from a light bulb
First, the light bulb is prepared. Having taken out the contact, split the black insulation and pull it out. Using a flathead screwdriver, peel off the inner structure and then remove it. An empty flask with a base and a smooth, neat hole remains in your hands.
Next, you can take a beautiful stone or make a twisted stand from wire. In the first case, hot melt adhesive is applied to one of the faces at four points and a light bulb is glued. Now you can start decorating.
Where is the marker lamp located, its functions
Front and rear lights ensure the safety of both the vehicle and pedestrians. They light up in the dark when moving, and also remain on when the car is parked on the roadway or side of the road.
The main function of any size is to attract the attention of other drivers in the dark and show them the size of the car. During the daytime, these lighting elements are not used, since bright sunlight makes them dim and almost invisible.
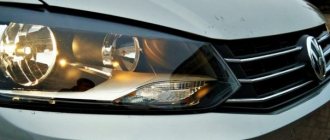
The front marker lights must be white and remain on continuously at night and in poor visibility conditions. This instruction is contained in the traffic rules and must be followed by all drivers without exception.
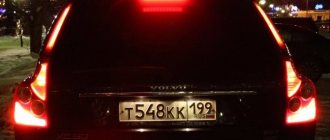
The rear side lamps are also located on the same line and, according to the requirements, must be red.
Important! Tail lights, regardless of what type of lamps are installed in them, should not shine brighter than brake lights and direction indicators. And if for some reason one of the elements does not light, the violator may receive a fine.
If a malfunction is detected and the lights burn out, you should immediately replace the failed element. You can find many different videos on the Internet on how to replace a side lamp on different Nissan Qashqai models.
On Nissan Qashqai 2011–2012, as well as all other models, the front dimensions are located in the headlights.
When is the replacement made?
Vehicle manufacturers do not provide clear regulations for carrying out this work. There are only 3 reasons why car enthusiasts change their side light bulbs to new ones as needed:
- The light elements have failed - they have burned out or gone out due to external mechanical influence.
- The owner of the car decided to install more modern LED bulbs.
- The lights began to shine too dimly.
The first reason is clear and does not require explanation. Installing LEDs is a useful operation, since these elements shine well, last a long time and consume much less electricity. The main thing is to maintain the polarity of the contacts during the replacement process, otherwise the new light bulb may fail or the fuses will begin to blow.
As a rule, a car enthusiast does not pay attention to the decrease in the luminous flux of running lights until he replaces one burnt-out headlight bulb. Then it becomes noticeable how much dimmer the old element burns than the new one. The reason is the internal darkening of the base glass from settling metal particles emanating from the heated spiral. Therefore, it is recommended to update old “dimensions” in pairs.
Reasons for replacing the side light bulbs
Replacing lamps in restyled and pre-restyled cars is different. As a rule, in the first case, replacement is somewhat more difficult. Nowadays, replacements do not need to be made so often because LEDs have replaced the old incandescent lamps.
However, there are situations in which replacement is definitely worthwhile.
- You want to improve the appearance of your car and get brighter bulbs. It is worth remembering that LEDs combine well with cold xenon.
- You want to increase the life of your side lights. LEDs have a longer lifespan than incandescent bulbs.
- You want to reduce the amount of electricity you consume or simply keep up with current technological trends.
The reasons for the lamp malfunction may lie in a manufacturing defect. Cheap Chinese lamps quite often fail before the stated end of their service life. Also, the malfunction may be hidden in the car’s electrical network or a leak in the headlight.
Additionally, we recommend reading our specialist’s article, which describes how to change the low beam light bulb on a Priora.
You can read about how to replace the license plate lamp in the material of our specialist.
We also recommend reading an expert’s article on how to replace a low beam light bulb without problems or unpleasant consequences.
Power parameters of all lamps
| Name | Lamp power, W |
| Headlight low beam (xenon, halogen type H7) | 55 W |
| Headlight high beam (xenon, halogen type H7) | 55 W |
| Front turn signal | 21 W |
| Front clearance | 5 W |
| Front fog lamp (type H8) | 35 W |
| Side turn signal repeater | 5 W |
| Rear turn signal | 21 W |
| Stop signal | 21 W |
| Taillight | 5 W |
| Reversing light | 21 W |
| High brake light | LEDs |
| License plate light | 5 W |
| Rear fog lamp | 21 W |
| General interior lighting lamps | 8 W |
How to Choose Suitable Replacement Parking Lights
You can choose a suitable lamp both in car services and at car flea markets. At the same time, experienced drivers do not recommend purchasing cheap Chinese products, since the likelihood that they will burn out ahead of schedule is quite high.
When choosing a light bulb, you need to pay attention to the following characteristics.
- Brightness _ This is the most important characteristic of a light bulb, which is assessed by its luminous flux. Luminous flux is measured in lumens. For an incandescent lamp this value is approximately 50 lumens. Remember that the purpose of side lights is to inform other road users of the size of your vehicle. Light sources should not dazzle other road users, but at the same time they cannot be too dim. The upper threshold of luminous flux for side lights is 150 lumens, and the lower threshold is from 50 lumens. Traffic safety sometimes directly depends on the brightness of the side lights, since failure to inform in a timely manner that your vehicle is starting to slow down can lead to an accident.
- Construction . In the design of cheap Chinese light bulbs, the base is made of plastic. In this case, there is a high risk of melting, since plastic is by no means a heat-resistant material. If the part gets very hot, the plastic begins to melt and, as a result, the light bulb fails too early. More expensive models feature high-quality plastic that is heat-resistant. With increased brightness, the incandescent lamp begins to produce heat, which heats the lampshade. Therefore, recently the most popular are baseless lamps, the contacts of which are made on the basis of a glass plate and a sand board. Incandescent lamps are also very energy-intensive. With increased electricity consumption, fuel consumption begins to increase. When choosing a light bulb, it is also worth remembering to save energy.
- Price . The side light bulb is one of those car parts that you definitely shouldn’t skimp on. By buying lamps at low prices, you run the risk of replacing such lamps too often, and in the end, such “savings” will only lead to more serious expenses. It is best to purchase lamps from trusted manufacturers such as Osram and Phillips.
conclusions
All of the above actions mainly apply to commonly used car models. On some premium cars (Merscedes-Benz or Infinity), changing the light bulb yourself will be quite problematic due to the complex modern design, so you will have to use the services of a service station. But for other cars (such as the Hundai Solaris or Renault Logan), it will be much easier to replace it yourself, so as not to waste extra time and money.
When choosing, give preference to ordinary lamps. You should not buy too bright LEDs or even xenon lamps. But you shouldn’t take ordinary cheap incandescent lamps either, because their service life is shorter and there is a risk of melting and cracking.
You should also not buy cheap Chinese lamps at flea markets. It is better to take spare parts from well-known foreign manufacturers. You should not save on light bulbs installed in side lights, because traffic safety in the dark directly depends on them.
And finally, if you have any difficulties installing the light bulbs, carefully read the car’s operating instructions. As a last resort, you can use the services of car services. The cost of installing a light bulb, provided that you already have a light bulb, starts from three hundred rubles. After installation work, make sure the system is tight. The ingress of dirt and dust will reduce the brightness of the light bulb, and therefore the visibility of the vehicle. Be sure to follow safety precautions. Good luck and easy travels!
How to replace the side light bulb in restyled models
Before replacing a light bulb, it is advisable to place the car on a relatively flat surface so as not to tilt again, and also turn off the engine. This way you will avoid electric shock, which is supplied to the light bulb when the engine is on. To avoid a short circuit during operation, on most cars it would be a good idea to disconnect the negative terminal of the battery. It is always better to start replacing from the right side. The headlight unit is equipped with a plastic cover. It is dismantled using a socket and extension.
There may be some minor additional complications with this operation. The socket with a light bulb is sometimes more difficult to get due to the fact that it is quite small in size and is located in a hard-to-reach place. To remove this cartridge, find it and start rocking it up and down until the cartridge is completely removed. There is no need to rotate the chuck.
Start installation work from the side where the washer fluid reservoir is installed. Then you should move on to the headlight installed on the battery side. The cartridge on this side is more difficult to reach due to the body. While removing, use your hand to lift the part up.
The dismantling process requires the presence of a special tool. Manufacturers place a protrusion on the lamp socket. Use a flat blade screwdriver to grab onto this tab and use a lever action to remove the cartridge.
How to disassemble an LED lamp
First of all, it is necessary to check the voltage supply to the cartridge contacts. To do this, screw in a working lamp; if the light comes on, the previous device is faulty.
The reasons for the failure of an LED lamp can be very different - the diode is burned out or the board is not in order.
They often stop working due to condensation that has accumulated inside the housing. In any case, the LED lamp needs to be repaired with preliminary disassembly of the structure.
The components of an LED lamp are:
- shell;
- base;
- matrix with a package of LEDs;
- diffuser;
- driver.
The lamp bulb is not airtight because there are no gases in it. The shell can be made of either plastic or glass. The plastic light diffuser is located at the top.
The LED lamp bases used are varied. The components of the package are groups of LEDs soldered onto PCB or aluminum boards.
Drivers in the form of individual blocks or built into the housing serve to transform the input voltage to a value most suitable for LEDs assembled in groups. The most popular power supply schemes are transformer type.
To make the inside accessible, you need to open the fastening clips that hold the diffuser dome. If it is attached to the housing with screws, they must be unscrewed.
There is another disassembly method used for devices made using sealant sizing. For implementation you will need a syringe with a needle, an awl, and a solvent. To detach the diffuser, you will need to remove the sealant that secures it to the retaining ring.
An awl is passed along the edge and the solvent with which the syringe is filled is injected into the groove. After 30 seconds, the diffuser is removed by twisting. The radiator is removed using a screwdriver, and the LED matrix is unsoldered.
A burnt-out LED can be easily identified visually. It reveals itself by having a black dot. As an option, to make the lamp work again, a jumper is placed at the edges of the unusable LED, but it is better to replace it with a new one.
Replacing side light bulbs in pre-restyling models
To do this, you must first prepare the car as indicated above (place it on a flat surface and turn off the engine), and then begin installation work.
- Open the hood and disconnect the negative cable from the battery (to avoid a short circuit).
- Remove the plugs that go to the lamps, and then remove the element into which the plug is installed.
- Turn the light bulb clockwise 45 - 60 degrees, then remove the spare part. To remove the lamp, gently pull it towards you. The socket itself first rotates along with the light source, then it is removed.
- Install a new light bulb and carry out the reverse dismantling.
How to remove a side light bulb
Welcome to the ranks of our friendly company!
Useful
online now
Voting
Club Wallet
Nissan Friendly Clubs
Official sales of the new generation Nissan Tiida hatchback have started in Russia.
The new car is assembled at a Russian car assembly plant and is available in one of 7 trim levels: Welcome, Comfort, Elegance, Elegance Plus, Elegance Connect, Elegance Plus Connect and Tekna.
The cost of the car starts from 839,000 rubles.
For this money, buyers will receive a 1.6-liter gasoline engine producing 117 horsepower, paired with only a five-speed manual transmission. But the most expensive modification of the Nissan Tiida hatchback - the Tekna package - will be offered only with a transmission - a continuously variable variator and at a price of 1,030,000 rubles.
The Welcome starting package offers the following set of equipment: two airbags, anti-lock braking system, stability control system, full power windows and mirrors, a steering wheel with multiple functions, an on-board computer, preparation for an audio system (speakers and wiring), steel wheels with a diameter of 16 inches.
Air conditioning and a music system will be available for 873,000 rubles. This is exactly how much the Comfort package with a manual transmission costs. With a CVT, this equipment can be purchased for 903,000 rubles.
The most expensive Nissan Tiida in the Tekna configuration will cost at least 1,030,000 rubles. In addition to the options listed above, the top-end hatchback is equipped with rain and light sensors, an auto-dimming interior rearview mirror, a keyless entry system and push-button engine start, as well as a NissanConnect navigation system with a color touch screen and a rearview camera.
Instructions for replacing lamps
Inside the headlight units of different cars there are 2 types of lamps and connectors - old and new (restyling). Replacing a pre-restyling type side light bulb is performed as follows:
- Once you reach the back of the headlight, disconnect the power supply connector to the light element. There is no need to disconnect the sockets of powerful headlight lamps.
- Grasp the connector and rotate 45–60° counterclockwise. Remove the element from the slot.
- Carefully pull the light bulb out by the base without rotating it around its own axis.
- Insert the new one in its place, making sure that the contacts line up correctly.
- Connect the wires and check the functionality of the new part, then reassemble the unit in the reverse order.
Note. On different vehicle models, old-type elements can be rotated in different directions - clockwise and counterclockwise.
When installing a purchased lamp, you should not touch the base with your bare hands, as warned by the instructions included with each product. Before installation, wrap the glass flask with a soft rag or put on cloth gloves.
Updated versions of elements differ in overall dimensions and installation method. Replacing the lamp is done in the same way, only you do not need to disconnect the connectors and turn the socket - the part is removed from the socket along with the wires.
Another thing is that access to the light bulb is often limited - you cannot grasp the socket with your hand. In such cases, 2 options are practiced:
- use a special tool;
- First pull out the large headlight bulb, then take out the side light bulb.
The owners of some cars use the free space behind the headlights to install a gearbox that operates in liquefied gas engine power systems. Removing the unit to replace the lamp can be quite difficult.
Changing the light elements of the rear “dimensions” is much easier. The main work is removing the plastic and fabric trim from the luggage compartment side. The light bulbs are removed from the sockets in the manner described above.
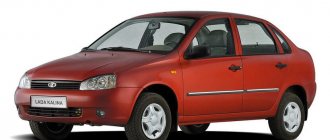
How to change all the lamps on a Lada Granta
Each type of light has its own separate replacement manual. Therefore, you will have to study several instructions at once. It is worth noting right away that there is no need to remove the bumper or dismantle the headlights! Everything is done by machine.
Replacing front headlight bulbs on Grant
There is nothing difficult about changing the bulbs in the Granta's headlights. Just follow the following instructions.
Near/Far
- Remove the protective cover from the back of the headlight.
- Disconnect the H4 lamp chip.
- Push the latch to the sides.
- Remove the old lamp and install the new one in its place in the reverse order.
Do not touch the headlight bulb with bare hands. Otherwise, there will be stains on it, which, when heated, will cause the glass to become cloudy! If you do touch the glass with your hands, wipe the flask with an alcohol wipe and dry.
Turn signal lamp
Press the chuck and turn it counterclockwise. Then remove the socket along with the lamp, press the light bulb and turn it to the left until it stops. After that, we replace it and install the socket back into the headlamp.
DRL and side light lamp
Turn the socket counterclockwise and remove it from the headlight housing. After this, put on gloves and simply pull the glass part of the light bulb, pulling it out. Install the new light source in reverse order and reassemble.
How to change the light bulbs in the front PTF on a Grant
To change the front fog lamp, you need to unscrew the fastenings of the fender liner and unfasten the bumper from its engagement. Then stick your hand in, remove the connector from the light bulb and turn its socket until it comes out of the housing. Replacement is made together with the cartridge.
Replacing lamps in Granta taillights
To gain access to the light sources, you need to open the trunk and peel back the carpet covering the back of the light. To change any lamp, you need to press the socket and turn it counterclockwise and pull it out.
Installation is in the reverse order. This procedure is the same for:
Many people mistakenly believe that to replace a light bulb it is necessary to dismantle the lantern. But that's not true. Everything changes from the trunk side.
Replacing the license plate lamp
To perform this procedure, you must do the following:
- Using a Phillips screwdriver, unscrew the license plate light mount.
- Remove the lampshade.
- Remove the glass from it.
- Bend one of the contacts and remove the old lamp.
- Install a new one in its place in the same way.
- Proceed with assembly.
| Light type | Applicable lamp standard |
| Near/Far | H4 |
| Front/Rear turn signal | PY21W |
| DRL and side light | W21/5W |
| Side turn signal | W5W |
| Brake light and marker | P21/5W |
| Reverse | P21W |
| Rear PTF | P21W |
| License plate light | C5W |
| Trunk lighting | C5W |
| Interior lamp | C10W |
| Illumination of the heater control unit, cigarette lighter | W1,2W |
| Front PTF | H11 |
Expert opinion
It-Technology, Electrical power and electronics specialist
Ask questions to the “Specialist for modernization of energy generation systems”
Replacing lamps (headlights, turn signals, brake lights, dimensions, interior) Great Wall Hover (Haval H5, H3 Hover) Although they are attractive at a more than affordable price, and there are plenty of them at any retail outlet, you won’t be able to get away with them. Ask, I'm in touch!
How to change the side light bulb yourself?
Driving a car with inoperative “dimensions” is prohibited by the rules - any traffic police officer who records such a violation has the right to issue a fine to the driver. To replace a side light bulb that has burned out and gone out, you do not need to visit a car service center - every car enthusiast can perform this operation. The following instructions describe how to make the replacement correctly.
Side light circuit
It's very easy to replace the side light bulb yourself.
In order to save fuel and reduce the load on the generator, daytime running lights are now often included in this circuit, which makes it quite complicated.
You might be interested to know whether it is possible to use LED lamps in a car? Read more in this article
The standard wiring option is quite simple and consists of the following elements:
- circuit breakers;
- front and rear position lamps;
- central or key switch;
- Let's take a closer look at the first two elements.
Circuit breakers
Sometimes blown fuses are the reason why the side lights do not light up on one side or another.
There are usually two fuses in the circuit, for the left and right sides separately. Since the light bulbs consume little power (4-5 W each), the fuse rating is small, only 5-7.5 A.
Where are the side light fuses located?
In the same place as the others, in a single block. On most modern cars, this block is located under the instrument panel next to the steering column, or, more often, on the lower left, under a plastic trim.
In the latter case, it is enough to remove the cover protecting the unit, mounted on latches. On the back of the cover, as a rule, there is a sticker with information about which circuit this or that fuse protects, indicating its rating.
The biggest inconvenience in this case may be insufficient knowledge of the English language - it is in this language that inscriptions are usually made, even on Korean and Japanese cars.
Lamps
Externally, the headlight bulb is marked W5W, but today LED sidelight bulbs are increasingly used.
Their advantage over incandescent lamps is their greater durability, and the price of both largely depends on the manufacturer. The most famous products are Philips, Osram, Tesla.
Watch the video about LED bulbs for side lights:
Moreover, as the “Behind the Wheel” test showed, expensive products do not always justify their price.
Also, quite often, the front dimensions are equipped with light bulbs with a metal base, but this, one might say, is a thing of the past.
For rear position lights, the most common lamp is with two spirals - 21 and 5 (or 4) W.
The 21 W coil lights up when you press the brake, i.e. In this case, the light bulb serves as a brake light, while the lower power spiral works as a side light.
Just as with any other lamps, purchasing a more expensive product does not guarantee any exceptional durability.
Safe work with fluorescent lamps
CFLs can be disassembled, but not for the purpose of further use for crafts, but only if you need to repair the launcher. It is better not to touch the bulb of a fluorescent lamp at all, since you need to stay away from toxic mercury vapors.
This lamp consists of five parts:
- U-shaped or spiral flask;
- the upper component of the body with the bulb attached to it;
- an electronic board with a ballast mounted on it;
- lower housing element with electronic ballast placed in it;
- plinth - together with the bottom of the case, this is an integral structure.
To disassemble and access the launch controller, use a flat-head screwdriver with a wide tip. With its help, the housing latches are disconnected one by one. To perform the operation, you need to insert the tool into the groove and turn it.
This is not so easy to do. After prolonged use, accompanied by constant heating, the plastic loses volatile substances and becomes hard. The latches themselves often break during the disconnection process.
If the constipations do break, they are simply cut off with a sharp tool or sawed off. To do this, you need to arm yourself with a small disk cutter. You can buy it or make it yourself.
First, measure the circumference of the body with a caliper. Then a pin with a cutter is inserted into the chuck of the drilling machine. This is done in such a way that the latter is above the frame at a height equal to ½ the diameter of the lamp body.
The drilling equipment is turned on, the lamp body is pressed against the cutting tool and the outer part of the body is carefully cut. Similar cuts are made at intervals of 1.5 cm along the entire contour.
A screwdriver with a thin rod is inserted into the slots and the cuttings are lifted. Then take a screwdriver one size larger and open the housing of the lighting fixture.
Next, check the lamp bulb for serviceability. Why take a multimeter and check the conclusions in pairs. Resistance within 15 ohms is considered normal. If everything is normal, they conclude that the ballast module is faulty.
If the filament breaks, the ballast may still be operational. In this case, the flask is disposed of, and the working device is used as a spare part.
If there is a fuse in the control circuit, it may blow. The issue is resolved by installing a resistor with a resistance of several ohms in its place.
If only one filament has burned out, it can be shunted with a resistance, but this will result in an overload of the ballast. Such a restored lamp will not be able to work for a long time - a year maximum.
Once the repair is complete, the two halves of the lamp are simply glued together. To simplify the reconstruction process, the product is sometimes heated using a hair dryer.
If the lamp cannot be repaired, it must be disposed of. Read about where to dispose of used fluorescent lamps in this article.
Replacing lamps
Usually, before replacing light bulbs, it is recommended to remove the terminal from the battery. Why is not clear. It is enough to simply de-energize the circuit using a switch - in case you accidentally short-circuit during replacement.
Replacement of rear marker
To provide access to the taillight lamps, you need to remove the hatches installed in the trunk trim.
To replace the tail light bulbs, it is usually necessary to remove the circuit board with the bulbs from the light. It is installed on latches, which are carefully bent with a flat screwdriver. There is no need to disconnect the wires.
There are also lanterns in which each lamp is connected separately. In this case, remove the desired cartridge from the socket by turning it slightly.
After replacing the lamps of both front and rear lights, you should check their functionality, for which you do not need to install the socket or board directly into the lamp. It is enough just to check that there is no short circuit to ground.
An important point - when replacing dimensions, always pay attention to the condition of the cartridges and contacts - the fuse only protects the circuit from short-circuiting, and fires in the wiring often occur due to poor contact.
Replacing the front marker
The most common option for connecting a headlight unit is to have a single power connector - for ease of dismantling the headlight itself. In this case, the power wires for all consumers (lamps, electrical corrector) are located inside the housing.
However, consumers are often connected separately. Before replacing, the main thing is to determine the location of the side light bulb, so as not to mistakenly remove, say, the headlight range control unit.
If you are changing light bulbs for the first time, it is better to start on the right side. The battery is usually located on the left, which interferes with both visibility and operation.
The replacement process itself is simple - remove the lamp together with the socket from the headlight, for which you turn the latter counterclockwise. The wires do not need to be disconnected if they are long enough to work comfortably.
It is important to pay attention to the condition of the cartridge - whether there are any traces of melting, which indicates overheating. A defective cartridge may subsequently cause a short circuit, so do not delay replacing it if necessary.
And here about what xenon and bi-xenon are, what is their difference https://mytopgear.ru/interesting/ee/ksenon-i-biksenon-v-chem-raznitsa/
About disassembling an incandescent lamp
Old lamps are used to create vases and containers for spices, miniature aquariums and many other crafts.
If you decide to master this process, then you should start with an ordinary incandescent light bulb. Inside it does not have a filling that is hazardous to health in the form of additives from harmful substances. Therefore, disassembling it is not only simple, but also completely harmless to health.
Briefly about the device
To begin dismantling the insides of the lamp, you need to become familiar with its structure in general terms. The main element is the filament body, the ends of which hold the electrodes.
Additional rigidity is created by holders mounted on a glass support - a bead. The rod is connected to a leg, which includes electrodes, a rod, and a plate.
All internal elements will have to be removed from the flask through its lower part.
How to disassemble
Here it is necessary to take into account some nuances, because You will have to work with glass. The material of the leg is very thin, while that of the base insulator is quite rough.
To prevent flying fragments and associated risks, you need to use a cardboard box as a workspace. Its bottom is covered with soft material.
Before starting the operation, you need to arm yourself with thin-nose pliers. With their help, it will be possible to dismantle the contact, firmly sealed at the neck of the flask.
The element is loosened and turned until the two wires going to the main part of the lamp - the filament body - break. Next, the released contact is removed.
The next task is to open the base insulation. This will require the same tool. Using thin-nose pliers, swing the light bulb leg and remove it complete with the plate, rod, electrodes, and filament body.
Having opened access to the internal cavity of the lamp, carefully clean it with a piece of textile. Without the insides of the light bulb, only the heat-resistant glass bulb remains.
How to use it depends on your imagination - it can become a container for spices, a tiny aquarium, a lampshade or a lamp.
For some crafts, a base will be superfluous. It is not difficult to remove since the connection is not very strong. You can simply keep it for a day in a mixture of hydrochloric acid with ammonium nitrate or in hydrofluoric acid. Which will dissolve the glue that attaches the base to the base of the flask.
With this option, it is important to thoroughly rinse the product in a soapy solution after the acid. And don’t forget to wear gloves to carry out all manipulations.
Another way is to unscrew the part at the point of contact with the glass, then remove the glue and remove the vessel. Sometimes it is enough to scratch the junction of the base and the bulb with a glass cutter to get rid of it.
Disassembling the lamp with socket
When replacing a light bulb, all sorts of troubles happen. It also happens that it separates from the base. In this case, you cannot do without disassembling the cartridge. The work requires the use of protective equipment in the form of glasses and rubber gloves.
Turn off the electricity and make sure there is no voltage by using an indicator. Remove debris from the floor.
Next, they arm themselves with narrow-nose pliers and, rotating the base in the direction opposite to the clockwise movement, turn it out. For a more secure grip, the edges of the base are bent inward.
If the attempt fails, the connection must be loosened by rotating in different directions. When this action does not bring results, the tool is rested against the inner walls of the base and unscrewed in this way.
Preparation Tips
To replace two side light bulbs, you do not need to create special conditions and drive the car into the garage - the work is carried out in any convenient place. What to do:
- Disconnect the negative terminal of the battery.
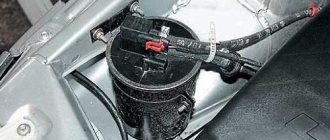
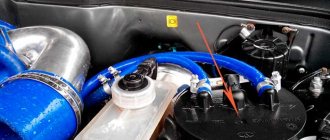
- Remove components and parts that block access to the headlight units from the engine compartment.
- Remove the plastic protective caps covering the rear parts of the blocks where the light fixtures are located.
To change the side light bulb, you need to get to the headlights from the rear, having first removed the interfering elements. Depending on the make and model of the car, there may be an air filter housing, a battery, cooling system pipes, and so on near the headlight units. Decorative plastic panels and trims should also be removed.
Let's sum it up
On some modern premium cars, it is not possible to even change a light bulb yourself. Whether this is good or bad, we cannot say for sure. But on budget models this option is available. Moreover, it is advisable to carry out the replacement yourself, because there is nothing complicated or impossible here.
Visiting a service station to replace a marker lamp is not the best solution. This way you will waste much more money and precious time. And when you replace it yourself, you will gain valuable experience that will be useful in the future. It is recommended to take a burnt-out lamp to a car dealership and buy a similar one. You shouldn’t chase more powerful lighting devices, they usually only bring problems. On some brands of cars, like Renault Logan, it is more difficult to replace a lamp than on others. But nothing is impossible, so it’s definitely worth addressing this issue.