The electronic control unit is located under the instrument panel. To replace the electronic control unit, you will need a Phillips screwdriver. Remove.
2. Use the blade to cover the floor tunnel on the right.
3. Take hold of the protrusion two by one and move the fixing bracket of the plane along the connector until it stops.
4. Disconnect the block from the ECU from the wires.
5. Unscrew (not completely) the two nuts of the ECU mounting bracket.
On the opposite side, the bracket with the ECU nut is not secured
6. Move the bracket to the right with lifting and lifting the ECU slightly up, remove the ECU from Install
car ECU in the reverse order of removal.
electronic A faulty unit can only be replaced with a new unit in which the anti-theft function is not activated.
such When replacing the ECU, it will allow the engine to start regardless of the immobilizer.
To activate the anti-theft function, carry out the immobilizer training procedure.
activation For the anti-theft function of the new controller, it is necessary to perform a training procedure using the existing working and training keys.
The ECU on the Priora is located under the instrument panel on the right side. In order to get to the engine control unit, you need to remove the plastic plug of the floor tunnel at the feet of the front one. the passenger behind it is a controller, which is clearly visible in the photo below.
In order to replace (remove) the brains on a Priora, you will need the following tool:
- 10 mm head
- extension
- ratchet or
Unlock process
When the immobilizer is active, the ignition must be turned on.
At the same time, the immobilizer lamp on the instrument panel will begin to blink, indicating that the immobilizer has blocked the engine from starting. What to do next? Press and hold the gas pedal, after which the lamp will stop flashing. Now we need to enter the code using the on-board computer button. To do this, the button must be pressed in an amount equal to the first digit of the code. Release the gas pedal, the light will start flashing again. The action described above must be carried out for all numbers.
Once all the code has been entered, the lamp will remain on all the time. This is a good sign that the engine is unlocked and can now be started. There is no need to be surprised if, after pressing the button on the key with the transmitter, the immobilizer blocked the engine from starting on the Prior. What to do in this case? It's okay, it's okay.
If you enter the wrong code three times in a row, the next attempts are possible only after 15 minutes. To configure other keys, you need to unlock the immobilizer. His light should not be on. Then you need to turn the ignition on and off, quickly press the central locking control button. The doors will close and open again (or vice versa). The immobilizer light will come on. Within the next 15 seconds you need to do the following:
- Point the IR key at the signal receiver and press the key button 2 times with an interval of one and a half seconds. The doors should open and close.
- Now we need to carry out similar actions with the keys that we want to program for the current immobilizer.
All actions need to be carried out only once for each linked key. Note that this is a generalized process. If the immobilizer has blocked the engine of a Nissan Almera or another car from starting, then perhaps unlocking and binding the keys is carried out a little differently. In any case, information about this is in the instructions.
Instrument cluster
1. Disconnect the wire from the negative terminal of the battery.
2. Lower the steering column all the way down.
3. Using a Phillips screwdriver, unscrew the two upper screws securing the instrument cluster trim.
4. Then we need to get to the lower screws securing the instrument cluster trim; to do this, we need to remove the cover of the fuse and relay mounting block.
5. At the bottom, turn the three plastic screws securing the cover of the fuse and relay mounting block 90º counterclockwise.
Note
: Only two of three plastic screws are shown.
6. Gently pry the top with your fingers and, overcoming the resistance of the latches, ...
... disconnect the cover of the fuse and relay mounting block from the dashboard. Let's remove this cover.
7. Now on the left and on the right we unscrew one lower screw securing the instrument cluster trim.
Note
Shown on the left side as an example.
8. Using your fingers, carefully pry it up from above and, overcoming the resistance of the clamps, remove the trim of the instrument cluster.
Types of ECU memory
417 UAZ engine: technical specifications, repairs, photos
In order to perform its functions, the controller has to operate with a lot of data. Some of them are constantly in operation, others are loaded periodically. Therefore, memory is divided into three types:
- PROM is a programmable read-only memory device. It contains the so-called firmware - a program that controls engine operating parameters, such as fuel injection timing, ignition angle advance control, idle speed, as well as calibration data. This type of memory is retained when there is no power. Data changes are made using reprogramming.
- RAM is a random access memory device. Performs the same function as the RAM of a regular computer - temporary storage of information during one working session. This memory receives sensor data, stores diagnostic codes, as well as intermediate information about the activity of the microprocessor. It requires electric current to operate.
EPROM is an electrically programmable memory device. This type of memory is part of the standard anti-theft system. When starting the engine, the immobilizer control unit transmits codes to the Priora ECU, where password codes are located that allow or prohibit the start. In addition, the EPROM records deviations in engine operation. This memory does not depend on the supply of electricity and stores information in the controller permanently.
Signs of the need for internal combustion engine repair
The reasons why the operation of the engine is disrupted are arranged in a small list, starting with refusal to start and ending with floating idle speed (this problem was removed on the 127 “engine”). Not all breakdowns end in capital damage - sometimes it’s enough to add oil, sometimes it’s enough to adjust the ECU settings.
Compression reduction
A decrease in cylinder compression below 16 atmospheres is a bad sign. Such a high limit corresponds to a compression ratio of 11.
Knocks in the engine
Engine knocks can come from several points. These could be hydraulic compressors, timing belt rollers or pins. The knocking noise could also be caused by low oil level. The answer to the question will be given by a thorough detailed inspection of all parts of the unit and checking the oil level.
Blue smoke from the exhaust pipe
The blue smoke that comes from the exhaust pipe appears when oil enters the combustion chamber. It can leak either from the valves or from under the piston. The result is the same: the oil is eaten up and blue smoke pours out of the chimney. Once the leak is located, half the problem will already be solved.
Troit motor
Sometimes in the cold the engine may stall - don’t be alarmed by this, because it may simply be one of the spark plugs that fails. In this case, we advise you to simply restart the engine and it will stop running.
How much does it cost to overhaul a Priora engine - average price
Self-repair of a Priora engine with 16 valves costs an average of 16-20 thousand rubles. The cost depends on the severity of the breakdown and may be lower or higher than this average range. Repairing a Priora engine can be entrusted to the wrong hands, but then you will have to pay for the work - sometimes the cost of repairs reaches as much as 40 thousand rubles.
This is an unreasonably inflated figure, because, as practice shows, you can rebuild the engine on a Priora, working at a moderate pace, in just three days - and three days of work is definitely not worth that kind of money. Don’t be afraid of not being able to cope - your Lada is easy to repair, and using the advice and “tutorials”, you will conquer even such a task that is impossible at first glance.
ECU "Priors": characteristics, photo, where it is located
Fuses for Nissan Almera classic and n16: characteristics, photos and videos
The engine operation of the VAZ-2170 Priora is controlled using an electronic control unit (ECU). It also monitors compliance with environmental safety standards “Euro 3”, “Euro 4” and provides feedback using the OBD-II diagnostic connector.
What data goes to the controller
The Priora ECU operates in the mode of continuous reading of information from sensors. Based on this information, the computer makes decisions about changing the operating modes of the engine systems. The types of data entering the controller are as follows:
- electrical voltage in the car network;
- presence of detonation in combustion chambers;
- vehicle speed;
- cooling system temperature;
- amount of oxygen in exhaust gases;
- air flow;
- temperature of the air entering the intake manifold;
- position of the camshaft and crankshaft;
- throttle position.
How to perform diagnostics using a standard on-board computer
In the absence of additional diagnostic tools, errors that are read by the Priora ECU can be displayed on the instrument panel in the standard way. To do this you need:
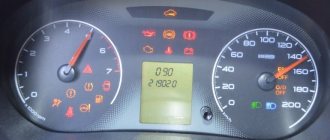
- While holding the mileage reset button, turn on the ignition. After pressing for 4 seconds, the instrument panel begins to move (all indicators light up, instrument arrows rotate around the axis several times, the LCD display turns on all registers). This indicates that the self-diagnosis mode has turned on.
- On the right steering column switch, the Reset button selects the position for displaying the firmware version, error code, and error reset.
If you need to get rid of an engine error, in reset mode, press Reset and hold the button in this position for 3 seconds.
Error codes
In error mode, the computer may display the following codes:
- 2 - the network voltage is too high;
- 3 — malfunction of the fuel level sensor;
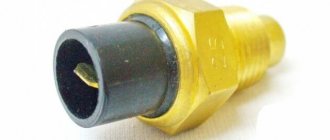
- 4 — malfunction of the coolant temperature sensor;
- 5 — outside temperature sensor error;
- 6 - engine temperature is too high;
- 7 - low pressure in the lubrication system;
- 8 — malfunction of the brake system;
- 9 - low battery voltage.
After troubleshooting, you need to reset the error. If no action is performed within 20 seconds, the on-board computer goes into normal operation.
How to replace the Priora ECU
There can be many reasons for replacing the controller: the desire to install another model that can work with more efficient firmware, failure, incorrect operation.
You can find out which ECU is on the Priora using the diagnostic method, or by using the firmware identifier, which can be checked on a special website. Bosch M 10 and “January-7” controllers are installed on cars.
In order to change the ECU, you need to do the following:
- Disconnect the on-board system from the battery. To do this, simply remove the negative terminal.
- Remove the plastic lining of the tunnel on the right side.
- Push the bracket securing the connector with the bundle of wires all the way.
- Remove the block with wires.
- Unscrew the 2 nuts in the place where the Priora ECU is attached to the bracket.
- Lift the controller up and remove it through the right side.
As can be seen from the description, the procedure is very simple and does not take more than 5-10 minutes. Installation occurs in reverse order.
Self-diagnosis systems
Like any computer, the Priora ECU has feedback from the user.
The driver learns about problems using signal codes, which can be seen in two ways: using an additional on-board computer connected to the diagnostic connector, and on the instrument panel after performing simple manipulations.
For self-diagnosis, you can install the following devices:
- State X 1 P Priora. A small device that is inserted in place of a standard button. Has an LED display with 3 characters. In addition to the diagnostic function using 30 parameters, it allows you to warm up the spark plugs during cold periods, independently regulate the temperature at which the cooling system fan turns on, and reset engine errors.
- Priora State Matrix. A more serious on-board computer. It is placed in place of the standard clock and has a graphic display of 128 x 32 pixels.
In addition to the functions listed on the previous computer, the device can work with gas equipment, reading gas consumption. The “Afterburner” function allows you not only to reset engine errors, but also to roll back the controller to its factory state, thereby resuscitating it. After activating this option, the “Priors” ECU mode will turn on, which was set at the factory. This bookmaker also has the ability to update the software. - Multitronics C-900. Universal on-board computer. Can be installed in different places. It has enormous capabilities both in diagnostics and adjustments. Suitable for a wide range of cars. It has a 480 x 800 pixel LCD display and the ability to change settings directly from your home PC.
How it works and what blocks it
How to remove the center console of a Priora
The immobilizer on Priora is designed to prevent theft of a vehicle by intruders. It consists of the following parts:
- APS unit, structurally combined with electrical package.
- A sensor, the presence of a key with a “native” chip in the form of a pumping loop wound around the ignition switch.
- Connecting wires for signal transmission.
- Keys with transponder.
When purchasing a car, the owner is given a special key with a red insert, which contains a chip that allows you to train working keys, and 2 working keys with programmable chips. The training key must be kept at home, because it gives access to setting up keys that the APS will consider “native”.
After activating the immobilizer and learning the working keys, the car can be started. But, only if the anti-theft unit “sees” the key with the transponder and a code is written in the chip that matches the information stored in the non-volatile memory of the APS.
In Priora, the immobilizer works as follows:
- When the working key is turned in the ignition switch cell, a voltage pulse is applied to an inductive coil wound around the lock, which excites electromagnetic oscillations in space.
- The switch contains an inductance in which the current strength changes, which allows it to receive a pulse from the pump loop.
- The capacitance is charged, supplying power to the chip with the code.
- The chip generates a return pulse, which is emitted into space and received by the pump loop.
- The signal enters the APS, where the codes stored in the block’s memory and the received codes are compared.
- If the data matches, the anti-theft device does not interfere with the operation of the engine ECU. If the codes do not match, the APS goes into protective mode, transmitting a signal to the ECU, which blocks power to the fuel pump, starter and ignition of the car.
What you need to know about chip tuning
Correct tuning of the Priora involves selecting a suitable program for flashing, which should best suit the vehicle's engine system. A program from another car is not suitable for flashing, since each model has its own program, which contains individual settings for a specific car.
Do-it-yourself ECU modernization, in case of an error, may not give positive results, but only worsen the existing performance of the car. And in some cases, an improvement will still appear, for example, increased power and faster acceleration, but the engine will suffer. Therefore, you should carefully read the information about the procedure for this type of modernization so as not to “damage” your car.
Recently, special systems for cars have appeared that allow you to select optimal programs for working with the engine. Such programs are convenient because you can change the engine settings at any time by switching it to sports mode or economy mode.
Priora ECU - how to regain control of the immobilizer?
As for the basic configuration of the Lada Priora, produced since 2007, it includes:
- electrically heated seats;
- parking signal;
- air conditioner;
- modern alarm system.
In subsequent years of production, the car underwent additional improvements, such as, for example, an anti-lock braking system (ABS).
This system allows you not to lose control of the vehicle during emergency braking due to the absence of wheel locking.
Since 2013, the Lada Priora has been equipped with up to four airbags, a stabilization system, a rain sensor, and an additional braking system for ABS (BAS).
The “brain center” of the car, which controls the electronic system and sends signals to the engine, is the controller (ECU). A variety of sensors installed in all strategic places of Priora transmit information there.
Data is continuously processed, allowing all systems to holistically, harmoniously and safely influence the performance characteristics of the car. The controller also controls systems responsible for exhaust toxicity.
The information that the ECU collects consists of various characteristics. For example, a special MAF sensor records the mass air flow of the engine. The more air the engine absorbs, the stronger its dynamics. However, if the standard values for air intake are exceeded, excessive fuel consumption begins.
Monitoring data from the mass flow sensor will help prevent the high costs associated with this fact.
Data on the position of the crankshaft and camshafts, the temperature of the intake air and coolant, the voltage in the on-board network, the content of oxygen and harmful impurities in the exhaust gases, the speed of the car and even the oscillatory amplitude of the body - all this is also recorded and transmitted to the controller.
If any malfunction is detected, it immediately alerts the owner through a special warning system. This could be a warning light that means you need to check your engine.
Whatever the model of the controller, it must store all fault codes in order to provide the clearest possible picture of the condition of the Lada Priora during repairs. If you need to pinout the ECU, this data will also be useful.
The controller has several types of memory. The first is a programmable read-only memory, or PROM. His program contains clear control circuits and records commands in a strict sequence. It also contains information about the calibration of processes that depend on the power and type of engine, vehicle weight and other factors (for example, control of the ignition system).
PROM memory does not depend on power sources and in their absence, the data is still saved. The second type of memory is random access memory (RAM). Unlike the first one, this storage device requires energy supply, and uninterrupted supply. Otherwise, all diagnostic codes will be destroyed. Intermediate data required by the ECU for calculations is stored here.
Finally, the third type is an electrically reprogrammable memory device (ERPROM)
The importance of this memory is that it stores codes for the immobilizer. Without these passwords, or rather without the same password on the key and in the EEPROM, no one will be able to start the engine on your Priora
The memory of this device also does not depend on recharging and stores information permanently.
This operation is necessary for those who have lost or otherwise lost the electronic key to their car’s immobilizer. The password must be changed, and this procedure involves interfering with the computer and reprogramming its EEPROM. To register new keys, you need to upload a clean dump to the controller.
Thus, we erase the memory of the storage device and create a field for its new settings. A dump is the contents of the memory of a process or the entire operating system of the Lada Priora. If a critical electronics error occurs, a full dump records all system information.
As soon as a new error occurs, the previous file is written again taking into account the new data.
The block must be disassembled, the chip unsoldered and a clean dump uploaded using the programmer. Next, you need to reassemble everything in reverse order, connect the ECU and check if the car starts.
The immobilizer is activated by registering new password keys, as well as installing them on a new key fob.
How to independently replace an electronic engine control unit (ECU, ECM, controller)
The electronic engine control system detects failures associated with wire breaks, short circuits to each other or to ground. With poor contact quality in the connectors. And also with a malfunction of the sensors themselves. However, there are malfunctions in the power and ignition systems that have external signs (which are noticed by the driver), but no fault codes are recorded in the memory of the electronic unit.
Main symptoms of malfunctions:
— Difficulty starting the engine.
A normal start is considered to be when the engine starts in one to three attempts. In this case, the starter should be turned on for 10 - 15 seconds, with a break between attempts of one minute. In this case, the minimum crankshaft rotation speed should be 60 - 80 revolutions per minute or one revolution per second.
If, when starting the engine, the battery voltage drops to eight volts (determined by the voltmeter on the instrument panel), then these are poor starting conditions (low ambient temperature) or the battery capacity is less than nominal. Quite often, a voltage drop is associated with oxidation of the battery terminals. Also, starting the engine will be difficult at low temperatures and high oil viscosity.
The following elements of the electronic system may be associated with the appearance of this symptom: mass air flow sensor, throttle position sensor, crankshaft position sensor, coolant temperature sensor, idle speed regulator, injector tightness, injector clogging, malfunctions in the ignition module (high-voltage wires are pierced , spark plug tips, the spark plugs themselves are faulty, the high-voltage terminals of the ignition coils are heavily oxidized). Lack of required fuel pressure due to a malfunction of the fuel pump or pressure regulator.
— jerks or failures in engine operation.
When you press the gas pedal, there is no expected acceleration. A well-warmed-up engine should, when you sharply press the gas pedal, increase the crankshaft speed from low (800-900 rpm) to high (5000 rpm) in no more than 0.75 seconds.
The following elements of the electronic system may be associated with the appearance of this symptom: mass air flow sensor, oxygen sensor, clogged injectors. This symptom can also appear when the injectors are unbalanced, there is a malfunction in the ignition module (high-voltage wires, spark plug tips are broken, the spark plugs themselves are faulty, the high-voltage terminals of the ignition coils are heavily oxidized. Lack of the required fuel pressure due to a malfunction of the fuel pump or pressure regulator.
— insufficient throttle response (power).
When the car is moving, downshifts are often used. The speed is picking up slowly. There is a feeling that the engine “does not pull, it’s dull.”
The following elements of the electronic system may be associated with the appearance of this symptom: mass air flow sensor, oxygen sensor, clogged injectors, unbalanced injectors, lack of required fuel pressure due to a malfunction of the fuel pump or pressure regulator. You should check whether the throttle valve opens fully and whether the exhaust system is clogged.
- frequent detonation.
A sharp metallic knock is heard, changing when the throttle valve is opened. The main factors contributing to the occurrence of detonation are temperature and pressure in the combustion chamber. As well as the ignition timing.
The following elements of the electronic system may be associated with the appearance of this symptom: mass air flow sensor, coolant temperature sensor, oxygen sensor, knock sensor, lack of required fuel pressure due to a malfunction of the fuel pump or pressure regulator.
The air filter should be replaced. If the filter is heavily contaminated, the correspondence between the action on the gas pedal and the signal from the mass air flow sensor sent to the control unit is disrupted.
The temperature in the combustion chamber depends on the health of the cooling system. If the engine overheats, you need to check the coolant level, the coolant pump drive belt, the operation of the electric fan of the cooling system, contamination of the radiator, the absence of vapor locks in the cooling system, and the operation of the thermostat.
— delays, twitching, failures.
This is most noticeable when starting off.
When you press the gas pedal, the engine does not immediately respond by increasing the crankshaft speed. Such delays can occur at all vehicle speeds.
How is the Lada Priora rechipped?
All actions to reflash the engine are performed on the electronic control unit (ECU). In this block, you can replace the standard parameters with the desired ones, for example, you can adjust the ignition timing settings, the volume of fuel in the cylinders, exhaust control, the level of toxicity of exhaust gases, increase traction and engine power, etc.
The process is carried out in two ways:
- Installing a new chip with a new program in the ECU.
- Changing the parameters of an existing ECU chip.
Equipment
To chip the ECU you will need:
- A laptop with a pre-installed program for reconfiguring the chip.
- Adapters, cords and adapters for connecting a laptop and a car's ECU.
- New program (firmware) and modules.
Engine tuning Priora 21126 1.6 16V
Chip tuning of the Priora engine
For fun, you can play with the sports firmware, but there will be no obvious improvement; see how to properly increase the power below.
Priora engine tuning for the city
There are legends that the Priora’s engine produces 105, 110 and even 120 hp, and the power was underestimated to reduce taxes, various measurements were even taken in which the car produced similar power... what everyone decides to believe, let’s focus on the indicators declared by the manufacturer. So, how to increase the power of a Priora engine, how to charge it without resorting to anything special, for a small increase you need to let the engine breathe freely. We install a receiver, a 4-2-1 exhaust, a 54-56 mm throttle body, and we get about 120 hp, which is quite good for the city.
Boosting the Priora engine will not be complete without sports camshafts, for example, STI-3 camshafts with the configuration described above will provide about 140 hp. and it will be fast, an excellent city engine. The modification of the Priora engine goes further, sawn cylinder head, Stolnikov 9.15 316 shafts, light valves, 440cc injectors and your car easily produces more than 150-160 hp.
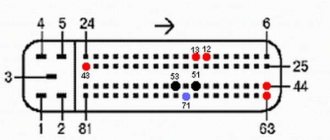
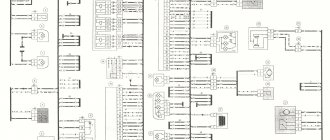
Interpretation of the symbols for the rear wiring harness of the VAZ Priora
This part is organized to supply power to the main instruments and engine control system of the Lada Priora. From here, voltage is supplied to the main components, units of the vehicle’s power plant, as well as control sensors and ECUs. The standard electrical circuit connection system (pinout) looks like this:
- 1 – ECU power supply;
- 2 – main block of the electronic system to the dashboard;
- 3 – distribution board;
- 4 – speedometer;
- 5 – road surface roughness sensor;
- 6 – indication of pressure in the engine crankcase;
- 7 – TPS;
- 8 – DTOZH;
- 9 – indication of antifreeze temperature sensor;
- 10 – mass air flow sensor;
- 11 – control XX;
- 12 – main relay of the fuel pump;
- 13 – VT circuit fuse;
- 14 – relay BZ;
- 15 – fuse of the above circuit;
- 16 – ECU fusible link;
- 17 – DPKV;
- 18 – power supply for mass air flow sensor;
- 19 – phase distribution;
- 20 – mixture detonation sensor;
- 21 – EMC for purging the adsorber;
- 22 – diagnostics of the air flow sensor;
- 23 – power supply to the ignition coil;
- 24 – supply voltage to spark plugs;
- 25 – power supply to fuel injectors;
- 26 – terminal from the ignition coils to the ECM;
- 27 – feedback from 26;
- 28 – ECM connector to the injection system;
- 29 – response to the previous output;
- A – phase on the battery;
- B1/2 – ignition mass;
- C1 – mass from short circuit.
The rear part of the electrical wiring chain is responsible for the vehicle's lighting and peripheral systems. This includes lights, locks and windows. The pinout of tips and terminals looks like this:
- 1 – dashboard response;
- 2 – power supply for the door behind the driver;
- 3/28 – power supply for the front passenger panel equipment;
- 4 – maintenance of power windows and door locks;
- 5-6 turn signals;
- 7 – interior lighting;
- 8 – handbrake indication switch;
- 9-10 – aft dimensions;
- 11 – temperature inside the car;
- 12-15 – circuit breakers for lighting the interior of the machine;
- 16/17 – power supply to the devices of the aft right and front left doors, respectively;
- 18/19 – voltage to the rear right and left speakers, respectively;
- 20 – cigarette lighter power core;
- 21 – EBN;
- 22 – contact group of the cargo compartment lighting circuit breaker;
- 23 – heated rear windshield;
- 24 – luggage compartment lighting lamp;
- 25 – additional stop;
- 26 – power line to the electric lock of the luggage compartment lid;
- 27 – power supply for rear number plate illumination;
- A1-4 – mass;
- ХР1/3 – electrical package power controller.
The small harness, located in the luggage compartment, has only three terminals:
- 1 – power supply to the stern license plate lights;
- 2-3 – license plate lighting lamps;
- 4 – trunk lid lock motor.
The harness is routed to supply power to the driver's door equipment. There is an output to the key panel installed in the armrest. There are six elements in total:
- 1 – additional terminal to the rear of the machine;
- 2 – line to the left fuse;
- 3 – electric window drive;
- 4 – armrest control module;
- 5 – door lock drive;
- 6 – rear view mirror control chip.
The unit duplicates the voltage supply from the center console to the passenger keypad located on the right side of the car. There are only seven connectors here:
- 1 – continuation of the main highway to the rear;
- 2 – terminal of the line to the right front speaker;
- 3 – window lift drive;
- 4 – electric window lift button;
- 5 – door lock drive;
- 6 – control of the position of the rear view mirror, as well as heated glass;
- 7 – continuation of the highway to the rear.
Read more: Connecting a Pioneer radio by wire colors, diagram and video instructions
Rear door harnesses
The rear door wiring diagram has only two terminals. In this case, the side of the car is not of fundamental importance:
- 1 – continuation of the highway;
- 2 – locking drive.
Removing the left support
We install an adjustable stop under the gearbox.
Using a 15mm socket with an extension, loosen the tightening of the upper tension nut of the support cushion.
From the bottom of the car, using a 17" socket with an extension, unscrew the nut securing the left power unit support to the gearbox bracket (for clarity, the left mudguard of the engine compartment has been removed)... ...and remove the washer.
Using a 13mm socket with an extension, unscrew the two bolts securing the support to the body.
Remove the left support. To disassemble the support, finally unscrew the upper coupling nut of the support cushion.
Left support parts
: 1 - upper nut; 2 - upper limiter; 3 - pillow; 4 - lower limiter; 5 — hairpin; 6 — washer; 7 — lower nut The upper support stop has two flats. When installing the support...
(1 rating, average 5 out of 5)
Removing and installing the computer on a Priora
When the plug is removed, you need to find two nuts securing the ECU from the bottom to the metal strip. This can be clearly seen in the photo below.
It is necessary to unscrew the nuts securing the plastic strip on which the controller is located.
When both nuts are loosened, we move the bar towards the engine compartment literally 1 cm, after which we lift it up a little and move it to the side for removal.
Now we pull out the Priora engine control unit towards ourselves so that we can carry out further actions.
Now we unfold the block in such a way that it is more convenient to disconnect the block with the power wires. Next, you need to pull out the locking frame using a screwdriver or by hand, as shown in the photo:
And now the controller connector is disconnected without any problems.
Installation of a new control unit occurs in the reverse order of removal. It is advisable to carry out a similar procedure with the battery disconnected. If you need to replace the ECU on a Priora, then a new unit will cost at least 6,500 to 10,000 rubles. A used controller purchased from a disassembly unit can be purchased for 3,000 rubles.
Signs of the need for internal combustion engine repair
The reasons why the operation of the engine is disrupted are arranged in a small list, starting with refusal to start and ending with floating idle speed (this problem was removed on the 127 “engine”). Not all breakdowns end in capital damage - sometimes it’s enough to add oil, sometimes it’s enough to adjust the ECU settings.
Compression reduction
A decrease in cylinder compression below 16 atmospheres is a bad sign. Such a high limit corresponds to a compression ratio of 11.
Knocks in the engine
Engine knocks can come from several points. These could be hydraulic compressors, timing belt rollers or pins. The knocking noise could also be caused by low oil level. The answer to the question will be given by a thorough detailed inspection of all parts of the unit and checking the oil level.
Blue smoke from the exhaust pipe
The blue smoke that comes from the exhaust pipe appears when oil enters the combustion chamber. It can leak either from the valves or from under the piston. The result is the same: the oil is eaten up and blue smoke pours out of the chimney. Once the leak is located, half the problem will already be solved.
Troit motor
Sometimes in the cold the engine may stall - don’t be alarmed by this, because it may simply be one of the spark plugs that fails. In this case, we advise you to simply restart the engine and it will stop running.
How much does it cost to overhaul a Priora engine - average price
Self-repair of a Priora engine with 16 valves costs an average of 16-20 thousand rubles. The cost depends on the severity of the breakdown and may be lower or higher than this average range. Repairing a Priora engine can be entrusted to the wrong hands, but then you will have to pay for the work - sometimes the cost of repairs reaches as much as 40 thousand rubles.
This is an unreasonably inflated figure, because, as practice shows, you can rebuild the engine on a Priora, working at a moderate pace, in just three days - and three days of work is definitely not worth that kind of money. Don’t be afraid of not being able to cope - your Lada is easy to repair, and using the advice and “tutorials”, you will conquer even such a task that is impossible at first glance.
Diagnostics with ELM-327 scanner
Thanks to Chinese engineers, car diagnostics have become much easier and cheaper. Not long ago, a universal internal combustion engine scanner appeared on Chinese websites, which is suitable for almost all cars with OBD-2 connectors.
The ELM 327 scanner on the AliExpress website costs from 5 to 10 dollars, depending on the version.
This gadget is divided into two types and you should pay special attention to this when purchasing. ELM 327 works with our domestic cars only on version 1.5
Therefore, you need to purchase an ELM-327 v1.5 scanner. If you purchase version 2.1, then work with domestic cars is not guaranteed.
It should also be noted that this scanner only works in conjunction with a smartphone. If you have an Android smartphone, then you just need to buy a scanner with Bluetooth only.
If your smartphone is based on iOS, then you need to purchase a scanner with a Wi-Fi module, since Apple smartphones do not allow connecting third-party devices via Bluetooth.
"January-4", "gm-09"
The very first controllers on SAMARA were January-4, GM - 09. They were installed on the first models before the year 2000. These models were produced both with and without a resonant knock sensor.
The table contains two columns: 1st column – ECU number, second column – brand of “brains”, firmware version, toxicity standard, distinctive features.
| 2111-1411020-22 | January-4, without DC, RSO (resistor), 1st ser. version |
| 2111-1411020-22 | January-4, without recreation center, RSO, 2nd ser. version |
| 2111-1411020-22 | January-4, without recreation center, RSO, 3rd ser. version |
| 2111-1411020-22 | January-4, without recreation center, RSO, 4th ser. version |
| 2111-1411020-20 | GM,GM EFI-4,2111,with DC,USA-83 |
| 2111-1411020-21 | GM, GM EFI-4, 2111, with DC, EURO-2 |
| 2111-1411020-10 | GM,GM EFI-4 2111,with DC |
| 2111-1411020-20 h | GM, RSO |
VAZ 2113-2115 from 2003 are equipped with the following types of ECUs:
Types of ECU memory
In order to perform its functions, the controller has to operate with a lot of data. Some of them are constantly in operation, others are loaded periodically. Therefore, memory is divided into three types:
- PROM is a programmable read-only memory device. It contains the so-called firmware - a program that controls engine operating parameters, such as fuel injection timing, ignition angle advance control, idle speed, as well as calibration data. This type of memory is retained when there is no power. Data changes are made using reprogramming.
- RAM is a random access memory device. Performs the same function as the RAM of a regular computer - temporary storage of information during one working session. This memory receives sensor data, stores diagnostic codes, as well as intermediate information about the activity of the microprocessor. It requires electric current to operate.
- EPROM is an electrically programmable memory device. This type of memory is part of the standard anti-theft system. When starting the engine, the immobilizer control unit transmits codes to the Priora ECU, where password codes are located that allow or prohibit the start. In addition, the EPROM records deviations in engine operation. This memory does not depend on the supply of electricity and stores information in the controller permanently.
Video “How to detect battery current leakage?”
Instructions on the topic of detecting possible current leaks are presented in the video below (author - HF Autoelectrics channel).
Since at the time of writing this article we have a severe winter between us, the choice of battery for many owners of the Lada Priora is of paramount importance and this issue will be relevant for at least another couple of months until the temperature approaches positive.
As far as I know, all Prioras are factory-installed with AKOM batteries and their capacity is 55 Ampere-hour. As for the starting current, it is not so high for such a car and is equal to 425 Amperes. Here is a clear example of what is on the Priora in 90% of the cases that I have seen:
The exact same one is installed on both my Kalina and my friend’s Grant, so apparently there is only one supplier of batteries, the well-known AKOM. But is the declared capacity and starting current sufficient for harsh winter conditions, and how long can the original battery last? Let’s see.
So, at the same time as me, an acquaintance bought a Priora, and this was in 2011. Now we have 2014 in our yard, and its battery died about a month ago. And in recent days, according to him, she often recharged it, since the power was no longer enough to start the engine cold. Oddly enough, my battery lasted about the same amount of time, only without a single recharge and was also replaced with a new one.
Disabling the immobilizer without a crawler yourself
Depending on the unit model, reprogramming the ECM may require changing the installation diagram of the component elements. Such devices include M73 microprocessor modules from the manufacturer Avtel. Before performing the task, it is necessary to remove the microprocessor from the seat and connect the K-Lin adapter to it.
To remove the immo, you will need an adapter wiring harness; you will have to make it yourself.
When the transition harness is ready, perform the following steps:
- The OpenBox program is installed on a PC or laptop. The utility is freely available. After downloading it, the software is launched; at the first stage, the car owner needs to read the standard EEPROM firmware. Factory software information is stored separately. It may be required to perform modifications or if it is necessary to roll back to its original state.
- Then the HxD file editor is loaded. The downloaded firmware opens on the computer.
- At the beginning of the opened text, a line is added that consists of two FF characters. Changes to the firmware are saved.
- Then the edited file must be loaded into the memory of the microprocessor module. To perform this task, it is allowed to use ready-made versions of untrained firmware. They can be found in the public domain on the Internet.
- The microprocessor module is disconnected and the device is installed back.
If the car is equipped with a January 7.2 block, then to deactivate it, use the diagram shown in the photo in the gallery. It is assembled on the basis of the K-Lin adapter. A positive contact switch must be added to the circuit; it will be used as an ignition switch.
The Bureau of Technical Solutions channel talked about disabling the engine blocking device yourself.
After this, the following steps are performed:
- ChipLoader software is installed on a PC or laptop. The program version must be 1.97.7 or higher.
- The utility is launched and the required type of microprocessor is selected in the window that opens.
- Then you need to connect to the module; to do this, use the “Establish connection” option.
- Information is being read from the EEPROM board.
- In the program window, press the “Delete immo” button. As a result, the utility will automatically adjust the information written to the file.
- The program closes. The microprocessor module can be disconnected from the computer and installed back on the car.
In M74 models, the procedure for deactivating the blocker is performed differently:
- The battery is disconnected from the car; first, the clamp on the negative terminal must be loosened with a wrench.
- The connector is disconnected from the immobilizer control unit.
- A homemade harness is connected, which is made according to the diagram. It should use a double switch, since with its help the voltage can be supplied to the device in stages.
- The assembled circuit is connected to the battery via a VAG-COM cable.
- The first button on the switching device is activated. With its help, a pulse is sent that allows programming of the block. The WinFlashECU utility starts on the PC. In the settings window that opens, you must specify the type of microprocessor module, as well as the information transfer speed. It is recommended to select the last parameter as minimal.
- The second button is activated. Then a message will appear in the window that opens indicating that communication with the module has been established.
- The standard software of the control unit is saved. Then this file must be replaced with a new one. The total time to complete the task will take no more than a few minutes.
- When the firmware is completed, the program is disabled. The power and wiring must be disconnected from the device.
- Then the engine blocker control unit is again connected to the machine’s electrical network. When carrying out this task, it may be necessary to adapt the zero position of the throttle valve. To do this, start the engine and make a test drive. When the speed increases to four thousand per minute, the power unit brakes. In this case, second gear must be engaged.
Photo gallery
Connection card for the M73 unit using a K-Lin adapter Electrical diagram for connecting M72 models with a battery This diagram is used to connect the M74 microprocessor unit
How to flash Bosch ECU 7.9.7+
Here I will tell you how you can flash the ECU of a VAZ 21703 Lada Priora, since I myself decided not to pay anyone money and do it myself, everything worked out and works great, and those who say and scare you that nothing will work out for you simply they want to get money out of you!
I won’t lie, you will still have to spend around 1000 rubles. to purchase an adapter and firmware, but it’s worth it, after that you can upload any firmware to your taste and do it to your friends for a small fee and get the money back, and drink beer.
For this we need:
Universal adapter KL-Line BM9213 USB MASTER KIT for tuning a car with an injection engine, you will not chip the carburetor with it,
You can read more about it and how to purchase it here. For the adapter you will need a virtual COM port driver for Win XP, Vista can be downloaded here, you can also use another adapter VAG COM USB KKL v409.1 which you can buy from our partners, this is the same KK-Line adapter only in a housing and for ridiculous money.
Next, to flash the chip firmware, we will need ChipLoader 1.96, you can also use the newer version of ChipLoader 1.97.7, but the previous one also works stably, so I don’t see the need to use the new one.
in the Help > Help tab you will find the User Guide, also go to the settings and uncheck all the boxes as shown in the figure above. In order for the block to start sewing, it needs to be modified according to the instructions in the User's Manual, everything is described in detail there.
You will also need firmware, if you just want to try chipping, then first you can try the free Tuned VAZ firmware, but I would advise you to immediately flash the normal VAZ Commercial firmware, the difference is significant.
Also, many beginners wonder why ChipLoader gives an error after selecting a 260 kB firmware?
The answer is simple, ChipLoader supports firmware only in full-size format, i.e. “Decrypt” size is 832 KB (851,968 bytes) to decrypt the firmware we need the SMS Enigma new v 1.10 program
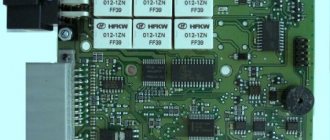
First, you need to remove the ECU to read the inscription on the sticker, then you need to determine its type, you can do this here, my sticker looked like this:
I have identified my unit as Bosch 7.9.7+; in order to program it, it needs to be modified; it is written how to do this here
Next we need to assemble a simple circuit, I made it simply from thick wires so that they could fit onto the ECU pins.
I took the 12 volt power supply from 8 1.5V batteries, you can use a power supply, but only a stabilized one, do not use pulsed ones from the computer from the one from which you will be sewing, units from Sega Dandy consoles and other Chinese equipment are not suitable, it is better to take power from batteries straight from the car, and sew on a laptop without connecting to the network, or use an uninterruptible power supply in case the power suddenly goes out
We disassemble our block and solder the resistor on the board
after reprog return it back.
connecting to the connector is not difficult, the outermost outputs are numbered, the rest can be counted, the connector looks like this:
It is advisable to follow the connection sequence: install the driver on the adapter, it is a virtual com port, and in the settings change it to COM-1, Connect the wires according to the diagram to the ECU, switch S1 should be turned down (see diagram) S2 is disconnected, then we connect everything with Master Kit Adapter or VAG COM USB KKL v409.1 (plus circuits to the plus of the adapter, GND - circuits to GND - adapter, we do not connect the power, insert the adapter into the USB, it is detected, now we connect the 12 volt power to our circuit, in a few seconds turn on the S2 switch (this is the ignition), run the ChipLoader1.96 program and select your virtual port there, click establish a connection, if it’s established, select the firmware and click load, you don’t need to erase anything, if it’s not installed, turn off S2, wait a few seconds and repeat the procedure, everything is sewn fine.
After flashing the firmware, we install the unit in place and connect to the diagnostic block according to this diagram:
and be sure to reset self-learning using InitECU. everything is ready, congratulations, you are now chipun
Source
How to perform diagnostics using a standard on-board computer
In the absence of additional diagnostic tools, errors that are read by the Priora ECU can be displayed on the instrument panel in the standard way. To do this you need:
- While holding the mileage reset button, turn on the ignition. After pressing for 4 seconds, the instrument panel begins to move (all indicators light up, instrument arrows rotate around the axis several times, the LCD display turns on all registers). This indicates that the self-diagnosis mode has turned on.
- On the right steering column switch, the Reset button selects the position for displaying the firmware version, error code, and error reset.
If you need to get rid of an engine error, in reset mode, press Reset and hold the button in this position for 3 seconds.
Self-repair of the Priora comfort unit, is this possible?
If you have never encountered soldering, diagnostics of printed circuit boards of varying complexity and configurations, or do not have the necessary diagnostic or soldering equipment, then it is better to address the repair question to qualified specialists. If you have the above skills and understand the causes of malfunctions, independent repairs are carried out quite often. This is due to the fact that various microcircuits or chips constantly fail. For example, having established that the reason for the turn signal failure is a failed control driver, it is always possible to purchase a new part and simply re-solder it to replace the faulty one.
Malfunctions and their possible causes
The cost of a new, original unit is quite high, so do not rush to buy a new product, figure out the causes of the malfunctions. Of course, there are always cases when the board cannot be repaired and it is more advisable to simply install a new product to replace the faulty one. Do not forget that the causes of malfunctions can be frayed or broken wires that are connected to energy consumers.
According to statistical data collected on technical support forums, car owners quite often complain about malfunctions in the operation of power windows, turn signals, and parking lights.
"Important! Before carrying out any electrical work, disconnect the power supply by disconnecting the negative terminal of the battery."
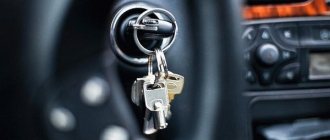
Standard ignition switch - article number, price, how it works, device
The module on Priora does not work directly with the components that initiate the engine start. For it to work properly, you need to wait a few seconds before starting until the fuel pump creates the required pressure. On the Priora, only wires are connected to it - the paths along which messages pass from the ignition switch to the electronic control unit.
The ECU of the Priora car just receives data about the position of the key and can crank the starter if this operation is “not blocked”. Due to a breakdown, it can only turn on the ignition, leaving the battery to work.
After the ECU key has turned, it gives commands to several parts at once. When you turn on the second position, let the fuel pump run for 5 seconds so that it pumps fuel from the tank closer to the engine.
When the starting process itself begins, the starter rotates - the force it creates goes to the crankshaft;
the ignition system element converts the low voltage current coming from the battery into a high one so that the spark plugs are “charged” and give a spark at the right moment;
The injector creates the first batch of air-fuel mixture to put it into the chamber, where everything is ready for it - the pistons “move”, the spark plugs spark.
In the module itself, everything is simple - there is a cylinder with a return spring inside, between the coils there is a locking ball that does not allow it to curl up more than necessary, and a locking rod holds the structure in place. Finally, as a complication of the entire system, there is an “immobilizer” - an anti-theft system that you can install yourself. It just takes a long time to set it up.
A regular kit with a master key and several door cylinders (with an immobilizer) costs from 1,800 - 2,000 rubles, catalog number - 2170-3704005. A set without a master key (without an immobilizer) can be purchased for 1,200 – 1,400 rubles, article number -2170-3704006.
Checking the functionality of the controller
After replacing the controller or resetting the controller using a scan tool, you must perform the Throttle Zero Adaptation procedure and the Misfire Diagnostic Adaptation procedure.
The procedure for adapting the throttle zero of Priora, Kalina: with the car standing, you must turn on the ignition, wait 30 s, turn off the ignition, wait until the main relay turns off.
Adaptation will be interrupted if:
- the engine turns over;
- the car is moving;
- the accelerator pedal is pressed;
- engine temperature is below 5 °C or above 100 °C;
- Ambient temperature is below 5 °C.
The procedure for adapting the misfire diagnostic function of Priora, Kalina:
- warm up the engine to operating temperature (controlled parameter TMOT_W = 60...90 °C);
- accelerate the car in 2nd gear until higher crankshaft speeds are reached (NMOT-W = 4000 min-1) and perform engine braking (NMOT-W = 1000 min-1);
- Perform engine braking six times in one trip.
It is recommended to replace the control unit with a new model with the immobilizer function not activated. This way the ECU will not prevent the engine from starting. To activate the anti-theft system, you need to teach the immobilizer new keys.
Also watch a useful video on disassembling and repairing the ECU:
The electrical package control unit, or the so-called Priora comfort unit, is a complex electrical device. Its basis is a printed circuit board with numerous microcircuits, relays, control drivers and other elements soldered to it.
Content
ECU
The engine operation of the VAZ-2170 Priora is controlled using an electronic control unit (ECU). It also monitors compliance with environmental safety standards “Euro 3”, “Euro 4” and provides feedback using the OBD-II diagnostic connector.
How to replace the Priora ECU
There can be many reasons for replacing the controller: the desire to install another model that can work with more efficient firmware, failure, incorrect operation.
You can find out which ECU is on the Priora using the diagnostic method, or by using the firmware identifier, which can be checked on a special website. Bosch M 10 and “January-7” controllers are installed on cars.
In order to change the ECU, you need to do the following:
- Disconnect the on-board system from the battery. To do this, simply remove the negative terminal.
- Remove the plastic lining of the tunnel on the right side.
- Push the bracket securing the connector with the bundle of wires all the way.
- Remove the block with wires.
- Unscrew the 2 nuts in the place where the Priora ECU is attached to the bracket.
- Lift the controller up and remove it through the right side.
As can be seen from the description, the procedure is very simple and does not take more than 5-10 minutes. Installation occurs in reverse order.
Installing the controller
1) For the LADA PRIORA family , attach the bracket to the controller and secure it with screws. Screw tightening torque 1.2…1.6 Nm (Phillips screwdriver, Phillips head, torque screwdriver). Install the controller on the car and secure it with nuts. The tightening torque of the nuts is 1.9…4.5 Nm (spanner 8, interchangeable head “8”, torque wrench).
For the LADA KALINA family , attach the bracket to the controller and secure it with screws. Screw tightening torque 1.2…1.6 Nm (Phillips screwdriver, Phillips head, torque screwdriver). Install the controller on the car and secure it with a screw. The tightening torque of the screw is 1.7…3.5 Nm (Phillips screwdriver, Phillips head, torque screwdriver).
For the LADA 4x4 family , install the controller on the car and secure it with nuts. The tightening torque of the nuts is 1.9…4.5 Nm (spanner “8”, interchangeable head “8”, torque wrench).
2) Connect the wiring harness connectors to the controller.
3) Install the instrument panel console screen into place (using a Phillips screwdriver). For the LADA 4x4 family, install the left front upholstery.
4) Connect the wire to the negative terminal of the battery (spanner “10”).
Circuit breakers
LADA PRIORA 21723
F1 (green) 30 Electronic engine management system F2 (blue) 60 power package control unit, engine fan, heated rear window, ignition switch unloading relay F3 (blue) 60 cooling fan power supply circuit, horn, alarm, ignition switch, instrument cluster, interior lighting, brake light, cigarette lighter F4 (blue) 60 Priora generator F5 (red) 50 Electromechanical power steering F6 (blue) 60 Generator
F1 (blue) 15 Main relay and starter interlock circuit F2 (brown) 7.5 Controller power circuit F3 (blue) 15 Electric fuel pump fuse K1 - Ignition relay K2 - Electric fuel pump relay
F1 25 Electric radiator fan of the cooling system F2 25 Heated rear window Priora F3 10 High beam right F4 10 High beam left F5 10 Sound signal F6 7.5 Low beam (left) F7 7.5 Low beam (right) F8 10 Alarm signal F9 25 Heater Priora F10) 7.
5 Interior lighting, instrument cluster, brake light F11 20 Windshield wiper F12 10 Terminal 15 devices F13 15 Cigarette lighter F14 5 Side light left, license plate light, trunk light F15 5 Side light right F16 10 Terminal 15 ABS F17 10 Fog light (PTF) left F 18 10 Fog lamp (PTF) right F19 15 Seat heating F31 or F27 30 Electrical package control unit
What functions does the block provide?
- fog lights, low beam, side lights;
- lighting in the car interior;
- direction indicators;
- power window system;
- operation, adjustment and heating of side mirrors;
- anti-theft system;
- signaling;
- door locking;
- trunk lighting;
- instrument panel lighting.
Partial, and even more so complete failure of the unit causes significant trouble for any car owner. The biggest problems are caused by the failure of the comfort unit in dense city traffic conditions.