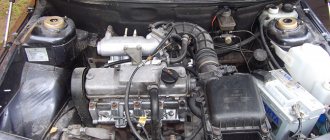
According to the established regulations, the valves are adjusted at intervals of 20 to 30 thousand kilometers; valve adjustment on VAZ 2108 vehicles is also necessary after each replacement or dismantling of the cylinder block. Typically, the cost of this kind of work at a service station is not particularly expensive for eight-valve engines on domestic iron horses. Moreover, the procedure requires the presence of a mandatory and specific tool. However, independent skills in repairing your own car have always been invaluable, so this manual will undoubtedly find its reader.
Puller drawings. Repair equipment. Tool
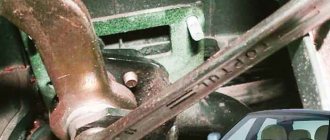
Device for tensioning the timing belt (for a new type of roller).
The device is a metal, slightly curved strip, 2 - 3 mm thick, 120 mm long. and width - 25 mm. On one side at a distance of 10 mm. two pins with a diameter of 4 mm are installed from the end. The height of the pins is 10 mm, the distance between the pins is 17 mm. The diameter of the semicircle is 16 mm. Everything should be clear from the photograph of the device.
Instead of this device, to tension the timing belt, you can use two drills (4 mm in diameter) inserted into the holes of the tension roller. We insert a screwdriver between the drills and use it as a lever to tighten the timing belt.
Device for adjusting valves.
Due to the relative complexity of this device and its low cost (less than 200 rubles), I recommend just buying it.
As a last resort, you can use a pair of regular flathead screwdrivers. Using one powerful screwdriver, we recess the pusher, and with the second (you can bend it a little and sharpen it in place) we fix the pusher by the side. But this method is extremely inconvenient and the fixing screwdriver can fly out; in general, it’s only suitable as a last resort.
Device for desiccation of valves.
Like the previous device, it is easier to buy it than to make it yourself. Costs less than 200 rubles.
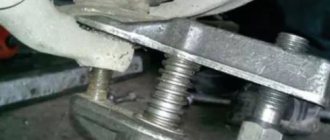
Homemade device for pressing valve stem seals.
It consists of old pliers slightly modified on a sharpener. The central part of the pliers must be ground off so that when the seal engages, it does not touch the valve stem.
When replacing the oil seal, carefully grasp the cap body with pliers and slowly press it together. The main thing here is not to rush, not to use excessive force (so as not to damage the valve itself and the guide sleeve) and good lighting.
Devices for replacing oil seals (valve seals).
To replace the valve stem seals we will need: 1. A device for loosening the valves. 2. Remover of old caps (modified pliers). 3. Mandrel for pressing in new oil seals. 4. A rod of soft metal, 8-10 mm thick, is inserted into the spark plug hole between the piston and the valve so that the latter does not fall into the cylinder when desiccated. 5. Device for adjusting valves (if adjustment is planned).
Device for adjusting Solex carburetor floats
Drawing of a device for adjusting the fuel level in the float chamber of a Solex carburetor
Photo of a device for adjusting floats
Device for measuring fuel pressure in the fuel rail on injection engines
It is a pressure gauge (used in tire pumps), the markings should be large and at least up to 6 (foreign cars seem to require more). A piece of hose. In this case, a hose for the vacuum brake booster is used. Two normal clamps.
How to measure pressure is described in the following topic: Measuring fuel pressure
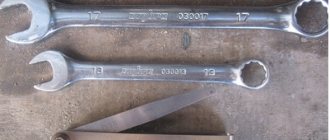
Handbrake adjustment key
I highly recommend purchasing a wrench like this for 13, with a ratchet and a hinge. It is a pleasure for them to adjust the tension of the handbrake. It will also be useful for other repair work.
Wrench for bleeding the brake system and unscrewing brake pipes
8 x 10 wrench with the ability to fit onto the brake pipe and securely fasten. The edges of the brake pipe nuts and bleeder fittings remain intact. Indispensable when working with brakes.
Clutch adjustment key
Key for adjusting the clutch drive. It's a 17mm key cut off. It's very convenient to adjust the clutch cable; with a large key you can't really turn it around. On carburetor Samaras, you don’t need to remove anything additional; you can use a short wrench to get to it. On injection engines, unscrew the adsorber, stick your hand in and adjust the clutch.
Source
Correct valve clearances for VAZ 2108: checking and adjustment
According to the established regulations, the valves are adjusted at intervals of 20 to 30 thousand kilometers; valve adjustment on VAZ 2108 vehicles is also necessary after each replacement or dismantling of the cylinder block. Typically, the cost of this kind of work at a service station is not particularly expensive for eight-valve engines on domestic iron horses. Moreover, the procedure requires the presence of a mandatory and specific tool. However, independent skills in repairing your own car have always been invaluable, so this manual will undoubtedly find its reader.
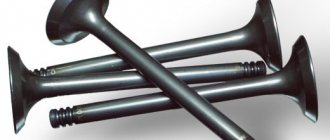
Standard valves VAZ 2108
Below are data for 15 different years of manufacture, modifications and engine sizes.
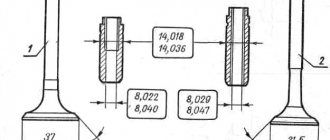
In general, the length (L) of the valve is:
The parameters that characterize the valves in a car engine are the length, diameter of the valve plate and diameter of the valve stem.
An important parameter is also the sliding length of the valve.
Important: measurements are taken with a caliper at the extreme points of the valve.
Intake and exhaust valves are divided into:
- All-metal valve: made from a single material that meets high requirements for heat resistance and anti-friction properties;
- Bimetallic valve: made of two metals: valve disc material with high heat resistance and valve stem material, which is hardened on the stem end side and has high anti-friction properties.
Important: reference dimensions of car engine valves are presented in the table below.
Other designations of the VAZ 2108 hatchback on the Russian market: VAZ 2109, VAZ 2113, VAZ 2114, Lada Samara.
Important: years of production of all modifications of the model: 1984-2014.
| General view General view of valves |
Caution: The above data are the official figures of the manufacturer, however, please note that the information is for reference only and is not guaranteed to be completely accurate.
Source
Adjusting valves on engines of VAZ 2108, 2109, 21099 cars
The cause of a number of malfunctions in the operation of the engine of VAZ 2108, 2109, 21099 cars, along with a faulty or unadjusted carburetor, may be increased or decreased thermal clearances in the valve mechanism. Such malfunctions include: - unstable operation of the engine at idle; — inability to adjust idle speed; — loss of power and throttle response (deterioration of vehicle dynamics); — “dips” when pressing the gas pedal; - “shots” into the carburetor. In any case, it is worth adjusting the valves. This normalizes the operation of both the gas distribution mechanism in particular and the engine as a whole. It is quite possible that the existing problems in its work will disappear, after such adjustment, by themselves. Required Tools
— A device for adjusting valves with a lock.
Or two screwdrivers if you don't have the tool. One should be long and powerful to push the pusher with the washer down, the second splined with a wide blade (at least 10 mm) to fix the pusher in the pressed position.
— Set of flat feeler gauges — Tweezers — Socket wrench 17 — Set of adjusting washers
Not necessary, since the required size washers can be purchased separately after measuring the thermal gaps.
Preparatory work
Valve adjustment is carried out on a cold engine, so if your engine is currently warm, allow it to cool for at least 1 hour. — Remove the air filter housing. — Remove the throttle linkage bracket. — Remove the engine valve cover. — Remove the timing belt protective cover. — We make three more marks on the camshaft pulley. To do this, we count the number of teeth on it and divide it into four parts.
Additional marks on the camshaft pulley
— Align the installation mark on the camshaft pulley with the protrusion on the rear timing cover. The pistons of the first and fourth cylinders reach top dead center (TDC). — In the hatch on the clutch housing, make sure that the long mark (mark) on the flywheel is located opposite the middle of the triangular cutout of the ignition timing scale.
Before adjusting the valves on the engines of VAZ 2108, 2109, 21099 cars, it is necessary to check the thermal clearances in order to find out the general picture of the technical condition of the valve mechanism of this engine.
measuring the thermal gap using a feeler gauge
Adjusting valve thermal clearances
Let's consider, as an example, the adjustment of the third valve. — Set the pulley to the position where the alignment marks coincide (top dead center). Turn it 3-4 teeth (40-50 0) clockwise.
— We install the adjustment device on the block head. If it is not there, take two screwdrivers. We will use the long and powerful one as a lever, the smaller one will be splined to fix the pusher. — We turn the pusher with the slot towards you (towards the radiator). — We introduce the “fang” of the device between the cam and the pusher. — Push down the lever of the device and push the pusher down. Instead of a tool, you can use a long screwdriver. Resting it on the cam, we also recess the pusher. — We install a clamp between the edge of the pusher and the camshaft, which holds the pusher in the pressed position. If there is no latch, insert the blade of a slotted screwdriver flat. It is necessary that the latch sits exactly on the edge of the pusher and does not interfere with removing the adjusting washer. — Using tweezers, remove the adjusting washer through the slot in the pusher. Its surface may be marked with its thickness. If the marking is erased, you will have to measure its thickness with a micrometer, and if there is none, select a new one experimentally.
— We calculate the thickness of the new washer using the formula:
— for intake valves Z=Y+X-0.2 mm ;
— for exhaust valves Z=Y+X-0.35 mm ;
Z – design thickness of the new washer;
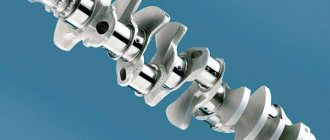
Interaction of parts of the gas distribution mechanism of VAZ 2109, 2108
It is very important to preview the engine performance requirements. The values of its clearances and other indicators of the interaction of parts of the gas distribution mechanism of VAZ 2109, 2108.
On a cold engine, specific clearance values are set between the pusher and the camshaft. The indicator is 0.20 millimeters (a deviation of 0.05 millimeters in different directions is allowed), which is relevant for intake valves . For exhaust valves, the gap value is set within 0.35 millimeters with the same tolerance. Here you need a specific set of feeler gauges that can measure gaps within 0.30-0.40 millimeters.
If the maximum probe fits into the hole, it means that you will need to select an appropriate washer that is slightly thicker in size, and then replace it.
In the same case, when the gap value is smaller, the valve can easily close on a preheated engine. In fact, this is very dangerous, because such a value can lead to the valve and seats burning out. Consequently, there is a sharp loss of pressure, the occurrence of compression and a drop in power level.
Ultimately, this necessarily leads to the need to perform a complete cylinder head repair, which will be too expensive. This can be diagnosed without problems. Indeed, in the case when the gap is increased, a corresponding knock in the engine is noted.
As numerous masters say, this indicates that there is a situation with increased wear on the camshaft. It is exposed to unnecessary shock loads. This in itself is not a pleasant moment. It is in this case that it is important to promptly complete the process of adjusting the gaps at a strictly defined time.
From theory to practice. We adjust the VAZ 2108 valves with our own hands
To correctly calibrate the gaps you only need to know a few basic points. The most important is the recommended range of normal values, measured in millimeters:
- for the exhaust valve it ranges from a minimum of 25 mm, and the maximum distance from the washer to the camshaft cam is limited to 35 mm;
- for the intake valve the range is similar, but the gap sizes themselves are somewhat different. The minimum is 15 mm, and the maximum is 25.
Table of clearances
We also do not forget that this distance on VAZ 2108 injection engines tends to decrease over time. Therefore, we recommend adjusting the valves taking this nuance into account, approaching the maximum distance to the cam. On the classics, the effect is exactly the opposite, for this reason, with increasing gaps the problem is much easier to localize. However, drivers who at one time switched from classics to more modern domestic cars like the V8 run the risk of being hostage to an erroneous idea about setting the valves of the power unit, as a result of which the seat burns out and further wear of the “head” parts occurs.
Why do you need valve adjustment on a figure eight?
We have gradually arrived at a very interesting question, what if. What if you didn’t or for some reason forgot about the need for periodic adjustments. It is worth understanding that the design of the VAZ 2108 engine leads to the fact that the gaps decrease over time, which, at best, negatively affects the dynamic characteristics of your iron horse, and fuel consumption, on the contrary, increases. The most advanced cases provoke increased wear of the main parts of the power unit, including:
- camshaft;
- the valve seat and even the adjusting washers themselves burn out;
- The problem may also occur with the pushrod (rocker) and valve system.
In order not to provoke premature aging of your stallion, turning him into a sluggish, tortured horse, you should not forget about the need for periodic maintenance of the valve head on the VAZ 2108, and we also advise you to carefully listen to the sounds from the power unit when the car is running. A sure signal for action is the characteristic clattering sound emitted from the top of the internal combustion engine (actually, from its “head”), the first thing that suffers in this case is the saddle. Well, in order to become a sophisticated specialist in the matter of adjusting VAZ 2108 valves, all you have to do is familiarize yourself with the practical part of this article and get a little experience.
Adjusting valves of VAZ-2108, 2109, 2110.
Adjusting valves on a car is not particularly difficult if you follow all the technical conditions for this.
The VAZ-2108 engine has eight valves. Four inlets having a thermal gap of 0.15-0.25mm, and four outlets 0.30-0.40mm. Thermal clearances are adjusted using a set of shims having different thicknesses from 3.0mm to 4.5mm with a minimum difference of 0.05mm.
The working gap between the cam and the adjusting washer is measured with a special measuring probe. The set includes 20 probe sizes from 0.05mm to 1.00mm.
To prepare for work, do the following:
1. cool the engine to a temperature of 20 degrees
2. remove the valve cover
3. Set the hand brake.
4. set the gearbox to 4th speed
5. jack up the right front wheel
6. check that when you rotate the raised wheel with your hands, the camshaft rotates; by rotating the right wheel with your hands, set the cams to the upper position
We begin adjustment on the 1st and 3rd cams. To do this, by rotating the wheel, we set these cams to the highest possible position. Then we measure the gaps. If the gap is less than the minimum allowable, then remove the adjusting washer from the pusher and measure its size. Let's sum them up: subtract the nominal clearance and get the size of the washer that we must install.
The technique for performing this operation is as follows:
- by rotating the camshaft, the cams were raised as high as possible
- press the adjusting washer together with the pusher down using a tool
- placed a stop between the camshaft and the pusher
- removed the adjusting washer from the pusher
- measured the adjusting washer
- picked up a new washer
- inserted the washer into the pusher socket and removed the stop
- made a control measurement of the gap
If the gap between the cam and the washer is greater than the maximum permissible, then measure it using a feeler gauge. Then we take out the adjusting washer and measure it. We sum up the thickness of the washer and the gap. We subtract the nominal clearance from this amount. The resulting difference is equal to the thickness of the new washer that we must install.
In this way we will go through all the cams. Before measuring the gap, do not forget to turn the camshaft so that the hump of the cam is at the top. To avoid mistakes, after installing the new washer, we control and check the gap.
Adjusting the valves of a VAZ 2109 carburetor 8 valves with your own hands
Adjustment of valves
Many VAZ 2109 car owners are accustomed to turning to a car service center for help, even with such a fairly simple operation as adjusting the thermal valve clearances. In fact, this work is not so difficult and you can do it yourself. To do this, you just need to have the following set of tools and devices, a list of which is given below:
- 10mm wrench for removing valve cover and timing belt cover
- Jack
- Long-nose pliers or tweezers
- Device for adjusting valves VAZ 2108-09
- Flathead and Phillips screwdrivers
- Required shims
- Set of probes
The procedure for adjusting the thermal clearances of valves on VAZ 2109-21099
Attention! The car engine must be cold and its temperature at the time of adjustment should not be higher than 20 degrees.
Video tutorial on how to do the job
In order to clearly demonstrate the procedure for adjusting thermal gaps, it was decided to record a special video clip that shows everything in detail.
If from the guide presented above there is something still unclear to you, then below everything will be presented in a form familiar to everyone.
Carrying out maintenance
So, before proceeding with this operation, you first need to remove the valve cover, as well as the casing under which the timing mechanism is located.
After this, you need to set the gas distribution mechanism according to the marks. To do this, jack up the front right part of the car so that you can turn the wheel by hand to set the valve timing marks.
do-it-yourself valve adjustment for VAZ 2109 carburetor 8 valves
Then we turn the wheel until the marks on the camshaft sprocket and the marks on the rear timing cover align, as clearly demonstrated in the picture below:
- At the same time, make sure that the mark on the flywheel also coincides with the cutout. You need to look through the window, which is located to the right of the fourth cylinder on the gearbox housing. You must first remove the rubber plug:
- When the camshaft is in this position, you can begin to measure the thermal clearances between the cams and pushers of the 1st, 2nd, 3rd and 5th valves (counting from the left):
- For intake valves, the nominal clearance should be 0.20 (+-0.05) mm, and for exhaust valves 0.35 (+-0.05) mm. If you don’t know the location, I can say: from left to right in order: exhaust-inlet, inlet-outlet, etc.
- If, when measuring the gaps, they go beyond the maximum permissible values, they must be adjusted by installing new shims. To do this, we put the bar on the valve cover studs and secure it with nuts.
- Now we bring the mechanism lever to the desired valve, and direct it as if between the pusher and the camshaft cam, and recess the valve to the very end:
- And when the pusher is pressed down as much as possible, you need to insert a clamp between the camshaft and the pusher:
- It is worth noting that the cutout on the pushrod should be facing towards you so that you can conveniently remove the shim. It is very convenient to use long-nose pliers for this:
- After that, look at its size, which is indicated on its back side:
- Now we calculate, based on the measured gap and the thickness of the old washer, what the thickness of the new washer should be in order to achieve the optimal gap.
- Now you can insert the new washer into place and make further adjustments. When the first 4 valves are ready, you can turn the crankshaft one revolution and carry out a similar procedure with the remaining 4, 6, 7 and 8 valves.
How to understand valve adjustment
To better understand the process of adjusting the 2108 valves, it is necessary to briefly consider the design of the timing valve mechanism of this engine. So, to open the intake or exhaust valve, the camshaft cams are used, which, when the shaft is turned, press on the rod of one or another valve, according to the valve timing, and open it.
This is interesting: Replacing lamps in Kia Sportage 3: photos, instructions
The valve is closed by the valve return spring. The cam does not directly act on the valve stem and engines have additional elements in the valve drive. So these can be rocker arms (ZAZ, AZLK, BMW, etc.) of a rocker (classic VAZ) or pushers (glasses) with adjusting washers embedded in them, as in our case under consideration with the VAZ 2108 car and its modifications.
There are special recesses in the block head, round in shape, where a valve with a spring is mounted. A pusher is placed on top of the valve. The pusher has a flange to hold the shim. The washer for adjustment is inserted into this recess in the pusher. The camshaft cam presses on this washer, the washer transmits force to the pusher, and it, in turn, to the valve stem, forcing it to open at the right moment.
Between the camshaft cams and the adjustment washer, it is necessary to maintain a certain gap, designed for thermal expansion of the parts. It turns out that the higher the height of the adjusting washer (its thickness), the smaller the gap between it and the camshaft cam and vice versa.
Each washer has its nominal value in the form of numbers, say 3.15 or 3.80, etc., which is necessary when selecting an adjusting washer by setting the required gap. If for some reason the inscription is erased, then the thickness of the washer is measured with a micrometer. The factory provides a set of adjusting washers from 2.5 to 5.0 mm or more and in increments of 0.05 mm, say 2.5, 3.0, 3.05, 3.10, 3.15, etc. This makes it possible to very accurately select the size in any case - about 122 of the most popular sizes.
In addition, today there are intermediate sizes, such as 3.27; 3.52; 3.78 and others, which further increases the accuracy of adjustment. This is especially true after a major overhaul of the engine with the cylinder head, when the valves were ground in or replaced.
What does replacing parts do?
All engine elements of the VAZ 2108 and subsequent models are developed by the manufacturer’s designers based on the principle of reliability and expediency. The first is manifested in the amount of metal used to manufacture a particular part. That is, VAZ valves are made with a large margin of safety and are designed for operation with a normal driving style.
The feasibility lies in the use of materials and technological processes that reduce the cost of each product as much as possible, so that the overall price of the car is acceptable to the buyer. This leads to an inevitable drawback - the significant weight of all stock parts, which increases the energy consumption for their movement and the force of inertia. Therefore, the 8-valve VAZ 2112 engine, equipped with factory elements, cannot overcome the 8 thousand rpm bar without consequences. Reaching such high speeds is allowed only for a short time, although often the engine is simply not able to do this.
For those who are interested in car tuning, motorsports, or simply aggressive driving, there is only one option left - to replace stock parts with lightweight ones that have less weight and inertia. These include T-shaped valves, which differ from the factory ones in the following ways:
- less weight;
- the “plate” of the element is made thinner;
- the lower part of the pusher has a smaller diameter;
- the entire pusher and “plate” are carefully polished.
The lightweight valve, which moves easily in the sleeve, puts less load on the spring, does not hang at maximum engine speeds and provides improved performance even with a stock piston group. The use of such elements provides the following advantages:
- The tuned power unit can be “spinned up” to 8 - 8.5 thousand revolutions per minute without fear of consequences.
- Thanks to the polished surface of the pusher, the wear of the oil deflector caps and guide bushings is sharply reduced.
- Soot from burning the combustible mixture does not adhere well to the polished surface of the “plate”.
- The reduced diameter of the pusher makes it possible to increase the opening through which fuel enters the combustion chamber. Hence the improved filling of the cylinders with the air-fuel mixture, increasing the power and dynamics of the VAZ 2112.
- The load on the return springs and energy costs for moving parts are reduced. This theoretically results in a reduction in fuel consumption.
The paragraph on fuel economy says “theoretically,” since in practice, gasoline consumption under extreme operating conditions will be high in any case. Although, by means of deeper tuning of the power unit, this consumption can also be reduced.
There are no serious disadvantages when using lightweight valves in VAZ 2108-2115 engines. The service life of such parts depends entirely on the operating mode and speed loads, that is, on the owner of the machine. If we compare the average service life of stock and lightweight valves, the latter last less - up to 100 thousand km.
Adjusting valves VAZ 21083 (carburetor)
The adjustment was made on engine 21083 (carburetor).
1. Remove the protective cover of the timing belt (to the left of the engine, three 10 screws) 2. Remove all pipes from the valve cover, and also unscrew the bracket for the choke and gas cable holder. 3. Remove the valve cover by unscrewing the two nuts by 10 (you may have to remove the carburetor “pan,” but I pulled out the cover without removing the “pan.” 4. Turn out all the spark plugs (it is advisable to first unscrew the spark plugs halfway and remove all dirt around the spark plugs, to avoid dirt getting into the cylinders) 5. Using a regular medical syringe, remove oil from the top of the cylinder head so that when recessing the pushers we can see the washers.
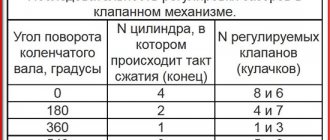
6. Align the mark on the camshaft pulley with the installation mark on the rear timing belt cover. 7. Through the inspection window on the gearbox housing, we check whether the mark on the flywheel is aligned with the triangular cutout on the engine block. 8. Cut out a square 8cm by 8cm from a regular sheet of paper, make a hole in the middle of the square so that this square can be put on the camshaft pulley mounting bolt. One corner of the cut square should face the mark located on the camshaft pulley. Then with a marker we draw marks on the camshaft pulley opposite the remaining three squares. As a result, we will get four marks (0, 90, 180, 270 degrees of camshaft rotation, which corresponds to a crankshaft rotation of 0, 180, 360, 540 degrees). 9. Turn the camshaft 2-3 teeth clockwise, which will correspond to 40-50 degrees of crankshaft rotation (I turned it with a key to 17, using the camshaft bolt. But they recommend jacking up the front wheel and turning the wheel in 4th gear). 10. With this position of the camshaft, use a feeler gauge to measure the gap (the distance between the camshaft cam and the adjusting washer) of the first and third valves. The gaps should be as follows (gaps can be adjusted with an error of plus or minus 0.05 mm:
Adjusting the valves of vases
Many myths and legends have developed around such a necessary procedure as adjusting the valves on the VAZ 2109, 2114 and 2108. At first, carburetor ones then became injection ones, but the design of the gas distribution mechanism did not change. Until the 2011 release, even the thermal gaps remained the same. Only with the advent of the light ShPG did the gaps become a little larger. The seats are metal-ceramic, and the pistons are light. The frequency of valve adjustment remains the same at 30,000 km.
On a new car, it is necessary to adjust the valves in the first 3,000 km, then at 15,000 and every 30,000 km. If you do not adhere to periodicity, the valves may burn out and the seats in the head may sag. In addition, traction is lost and fuel consumption increases. Thermal clearances on vases 2108, 21083, 2109, 21099, 2110, 21102, 2111, 21114, 2112, 2113, 2114, 2115, 1113, 11113, 2170, 2190, Priora, Granta (with engine 1118 3), should be like this:
Thermal clearances on new modifications since 2011 for VAZ 8 valve Lada Granta, Kalina 2, Priora, with engine 21116
Standard valves VAZ 2108
Information on VAZ valves is provided for 10 models and 62 modifications.
The standard valve length for (VAZ) is:
- Length (L): .
Valves and their number significantly affect the power performance of a car engine. It is believed that with more valves, the engine runs smoother. Valves are installed on the inlet and outlet of the cylinder from 2 to 5 pieces.
Explanation of the terms presented in the table below:
- Length (L): overall valve length;
- Disc diameter (D): valve head width;
- Rod diameter (d): outer width of the product;
- Slide Length: Valve lift height.
Important: reference valve sizes for all VAZ models are presented in the links below.
The main elements of the valve are the head (disc) and the stem (stem). In order to reduce hydraulic losses at the inlet and outlet, the transition from the valve head to the valve stem is made as smooth as possible. Exhaust valves operate under high thermal stress, the plate temperature reaches 350-500ºС, and the exhaust valve reaches 700-900ºС.
To reduce weight, hollow, unfilled intake valves are used in modern engine construction.
Important: the specified design data are indicative and may vary for different car models, different brands and engine components.
Source
Necessary tools and spare parts
First, we need to purchase or borrow from friends a special device with which you can easily remove and install the washers. This device is necessary in order to push the glass down, thereby making it possible to pry the washer through a special gap in it. The most sophisticated valve replacement specialists can do without this device, simply using a screwdriver as a lever; the other procedure remains the same: it is not so convenient, but the savings are obvious.
Another interesting tool allows you to easily and easily measure valve clearances using a gauge micrometer. The meter is installed on a special bar and allows you to determine with millimeter accuracy the amount of clearance by which the washer is recessed into the seat. However, the ability to measure gaps with a special set of feeler gauges has also not been canceled. Of course, the accuracy there is not as high as in the previous version, but it is also much cheaper and quite effective for the task assigned to you.
Adjusting the gaps
In addition, you will need a set of simpler and more affordable tools. The most common tweezers to grip the valve washer and the screwdriver used as a lever. A micrometer will also not be amiss: sometimes it is necessary to clarify the thickness of the washer, since its markings are erased. This list of the necessary tools can be considered exhaustive.
You also cannot do without a set of mounting washers for the VAZ 2108 of various sizes. The gap has to be calibrated to the nearest millimeter, so we will need a full store of spare parts if we want to accurately adjust the distances, as required by correct adjustment. If you have stocked up on all of the above tools and a store of spare washers, you can consider that half the job is done. The devil is not as scary as he may seem to us; adjusting the valves on the VAZ 2108 itself is, in fact, not so scary; it is much more dangerous not to do it.
Why do you need to adjust valves?
With mileage, the metal valve stem tends to stretch and contract. The seats in the cylinder head sag, which is why the thermal gap changes. And it is physically needed of a certain value due to the design features of the engine. The consequences of untimely adjustment are not reversible. A clamped valve during operation of an eight-valve engine loses its seal, and the avalanche flow after ignition burns its edges and the cylinder head seat, which is recessed into the body of the head. This type of repair is expensive and does not come with a warranty. It is better to regulate in time, especially since the cost of tuning an 8-valve engine at 600 - 800 rubles per 30,000 km is not so significant.
With correctly adjusted clearances, the car will drive freely, without loss of traction, consuming less fuel. Under no circumstances should you adjust it to hot. Just cool the engine to 30-40 degrees. Otherwise, you can make a mistake and jam the valves.
There are times when the valves have been adjusted, but the knock remains. The reason may not be gaps. On a cold engine, piston skirts and cups and pushers in the body of the head can knock. There can be many reasons, so don’t rush to conclusions, but check everything carefully. There is a special device - a stethoscope, with which you can easily listen to engine noise.
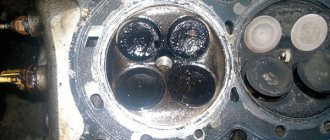
Inlet and exhaust valves
The valves are arranged in a V-shape in two rows. The design is similar to the valves of the VAZ 2110 engine, but with a smaller diameter of the plates and rods. The diameter of the intake valve plate is 29 mm, and that of the exhaust valve is 25.5 mm. The diameter of the intake and exhaust valve stems is 7 mm. One spring is installed on each valve.
Car enthusiasts, regardless of how long they have owned a car, are constantly looking for ways to increase engine power. There are several options for improving your car, one of which is modifying the cylinder head (cylinder head).
Adjustment procedure
The procedure for adjusting the valves on all modifications of the 8-valve vase is the same. There are differences only in injection Grant cars, Kalina 2 with a Grant engine. They have a lightweight piston group and metal-ceramic seats. In this regard, the gaps differ upward by 0.05 mm. Knowing the order and adjustment scheme, you can adjust the valves yourself. The downside is the lack of a set of washers for adjustment. It’s expensive to go to the market to buy them every time, and it’s also expensive to buy the entire range.
Here is a detailed diagram of valve adjustment for VAZ 2108, 2109, 2114, 2115
- First you need to cool the engine. You can use an additional cooling fan from any VAZ car. Place it on top so that the airflow is towards the internal combustion engine and turn on the 12 V power supply;
- When adjusting 8 valve engines (11186, 11113 oka, 1118, 1111) with a mechanical throttle assembly, unscrew the throttle cable from the intake manifold receiver;
- Disassemble the valve cover, timing belt side casing. Disconnect the large and small breather hose going to the throttle body pipe;
- Pump out the oil near the valve cups using a syringe or bulb. It is most convenient to use a regular medical syringe with a white silicone hose at the end;
- Install a device for adjustment - a rack for pressing the valve, also called a ruler;
- Set the first adjustment position. Turn the camshaft clockwise to the mark and tighten 2-3 teeth. For cars with a lightweight piston group (Granta, Kalina 2, Priora), turn strictly by the crankshaft. If you turn the camshaft, the timing belt may slip, and if this is not noticed and the engine is driven, the valves may bend;
- Adjust in the following sequence: 1 outlet and 3 inlet valves;
- Rotate the camshaft 90 degrees. Adjust 5 outlet and 2 inlet valves;
- Rotate 90 degrees. Adjust 8 exhaust and 6 inlet ports;
- We make the last turn by 90 degrees and adjust the 4th exhaust and 7th inlet valves;
- Reassemble in reverse order. We install a new gasket under the valve cover to prevent oil from leaking out.
- On carburetor engines, everything is done in a similar order. First you need to unscrew the filter housing and the suction cable. The frequency is the same as on the injector 30,000 km.
On engines with 16 valves, adjustment is not required, since thermal clearances are selected automatically using hydraulic compensators.
Checking the gaps is also required after repairing the cylinder head. Especially after replacing the guides. When replacing bushings, the seats are countersunk with a special tool and deliberately recessed into the head. Accordingly, you need to follow the sequence, set the optimal gaps and repeat after 1000 km.
Adjusting the 8kL engine for gas increases the mileage between adjustments. If the engine is not intended to operate on gas equipment, the seats and valves will quickly burn out, and in order to somehow extend the service life, the clearances should be made a little larger than standard. Usually they do +0.05 mm. If the gap is not set, that is, does not expand, then the saddle is sunk a decent distance into the head. In this case, you need to measure how much the gap needs to be increased, disassemble the cylinder head and file the end of the valve. The second option would be to replace the seat or the cylinder head itself.
Varieties of elements
At the moment, the following types of advanced valves can be purchased for front-wheel drive VAZ cars:
- T-shaped;
- titanium;
- "tulips".
Valves in the form of tulips or the letter “T” are made of durable alloy steel and differ from each other only in configuration. In “tulips”, the place where the pusher joins the “plate” has a larger radius, and an additional recess is made at the end. In terms of weight and performance characteristics, these parts are almost identical.
Titanium valves are the most reliable and durable, and the lightest in weight. Since titanium, unlike alloy steel, has reduced resistance to friction, a special super-hard coating is applied to the entire surface of the part. Its job is to resist wear from friction and high temperatures in the combustion chamber. The composition of the coating is titanium carbide, titanium nitrite and titanium nitro-aluminate. Lightweight titanium valves have only one significant drawback - high cost.
Adjusting valve clearances on a VAZ 2108 engine: procedure
block The nominal value of the “thermal compensator” determined by the manufacturer on a cold engine for the intake valves is 0.2 mm, exhaust valves – 0.35 mm.
Permissible deviations from the nominal value are also specified - 0.05 mm in both directions. A good example: when adjusting the intake valve, the 0.15 probe enters without hindrance, the 0.2 probe enters with slight interference, and the 0.25 probe does not enter at all. This is interesting: Where is the cabin filter located and when does it need to be changed? Checking and adjusting the valve mechanism is carried out in pairs in 4 approaches. Each approach is performed at a different camshaft position. Before the first approach, align the marks on the camshaft pulley and the timing belt housing by turning the pulley clockwise with a spanner.
The procedure for checking the actual gap using the first approach as an example is as follows:
- rotate the camshaft 40-50 degrees clockwise (2-3 teeth);
- remove the actual values of the gaps at 1 (exhaust) and 3 (intake) valves using feeler gauges (counted from the timing belt).
The steps for checking the gaps in the remaining pairs of VAZ 2108 valves are carried out by turning the camshaft at intervals of 180 degrees:
- 220-230: 5 (inlet), 2 (exhaust);
- 400-410: 8 (inlet), 6 (exhaust);
- 580-590: 4 (inlet), 7 (exhaust).
The valve adjustment process is carried out in the presence of unacceptable deviations from the norm. The sequence of actions is as follows:
- install the adjustment device on the studs of the bearing housings located at the ends;
- insert a curved lever between one of the valve tappets under study and the cam (the handle of the device should be facing the front bumper of the car);
- by pressing the handle, recess the pusher and install a lock between the edge of the end of the pusher and the camshaft to prevent the part from returning to its original position;
- remove the lever of the device and move it to the side;
- remove the washer using tweezers;
- install a new washer of the calculated thickness with the marking down;
- remove the lock;
- measure the resulting gap.
The selection of a new washer is made based on the following considerations:
- the thickness of the removed washer is determined (if the inscription is erased, the operation is carried out using a micrometer);
- the required thickness is calculated based on the previously made measurement in the format: size of the new washer = thickness of the old part + (measured - nominal clearances).
Here is a detailed diagram of valve adjustment for VAZ 2108, 2109, 2114, 2115
- First you need to cool the engine. You can use an additional cooling fan from any VAZ car. Place it on top so that the airflow is towards the internal combustion engine and turn on the 12 V power supply;
- When adjusting 8 valve engines (11186, 11113 oka, 1118, 1111) with a mechanical throttle assembly, unscrew the throttle cable from the intake manifold receiver;
- Disassemble the valve cover, timing belt side casing. Disconnect the large and small breather hose going to the throttle body pipe;
- Pump out the oil near the valve cups using a syringe or bulb. It is most convenient to use a regular medical syringe with a white silicone hose at the end;
- Install a device for adjustment - a rack for pressing the valve, also called a ruler;
- Set the first adjustment position. Turn the camshaft clockwise to the mark and tighten 2-3 teeth. For cars with a lightweight piston group (Granta, Kalina 2, Priora), turn strictly by the crankshaft. If you turn the camshaft, the timing belt may slip, and if this is not noticed and the engine is driven, the valves may bend;
- Adjust in the following sequence: 1 outlet and 3 inlet valves;
- Rotate the camshaft 90 degrees. Adjust 5 outlet and 2 inlet valves;
- Rotate 90 degrees. Adjust 8 exhaust and 6 inlet ports;
- We make the last turn by 90 degrees and adjust the 4th exhaust and 7th inlet valves;
- Reassemble in reverse order. We install a new gasket under the valve cover to prevent oil from leaking out.
- On carburetor engines, everything is done in a similar order. First you need to unscrew the filter housing and the suction cable. The frequency is the same as on the injector 30,000 km.
Initial stage: opening access to the camshaft
The proper conditions under which the valve assembly is adjusted are formed after dismantling the cylinder head cover. You can easily remove the upper cylinder head housing with gasket after performing the following procedures:
- loosen the cable by rotating the two nuts to “13” near the bracket and remove it, after first removing the return spring on the plastic sector of the damper drive;
- Using a 10mm wrench, unscrew the two nuts securing the throttle cable bracket and remove it;
- Loosen the fastening clamps with a screwdriver and remove the inlet (located on the front side near the oil filler neck) and two outlet pipes for the crankcase ventilation (attached to the back of the valve cover);
- Unscrew the two nuts securing the housing to the cylinder head (use a “10” wrench);
- remove two rubber plugs located under the nuts already removed in the previous transition.
This is interesting: Repair of the driver's door lock of Nissan Tiida and Qashqai - restoration of the cable
At the end of the preparation stage for adjusting the valve clearances of the VAZ 2108 engine, an operation is carried out to remove the gas distribution mechanism cover, which is secured with three “10” bolts. A set of necessary accessories is also formed:
- device for recessing the pusher;
- a special clamp that secures the pusher in the lower position;
- tweezers;
- valve tappet retainer;
- set of measuring probes;
- set of adjusting washers.
It is also worth preparing a new cylinder head gasket and sealant.
If there is no valve adjuster
The functions of special equipment can be assigned to two powerful flat-head screwdrivers with a flat working surface width of at least 10 mm. In this case, setting the clearances of certain valves on the VAZ 2108 is carried out as follows:
- press the pusher down, leaning on the cam;
- install the edge of a screwdriver between the camshaft and the pusher;
- remove the first screwdriver;
- remove the washer with tweezers;
- install a new part;
- remove the second screwdriver, which acts as a lock.
The process of adjusting the valve mechanism is carried out every 20-30 thousand km and is carried out with the cylinder head cover removed. At a certain angle of rotation of the camshaft, the gap between two pairs of valve tappets and cams is checked with a feeler gauge.
Adjustment of the gaps should be resorted to in case of significant deviations from the norm: 0.15...0.25 mm for intake and 0.30...0.40 mm for exhaust. Using a special device or two screwdrivers, the pusher is bent and fixed, the old washer is removed, a washer of a new thickness is installed, the lock is removed and the resulting gap is checked.
Adjusting the valve clearances of VAZ 2109, 2108
To adjust the valve clearances of VAZ 2109, 2108 you will need:
- Availability of a special set of probes, values 0.10-0.50 millimeters.
- A tool designed to perform work on replacing a set of washers.
- Directly the set of replacement washers itself, in accordance with the engine configuration, regulated by the passport data.
Initially, it should be noted that the engine of the car model has 8 valves . According to the vehicle operating regulations, the operation is performed every 20,000-30,000 kilometers.
Everything is done extremely simply, you just need to:
- Set a special TDC or make marks.
- Check the position of the first cylinder , which is done by turning the camshaft 90 degrees clockwise.
- In the future, it is necessary to similarly check the third cylinder , after the fourth and finally the second .
Adjustment table according to factory instructions
| car brand | Inlet | Release |
| Priora 21116 | 0,25 | 0,4 |
| Kalina 2 21116 | ||
| Lada Granta 21116 | ||
| grant 2190 | 0,2 | 0,35 |
| Priora 2170 | ||
| 21114 | ||
| 21102 | ||
| 21099 | ||
| 21093 | ||
| 21083 | ||
| 11186 | ||
| 11183 | ||
| 2190 | ||
| 2115 | ||
| 2114 | ||
| 2113 | ||
| 2112 | ||
| 2111 | ||
| 2110 | ||
| 2109 | ||
| 2108 | ||
| VAZ 99 | ||
| VAZ 083 | ||
| 1118 | ||
| 11113 oka | ||
| 1111 oka |
What is needed for adjustment
As already noted above, you can adjust the thermal clearances of the valves on the vase with your own hands. To do this you need a set of washers, some fixtures and tools. You can make a homemade rail, but it is more cost-effective to buy a ready-made fork for setting gaps at the car market.
Heels for adjustment will be needed in the range from 3.40 to 4.05 mm if the guides in the cylinder head have not been changed. If, however, repairs were carried out, or the car runs on gas, you will have to purchase washers in the range of 2.50 mm for the exhaust valves. Intake valves, as a rule, remain at the same clearance; the seats on them do not flush.
Thus, in this article we briefly examined the procedure for adjusting valves on VAZ cars with front-wheel drive. The consequences of untimely tuning and driving on gas were also touched upon.
Source
What is needed to adjust thermal clearances?
In addition to the tool itself and special devices, you will also need to change the old valve cover gasket.
| Manufacturer | vendor code | price, rub. |
| Original | ||
| VAZ | 21081003270 | 56 |
| Analogs | ||
| VICTOR REINZ | 703856900 | 125 |
| ELRING | 559431 | 184 |
| GLASER | X0896401 | 342 |
Required Tools
- Jack;
- 10 mm wrench;
- Screwdriver “-“;
- Medical syringe with hose;
- Device for adjusting valves VAZ 2108-2115;
- Adjustment probes FORCE 61802;
- Tweezers;
- Micrometer;
- Clean rags;
- Adjusting washers of different sizes.