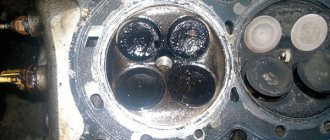
Russian-made cars of the VAZ-2107 or “Seven” brand were produced in two modifications: with a carburetor and an injector. In Russia, production of the “Seven” was completed in April 2012, and in Egypt it continued until 2014.
While carburetor cars have long been studied by the owners of these vehicles, injection engines raise some questions when carrying out repairs and maintenance. Let's pay attention to the features of adjusting valves on VAZ-2107 carburetor and injection engines with our own hands. Owners of “Sevens” know from rumors that the problem with valve clearance on these cars is a disease. Are there any differences between adjustments for engines with different fuel injection systems, and what are they?
- 2 How to determine the need to adjust valves on a VAZ-2107
- 3 What you will need to carry out the work: list of tools
- 4 Preparatory work: what needs to be done before the procedure
- 5 Adjusting valves on a VAZ-2107 carburetor: step-by-step instructions using a dipstick
- 6 Features of the operation on a VAZ-2107 injector car: instructions using a micrometer
- 7 Video: adjusting valves on the classic VAZ-2107
Valve adjustment: features of the technique
Before you find out what the adjustment technique is, you should understand the design of these elements. The valves of internal combustion engines are cylindrical plates with a steel rod or leg. The valves are located in the cylinder block, and at least 2 products are required for each cylinder. When closed, the valves are adjacent to the seats, and they are made of steel and pressed into the cylinder head.
During operation, the elements in question experience heavy loads, both mechanical and thermal. That is why it is important that such products are made from special types of steel that are resistant to mechanical and thermal loads. Valves are divided into inlet and outlet. The purpose of the intake valves is to admit the combustible mixture into the cylinder, and the exhaust valves are to release exhaust gases.
Appearance of valves on a VAZ-2107
When the valves operate, they expand, causing the rods to lengthen, therefore changing the gaps between the ends and the pusher fists (or rocker arms). During the operation of internal combustion engines, the gaps increase, which leads to exceeding the permissible values. To prevent this from happening, you need to adjust the valves. It turns out that valve adjustment is a procedure for bringing the clearances back to normal. This procedure is carried out not only for VAZ-2107 cars, but also for all types of vehicles equipped with internal combustion engines.
Many car owners do not know that debugging valves is a mandatory preventive action. If this technique is not carried out in a timely manner, the consequences can be disastrous, because valves are an integral part of the operation of the internal combustion engine. What are the consequences of not carrying out the procedure? The consequences may be as follows:
- With a small gap, the process of burning the disc part occurs. Burning is the appearance of soot formed from the combustion products of the fuel mixture. This deposit interferes with the normal functioning of the timing system, as well as the entire engine. The disadvantage of the formation of such deposits is the difficulty of removing it.
- If the valve clearance is large, they do not open completely, which significantly affects the reduction in engine power. If the gap is large, a characteristic knocking sound occurs, especially when the accelerator pedal is pressed sharply. Experienced drivers can easily identify such a knock, and therefore know that it is time to adjust the valves. Both small and large gaps have a negative impact on engine performance.
Sectional design of the cylinder head of a VAZ-2107 car
The importance of fine tuning
It must be taken into account that do-it-yourself adjustment of VAZ 2107 injector valves is available to all car enthusiasts, even in garage conditions, with a minimum set of tools. Often the operation is carried out on a hot engine, although it is preferable to do it “on a cold one”. The result will be more accurate readings.
It is important to know that adjusting the VAZ 2107 valves (injector) will require purchasing two types of probes: 0.15 mm for monitoring a cold engine and 0.20 mm for monitoring a hot engine.
Probes of different sizes are available for sale. It is preferable to use wide ones, as they are more comfortable to use, and they are often sold in pairs. As a result of proper setup and adjustment, the following results can be achieved:
- valve timing will work most accurately;
- the working cylinders will become fully filled with the air-fuel mixture;
- the mixture will burn as completely as possible;
- high-quality blowing of the empty cylinders will be ensured.
Correctly set valve clearance of the VAZ 2107 (injector) will result in cleaner operation of the internal combustion engine, possible knocks from the engine compartment will disappear, and the service life of the vehicle will significantly increase. This factor is a consequence of the lack of impact of the camshaft cam on the rocker (drive lever) or valve axis. Thus, these parts will be able to last much longer if the adjustment gaps are clearly ensured.
However, reducing clearances is considered more problematic for engine operation. With this position, the chance of the valve burning out increases, because it does not have time to install itself in the seat of the block head. Aggressive exhaust gas from the combustion chamber is directed through the resulting cracks. Its temperature during the explosion phase reaches 2000C, which leads to burning of the edges of the exhaust valve. Valve seals are also negatively affected due to overheating, which is accompanied by increased oil consumption and contamination by combustion products.
The importance of adjustment is obvious for the performance and increase in the service life of the car. Control must be carried out depending on the degree of operation after 10-15 thousand kilometers.
How to determine the need to adjust valves on a VAZ-2107
Returning to the Russian car industry VAZ-2107, it should be noted that the production of injection engine modifications began in 2006. From 1982 to 2006, the “seven” was equipped with a carburetor injection system.
Although both types of engines have some design differences, they definitely need valve debugging. Manufacturers recommend performing valve adjustment diagnostics on all cars every 20-35 thousand km. However, many car owners resort to this procedure only when extraneous noise appears when the engine is running.
On the VAZ-2107, adjustments should be made much earlier, since clearance violation is a disease of domestic cars. According to the manufacturer's instructions, this value is 15-20 thousand km.
This is interesting! Not all internal combustion engines require valve adjustment. If the car is equipped with hydraulic compensators, then there is no need to periodically adjust the valves.
A hydraulic compensator is a device that automatically adjusts the thermal clearances of the valves. Modern cars are equipped with such devices, so such parts were not installed on the VAZ-2107 from the factory. You can install them yourself, but this is troublesome and quite expensive.
The need to adjust valve thermal clearances can be determined by detecting the following characteristic signs:
- Extraneous noise when the engine is running. These are loud clicks or “clunking” noises, which usually appear clearly when you press the gas pedal sharply.
- The engine begins to “trouble”, which is due to a decrease in compression or its disappearance altogether.
- Increased fuel consumption for no reason.
- Dynamics decreases during acceleration.
Particular attention should be paid to a metallic ringing knock, which is the main sign, and everything else is indirect symptoms. The video shows what metallic valve knocking sounds like.
If such symptoms occur, it is necessary to carry out diagnostics and, if necessary, adjust the valves. If the mileage of a VAZ-2107 car is more than 20 thousand km, but there are no signs of a malfunction in the timing mechanism, then you should be guided by the “do no harm” principle. If the engine is functioning normally and there are no signs of clearance violations, then there is no need to rush to remove the valve cover. There are cases when carburetor and injection “sevens” ran for over 30 thousand kilometers and did not need adjustment. Hence the conclusion is that the need for the procedure arises depending on the nature of the vehicle’s operation.
The adjustment procedure on the VAZ-2107 does not present any difficulties, so every car owner will be able to cope with this task independently. When carrying out the procedure, it is important to know which fuel supply system is installed on the VAZ-2107 car, since the method has minor differences for the injector and carburetor.
This is interesting! If you are tired of adjusting the thermal valve clearances on the “Seven”, then an alternative option is to install a cylinder head with hydraulic compensators for the VAZ-2107. Despite the high cost, many car owners resort to installing hydraulic compensators themselves.
A brief excursion into history
The VAZ 2107 was not always fuel-injected. At first, these cars were equipped with conventional carburetors. And the car began to be equipped with a forced fuel injection system only in 2006. The reason is simple: the automaker tried to fit its cars to the standard now known as Euro 2, and this required changing a number of characteristics of the car. The main advantage of replacing the carburetor system with an electronic system was that in the injection version there was no need to fine-tune the injection. That is, there was no “swimming” at idle speed for injection cars. But there were also disadvantages. For example, increased fuel requirements. The catalyst for the injection “sevens” was located directly under the bottom, which means the ground clearance became lower. Repairing such machines was more difficult because it was difficult to get to some parts.
What you will need to carry out the work: list of tools
To avoid problems during adjustment work, it is recommended to make sure that you have the necessary tools. To work you will need the following tools:
- A set of keys for “10”, “13”, “17”.
- A special key set to “38”, which will be used to rotate the crankshaft pulley mounting bolt.
- Screwdriver Set.
- 0.15 mm feeler gauge or micrometer.
To perform the adjustment directly, you only need a 0.15 mm feeler gauge or a micrometer, as well as open-end wrenches for “17” and “13”. Before carrying out the relevant work, it is important to prepare the car. Let's consider what the procedure for preparing the “seven” for debugging is.
A set of tools for adjusting valves on a VAZ-2107: open-end wrenches for “13” and “17”, as well as feeler gauges
It is important! You will need a new gasket under the timing cover, since it is recommended to change it every time the cover is removed.
Valve lid
The valve cover protects the gas distribution mechanism from external influences and also prevents oil leaks. The valve cover gasket is designed to seal the joint between the valve cover and the cylinder head. It is a strip of rubber whose shape exactly follows the contours of the valve cover.
Replacing the valve cover gasket
If there are oil leaks from under the valve cover, the gasket should be replaced. To do this, you need to remove the valve cover (you already know how to do this from the section on valve adjustment) and the gasket. The new gasket is installed without any special tools or equipment.
The valve cover gasket is placed on the surface of the cylinder head by hand, without any tools.
The installation site must be thoroughly cleaned of remnants of the old gasket and traces of sealant. We put the new gasket in place and install the valve cover on the engine.
Valve cover tightening procedure
After installing the valve cover on the engine, it must be secured with nuts to the cylinder head. To prevent distortion, displacement and damage to the gasket, there is a special procedure for tightening the nuts. The essence of this process is to tighten the fasteners from the center to the edges.
- Tighten the central nut.
- Tighten the second central nut.
- Tighten the outer nuts on one side of the cover.
- Tighten the outer nuts on the opposite side of the cover.
- Tighten the nut on the valve cover protrusion.
The valve cover nuts must be tightened in a specific order to avoid distortion and deformation of the gasket.
By following the order in which the nuts are tightened, you are guaranteed to avoid subsequent problems with oil leakage from under the valve cover.
Video: adjusting valves on a classic VAZ-2107
The material examined two possible ways to adjust the valves on a VAZ-2107 carburetor and injection type. After carrying out such manipulations, you should check the operation of the engine. The ringing sound should disappear. If after performing the procedure you can still hear extraneous sounds, then the problem is not in the valves.
After the gaps are set, the operation of the engine will change not only by ear, but also when the car is moving. The acceleration dynamics of the vehicle will increase, and fuel consumption will also decrease, which is especially important for injection engines. Owners of domestic cars must master one of the methods described above, which will allow them to adjust the valves independently at home.
- Author: Andrey
Rate this article:
- 5
- 4
- 3
- 2
- 1
(27 votes, average: 3.8 out of 5)
Share with your friends!
Home →
Maintenance and Repair →
Engine →
Preliminary preparation
Before you start adjusting and tuning, it is worth tensioning the chain to an acceptable level if it is loose. There is a corresponding device under the hood for this purpose.
After removing the valve covers, you need to check and set the marks in the correct positions. There is a lower groove on the crankshaft pulley and a small boss on the cover in front of the cylinder block, as well as a depression on the top of the camshaft sprocket and a boss on the camshaft bed.
We recommend: How to properly remove the interior light bulb with your own hands?
Compression check and troubleshooting
This procedure allows you to assess the condition of the parts of the cylinder-piston group. It shows quite accurately whether engine repair, replacement of worn parts, tuning and adjustment of the gas distribution mechanism is required. In some cases, the situation can be corrected by grinding in the VAZ 2107 valves, which restores the tightness of the joint between the parts.
The measurement is carried out with a special pressure gauge with the spark plugs turned out, and it is advisable to disconnect the carburetor from the fuel pump. This will prevent it from flooding with fuel and make starting easier. The test is carried out with the throttle valve fully open, so that the carburetor creates minimal resistance to air flow. The lowest indicator demonstrates the degree of maximum wear of the cylinders.
If the difference in compression values for different cylinders is above a certain value, which means a large gap between the cylinder wall and the piston.
Engine repair and subsequent valve adjustment will be required. During the work, compression and oil scraper rings are usually replaced.
Gap measurement
The procedure for adjusting valves on a VAZ 2106
Determining and checking what valve clearances are present should be carried out exclusively on a cold engine.
To carry out this operation, you will need to prepare a dipstick and other additional tools, the choice of which depends on the category of the valve pusher. This can be a spanner or open-end wrench, a hammer, a micrometer or a puller. The processes involved in measuring gaps are carried out in different ways.
To measure the thermal clearance on a pushrod with a special screw adjustment, the crankshaft must be rotated so that its cam is directed in the opposite direction from the pushrod. Next, you need to lightly hit the pusher with a hammer and swing it slightly to the sides with your hands. Using a feeler gauge, the gap between the valve and the pusher is measured, and then checked with the value specified in the car’s operating instructions.
To measure the thermal gap on a motor with shim adjustment, the crankshaft must be rotated so that the cam of the selected valve points upward. Using a probe, measurements are taken and also compared with the indicators in the car’s instructions.
If, as a result of the measurements taken, it becomes clear that the indicators are deviated from the norm, adjustment will be required.
If the motor is worn out
For a VAZ-2107 or other classic with a slightly worn engine, everything will go like clockwork, but a car with high mileage and a worn out engine may upset you. The knocking of the valves will become even louder after adjustment. Why did this happen? When the engine is running, the parts of the valve mechanism are worn in to each other, changing their original shape.
Rockers and adjusting bolts require replacement at high mileage
So the supporting surfaces of the adjusting bolts change from spherical to oval. By turning such a bolt during adjustment, you break their mutual fit, forcing you to break in again. The gap you just set will quickly “float away” and start all over again... What is the way out? The rockers and adjustment bolts need to be replaced. The camshaft itself can most likely still work; it needs to be changed if the cams are severely worn. To see how it all looks, watch this video. The author very clearly shows the correct way to configure the valve mechanism.
Installation of shafts according to marks
There is a drilling on the camshaft gear on the inside of the engine. It must be aligned with the protrusion on the camshaft housing.
In this position, the piston of the fourth cylinder will reach top dead center during the compression stroke. This is a very convenient position of the marks for accurately determining the position of the camshaft. Their combination is enough to accurately set the camshaft in the desired position for adjusting the valves.
Because in one engine cycle. The camshaft makes one revolution. The crankshaft turns two times.
- That is, in this position at top dead center there are pistons of cylinders 1 and 4. 4 cylinder in the compression stroke in the first cylinder the exhaust gas emission stroke has ended and after the piston passes TDC the fuel mixture intake stroke begins.
- If you turn the crankshaft half a turn 180 degrees, the camshaft will turn a quarter turn 90 degrees. The compression stroke will begin in the second cylinder.
- When the crankshaft is rotated another 180 degrees, the compression stroke begins in the first cylinder.
- Another 180 degrees and the compression stroke will be in the third cylinder
As mentioned above, to begin adjusting the valves, you need to align the mark on the camshaft pulley with the casting on the camshaft housing. And check the position of the crankshaft at the TDC mark.
In this position, the pistons of cylinders 1 and 4 and the fourth cylinder will be at TDC on the compression stroke.
