Often, inexperienced car owners mistake problems with the clutch for a failure of the gearbox. Do not panic ahead of time, it is important to correctly diagnose the problem; if the cause of the problem is the rocker, you can fix the problem yourself.
Experience in servicing the VAZ 2110 allows us to say that problems with the rocker require replacement or major repairs of the part in extreme cases. Most often, the situation is saved by simple adjustment.
You should not be afraid when it becomes clear that repair work, replacement, or adjustment of a car part is inevitable. Almost every car owner can adjust the VAZ rocker with his own hands.
Symptoms of a malfunctioning rocker
Content
There are certain signs indicating that it is the gearbox linkage that has become unusable, and not the transfer case itself.
The most common signs:
- When turning on/off first gear, the driver experiences difficulties; it is difficult to move the gearbox handle to the desired position;
- The first gear is driven correctly, but after a while the reverse gear is set independently;
- The choice of any speed takes place in normal mode, but it is difficult to turn on the first and fifth, the lever does not obey.
As soon as the listed symptoms, even one of them, are noted while driving a car, you need to contact the service to fix the problem. If experience and desire allow, you can fix the breakdown yourself.
The most common symptoms of a link failure and possible cause:
- The play in the gearbox lever can be clearly felt: the cause could be physical wear of the linkage, the problem can be solved by completely replacing the part.
- The box slide rings when gears are changed: sometimes the sound indicates a poorly performed repair or a factory assembly defect.
- Speeds are switched with great effort: adjusting the VAZ 2110 rocker will fix this; if the problem persists, you will need to replace the element.
- When you engage the first gear, the lever shifts to reverse gear: the reason is precisely in the gearbox, a mandatory replacement is required. The situation can be corrected by a repair kit, but this depends on the severity of the damage or the detected wear of the assembly elements.
- When the engine is running, strong vibration is transmitted to the gearshift knob: the hinges need to be checked, the cause could be play.
Installing a short-stroke cardan
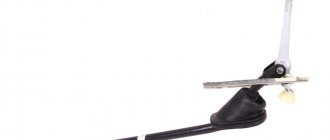
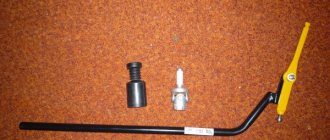
The first step is to purchase the cardan itself. The best choice would be a part from Priora or Kalina. Usually it is included in the repair kit with a boot, so the standard boot from a VAZ 2110 will not fit here.
Work is performed only if there is an overpass, inspection hole or lift. It is also recommended to call an assistant for help, since at the end of the process it will be problematic to independently adjust the position of the gearshift lever.
The work proceeds according to the following scheme:
- Armed with two 13 keys, we need to loosen the clamp on the drive rod and then pull it off the rod.
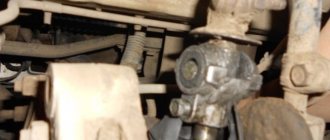
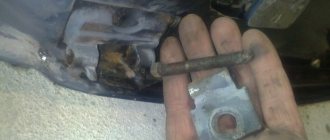
- The next step is to dismantle the boot. Next, use the 10th key to unscrew the bolt, which is a lock on the standard cardan. Now you can remove the cardan with gentle blows of a hammer.
Important: it is necessary to check the condition of the oil seal. If this is the first intervention in the gearbox, then it is most likely in a worn condition, so it is recommended to change the boot.
- We install the driveshaft from the Priora in the reverse order: put on the boot and install the new driveshaft, securely tighten the fixing bolt, and then tighten the boot. All that remains is to put the drive rod on the cardan rod, but the clamp should not be tightened.
- Now the assistant gets behind the wheel and places the gearshift lever in the optimal position. At this time, the clamp is tightened. Done, the replacement is complete, all that remains is to test the switching.
Adjusting the backstage. Sequence of procedure
On a VAZ 2110, the adjustment of the backstage can be repaired in a regular garage; you just need to be patient, free time and the participation of a caring friend.
How to adjust the VAZ 2110 rocker if signs of a malfunction have just begun to appear:
- It is necessary to set the gearbox lever to first gear. It will be difficult to do this, but it must be done;
- It is most convenient to inspect the car on a lifting mechanism, which will provide access under the car. It is necessary to secure it with a handbrake and locking objects installed under the wheels;
- The box should remain engaged in first gear;
- Open the engine compartment and try to find the clamp that holds the rocker. To do this, you need to get close to the transfer case and reduce the clamp pressure;
- As soon as the clamp is loosened, perform the next adjustment step - move the gear shift lever to the left as much as possible. This must be done without jerking; if the movement is chaotic, the slide will come off;
- With the gearbox lever in the maximum left position, tighten the clamp;
- Often it is enough to move the link in relation to the cardan by a few millimeters.
By adjusting the rockers, it is possible to assess the degree of wear of the driveshaft; it is better to replace it if severe wear is noticed.
Video instruction
Many inexperienced drivers begin to panic and talk about a breakdown of the gearbox, although in fact the culprit of the problem is the rocker.
Practice shows that replacement and repair are rare and not very common measures. Much more often, the current situation forces you to simply adjust the scenes.
But today we will talk not only about adjustment, but also talk about the features of modification, repair and replacement of this element.
Element location
Finalization of the scenes of the VAZ 2110
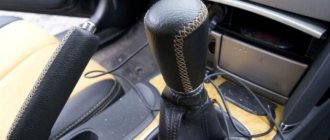
Owners of domestically produced cars often wonder about the possibility of improving the operation of the gearbox by installing a short-throw shifter instead of the standard one installed during assembly.
The short-throw rocker is the result of a VAZ garage tuning. Replacement allows you to improve the efficiency of the box, gear shifting is carried out in a more precise mode, and whether to make this replacement or not is the choice of the car owner.
Changing the type of rocker does not require dismantling the standard part. Replacement is carried out in the sequence described below:
- From the outside, disassemble the ball joint;
- The metal ring of the support gently opens, the plastic legs move apart;
- The support ball rolls out;
- Disconnect the rod from the support, then weld a fragment of a tube, a strong piece of metal, to it, to the rod;
- When making adjustments, it is necessary to raise the hinge with the hook, this will prevent the switching on the wrong speed that was selected.
You can watch the process in more detail in the video:
Changing the type of gearbox link will result in a harder gear shift, but it will also become clearer.
Technological features of long-stroke and short-stroke scenes, as well as their advantages and disadvantages:
| Short stroke | Long-stroke | ||
| Advantages | Flaws | Advantages | Flaws |
| Lever path for gear shifting is shortened | Force required to shift higher gear | The effort to change gears is minimal | The lever path to change gear is significantly longer |
| Gears are engaged more accurately and predictably, especially when paired with a driveshaft from Kalina | Faster synchronizer failure time | Gearbox resource is higher | Switching time is higher |
| Used in motorsports | Requires manufacture or purchase | Installed on the vehicle from the factory | |
| Reduced gear shift times | |||
Diagnosis of the problem
The gearbox linkage in a car is necessary so that the unit cannot independently change gears as a result of the simultaneous movement of the sliders. This mechanism requires careful care, as well as periodic and high-quality adjustments. If the adjustment is performed poorly or some time has passed, this may manifest itself while the car is moving and the driver will feel discomfort.
In practice, as a result of constant use of a car with a rocker drive that requires adjustment, the vehicle may be at risk of breaking the entire transmission system. Therefore, attention should be paid to the quality of the unit’s operation and problems that arise during operation should not be neglected.
To understand that in your VAZ 2110 you need to adjust the rocker shaft, you just need to pay attention to the operation of the gearbox unit. Symptoms of the malfunction will be as follows:
- There were problems with engaging first gear. In particular, it will be impossible to turn on the gearshift lever, and sometimes it will be impossible to switch from first speed to second.
- Instead of first gear, reverse gear is engaged. Imagine: you are about to start moving and engage first gear, but instead your vehicle starts moving backwards. Perhaps after switching to “neutral” the problem will disappear, but over time it may happen again. In this case, in 98% of cases the problem lies precisely in the rocker shaft, that is, this has nothing to do with the speed lever.
- There may be problems with engaging first and fifth speeds. At the same time, all transmissions will work normally.
Backstage repair
In the case where you plan to adjust the VAZ 2110 rocker with your own hands, completely replace or repair it, you will need to completely disassemble the unit.
This is done like this:
- The casing is removed from the shift lever;
- The car is placed on a hill or raised on a jack;
- The front console is dismantled;
- The rocker is removed; in the VAZ 2110 it is secured with 6 bolts;
- When disassembling the unit, evaluate the wear of each element;
- An overview of the support, cardan and oil seal can be obtained by carefully bending the boot.
By visually assessing all the parts of the unit, you can decide on the course and sequence of repair actions.
- For repairs and adjustment of the rocker, only a repair kit is enough;
- A deformed bushing requires mandatory replacement;
- It is wise to assess the degree of wear of the lever axis bore;
- If play in the cardan is detected, the link will need to be completely replaced;
- In many cases, extraneous sounds are caused by the rocker pad; replacing it is not difficult even for a novice car enthusiast.
Replacing rocker seals
Nothing frustrates a car owner more than traces of oil under the bottom while parked. The cause of this manifestation may be a worn out oil filter or a faulty oil seal.
When installing a new oil seal, you can see and evaluate the condition of the rocker pad, cardan and boot.
Before you begin disassembling all components of the car, you need to find out the reason for the leakage of the oil mixture. If the reason is not the oil filter, you need to make sure that the oil seal is in good condition. To do this, the car is installed on a platform or lift. If the work of replacing and installing a new oil seal is being carried out for the first time, previewing a video on this topic will be very helpful.
- Climb under the car and make a visual assessment of the boot. If oil leaks through the oil seal, the boot will reveal this and there will be traces of oil leaks on it;
- Having bent the boot, you need to get to the cardan. Disconnecting the driveshaft will open the way to the cuff;
- The sequence of removing the cardan is strictly from the lever to the rocker, the reverse order is prohibited;
- After dismantling the cardan shaft, access to the oil seal opens;
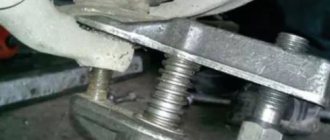
- To remove the cuff you will need a hook and spike;
- A seal that has become unusable is replaced with a new one. Garage repair gurus use a plastic bottle cap as an auxiliary tool for this;
- After installing the new oil seal, the unit is reassembled. In this case, the condition of each element is necessarily checked for wear, and if necessary, the part is also replaced.
