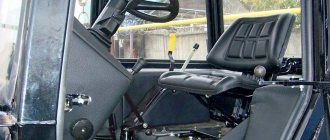
Using the lever, the driver gives the necessary commands to the manual gearbox. On rear-wheel drive cars (VAZ 2101-2107), the manual gearbox (MT) is installed directly under the lever, so there is no need for a rocker. After all, the gear shift mechanism directly connects the lever and the fork rods of the corresponding gears.
For front-wheel drive cars (VAZ 2108-2112) it is installed next to the engine, across the body. Therefore, to transmit commands from the lever to the gear shift mechanism, it is done using a backstage made of steel pipe. Because of this, the technology for removing, replacing and repairing the shift lever is different.
Installing/removing the VAZ 2106 gearbox
To repair or replace the gearbox, it must be removed.
Today we will tell you how to remove or install the gearbox on a VAZ 2106 yourself. Installation and removal of the VAZ 2106 gearbox
1. Work must be carried out on an inspection ditch or lift.
2. Disconnect the negative cable from the battery.
3. Disconnect the cardan drive from the gearbox and remove it from the car.
4. Remove the exhaust pipe from the mufflers.
5. Disconnect the terminals from the reverse light switch.
6. In the salon, carefully remove the decorative cover from the ring.
7. Use a screwdriver to pry off the rings holding the mat.
8. Moving and lifting the mat, unscrew the four screws securing the cover.
9. Take out the cover with the foam rubber seal from under the mat and lift them up.
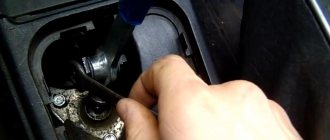
10. Pressing down on the gear shift knob, use a thin screwdriver to remove the locking sleeve from the groove of the lever rod...
11. ...and remove the handle.
12. By striking the mounting blade inserted between the engine and the engine compartment partition, we bend the eye washer of the upper clutch housing mounting bolt.
13. Using a 19mm wrench, unscrew the bolt.
14. It is more convenient to use a special curved wrench with a head for this purpose.
15. Using a wrench or a 13mm socket with a cardan joint, unscrew the two upper bolts securing the starter to the clutch housing.
16. Using a 13mm socket with an extension, unscrew the lower starter mounting bolt.
17. Using a 10mm wrench, unscrew the four bolts securing the clutch housing cover.
18. Using your hand or sliding pliers, unscrew the nut securing the flexible speedometer drive shaft to the drive housing.
19. Install a stop under the lower part of the gearbox housing. Using a 19mm socket with a universal joint on the wrench extension, unscrew the remaining three bolts securing the clutch housing.
20. Using a 13mm wrench, unscrew the two nuts securing the cross member.
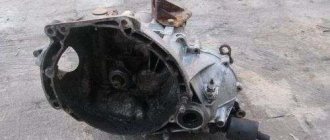
21. Remove the gearbox by sliding it back.
Installing/removing the VAZ 2106 gearbox
To repair or replace the gearbox, it must be removed. Today we will tell you how to remove or install the gearbox on a VAZ 2106 yourself.
Installation and removal of the VAZ 2106 gearbox
1. Work must be carried out on an inspection ditch or lift.
2. Disconnect the negative cable from the battery.
3. Disconnect the cardan drive from the gearbox and remove it from the car.
4. Remove the exhaust pipe from the mufflers.
5. Disconnect the terminals from the reverse light switch.
6. In the salon, carefully remove the decorative cover from the ring.
7. Use a screwdriver to pry off the rings holding the mat.
8. Moving and lifting the mat, unscrew the four screws securing the cover.
9. Take out the cover with the foam rubber seal from under the mat and lift them up.
10. Pressing down on the gear shift knob, use a thin screwdriver to remove the locking sleeve from the groove of the lever rod...
11. ...and remove the handle.
12. By striking the mounting blade inserted between the engine and the engine compartment partition, we bend the eye washer of the upper clutch housing mounting bolt.
13. Using a 19mm wrench, unscrew the bolt.
14. It is more convenient to use a special curved wrench with a head for this purpose.
15. Using a wrench or a 13mm socket with a cardan joint, unscrew the two upper bolts securing the starter to the clutch housing.
16. Using a 13mm socket with an extension, unscrew the lower starter mounting bolt.
17. Using a 10mm wrench, unscrew the four bolts securing the clutch housing cover.
18. Using your hand or sliding pliers, unscrew the nut securing the flexible speedometer drive shaft to the drive housing.
19. Install a stop under the lower part of the gearbox housing. Using a 19mm socket with a universal joint on the wrench extension, unscrew the remaining three bolts securing the clutch housing.
Self-replacement of the VAZ 2107 gearshift lever
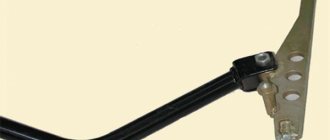
The VAZ 2107 gear shift lever is used to enable the driver to control the car, which is possible using a gearbox. The gearbox, in turn, is a mechanism inside which there are gears of different diameters. This device is the link between the engine and the drive wheels of the car. For rear-wheel drive cars, which is the VAZ 2107, the manual transmission is typically located under the lever itself. To connect the lever to the gearbox, no additional link is required, as is typical for front-wheel drive car models. The VAZ 2107 rocker is presented in the form of a small half-bent tube onto which the gearshift lever itself is placed. In the material we will pay attention to the question of how to replace it, as well as the features of dismantling.
Increased noise
After disassembly, you need to troubleshoot the box parts. If severe wear of the gear teeth is noticed, they must be replaced. It is better to replace gears one by one. So as not to confuse the gears.
Many gears have retaining rings. Synchronizers also undergo the same troubleshooting. If they notice even slight wear or damage, they are replaced.
Particular attention should be paid to the condition of the bearings. They should not have any play or the appearance of deep treadmills of balls.
Although, even if the bearing looks good on the outside, it is better to replace it. This eliminates the possibility of noise occurring after the box is assembled.
Spontaneous speed shutdown
If the repair of the VAZ-2107 gearbox is associated with the spontaneous shutdown of any gear, then in this case the sliders and clamps need close attention.
It is necessary to inspect the condition of the fastener seats. If the edges of the seats are heavily worn, then the sliders need to be replaced.
Another method of restoring seats is used by some craftsmen. To do this, a layer of metal is applied to the seats using a welding machine. And then, using a grinder, new seats are cut out in the applied metal.
The method is quite simple, but not very effective, since the applied metal is softer in structure, which means it will wear out much faster.
It is advisable to replace the clamps during repairs, as well as the springs that press them to the slides.
This is done because the springs are constantly pressed and shrink over time, which is why they do not create the required force on the clamps.
Device location and characteristics
The gearshift lever of the VAZ 2107 is located directly in the car's interior. It is used to be able to change gears while moving. The gear lever fails only in rare cases, and the reason for this is negligence towards the product. If the product fails, it must be replaced. But before replacing, it is necessary to remove the product in question. We’ll find out in more detail how to remove it, as well as replace it on the “seven”.
On the “seven” the gear shift knob has a common problem - rattling and chattering. If you fix such a malfunction using improvised means, then replacing the device will not be necessary. Before you begin replacing the device, you will need to find out the exact causes of the malfunction. After all, sometimes not only the part in question can “fail,” but also the gearbox or clutch.
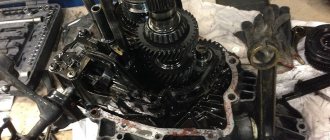
How to remove the input shaft from the box
The gearbox must be installed on a flat surface so that nothing prevents its disassembly
Before starting work, it is important to clean the housing from dirt and liquid spills so that debris does not accidentally get inside the housing.
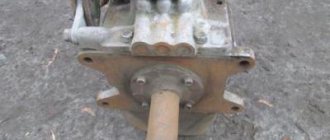
The box looks like an elongated bell
To work you will need standard tools:
- set of wrenches;
- flat screwdriver;
- a thick bolt or a screwdriver with a powerful blade.
You need to pull the input shaft out of the gearbox strictly according to the regulations:
- Pull the oil level indicator out of the box body.
- Remove the bolt with flat washer and two nuts that hold the clutch cable bracket. Remove the cable mechanism from the gearbox.
- Unscrew the four bolts from the box cover and remove the cover.
- Unscrew the bolt with spring washer that secures one part of the input shaft.
- Before you start working with the input shaft, you will need to prevent the shafts from spinning among themselves. To do this, they need to be fixed: for example, insert a thick screwdriver between the teeth.
- Unlock the input shaft securing nut. It is very firmly planted and can take a long time to remove.
- After this, carefully pull the shaft out of the gearbox housing.
Photo gallery: main stages of work
Even after unscrewing the bolts, the cover will fit tightly to the body, so effort will be required to remove it
The most difficult stage of the work is when you have to unscrew this nut
The input shaft must be pulled out of the box very carefully so as not to damage both the shaft itself and adjacent elements
For further work, you will need to wipe all the mechanisms in order to be able to carry out troubleshooting.
Rejecting the input shaft
When the car and gearbox are operating normally, the driver, as a rule, does not have any suspicions about the exhaustion of the shaft and its elements. However, if the car starts to “strange things”, for example, the gear does not work or the speed starts to switch on in an arbitrary order, then you need to make sure that the box and, in particular, the input shaft are working.
This gear can no longer be used and needs to be replaced.The correct culling procedure is carried out according to the following scheme:
- Visual inspection of the input shaft for abrasions and deformations.
- General condition of the retaining rings and locking ring springs.
- Wear of splines.
- Scuffs and burrs on gears.
That is, a routine inspection of the mechanism allows you to determine the degree of wear of each element and, if necessary, replace them
It is important that the gears and the splined part of the input shaft do not have even the slightest damage, otherwise you will have to install new parts
Transfer of the gearshift lever. 4-speed gearbox on a classic
Now it’s time for a new blog, in which I want to tell you how to move the lever on a four-speed gearbox
gearbox
This is done for convenience and a short stroke of the lever. In my case, the move remained the same, maybe a little less. But the convenience has increased significantly =)
This can be done either using a bolted connection or by welding. You will learn everything during the story =)
You need to buy the following:
1. Gear shift mechanism 2108 (I got it at a discount for 300 rubles) 2. Driveshaft 2108 (170 rubles) 3. Bolt for driveshaft (8 rubles) 4. M6 bolts 5 pieces + washers + nuts (30 rubles)
You can see that this is not a costly business! Also, one of the positive aspects is that you don’t have to remove the box, everything is done from the interior.
So, we unscrew the plastic thing, remove the lever (by picking out the plastic circle from it), and unscrew the slide. A spring will prevent us from removing it, returning the lever back
At first I grabbed it and secured it like this:
But this turned out to be a little pointless, since during subsequent adjustments I would have to remove and pull out the slide often, so I simply pulled out this spring. After you have taken out the drawstring, you need to modify it as follows:
This is done so that the reverse gear is engaged without recessing; it will be automatically retracted when the lever is shifted to the right. The picture shows an ideal cut, I didn’t get it very well, but everything works just the same
We also file down the lever and make an incision (2-3 millimeters) with a grinder as shown in the photo
It is done in the place where the bolt of the cardan will rest against the lever so that it does not jump off (drawn schematically, look at the place where to cut). That's it with the slide) Now a little work with the cardan itself. Since it does not bend fully at 90 degrees, I had to make it bend
Then I removed the backlash by hammering in thin metal plates
The operations with the cardan are completed) Then we position the gearshift lever as conveniently as possible, for me this place turned out to be like this:
I screwed everything back on from inside the car, so I didn’t have to crawl under the car. We measure how many tubes need to be cut and cut them. At the beginning, I decided not to resort to welding, to do everything with bolts. I found a suitable tube. In stores there is also a suitable tube called something like a traction finger. This one will fit better, although it will need to be sharpened in length, since it is a little thicker than necessary. If you decide to do it with bolts, then you need to drill everything very carefully so that there are no backlashes later and use a non-hollow tube as a connector! And be sure to drill a hole and insert a bolt where the tube connects to the cardan, no clamp will hold it. Also, the “U” shaped end, which is attached to the new lever, is not quite “U” shaped, it will also need to be slightly bent, in reality you will see and understand)
As a result, after driving, the connection became loose, since, apparently, the connecting tube was hollow. If it were solid and the holes were more precise, I think everything would work. So I brewed it. It turned out both with bolts and welding =) Double protection)
After driving a little, the cardan will most likely start to creak a little and everything that can creak)) So I removed this rubber band + lubricated the cardan + where the lever rotates. Now nothing creaks. Finally, I decided to glue it with vibration and heat and noise insulation for pipes, so that I could hear less switching sounds:
The interior is still a mess, but by the season I’ll make everything better than it was!)
I’ll probably answer the frequently asked questions 1. Why the cardan 2108? Why not from viburnum? And not from the classic steering shaft? The driveshaft from the viburnum bends only 130 degrees instead of the required 90; there is no way to modify it so that it bends 90. I couldn't find the steering shaft driveshaft anywhere. So the best option turned out to be 2108, although it required so many modifications. 2.Is it reliable? At first I didn’t make a slot on the rocker arm for the cardan shaft bolt and the following happened:
Because it was overstretched. Now the new cardan is holding up and working perfectly and is not losing its position yet! 3.Will the lever dangle without a return spring? Actually, I wanted to leave it, I thought it would be inconvenient. But as it turned out, everything works fine without it, the lever does not dangle due to the resistance of the structure, so to speak. 4. We cut off the limiter so that the rear gear is engaged without sinking, will we accidentally engage the reverse gear while driving? The answer is no. Firstly, 4th gear is much closer than reverse gear is engaged. Secondly, try to turn on the rear at least while moving 10 km/h, you will get nothing but terrible sounds, so it’s better not to try) 5. What needs to be done to have a short stroke? Just attach the “P” pattern higher. The higher you fix it, the shorter the gears will be, but it will take more effort to engage.
6.If I have a 5-mortar. What will change? Everything is much simpler here, you go to the store, buy a Chevy Niva rocker link, unscrew the original one and screw on the Chevy Niva one. The operations with the backstage described here will not concern you)
Thanks to such sites as vaz2101.ru, lada.ss and lada-vfts.ru for a lot of useful information!
And of course to the readers for their support and comments)
Added 11/11/2012! I converted the system to a driveshaft from a Subaru Impreza, and it also turned out to be short due to the upward displacement!
Just the first option, just moving the lever, the initial one:
How to change a torn or stretched parking brake cable on a VAZ classic
All work must be done in the same way as during adjustment, placing the car above the inspection ditch, or lifting it using a lift. There are also some pitfalls. The brake drums, which will have to be removed, are tightly “stuck” to the axle shaft flanges. Beating the drums themselves is more expensive, they are fragile and break easily. Therefore, we will do this: - by hanging the wheels, we will reliably strengthen the car from rolling in a way suitable for your conditions; — fourth gear, release the clutch, “accelerate” and sharply “hit” the brakes; — we repeat this “procedure” until the inertia tears the drums away from the flange; — we clean off the rust from the hub flange with a file - it interferes with pulling out the drum; — rocking from side to side, using wooden drifts, remove the drum. A protrusion on its inner side, formed over years of wear, can also prevent successful removal of the drum. Now, inspect what is inside - the pads and cylinders. Severe wear on the linings is a reason to replace the pads. The cylinders should not leak brake fluid, the boots should be intact without breaks. The cable sheath is bolted to the brake shield. You need to unscrew them very carefully, generously watering them with “Vedashka”, otherwise you will twist the “head” and will have to drill it out. Have you turned away? Wonderful! All that remains is to pull out the old cable and lay a new one in its place. We put everything else back together, and then, having installed the drums and wheels in place, we adjust the parking brake, as described above. Everything is ready, we have successfully replaced the parking brake cable of a VAZ classic. Video on this topic
Read, it might come in handy: Why do brakes squeak And one more thing
Gearbox VAZ 2106
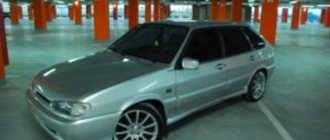
The Soviet Union is not just a state, but an entire era that lasted more than 70 years. The state sought to become one of the leaders on the world stage, so it was extremely important that the automotive industry be no worse than in the countries of the Western world. One of the brightest representatives of this race in the automotive industry was the legendary VAZ 2106. Several generations of our citizens have grown up who consider the six to be the best domestic car. And this is not without common sense, because the engineers of the automobile plant in Togliatti created a simple and therefore reliable car.
The gearbox of the VAZ 2106 car was also distinguished by a high degree of reliability and quality. However, without high-quality gear oil, the operation of the gearbox would not be long. The six gearbox is the main element of the transmission, with the help of which torque is transmitted from the power unit through the clutch to the drive of the drive wheels, regulating the speed of their rotation.
Tools for repairs
If all silent blocks must be replaced, you will need a spring remover. You will also need a puller for silent blocks if you do not plan to change the levers, but decide to change only the rubber-metal bushings. And a puller for ball joints will be needed if the levers are being replaced, but the ball joints themselves remain.
Also stock up on a can of penetrating lubricant. It is advisable to treat all threaded connections with it one day before the start of repairs. This will make your work easier; all the nuts and bolts will be easy to unscrew. You will also need a jack, a set of socket, box and open-end wrenches. And don’t forget about the washers that are placed under the lower arm; carefully remember how they were laid. With their help, wheel camber is adjusted.
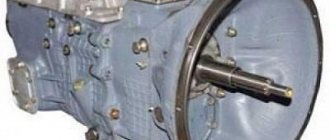
Gearbox VAZ 2106 and their design
This car was equipped with two types of gearboxes, one of them was a manual 4-speed transmission. The second is an improved version of the previous one, designed for 5 speeds, also of a mechanical type. At the same time, the five-speed gearbox, due to its modernization, was more expensive and more demanding to maintain. In addition, both of these gearboxes (5-speed and 4-speed) can be interchangeable.
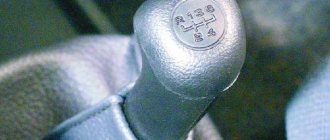
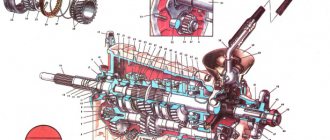
The VAZ 2106 gear shift diagram is shown in the photo.
The device of any of them is a simple structure consisting of several shafts (primary, secondary, intermediate), a crankcase and a gear shift mechanism with synchronizers. On the input shaft there is a firmly seated gear, which is in constant mesh with all other gears. The shaft rotates due to two bearings located at the front and rear; the front one is also located in the crankshaft socket at the end. The rear one is located inside the crankcase and is sealed with an oil seal. The presence of the latter is explained by the fact that there is transmission oil in the crankcase.
The secondary shaft rotates due to three bearings. The front needle bearing is firmly seated in the input shaft socket, the ball bearing in the center is located in the crankcase seat, and the rear bearing is pressed into the socket on the rear wall. It also has a seal element that prevents possible oil leakage from the gearbox housing.
The intermediate shaft is a shaft with a gear block that rotates on two bearings. There is a ball bearing at the front and a cylindrical roller bearing at the rear. On the side there is a gear with reverse motion. As for synchronizers, they are structurally the same and consist of a hub, springs and couplings, equipped with locking rings.
Largely thanks to the simple, reliable and high-quality gearbox, the VAZ 2106 can boast of good dynamics and speed characteristics. All gears, with the exception of those at reverse speed, have an oblique tooth and are in constant mesh. Such a design, with its small size, allows more torque to be transmitted to the shafts, especially since the gear ratios of the VAZ 2106 gearbox are selected correctly. In reverse, gears with straight teeth are installed, so the car cannot gain high speed when the reverse gear is engaged, since such gears cannot transmit large torque.
VAZ 2106 gearbox device
Speed shifting occurs as a result of the operation of clutches with synchronizers. The shift lever itself and the entire mechanism are forks with rods. After switching, the speed is fixed by balls with springs that hold the rod. The engineers also provided protection against the possibility of turning on two speeds at once, using special blockers or, in common parlance, “crackers” for this. In order to change the oil, the gearbox has special holes with plugs with threads and rubber seals.
Please note: the performance characteristics of metal parts are selected taking into account the use of high-quality gear oil.
Main faults on the VAZ 2106 gearbox and how to fix them
Malfunctions of the “six” gearbox have more than one cause. Accordingly, the methods for eliminating them will vary.
Cause of malfunction
Presence of noise in the gearbox (may disappear if you depress the clutch pedal)
There is no noise, but the speeds are difficult to switch on
Between third and fourth gear there is no way to lock the gear lever in neutral
Spontaneous gear shutdown
There is a noise, crackling or squealing sound when shifting gears
Oil leak
It is worth considering that some of the faults are related to other components and assemblies of the car.
How to replace a gearbox on a VAZ 2106
Before proceeding with dismantling the gearbox and further disassembly, you need to make sure that the cause of the malfunction is in the gearbox itself and is not related to other elements. For example, the following options are possible.
- The oil in the box is below the minimum level or is completely absent. As a rule, in such a situation, the gears will be engaged with a strong crunch and great difficulty.
- The fastenings of the box have become loose and it is hanging loose. Basically, a weakened gearbox is noticeable on the move when driving over bumps.
- Clutch malfunctions. The clutch drive has failed; in this case, if you press the clutch pedal all the way, the gears will also be engaged with difficulty and with a strong crunch.
If you are absolutely sure that the cause of the malfunction lies directly in the gearbox, then you can proceed to the process of removing it.
Dismantling the gearbox
The car must be placed above the inspection hole (unless, of course, it is possible to use a lift). Wheel chocks must be placed under the rear wheels and the parking brake lever must be lowered. The gear shift lever must be removed.
Removing the lever is not enough, since there are still three bushings left on the rocker (the main gear shift lever) that need to be unscrewed.
To do this, use two screwdrivers to carefully separate the petals of the upper bushing. After this it must be removed. Then, with a little effort, you can remove bushings A and B from the lever.
Unscrew the two screws securing the cover to the floor and remove it. Using a screwdriver, loosen the two screws holding the handbrake lever cover and remove it. Remove the screws under the front seats that secure the front floor mats to the floor.
Move the front seats all the way back and bend the edges of the floor mats.
Unscrew the nuts on the front seats that secure the slides to the brackets.
Unscrew the four screws securing the trim to the threshold and remove it (the trims are removed from both sides).
Lift the floor mat and push it forward as far as possible, with the mat ring (A) threaded through the drawstring (B).
Unscrew the screws that secure the plastic cover of the rocker and remove it.
Remove the hose that supplies warm air to the air filter housing. After disconnecting the warm air supply hose, you need to, armed with a wrench, unscrew all the bolts that secure the starter and move it forward. Disconnect the crankcase drain plug and drain the oil into any suitable container.
Remove the exhaust system, starting with the exhaust manifold. You need to disconnect the propeller shaft coupling from the gearbox flange (after removing the muffler). Disconnect the wire block (see photo) from the reverse signal switch (located directly on the gearbox on its right side).
Using a handy tool (pliers or just your hands), loosen the speedometer nut and disconnect the end of the cable from the gearbox.
Remove the clutch slave cylinder (there is no need to remove it completely, just remove it from the bracket; it is not necessary to remove the cylinder hose). Remove the four bolts that secure the clutch housing cover.
Using any suitable wooden block, you need to support the bracket, placing one side of the block on the crossbar and the other on the ground.
Unscrew the nuts that secure the cross member to the body. Remove the block and bring together the rear part of the gearbox. Using the same block, you need to support the front part of the engine, always in the place indicated in the photo.
Remove the top bolts that secure the clutch housing to the engine. An assistant must support the rear of the gearbox, and at this time you need to unscrew the lower bolts securing the gearbox housing to the engine. After all the manipulations done, together with an assistant, you need to move the gearbox back in the direction of travel until the input shaft disengages from the engine flywheel. In fact, there is nothing complicated about replacing this unit; no special knowledge or skills are required.
Causes and signs of lever failure
A common cause of failure of an automatic transmission and its lever part is non-compliance with operating rules. This problem often arises among drivers who have “switched” from a manual to an automatic transmission, since the use of these two systems has significant differences.
Replacing the automatic transmission lever or consumables is required in several cases:
- vibrations appear;
- the lever begins to scroll;
- the handle wears out;
- the sensor displays information incorrectly.
Malfunctions provoke:
- overheating of the gearbox due to aggressive driving;
- incorrect mode switching, especially in winter;
- engaging reverse until the vehicle comes to a complete stop; switching to Park mode until a complete stop;
- when the car gets into water, the selector sensor is flooded, which leads to failures in the readings and incorrect operation of the lever and the system as a whole;
- natural operational wear of the lever elements or wear resulting from the errors described above.
Malfunctions, as a rule, are eliminated by repairing or completely replacing the entire system, but sometimes you can get by with installing a new lever or consumables.
All work is done in reverse order. Depending on the model, some nuances may vary. For example, Passat cars often have problems getting the lever into place. The reason lies in the fact that the lock button, which needs to be fixed, returns to its original position. You have to unclip the latch from inside the handle to put it in place.
Replacing an automatic transmission lever by an unqualified technician is fraught with incorrect installation, which leads to incorrect operation of the system and failure of the sensor readings. Contacting a specialized service will eliminate such consequences and eliminate the risk of repeated repairs.
On cars that are called classics today, a suspension system of two arms is used - lower and upper. They are connected to the body using bolts and hinges made of rubber and metal. Despite the fact that the lever is an all-metal product, sometimes it needs to be replaced. There are times when they crack or burst. But more often, of course, the levers are removed to replace the silent blocks.