Types of malfunctions and their causes
In order to correctly determine the malfunction and its cause, it is necessary not only to know the principle of operation of the mechanism, but to notice all the symptoms of something wrong.
“Flying” gear – the gear block associated with this very gear has worn out. Aged locks on the clutch and gear also manifest themselves in a similar way.
Rapid wear of some elements occurs due to violations in the operation of the vehicle, which are clearly stated in the instructions of the car manufacturer. Changing gears at the wrong speed limit has a detrimental effect on many vehicle systems, including the gearbox. Experts recommend doing this around 3000-3500 rpm. Instant speed changes without observing the required time interval of 2 seconds, especially with a broken or incorrectly configured clutch, also cause very rapid wear of gearbox elements. This results in an excessive load on the synchronizers, which affects the gear block and leads to their failure.
During repairs, an incompetent specialist or a careless owner often makes the same mistake - the engagement clutch is not replaced.
It is quite easy to determine whether the clutch in the gearbox was replaced after repairs in the cabin or not. The element that has not been replaced begins to produce a fairly distinct “crunch” when shifting a gear that is not working before repair. If the state of the mechanism is very neglected, then a minimal overhaul will no longer save the situation.
Each gearbox has an acceptable noise limit. If the sounds produced by the mechanism exceed the usual limit, then something is wrong. Based on this, we can say with confidence that not a single gearbox in a car operates absolutely silently.
GOST level of external noise for a standard gearbox is a maximum of 96 dB, and internal noise is 78 dB.
Unstable engine speed can also cause noise in the transmission. Therefore, if you doubt the serviceability of the device, it is better to send the car for diagnostics.
Hard shifts, idle shifting, slipping gears - all this can be treated with a gearbox overhaul. The reason, like the malfunction itself, can be different, depending on many factors, because a car is a complex mechanism with a mass of interconnected components and systems.
Existing checkpoint rows
Gearbox rows VAZ 2108: 1 – 3.42, 2 – 2.11, 3 – 1.35, 4 – 0.96, 5 – 0.78, 6 – 0.69
They are also called “commercial” because for many years they were considered quite famous, as well as being sold in series. In general, this is true at the moment. The first speed is extended, the second and fourth are shortened. Any changes are minimal (five percent each), and this is enough to correct the shortcomings of the standard series. In most cases it is installed with GP 4.1. The good news is that it is within the normal range. Gives improved overclocking.
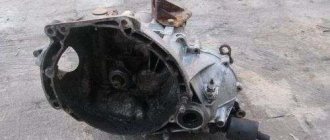
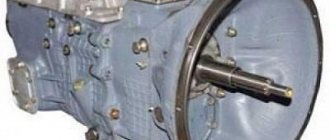
Dismantling the box
Sequential gearbox for VAZ 2108. Gearbox
If you can hear an incomprehensible noise in the gearbox, the car becomes difficult to change gears or does not want to move at all, you may need to remove this mechanism. Do-it-yourself repair of a VAZ 2109 vehicle can be done in any garage, having all the necessary tools at hand. The VAZ 2109 has a rather complicated gearbox removal, so you should prepare for this procedure in advance.
The box is located deep enough, so it is almost impossible to remove it alone. In this case, you may need special crowbars, the help of other people and some tools in order to properly disconnect it. In general, you can seek help from a service center, where the service will be carried out using special equipment. But, you can repair it yourself by removing it carefully without damaging other important parts.
Improving the gearbox by selecting gear ratios
Many techniques used in transmission tuning have been tested in motor sports. For any car, especially a sports one, the gearbox is an important element in realizing the dynamic qualities of the engine. Correctly selected gear ratios of the VAZ 2108 gearbox will make a car with a rather weak power unit fast.
Cars that require serious preparation use cam gearboxes. They are determined by many advantages - they can withstand quite large loads (using the shape of the tooth and the way the gear-cam clutch engages). They need less time to switch gears (due to incompletely squeezing the clutch or not squeezing it at all), especially since they do not destroy synchronizers (which simply do not exist).
But still, cam gearboxes are practically unsuitable for regular highway driving, since they produce a lot of noise (thanks to the use of spur gear pairs), they have “hard gear shifting” and have a fairly short resource. In addition, they are much more expensive than synchronized ones and must be constantly professionally maintained.
Synchronized gearboxes differ from conventional gearboxes only in gear ratios. Certain situations (VAZ eighth model) allow expansion to sixth gear. Good operation of the gearbox is achieved by effective selection of gear ratios of the main gearbox pair, the input shaft and the driven gears of the secondary shaft. The choice of gear ratios depends on the power and instantaneous capabilities of the engine, wheel diameter, and most importantly, on the desires of the motorist.
The gear ratio of the VAZ 2108 gearbox means the ratio of the number of teeth on the driven gear to the number of teeth on the drive gear. If it is increased, the transmission will become “more powerful”, also “shorter”, in a different way, the engine will turn the required number of revolutions. The car picks up speed quickly too, you just need to change gears often. This moment will only be reflected in a certain reduction in the maximum speed of the applied transmission.
Using an example, let’s take driving a VAZ eighth model with a 1.3 liter engine. with the main pair 4.5. It feels as if something very powerful was placed in the engine compartment, definitely not from a VAZ. Although the driver often needs to shift the gearshift knob of the VAZ 2108, the car is the first during any action, even at a traffic light. In sports cars, the gears used are the most “extreme” ones - 4.7, and on motocross cars - just 5.1.
What is a box and what is it for?
Window tinting for VAZ 21099-2109-2108
Let's figure out what it is and what it is intended for:
- A gearbox is needed to convert (change) the rotating (torque) moment that is transmitted to the drive wheels
- And also change the direction of torsion (rotation) of the wheels (providing reverse motion of the car)
- In addition, the gearbox makes it possible to disconnect the driveshaft from the crankshaft (and drive wheels)
- When the engine itself is idling (during starting, warming up and coasting)
- Manual transmission - as in our case (has an abbreviated name - manual transmission, as well as a common name - mechanics)
- The mechanics is a kind of multi-stage cylindrical gearbox, which provides for manual gear shifting
- According to the number of steps, four-speed, five-speed, six, seven and more speed gearboxes are distinguished (reverse gear is not taken into account)
- The main advantages (advantages) of a manual transmission are the simplicity of its design, operational reliability, the ability to be controlled manually in all driving modes and an affordable price.
- It is thanks to these qualities that the manual transmission is the most common type among gearboxes today.
Construction design and further repair of the gearbox
Repairing a VAZ 2108 gearbox is a very complex and time-consuming process, especially if the car has sufficient mileage. Despite multiple service stations, not all specialists will be able to make repairs. There can be many reasons for this. For example, there is little experience, as well as a lack of spare parts in stock. The gearbox is considered a complex element of the car. It is capable of changing the traction force of the driving wheels of a car due to the engagement of gears with different numbers of teeth.
In addition, it provides reverse gear and long-term disconnection of the engine (together with the clutch) from other elements of the transmission, while the car is stationary or moving forward by inertia. The engagement of gears with different numbers of teeth is realized by their movement. The drive shaft is connected to the clutch disc, while the driven shaft is connected to other transmission elements.
The driven shaft, in relation to the main one, is capable of rotating with a different number of revolutions. The transition shaft with a fixed set of gears through them is in constant engagement with the main shaft.
Repair
Repair of the fuel pump on carburetor VAZ 2108, VAZ 2109, VAZ 21099
To work, you will need to remove the transmission from the car. Install it vertically. Repair work is carried out in the following order:
First, unscrew the 6 nuts securing the rear box cover; The clutch attachment point is dismantled by unscrewing the screw securing it; Lightly hitting with a hammer, remove the cover from its place; Engage 3 or 4 gears; Unscrew the screw securing the 5th gear synchronizer. After engaging 5th gear, make sure that not a single shaft rotates; Next, you should unlock and unscrew the nuts of the primary and secondary shafts; Use two screwdrivers to pry the synchronizer into 5th gear. It is dismantled together with the plug. When removing the synchronizer, make sure that the spring balls have not jumped out of their sockets; Using a screwdriver, pry off the 5th gear driven gear and remove it from the shaft; The ring on the bearing stop is removed; The needle bearing is removed; The 5th gear drive gear is dismantled; Unscrew the 4 screws that secure the bearing plates. It is more convenient to do this with impact screwdrivers; The ring (stopper) of the bearing (needle) is removed; Next, remove the ring (stopper) of the bearing on the input shaft by prying it with the tip of a screwdriver; do the same on the other shaft; Unscrew the plug from the retainer, remove the ball and spring. The procedure is repeated with the remaining two fixatives; Remove the engine support mount; Unscrew the stopper plug in reverse and remove the ball; Remove the clutch housing. Unscrew the screw and 12 nuts that secure it
Carefully separate the crankcase and box; Remove the gearbox housing; The screw securing the first and second gear forks is unscrewed; Remove the stem and plug together; We unscrew the screw that secures the 3rd and 4th gear forks. Remove the rod head (disengage with the shift lever)
The rod is removed from the fork; The gear rod 5 rotates, releasing its head from the lever. Remove the rod; The fork, which includes reverse gear, is dismantled; The reverse gear is removed. This is done together with the axis; Remove both shafts. Be sure to shake them slightly.
- The driven gear of the main transmission (differential together) is pulled out;
- Unscrew 3 mounting screws from the gear shift mechanism. Afterwards you can dismantle it;
- The seal is removed, if you remove it carefully and do not damage it, you can put it in place during assembly;
- Press out the bearing in front of the secondary shaft. To do this, it is possible to use a special drift or a tube of suitable diameter;
- If the input shaft bearing needs to be replaced, the oil seal must be removed;
- Only remove bearings for replacement. When changing the bearing on the input shaft, you will additionally have to buy a new oil seal;
- The bearing is pressed into the crankcase;
- We remove the magnet located in the crankcase;
- We unscrew the nut securing the speedometer, pry it up with the tip of a screwdriver, and remove it from the box;
- Unscrew the reverse light switch from the gearbox;
- The cover of the hinge that switches the lever into gear is removed. To do this, you need to move it relative to the flange and carefully remove it;
- The screw securing the hinge is dismantled, after which it can be removed from the rod;
- Unscrew the screw securing the lever to the gear shift rod. Remove the rod with the lever from the crankcase;
- Inspect the rod; if there are oil leaks, the oil seal should be replaced;
- Carefully examine the crankcases; no damage is allowed. All mating surfaces must be free of dents and other defects. When the damage is small, it is worth treating it with sandpaper. In other cases, the part is replaced. Assembly is carried out in reverse order. When assembling, check the condition of all parts and replace them if necessary. All rubbing surfaces are lubricated with oil. Be sure to apply sealant under the gaskets, this will avoid problems with transmission fluid leakage.
Additionally
. The 5-speed gearbox repair process described here can also be applied to a four-speed unit. But, if your agenda is to repair a VAZ 2109 and 21099 gearbox with your own hands, which has 4 gears, you will have to stock up on an old driven disk to which a steel pipe is welded. This will allow the shafts to jam freely and do all the necessary work. This is the only difference in the repair of such a gearbox.
Transmission diagnostics
Noises, howling of gears in the box, while the gearbox lever is in the neutral position. Increased noise during gearbox operation can be caused by the following reasons:
- The oil level is low or the oil needs to be changed. Drain the old one and fill it with new oil of the required brand. We check the old oil from the box for the presence of metal particles or water;
- The gearbox input shaft bearings are worn out;
- There are defects in the gear teeth;
- An axial displacement of one or more shafts has occurred;
- Noise may also occur when the torque of the engine shaft changes. Check by changing the idle speed and see if the noise disappears or not.
We eliminate malfunctions by replacing (or adding oil) or replacing worn parts. Difficulty shifting - may mean:
- Incomplete disengagement when pressing the clutch pedal;
- The switching mechanism is broken;
- A hinge defect has occurred;
- The screws securing the shift rod hinge or lever are loose;
- The shift lever is bent;
- The drive rod for controlling the switching mechanism itself or the reaction rods are deformed;
- Improper adjustment of the shift drive.
Here it is necessary to adjust or replace damaged or faulty gearbox parts. Gears 1st - 2nd, 3rd - 4th or 5th - reverse (switched using one fork) do not shift. The bushings of the rod lock for these gears have shifted in the gearbox housing. Spontaneous shutdown (crunching noise is heard when shifting ) occurs for the following reasons:
- Damage and wear of gear teeth and couplings;
- Increased vibration of the unit on the mounting supports;
- Incomplete activation due to incorrect drive adjustment;
- Switching off 3-4-5 gears occurs spontaneously when the secondary shaft nut is loosened;
- The springs of the rod clamps are broken;
- Gear rods are worn out;
- Forks are deformed and worn.
It is necessary to replace all damaged or worn parts and adjust the drive itself. Noises or crunching sounds heard when turning on occur for the following reasons:
- Incomplete engagement or clutch failure
- Synchronizer locking ring worn
- A crunch heard when shifting into reverse means the clutch is broken.
Low gearbox oil level occurs due to oil leakage:
- Worn input shaft oil seal;
- Damage to drive seals (so-called CV joints);
- Damaged shift rod seal;
- Violation of the shaft seal or gasket of the speedometer drive;
- If the fastening is loosened or the gasket or sealant at the joints of the cover fastening to the body is damaged;
- The thread of the drain plug is damaged;
- Leakage through the reverse sensor;
- cracks in the 5th gear housing or cover.
We eliminate the cause by replacing damaged or worn parts.
A knocking noise occurs when moving from a standstill or when switching:
- The pinion axles in the differential are worn out
We fix it by replacing worn or damaged parts
Noise that occurs in any gear when accelerating or braking the engine:
- Main pair malfunction
Noise increasing in high gear:
- Malfunction of the upper bearing of the secondary shaft
If the noise increases in lower gears, this means:
- Malfunction of the lower bearing of the secondary shaft
Jerks occur when the vehicle is moving in reverse:
- 2nd gear synchronizer malfunction
Warning: When one of the listed parts was replaced during transmission repair: clutch or gearbox housing, differential housing or differential bearings, it is necessary to select differential bearing adjusting rings.
For your information: This section describes the repair of a five-speed gearbox (which is a structural transformation of a four-speed gearbox) in a more complex device, however, the most common.
Device
The VAZ 2108 gearbox consists of many parts and components. All of them are closely interconnected, and a malfunction of any of them can lead to a complete failure of the entire mechanism. The gearbox consists of the following spare parts:
- Clutch pedal cable bracket. It is responsible for the working stroke of the pedal itself, and the separation of the drive and driven disks. During normal operation of the bracket, the pedal should be pressed firmly and return to its original position when released. If the part is faulty, then the clutch pedal will fail without separating the discs;
- Oil level indicator in the oil pan (dipstick). Serves to determine the amount of oil in the engine. There are two marks on the dipstick: min (minimum level) and max (maximum level). Make sure that the oil is between these marks. At an increased level, it can push through the oil seals, and the engine will leak, and at a low level, the pressure will be insufficient to lubricate the upper part of the cylinder block, which will lead to a significant increase in wear;
- Carter. Installed at the very bottom of the engine. During operation, all used oil flows into it. Once the crankcase is full, oil is returned to the system by the oil pump;
- Clutch on/off fork;
- Primary shaft. It is connected directly to the engine and transmits its speed to the secondary shaft, which is responsible for rotating the wheels. On the primary (drive) shaft, the gears are fixedly fixed;
- Clutch engagement bearing;
- Shaft seal, responsible for driving the wheels;
- Protective cover for gearshift rod;
- Rear, right and left gearbox support;
- Drain plug;
- Plugs fixing the transmission;
- Secondary shaft;
- Differential. Distributes the torque of the drive shaft between the driven ones;
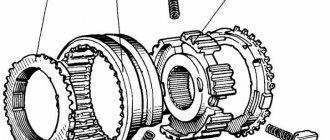
- Synchronizers. They equalize the shaft rotation speed for smooth gear shifting.
All gearbox mechanisms operate in a state of friction. Therefore, to reduce their wear and lower temperatures, special semi-synthetic transmission oil is used. It should be replaced at least once every 75,000 kilometers.
VAZ 2108 – gearbox: arrangement of components, its repair and improvement
The domestic car is a car with front-wheel drive, and the engine is placed transversely and is used for driving along the highways. The metal body is made in accordance with the hatchback type, which has 3 doors. The rear door is designed for loading and unloading luggage. When transporting long and oversized luggage, the rear row folds down - this increases the luggage compartment.
4-cylinder carburetor engines with a volume of 1.1, 1.3 or 1.5 liters. At the moment, fuel injection systems are installed in some cars. The front-wheel drive car guarantees improved vehicle handling when cornering, even on wet roads. During long-term use of the car, wear of many elements occurs, the fasteners of the assembly components are weakened and the adjustable values are violated.
The gearbox is the most reliable element in the car. Failure of this mechanism is quite rare compared to other parts. And with all this, its complete or partial failure makes the car completely unsuitable for further use. It will simply be impossible to operate the car for its intended purpose. In addition, you will need a tow truck to deliver the car for gearbox repair.
Replacing the box
Replacing the box on a VAZ 2109 is carried out in two stages: removing the old box and installing a new one in its place, let’s start in order, with removal:
- First, remove the mudguard, then the crankcase protection (if equipped)
- Drain the oil from the box (if it is there, it’s better to be safe)
- We tear off the nuts of the drives and wheels
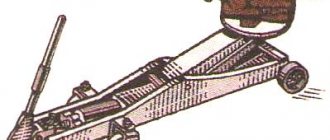
- When removal is carried out in a pit, then it is necessary to lift the front part of the car with a jack and hang it on “traces” (or large wooden blocks).
- It is imperative to disconnect (remove) the battery terminals
- Next, remove the clutch cable
- And disconnect the speedometer cable
- Then, with the car raised, unscrew its ball joints (we recommend unscrewing the two bolts securing the ball joint to the “fist”; the bolts are marked with arrows in the photo)
Unscrew the bolts that attach the ball to the knuckle
Then we tear off and remove the left longitudinal brace from the car
We tear off and remove the longitudinal brace, its fastenings are marked in red
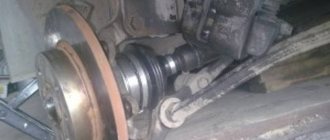
Now call an assistant to pull both drives out of the box, let the assistant tighten the inner grenade using a flat pry bar (so as not to bother with removing the drive), and you sharply pull the wheel to pull the drive out of the box
An assistant squeezes out a grenade with a flat pry bar.
Helpful advice: after you have removed one drive, in order to avoid turning or scattering of the differential, we need to insert a special chopper, stopper or old grenade in its place into the box
- Unscrew the central nuts of both drives and remove them
- Next, remove the starter
Unscrew the starter mounting bolts
Disconnect the ground wire Remove the connector from the reverse gear sensor From the box, unscrew the flywheel protective casing from the bottom Disconnect the gear shift lever (it is important not to forget to mark its position first)
We unscrew and pull off the drawstring, making sure to mark its position
Then you need to unscrew one by one all four points at which the gearbox is attached to the engine. It is important to fix the engine, either support it with a hydraulic jack from below, or hang it over a board that rests on the spar cups in order to remove the box on the VAZ 2109. Holding the box, unscrew and remove all the supports (and “cushions”) for fastening the gearbox with your own hands. Then, together with an assistant, slightly shaking, we move the box away from the engine to the side; about 10 centimeters are needed for the input shaft to free up and come out of the clutch disc and basket. When performing removal, you need to be very careful. be careful not to damage the clutch basket petals with the input shaft. On the VAZ 2109, the removal of the gearbox is completed
Removing the box is a labor-intensive task, so to avoid repeated removal after a couple of days, at the same time:
- It is necessary to check the serviceability of all components and parts (such as the clutch disc, release bearing, basket, and so on)
- Also check the alignment of the entire clutch kit, and lubricate the splined connections of the input shaft, as well as the release bearing flange
Now the question for the VAZ 2109 is how to remove the box.
Putting a new box in place
Replacing the gearbox on a VAZ 21093 with a new one, after removing the old one. In this case, you can definitely do without the help of a partner and perform the following actions:
- The motor, fixed with a jack or stretcher, is lowered by 10-15 degrees
- We lift and insert the new box until it stops (in this case, tightening the box with the engine with bolts is not allowed, you need to manually fit the box tightly against the engine)
- Tighten the four fastening points
- Then we install the gearbox supports (pillows)
- We put on and adjust the length of the clutch cable (in this case, the clutch pedal is located 1 centimeter higher than the brake pedal)
- Install and connect the starter and reverse speed sensor
- We put the flywheel protection in place, then the speedometer cable and behind it the ground wire
- We connect and adjust the gear shift mechanisms (put the gear selection lever on the mark or “neutral”, focusing on the first speed)
- We assemble the chassis (insert drives, screw on ball joints, install braces)
- We lower the car onto the wheels, tighten the central nuts of the drives (with a force of 23 -25 kilograms per meter, the approximate length of the lever is about 1-1.5 meters)
- Fill the oil to the level (if you haven’t drained it, then it’s fresh)
Our replacement instructions are complete, the procedure is accessible and can be done without going to a service station, the video will clarify any unclear questions about the replacement.
What to choose
The design of the VAZ 2109 gearbox is imperfect, but this is not a good reason to change it completely. The design itself is reliable, it just requires some modifications. The best option is to replace the problematic part, which causes frequent unit breakdowns, or install new components.
- If you need to change the gear ratios of your original transmission, replacing a pair of gears from 17-tooth to 15-tooth parts will do. This modernization increases the efficiency of acceleration, the transition time from gear to gear is reduced, but the maximum speed of the car decreases. Perfect for traveling in urban areas.
- Installing sports gears makes the gears “longer”, that is, switching from one gear to another is required less often, while the dynamics of acceleration and maximum speed are practically not lost. This gearbox tuning is suitable for those who want to increase the speed characteristics of their nine. Mainly used after replacing the engine with a more powerful analogue.
- You can try replacing the original secondary shaft of the nine. The problem with this part is that it is hollow inside. Due to dynamic loads on the assembly, it often happened that this particular shaft shattered into pieces, which led to the final breakdown of the entire gearbox due to fragments stuck in the teeth. Replacement is made with a solid analog shaft for a pair of gears with a gear ratio of 4.13.
- Want to make your car more agile on the track? Buy additional sports hub bearings for tuning. They will slightly improve the performance of the chassis, but the main thing is that they are more reliable than factory parts.
- Start adjusting the differential, but do it only in reputable auto repair shops and service stations. Incorrect adjustment of the part will lead to frequent breakdowns or loss of vehicle controllability.
There are a lot of tips and fairly detailed instructions on how to independently replace a part of an assembly or the entire assembly, but you don’t need to do this if you don’t know the architecture of the car. When carrying out many works, practice and clear knowledge of the matter are required, so it is better to entrust the work to the masters at the service station.
If you need to improve the gear shift mechanism of a VAZ 2109, then before modifying it you need to purchase some additional parts and replace the factory ones with them. This option for solving problems is the cheapest and simplest. Installing an automatic transmission on a VAZ 2109 is not always justified. This modification will simplify driving the car, slightly increase the working life of the unit and allow it to smoothly transition from one speed mode to another. On the other hand, not every owner of a nine can handle repairs, maintenance and installation of automation, so taking into account the costs, this solution is not effective.
Gearbox for front-wheel drive VAZs
The first VAZs of the eighth model, which rolled off the assembly line back in 1984 of the last century. They were equipped with 2-shaft gearboxes, which were combined in 1 housing with a differential. Since those distant times, gearboxes have been updated in every possible way. But since some changes have occurred in the elements, they are not entirely interchangeable. The first VAZs of the eighth model were equipped with 4 VAZ 2108 gearboxes, as well as 5-range gearboxes without a dipstick.
At the moment there are practically none of these left. In 4-band, the main pairs were 4.1, also 3.9. In five-band 3.9, also 3.7. The concern decided not to indulge in a large selection and used only one main pair - 3.7. As for the gearbox ratios, they were, and still are, only one for all cars.
Disassembling the old-style front-wheel drive transmission is not a cable transmission.
First of all, having removed the boot, take out the clutch fork. To do this, we hit the fork upward and knock out the plastic plug and take it out. Then you can immediately remove the release bearing guide by unscrewing 3 M6 bolts.
With the gearbox on its side, unscrew the nuts of the gearbox cover and housing. Then, hitting the ebb of the lid, remove it. Sometimes this is not so easy to do. If the box is old, has not been disassembled for many years, and has also been actively bathed in winter salt solutions, then corrosion will tightly grip the opening of the lid and the pins. These lid moldings break instantly. In this case, I heat it with an acetylene torch, gradually rock it and remove it. There is no better way.
Well, this box is from an almost new Priora, so there were no problems. Next you need to unscrew the two shaft nuts. First you need to secure the shafts from turning. To do this, engage some gear, then unscrew the 5th gear fork bolt and push the clutch and fork down. That is, we engage 2 gears at the same time.
But then everything depends on your equipment. With a thousand Newton impact wrench, everything is easy and simple; you don’t even have to lock the shafts. If you turn the head manually, then here is the problem: if the shaft bearings are destroyed, then these shafts dangle and when you try to unscrew the 5th gear gears, they will diverge and the teeth can easily crumble. But even if the bearings are intact, you should not jerk the wrench too sharply in an attempt to rip off the nuts. There have been cases when the teeth of the 5th gear gear broke off due to a sharp jerk.
The nuts are unscrewed, now you need to remove the 5th gear gears. We start with the driven one, it is held by a hub that sits on splines on the shaft. Using two screwdrivers, we try to remove the gear along with the hub and fork. It happens in different ways: sometimes this hub can be easily removed with your hands, and sometimes you come across such things that you can’t even use screwdrivers. Then you have to pull the clutch with the fork from the hub (in this case all the balls with springs fly apart) and only press it with a puller.
The leader (damn) is always easy to remove. Then unscrew the screws securing the steel plate with an impact screwdriver or impact wrench. True, the screwdriver may not be able to unscrew very tightly tightened screws; the slots in the screws will break off, or the bit will fall apart. In this case, an impact screwdriver will be more reliable, but you will have to hammer it.
To remove the retaining rings, I use ordinary pliers, only I sharpen the edges so that they become flat.
Rod plugs are now made with an internal hexagon of 8. Therefore, first we carefully clean the hole from dirt, then I recommend tapping them with a hammer. Even in those that were made before, the edges often curled up, but these are very weak, it is very easy to tear off the edges. A couple of blows with a hammer helps a lot. By the way, this also applies to old-style traffic jams. After unscrewing the plugs, we pull out the springs and balls with a magnet. Or we don’t pull it out and then when we remove the crankcase we look for balls in the dirt.
To separate the crankcase, we hammer in one screwdriver as shown by the arrow, and lift the other one from the other side. The same problem can arise as with the lid - corrosion.
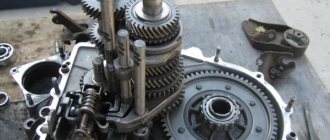
Having removed the crankcase, unscrew the two bolts of the forks and remove the rods. We simply pull the rod of the first and second gear up, slightly tapping the fork. Then we turn the 3-4 gear rod and also pull it up. We take out the 5th and rear rod.
We take the primary and secondary shafts at the same time and pull them out. We unscrew the three bolts of the gear selection mechanism.
All that remains is to unscrew the rod bolt and pull out the rod. Sometimes you have to tinker with this if the rod lever fits very tightly, and plus the thread locker was poured from the heart.
Well, that's all, business for 15 minutes. Well, all that remains is to knock out the old seals and bearings, if they need to be changed. Do all bearings need to be changed? More on that in another post.
If the gearbox secondary shaft breaks, it should be corrected
- It is necessary to clamp the secondary shaft of the VAZ 2108 gearbox in a vice with metal soft pads on the lips.
- Using 2 pry bars, you need to compress the ball bearing located behind the secondary shaft.
- Remove the thrust ring.
- Remove the 4th speed driven gear.
- Then remove the needle bearing of the 4th speed driven gear and be sure to mark it.
- Then remove the spacer washer from the secondary shaft.
- Using 2 pry bars, move the 3rd and 4th speed synchronizers through the third speed gear from the splines of the secondary shaft.
- Remove the 4th speed needle bearing bushing.
- Then remove the 3rd and 4th speed synchronizer with the 4th speed locking washer. Mark the synchronizer locking washer in relation to the synchronizer clutch.
- Then remove the blocker from the secondary shaft. the 3rd speed gear synchronizer washer, then mark it in relation to the synchronizer clutch.
- Remove the 3rd speed gear from the output shaft.
- Remove the 3rd speed gear needle bearing from the output shaft, then mark the needle bearing.
- Remove the thrust washer of the thrust rings.
- Remove the 2 thrust half-rings from the secondary shaft.
- Remove the ball that secures it from the hole on the secondary shaft.
- Remove the 2nd speed gear from the output shaft.
- Remove the 2nd gear needle bearing, then mark it.
- Remove the lock washer (spring) from the secondary shaft.
- Place the secondary shaft of the 1st speed gear on the lips of the vice, then, hitting the end of the secondary shaft with a wooden mallet, press the 1st and 2nd speed synchronizer from the splines of the secondary shaft.
- Remove the 1st and 2nd speed synchronizer from the secondary shaft from the lock. 2nd speed synchronizer washer.
- Next, remove the ring that blocks 1st speed from the secondary shaft, then mark the synchronizer blocking washer in relation to the synchronizer clutch.
- Remove the first speed gear.
- Remove the locking ring.
- Slightly release the lock of the 1st speed needle bearing and remove it by moving the latter along the length of the secondary shaft. Then mark the needle bearing.
- Turn the secondary shaft over, using 2 large screwdrivers, press the inner bearing washer in front of the secondary shaft. Then remove the thrust washer.
- Clean, rinse and dry the secondary shaft elements thoroughly. It's good to inspect them.
- Check the condition of the shafts. If the bearings are worn, they need to be replaced. The shaft splines must be free of dents and all sorts of defects.
- Check the position of the VAZ 2108 gearbox gear. In case of chipped teeth or any other damage, the gears need to be replaced.
- Check the condition of the bearings and replace them if damaged.
- The radial clearance of existing ball bearings should not exceed 0.05 millimeters. Check this method with an indicator.
- Next, check the lock position. synchronizer rings. If there are nicks and all sorts of chips, they should be replaced.
- Next, check the gap between the gears and the blocking rings. The smallest gap should be 0.6 millimeters. In case of smaller gap, block. the ring should be changed.
- If there are burrs and dents on the thrust washers and retaining rings, be sure to replace them.
- Assemble the secondary shaft in the same way as you removed it. Place the blocking rings with the marks marked earlier. Install new rings in such a way that they align with the grooves of the hub.
- Press the ball bearing on the rear of the secondary shaft using the required mandrel, using extreme force, to the ring inside the bearing
- After assembly, you should check the operation of the synchronizers. By moving their clutches manually to the proper speed engagement position.
- In general, this is how the gearbox bearings of a VAZ car are removed.
Changing the oil in a VAZ 2108 gearbox
The amount of oil required in the box is determined by its type - five-speed (3.3 liters) and four-speed (3 liters). Experts recommend using products from the following manufacturers: Reksol-T (GL-4, 80W-85), Volnez TM4 (GL-4, 80W-90) and OmskOil Trans P (GL-4/5, 80W-85 ).
Drain the oil from the box strictly after warming up. Before unscrewing the drain plug, remove the rubber cap from the breather, which is located on top of the gearbox. Clean the breather thoroughly using gasoline. Clean hard-to-reach places using regular wire. After cleaning, put the cap back on.
Now you can proceed directly to draining the oil. On the bottom of the gearbox there is a drain plug, which has a hexagon socket. Unscrew it completely and wait for the oil to drain. It is advisable to substitute the vessel if you are doing this procedure at home. After the oil has completely drained, screw the plug back on.
Pull out the dipstick and pour new oil into the same hole. Wipe the dipstick itself dry and put it in place. Wait 5 seconds and pull it out again. The oil level should be near the upper mark; if it is lower, add more. Remember that the oil has a thick consistency, and it will take a little time for it to completely glass.
On some VAZ 2108 gearboxes, oil is poured through the neck, which is located above the drain plug. There is no dipstick on this type of box.
How to replace a gearbox on a VAZ 2108 car
Repairing a VAZ 2108 gearbox is not reasonable in all cases; exchange in most situations is more reasonable and simpler. You can buy a gearbox new or used. The choice of unit is determined by the advantages and financial capabilities of the car enthusiast. It is profitable to buy a used box for disassembly. There are serviceable spare parts on sale with less than half capacity. The advantages of used units are obvious.
The disassembled gearbox is exactly free of manufacturing defects (it has been tested on the highway), it has been diagnosed by professionals from the service center before sale, it is serviceable and efficient, and for all that, its cost is less than that of a new one. In reality, for a VAZ 2108 gearbox, the cost is determined by the node type (4 or 5 range) and the level of wear. By installing this gearbox, you can save money and time on repairs.
You can replace the VAZ 2108 gearbox from a 4-speed to a 5-speed. Then the car’s capabilities will become several times greater, this will also depend on the type of engine. After all, it happens that with a 4-range gearbox, the car seems to lack one more speed.
About the oil
For good performance of the VAZ 2109, all important components must be coated with oil. Typically, the manufacturer independently determines the brand of engine and transmission parts that are recommended for use in cars of a given model.
If you do not have such information, you should consider the main purpose of the machine:
- if the VAZ is driven on excellent roads in the regional center, there is a certain type of oil for this;
- if you drive a car, a transmission would be the ideal option.
Remember to maintain the optimal oil level
When filling oil, it should be taken into account that the VAZ 2109 box requires a slightly larger amount. Only this approach will help protect and cover all spare parts located at the crankcase outlet.
Since the gearbox is the second most important element of a car, in the event of the slightest breakdown it is necessary to immediately eliminate the shortcomings. Let's look at the main malfunctions that can occur with the gearbox
Let's look at the main malfunctions that can occur with the gearbox.
'); if("undefined"===typeof loaded_blocks_drive){loaded_blocks_drive=[]; function n(){var e=loaded_blocks_drive.shift(); var t=e.adp_id; var r=e.div; var i=document.createElement("script"); i.type=”text/javascript”; i.async=true; i.charset=”utf-8″; i.src=»https://www.drivenetwork.ru/data/»+t+».js?async=1&div=»+r+»&t=»+Math.random(); var s=document.getElementsByTagName("head")||document.getElementsByTagName("body"); s.appendChild(i); var o=setInterval(function(){if(document.getElementById(r).innerHTML&&loaded_blocks_drive.length){n(); clearInterval(o)}},50)} setTimeout(n)}loaded_blocks_drive.push({adp_id:e ,div:t})})(47602)
Automatic transmission shutdown
- worn gears and locks on the coupling;
- failure to comply with vehicle operating rules;
- incorrectly selected speed mode;
- incorrect shifting with a poorly adjusted clutch;
- unprofessional gearbox repair (ignoring clutch replacement);
- ignoring repairs in the presence of extraneous noise in the form of crunching.
If you contact a service station in a timely manner, the VAZ gearbox can somehow be saved. If the condition is too neglected, count on expensive repairs.
What do the noises in the 2109 box mean?
There are no silent boxes. Each of them has a maximum permissible noise level, which is established by GOST.
- Extraneous noise from the VAZ box may occur as a result of the operation of gears and bearings;
- Used or low-quality oil also causes noise;
- Sometimes the reason for its appearance may be the operation of the power unit. In this case, the speed may be unstable or a powerful camshaft may be installed.
It takes forever to describe extraneous noises, since each driver hears them differently. To more fully understand the cause, it is necessary to diagnose the transmission.
Crunching sound when changing gear
Excessive or improper use of the vehicle.
If there is a crunching noise, the synchronizer will need to be replaced. If you decide to save money on it, you should expect to buy a whole block of gears in the future.
In addition, the presence of a crunching sound may indicate that it is time to change the used oil. Or perhaps it was filled with the wrong degree of viscosity?
Knocks
If you hear knocking noises in 21099, you should immediately check the gears
Perhaps one of the pairs has a chip; If a knocking noise occurs while driving, or when you switch the gearbox from one gear to another, pay attention to the satellites. Most likely they are the ones that have worn out.
The gearbox on a VAZ burst
Whether or not to purchase a new box is up to you. Judge for yourself, repairing it can cost you the same price as buying a new one.
The box is unstable and switches hard
The cause of this type of problem with box 21099 is the synchronizer or gear. In some cases, this situation may occur when purchasing new gearboxes or after repairing them.
Gearbox synchronizer
In any case, you should know that when buying a new car you need to run it in. Rough operation of the vehicle leads to serious problems.