How to check the radiator cap ? This question is asked by car enthusiasts at different times of the year. After all, the operation of the radiator cap provides increased pressure in the engine cooling system, which, in turn, makes it possible for the engine to operate normally and the interior heater to function during the cold season. Therefore, its condition must be regularly monitored, and if necessary, the valve, o-ring, or the entire lid must be replaced, since most often it is not a dismountable structure. Therefore, to check how the lid works, a visual inspection alone is not enough; you also need a pressure test.
Design and principle of operation
As a rule, the radiator cap is located either on the radiator itself or on the coolant expansion tank.
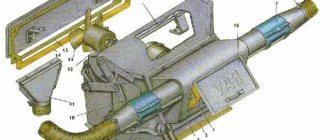
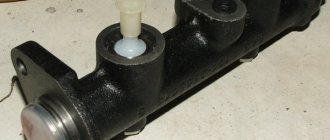
Hence, it should be called correctly - like a cooling system cover, and if the name also includes a functional meaning - then, according to technical terminology, it will sound correctly - like a bypass valve for the cooling system of an internal combustion engine of a car. Depending on the manufacturer and brand of car, the design of the radiator cap may differ both in appearance and in the complexity of the technical mechanism, but in any case it will consist of the following main parts:
- a tin cover with rotary clamp elements on the neck of the radiator or expansion tank;
- sealing rubber under the lid;
- intake valve mechanism;
- exhaust valve mechanism;
- two valve membranes in the form of rubberized plates;
- cover housings where the valve mechanisms are located.
The functional purpose of the radiator cap is to regulate the coolant pressure in the internal combustion engine cooling system. Therefore, the bypass valve system is designed for operation in a temperature range from a low point of -40⁰ C to a high point of +125⁰ C. The lower point is determined by the minimum winter ambient temperature, and the upper point is determined by the boiling limit of the coolant at an excess pressure of 100 kPa. That is: -40⁰ C is the freezing point of antifreeze and antifreeze, and +125⁰ C is their boiling point at slight excess pressure. For water, these temperature ranges will respectively range from 0⁰ C to +105⁰ C.
The bypass valves of the cooling system cover operate approximately according to the following three-position scheme:
- At +20⁰ C (conventionally), the pressure of the ambient air and liquid in the cooling system are equal, while both valves are closed.
- The car engine is running and heating up, causing the coolant to expand. When a certain limit is reached, the release valve opens and releases excess pressure without allowing the liquid to boil.
- After the engine is turned off, it begins to cool along with the cooling system fluid, which, in turn, decreases in volume and creates a vacuum. This is where the inlet valve opens to maintain normal pressure.
The process of installing a plug
Before installing the plug for the aluminum radiator, you should securely fix the heater to the wall. In general, you can follow the following instructions:
First, individual sections are assembled into a single heating device; the number of sections is selected individually for each case. When connecting elements, use FUM tape, which allows you to achieve maximum tightness. Next, choose the place where the radiator will be located; most often they are installed under the window
It is very important to adhere to the recommended distances from the wall, floor and window sill. Then holes are made in the wall using special tools, plastic anchors are hammered into them and metal brackets are screwed in. A radiator is hung on them.
- Now you can install plugs for bimetallic radiators, especially since there is no difficulty in this process. Their body is made in the shape of a hexagon, which allows you to use any key for tightening. Do not overtighten the plug to avoid damaging the threads or body. During the twisting process, an invisible microcrack may form, into which water under pressure can leak. In addition, repairing batteries in winter is no fun for anyone.
- After the plugs are installed, you can connect the incoming and outgoing pipelines. At the same time, the Mayevsky valve is installed in the upper hole of the radiator, and the lower hole is closed with a plug. It is worth noting that the air vent device is inexpensive, and heating efficiency increases significantly. To make it easier for air to leave the system, heating devices are installed with a slight slope of a few degrees.
- Test heating devices and connections. For this purpose, liquid is poured into the system and problem areas are examined.
The design of a modern radiator
How does a radiator sealant work: is it useful, which one is better to choose?
An internal combustion engine cooling radiator, as a rule, has two tanks (lower and upper), a core in which the liquid (antifreeze or antifreeze) is cooled, and several additional parts for fastening. The liquid from the engine cooling jacket enters the radiator, where its temperature drops to the required value, then the antifreeze is again transferred to the engine. Light metals are used to make the core and tanks: either aluminum or brass. Thanks to their high thermal conductivity, they provide efficient and fast cooling of antifreeze.
The core of the radiator consists of horizontally arranged metal plates connected to hollow tubes running vertically down from the upper reservoir to the lower reservoir. Thus, when moving through the core, the liquid is divided into several streams, and the area of its contact with atmospheric air increases, leading to an increase in the cooling intensity.
Radiator pipes allow the tanks to be connected to the engine cooling jacket. The bottom tank usually has a drain tap through which liquid can be drained. The engine jacket is also equipped with a similar tap. Antifreeze is poured into the cooling system through the neck of the upper reservoir.
https://youtube.com/watch?v=fJ9OtFZQCxE
https://youtube.com/watch?v=fJ9OtFZQCxE
The functioning of cooling systems of modern cars takes into account the temperature value:
- engine;
- coolant;
- environment;
- oils, etc.
The operation of the cooling system can be explained as follows. The liquid heated by the engine is directed by a pump through pipes to the radiator, where its temperature is reduced. After which the cooled liquid (antifreeze) is again supplied to the engine jacket, and then the cycle is repeated.
Car radiator cores can be:
- tubular-lamellar;
- tubular-ribbon.
In the first case, the cooling tubes may have the following arrangement:
- chess;
- at an angle;
- in a row.
The fins of tubular-plate radiators are either flat or wavy, and can have different sizes. In addition, to enhance heat transfer, special turbulators are sometimes made on them (perforations that are bent and form narrow passages for air).
For radiators, called tubular-band radiators, the cooling tubes are always arranged in a row, and a copper sheet with a thickness of 0.05 millimeters to 0.1 millimeters is used to make the strip of their grilles. To enhance heat transfer with the help of swirls, shaped holes are made on the tape using the stamping method or bent cuts are created.
Today, the most widespread are car cooling radiators made on the basis of aluminum alloys. Such devices are cheaper and lighter than brass analogs, but are inferior to the latter in reliability and service life. Another advantage of brass radiators is that they are easier to repair: they can be soldered. While the radiator of the cooling system, known as aluminum, is more difficult to repair, since its parts and structural elements are connected to each other using rolling and sealing materials.
Checking the lid using improvised means
How to check the expansion tank cap. device and principle of operation of the expansion tank
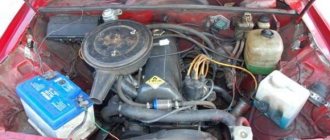
Checking the operation of the bypass valve is quite simple. To do this, you need to disconnect any small pipe of the cooling system on the engine, for example, a heated damper or manifold. Next, you need to use a compressor with a pressure gauge (to know the exact pressure supplied) to supply air to the system.
The pressure value at which the valve operates will be easy to determine by hissing and gurgling coming from the elements of the cooling system
Please note that the pressure should not be released suddenly at the end of the procedure. This threatens that when opening the lid, antifreeze may splash out under pressure.
From the expansion tank, liquid enters the radiator through a check valve. It holds pressure from the radiator side, but opens quietly if there is a complete vacuum there. Its verification is carried out in two stages:
- You should try to lift the valve patch with your finger. Ideally, it should move with minimal effort (without mechanical resistance).
- On a cold engine, when there is no excess pressure in the radiator, it is necessary to install the plug in its seat. Next, disconnect the tube going to the expansion tank of the cooling system and try to “inflate” the radiator through it. The valve is rated for low pressure, so you will probably be able to blow a small amount of excess air into the radiator. This can be checked by unscrewing the radiator cap again. In this case, a characteristic hissing sound of air emanating from it should be heard. Instead of a mouth, you can also use a compressor with a pressure gauge. However, you need to make sure that the pressure does not increase sharply.
Where to look for leaks?
Squeeze or bend the hose to expose any cracks.
Carefully inspect bends, joints and fastenings with clamps. Swelling of the hose may indicate an internal rupture. Such a hose can burst at any moment. Feel the problem areas, looking for soft spots, which may also indicate internal damage. Use a flashlight and a mirror to look under or behind the hose.
Rust deposits on the support indicate that the hose is leaking under pressure. Tighten the clamps tighter.
Basic malfunctions of the engine cooling system
How to replace the Lada Kalina cooling radiator
The cooling system of a car engine consists of a large number of individual parts - radiator, fan, pipe system, sensors. If at least one element does not work correctly, the entire system begins to work worse. Therefore, the cause of the breakdown may be:
- Radiator clogged. It is this element that is intended for the forced removal of thermal energy from the engine. If it becomes clogged externally (a large amount of dust and dirt gets into its slots) or internally (the core becomes clogged with a significant amount of rust and liquid sediment), then the efficiency of the unit is sharply reduced. Accordingly, the radiator, like the entire cooling system, must be periodically cleaned both outside and inside using special cleaners or improvised means.
- Faulty pump. For this reason, the cooling system either leaks from under the cooling pump bearing, or the circulation of liquid through the cooling jacket is disrupted. There are several reasons for pump failure. Among them are banal wear of its blades or internal parts, weakening of the drive, and violation of tightness. Often, corrosion can be observed on metal impellers, but the plastic impeller simply breaks off and turns.
- The thermostat is not working correctly. The main task of this unit is to block the flow of antifreeze or antifreeze into the radiator until the engine has warmed up sufficiently. On most cars, it opens only when the coolant temperature reaches +87... +95°C. Accordingly, if it fails, the engine will heat up for a very long time, especially in cold weather. If the thermostat is stuck and does not open at all, then the temperature in the system will be higher than normal until it boils. When it is open constantly, the temperature is below normal.
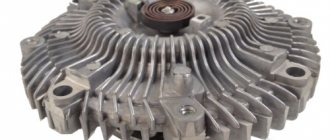
- Cooling fan malfunction. Depending on the type of its drive, there may be many reasons. For example, a mechanically driven fan may have loose drive tension. If the drive is electric, then the cause of its failure may be a faulty thermal relay or drive motor. If the drive is hydraulic, then the reason most likely lies in insufficient pressure (low level) of oil in the system.
- Depressurization of the system. Coolant leaks can occur in a variety of places. For example, on the pipes, their connections (on clamps), in the radiator housing, on the pump, on the cooling jacket of the cylinder head. If the cylinder head gasket burns out, the coolant mixes with the engine oil. This not only leads to a decrease in antifreeze levels, but also to a deterioration in oil performance, which puts additional stress on the engine.
- Temperature sensor malfunction. Information from it is sent to the electronic control unit, and based on it, the ECU issues commands to form an optimal air-fuel mixture, turn on/off the cooling system fan and other commands. You can check the temperature sensor using a multimeter.
- Low coolant level. Even if the cooling system is completely sealed and there are no leaks, the level of antifreeze in it still drops over time. This happens due to its evaporation. This process is quite long, but the car owner needs to periodically monitor the appropriate level and, if necessary, add or completely change the coolant if the end of its service life has come.
- Radiator cap valve leaking. In this case, the pressure in the cooling system will be below normal. Because of this, the liquid will boil even when the engine is idling. Coolant is also discharged into the expansion tank, but only after the engine is stopped. There will also be a large consumption of antifreeze.
Another malfunction can be considered the use of antifreeze with inappropriate parameters, for example, ordinary water. As you know, in cold weather it crystallizes, which usually leads to mechanical failure of the elements of the cooling system. Therefore, you need to choose antifreeze in accordance with the requirements of the car manufacturer.
Coolant of a VAZ 2107 car - checking the level
The expansion tank of the cooling system on a VAZ 2107 is installed in the engine compartment on the left side on the mudguard and secured to a bracket with a rubber clamp. Recommendation When removing and installing cooling system hoses, it is recommended to replace the standard band clamps with worm-type clamps marked 25-40. These clamps are more convenient for installation and seal the connections more reliably. Checking the coolant level on a VAZ 2107 car The coolant level in the expansion tank should be 3-4 mm above the “MIN” mark made on the translucent body of the expansion tank. 1. To make it easier to control the coolant level, unfasten the rubber belt while holding the expansion tank with your hand. ATTENTION You should only unscrew the expansion tank cap on a cold VAZ 2107 engine, since on a warm engine excess pressure is created inside the expansion tank.2. If necessary, open the cap of the expansion tank and add coolant to it (see Operating fluids used on VAZ 2107 vehicles to the required level. ATTENTION The coolant is poisonous, be careful. If it gets on the paintwork, the liquid can cause a change in its color, so remove it immediately coolant with a rag. Do not use water as a coolant, it does not contain corrosion inhibitors, does not lubricate pump seals well and freezes at subzero temperatures. Replacing the coolant on a VAZ 2107 car. We replace the coolant on a VAZ 2107 car according to the maintenance intervals (see "Periodic maintenance of the VAZ 2107 car"), as well as in the event of a change in its color (this is a sign of aging of the fluid). We replace the coolant only on a cold engine of the VAZ 2107 car! The sequence of work for replacing the coolant on the VAZ 21071 car. Install VAZ 2107 car on an inspection hole or overpass (see. “Preparation of the VAZ 2107 car for maintenance and repair”).2. We move the control lever for the interior heater of the VAZ 2107 to the extreme right position (fully open the heater valve). 3. Unscrew and remove the radiator and expansion tank caps. 4. Remove the engine mudguard (see “Mudguard - removal and installation”).5. Place a container (at least 10 liters) under the drain plug in the cylinder block. 6. Using a 13 mm socket wrench with an extension, unscrew the drain plug. 7. Drain the coolant from the VAZ 2107 car from the cylinder block. 8. Place the same container under the radiator drain hole and unscrew the plug. 9. Drain the coolant from the radiator. 10. Unfasten the expansion tank fastening belt and lift it, drain the coolant from the tank through the radiator. 11. Place the expansion tank in place and secure it with a belt. 12. We tighten the drain plugs on the radiator and cylinder block. Note To avoid air locks, it is recommended to remove the rubber hose from the pipe of the intake manifold heating unit (throttle body on the injection engine of a VAZ 2107 car). When filling the system, at the moment the liquid comes out of the hose, put it on the pipe 13. We fill the engine cooling system of the VAZ 2107 through the radiator neck until the liquid level reaches the lower edge of the neck. 14. In the process of filling the VAZ 2107 car system with coolant (to reduce the likelihood of air pockets), we crimp the radiator hoses by hand. Close the radiator cap. 15. Fill the expansion tank with coolant to a level 3-4 mm above the wall of the tank and close the cap. 16. Start the VAZ 2107 engine and let it idle for 3-5 minutes to remove air pockets, then stop the engine and add coolant to the radiator and expansion tank to the required level.
Valve operation
Maintaining the pressure at the level of 1.1 - 1.5 kg/cm2 is ensured by the safety valve of the lid, which opens when the limit value is exceeded.
In addition, after the engine cools down and the coolant begins to decrease in volume, the atmospheric valve opens to allow air in, in order to avoid excessive vacuum in the system.
In order to fully appreciate the role of the expansion tank cap, it is necessary to become more familiar with how excess or insufficient pressure affects the condition of not only the cooling system, but also the engine as a whole.
What are the dangers of excess or lack of pressure?
Excessive impact from the inside on parts of the cooling system can, at a minimum, lead to the pipes being torn off the fittings. But there may be worse consequences - rupture of the thermostat housing or expansion tank. There have also been cases of depressurization of engine cooling radiators or heaters, as well as vapor breakthrough through the cylinder head gasket.
The harmful effects of low pressure are not so obvious. But it is precisely this that leads to the boiling of antifreeze.
And boiling not only disrupts heat transfer from parts, but also causes cavitation erosion, that is, tearing out metal particles from the surface. The surface of the parts becomes pitted, as it were, which over time causes their destruction.
Such expensive engine parts as the cylinder block and head fall into the “risk zone”.
If the atmospheric valve does not open when cooling the antifreeze, then a vacuum will arise in the cooling system, strong enough to provoke air leaks through the sealing gaskets, connections of pipes with fittings, etc. The air that gets into the system forms steam-air plugs, “locking” pipelines and disrupting coolant circulation.
Summarizing the above, we can briefly formulate the answer to the question of what will happen if the expansion tank cap is faulty:
- Destruction of cooling system elements.
- Reduced service life of some engine components and assemblies.
- Impaired coolant circulation.
Signs of a faulty plug
How to determine the malfunction?
A characteristic sign of a breakdown of the safety valve that does not “lock” the expansion tank is premature (at a temperature of about 100°C) boiling of antifreeze, which is “thrown out” into the tank.
Sometimes steam may come from under the hood, causing coolant to splash onto the hot exhaust manifold. In this case, the engine temperature arrow is in the green zone.
But this phenomenon can also be caused by a burnt-out cylinder head gasket and a jammed thermostat valve, which prevents coolant from entering the radiator. In order to establish the functionality of the thermostat, check the upper and lower radiator pipes by touch - they should be hot.
If the cylinder head gasket is “blown”, then the upper pipe will become hard, like an inflated bicycle tire - from excess vapor. A gasket failure is also accompanied by increased exhaust smoke - white steam will escape from the muffler.
Also, on some foreign cars, when the cap is unscrewed, the valve breaks off and gets stuck in the tank. This fact indicates that the vacuum valve has stopped working. It's time to replace the plug.
What is an expansion tank?
Expansion tank - unit of the liquid cooling system of internal combustion engines; a specially designed container designed to compensate for leaks and thermal expansion of the coolant circulating in the system.
Expansion tanks are also used in other systems of vehicles, tractors and special equipment: in power steering (power steering) and in hydraulic systems for various purposes. In general, these tanks are similar in purpose and design to cooling system tanks, and their distinctive features are described below.
The expansion tank performs several functions:
- Compensation for thermal expansion of the coolant when the engine heats up - excess fluid flows from the system into the tank, preventing pressure build-up;
- Compensation for coolant leaks - a certain supply of liquid is always stored in the tank, which, if necessary, enters the system (after the liquid is released into the atmosphere during overheating, when minor leaks occur, etc.);
- Monitoring the coolant level in the system (using the corresponding marks on the tank body and the built-in sensor).
The presence of a reservoir in a liquid cooling system is determined by the characteristics and physical properties of the coolant - water or antifreeze. As the temperature increases, the liquid, in accordance with its coefficient of thermal expansion, increases in volume, which also leads to an increase in pressure in the system. If the temperature rises excessively, the liquid (especially water) may boil - in this case, the excess pressure is released into the atmosphere through a steam valve built into the radiator cap. However, with subsequent cooling of the engine, the liquid acquires a normal volume, and since part of it was lost during the release of steam, the pressure in the system drops - if the pressure drops excessively, the air valve built into the radiator cap opens, the pressure in the system equalizes with atmospheric pressure. In this case, air enters the system, which can have a negative effect - air pockets form in the radiator tubes, preventing normal fluid circulation. So after releasing the steam, it is necessary to replenish the water or antifreeze level.
Antifreezes of various types have a higher coefficient of thermal expansion compared to water, so the processes described above occur more intensively. To eliminate these negative effects, an expansion tank connected to the radiator is introduced into the cooling system. As the temperature rises, excess fluid is simply drained into the tank, and when the engine cools, it is returned to the system. This significantly increases the threshold for steam release into the atmosphere and increases the interval between replenishment of the liquid level in the system.
Engine cooling system and the location of the expansion tank in it
The expansion tank plays an important role in the operation of the cooling system and the entire power unit, so in case of any malfunction it must be replaced. To select the right tank and carry out repairs correctly, you must first understand the existing types and features of these parts.
Which radiator cap to install?
Many car enthusiasts who have started checking and replacing the mentioned cap are interested in the question of what are the best radiator caps? Before answering this question, you must immediately pay attention to the fact that the new cover must have the same performance characteristics as the one being replaced. In particular, it must have a similar diameter, thread pitch, internal valve size, and most importantly, it must be designed for similar pressure
As a rule, for most modern passenger cars, covers are sold that are designed to operate in the pressure range of 0.9...1.1 Bar. However, you should further clarify this information before purchasing, as exceptions sometimes occur. Accordingly, you need to choose a new cover with similar characteristics.
Please note that you can also find on sale so-called tuned radiator caps, designed to operate at increased pressure, in particular up to 1.3 Bar. This is done in order to further increase the boiling point of the antifreeze and thereby increase the efficiency of the car engine
Such covers can be used on sports cars whose engines are designed to operate at high power, but only for short periods of time.
For ordinary cars used in the urban cycle, such covers are absolutely not suitable. When installing them, a number of negative factors arise. Among them:
- The cooling system elements are subject to wear and tear. This leads to a decrease in their overall resource and the risk of premature failure. And if a pipe or clamp bursts due to excessive pressure, that’s half the problem, but this situation can end up much worse, for example, if the radiator or expansion tank bursts. This already threatens costly repairs.
- Reduced antifreeze life. Any coolant has a certain operating temperature range. Going beyond its limits reduces the performance characteristics of antifreeze and significantly reduces the time of its use. Therefore, when using tuned caps, you will have to change antifreeze more often.
Thus, it is better not to experiment and follow the recommendations of your car manufacturer. As for specific brands of radiator caps, there are quite a lot of them, and they are different for different cars (for European, American, Asian cars). It is best to buy original spare parts. Their articles can be found in the documentation or on special resources on the Internet.
Conclusion
Remember that a working radiator cap is the key to the normal operation of the engine of any car with a closed cooling system. Therefore, it makes sense to check its condition not only when it fails (or problems begin in the operation of the cooling system), but also periodically. This is especially true for older cars and/or cars that use water or diluted antifreeze in the cooling system. Over time, these compounds damage the material of the cover, and it fails. And the breakdown of its individual parts threatens to reduce the boiling point of the coolant and overheat the engine.
It is necessary to select a new cover according to previously known parameters. This applies to both its geometric dimensions (cap diameter, gasket diameter, spring force) and the pressure for which it is designed. You can find out this information from the manual or simply buy a radiator cap similar to the one installed before.
Classification
How to check the integrity and repair the expansion tank cap Plugs for heating radiators can be divided into groups according to several criteria.
Material
As a rule, it corresponds to the radiator material:
- For a cast iron battery, a cast iron radiator plug is used;
- For sectional steel and bimetallic radiators, steel pipe fittings are purchased.
Steel fitting for aluminum and bimetallic batteries.
Thread
It can be right-handed (screwed in clockwise) or left-handed. As a rule, the left plug for a cast iron radiator and the steel plug made in Russia for aluminum/steel/bimetallic devices are marked with the letter “L”.
If there is no marking, it is not difficult to identify the type of thread: it is enough to trace one of its threads over a couple of turns.
Functions
With a blind plug, everything is simple and clear: its only function is to plug the threads of the end section.
The pass-through radiator plug is used to connect the insulation and/or piping elements to the heating device. In fact, it is an adapter for a thread of a smaller diameter. The thread on the section depends on the material of the heating device:
| Battery Type | Thread size |
| Cast iron | DN32 (1 1/4 inches) |
| Aluminum, bimetallic | DN25 (1 inch) |
The diameter of the thread connected to the passage plug can also be different:
| Battery Type | Thread size |
| Cast iron | DU15, DU20, DU25 |
| Aluminum, bimetallic | DU15, DU20 |
Cast iron plug for liner with diameter DN20.
In some cases, the harness or liner may not use through-hole plugs for connection, but directly the thread of the end section manifold.
When is this practiced?
- When connecting cast iron batteries to the filling gap in a system with natural circulation. The maximum filling diameter is important here - it affects the hydraulic resistance of the circuit; therefore, the DN32 pipe is screwed directly into the sections.
- When installing a welded flush valve. These products are also, as a rule, made to fit the thread size of the sections themselves.
- When installing the air vent. Many manufacturers produce Mayevsky taps and automatic air vents for DU25 threads.
Symptoms of a bad radiator cap
It is recommended that the car owner periodically check the condition of the radiator cap, especially if the car is not new, the condition of the cooling system is average or lower, and/or if water or antifreeze diluted with it was used as coolant. It also makes sense to check the condition of the cap if antifreeze has been used in the cooling system for a very long time without replacing it. In this case, it may begin to corrode the rubber seal on the inner surface of the lid. A similar situation can arise, for example, when, when the cylinder head gasket is punctured, oil can get into the coolant. This process fluid is harmful to the lid seal, and in addition, it impairs the performance properties of the antifreeze.
The main symptom of a breakdown in this case is a leak from under the radiator cap. And the stronger it is, the worse the situation, although even with the slightest leakage of liquid it is necessary to perform additional diagnostics, repair or replace the cap.
There are several other indirect signs that the radiator cap is not maintaining pressure in the cooling system. These include:
- the bypass valve plunger sticks (usually skewed) during the return movement to compression;
- weakening of the cover spring;
- when pulling the atmospheric valve from its seat (seat), it jams and/or does not completely return to it;
- the diameter of the valve gasket is larger than the diameter of its seat;
- cracking (erosion) of rubber gaskets on the inner surface of the radiator cap.
The listed malfunctions can cause the radiator cap to let coolant (antifreeze or antifreeze) out. There are a couple more indirect signs of the cover failing. However, they may also indicate other, more serious failures in the cooling system. So, these include:
- when the bypass valve gets stuck, the upper radiator pipe swells;
- When the atmospheric valve sticks, the upper radiator hose is retracted.
Also, if one or the other valve does not work properly, the coolant level in the expansion tank will be the same. Under normal conditions, it should change (even if slightly) depending on the engine temperature.
Replacement or repair?
Why do many drivers drive with the expansion tank cap unscrewed?
Is it even possible to repair the tank? If he was torn to pieces, then no.
This element is subject to repair only in the event of failure of components - a float or a cover.
If the seal is lost, regardless of the reasons, repair is impossible. Theoretically, you can glue the plastic together and make patches, but such savings will not lead to anything good.
To replace the cover, use a spare part from the VAZ 2199 model. Although this model is older than the “ten”, the elements are interchangeable. Plus, the quality of the cover from the nine turned out to be better, and the thread matches perfectly.
Simply unscrew the broken cap and screw a new one in its place. That's the whole point of the replacement.
Replacement
So, the old expansion tank has lost its tightness, and therefore it should be dismantled and a new one should be installed in place of the old tank.
To properly replace the coolant container, you will need a certain set of tools and materials:
- Set of wrenches;
- Screwdrivers;
- Pliers;
- Clamps (we strongly do not recommend using old ones);
- Sandpaper.
Sandpaper is required to process the inlet holes of a new tank made of plastic. This is due to their roughness. If you make the holes smooth, the pipes will be stronger and fit more securely.
Installation process
Replacement instructions are included with each new tank. So there shouldn't be any problems with this. Let's describe the main points.
- If the car has just been driven into the garage, be sure to wait a while for the engine to cool down. When removing the container while the engine is hot, the coolant will be very hot. The consequences are not difficult to predict.
- Open the cap on the car's radiator. This will relieve excess pressure from the cooling system.
- Another cap is removed from the bottom of the radiator, which will allow you to drain the coolant. This doesn't always need to be done. For example, if the coolant was changed very recently, simply pinch the reservoir pipes so that you don’t have to drain and refill the coolant.
- Disconnect the coolant level sensor connector.
- Loosen the clamps to remove the steam pipe.
- Loosen the clamp on the filling hose and disconnect it.
- Disconnect the rubber tank securing strap to allow the tank to be removed.
- Reassemble the unit in the reverse order, but now with a new tank.
- If, after replacing the tank, the cap begins to release excess pressure normally, but the low coolant level lamp still lights up on the dashboard, try replacing the coolant level sensor. It is located in the tank itself and can be purchased separately.
- The sensor is installed by disconnecting the chip on the cover and screwing a new one in its place. That's all.
If you chose a tank from Priora, then you will have to remove the hood sound insulation and cut out a small section of it at the level of the top of the tank. This is due to the shape of the tank being slightly different from the standard one.
As you can see, the work is not difficult, no problems should arise. The main thing here is to correctly select a new expansion tank and, according to the instructions, install it in place of the failed component.