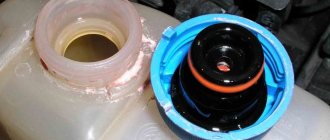
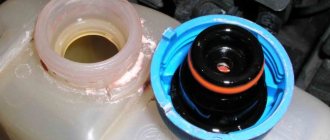
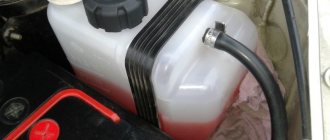
Such a small part as the expansion tank cap, unfortunately, almost always causes the least suspicion when any malfunction of the cooling system occurs. The expansion tank cap plays an important role in engine cooling. Its design allows you to regulate the pressure in the cooling system and maintain the correct temperature. Its malfunction can lead to a coolant leak or some kind of engine damage.
What functions does the expansion tank cap perform?
If you understand the operation of the cooling system, you can see that during its operation, a certain pressure is created inside. The fact is that when heated, any liquid expands, which creates pressure inside the system.
No car manufacturer is struggling with this problem. The fact is that pressure allows you to increase the boiling point of the coolant, and therefore reduce the risk of leakage due to boiling.
The difference in pressure inside the system and in the normal atmospheric environment lies in the tightness of the system, where the expanding liquid simply has nowhere to go. However, there is another side to the coin. Increased pressure can rupture the reservoir or cooling system pipes. Which will lead to instant overheating of the engine and failure. To prevent this from happening, the excess pressure of the cooling system must be periodically relieved. It is for these purposes that the expansion tank cap was developed.
How to replace the expansion tank with a new one
If the expansion tank on your VAZ 2112 is out of order, there is only one way out - replacement. Let us briefly describe this simple procedure that you can complete in just 15 minutes of your personal time.
- 1. Partially drain the coolant into a clean container using the drain plug on the radiator in sufficient quantity to easily remove the empty tank.
- 2. Loosen the clamps of the steam exhaust and filling hoses and fold the communications of the cooling system of the VAZ 2110 (2112) to the side.
- 3. By disconnecting the fastening clamp, you can remove the VAZ 2110 expansion tank from the hood.
The design and principle of operation of the lid
To ensure the required pressure, any expansion tank cap must create a hermetically sealed system. To relieve excess pressure, it has a special valve that opens when the pressure rises above the nominal value. Once the pressure is released, the valve closes and the cycle repeats until the engine stops.
When the engine stops, the dump valve closes and the intake valve opens. The fact is that during the cooling process, the liquid begins to narrow again, which means the pressure inside the system should return to normal. To do this, the intake valve draws in air and fills the space that was vacated by water or antifreeze. Thus, the pressure inside the cooling system is normalized and becomes corresponding to atmospheric pressure.
Why do expansion tanks break on a VAZ 2110 (2112) and what to do
The main failure of any expansion tank, of course, is its destruction due to high pressure, poor quality plastic or mechanical stress. In order to prevent destruction of the tank as a result of increased pressure, you should use a pressure gauge to check the functionality of the relief valve built into the lid. Below is a summary of what should be done to achieve this.
You can check the maximum pressure in the tank using an air compressor with a pressure gauge, plugging the filling and steam outlet pipes. The device readings should be in the range from 110 kPa (which corresponds to 1.1 kgf) to 150 kPa (1.5 kgf). Values outside the specified limits indicate that the valve is faulty.
Also pay attention to how securely the expansion tank of the VAZ 2110 is secured. Increased vibrations can cause friction and shocks against the car body, severe deformations and water hammer. In order to eliminate increased vibration, it will be enough to seal the container on the side of the walls with rubber gaskets.
Malfunctions of tank caps and their consequences
A leaky expansion tank cap can cause additional and “unnecessary” air leaks into the system. The fact is that if the pressure inside the system corresponds to atmospheric pressure, then the liquid will begin to boil at the temperatures at which this should occur. Thus, there will be a leak of coolant and subsequent overheating of the engine. The latter can easily fail.
The other side of the problem is the formation of an air lock. The air lock moves along with the coolant and prevents it from performing its functions. The liquid heats up and boils, which leads to its leakage, and in winter, due to an air lock, poor operation of the interior heater radiator is possible.
The worst thing is when the lid is hermetically closed, but has stopped releasing pressure into the atmosphere. As pressure increases, coolant begins to push out through pipe connections and other “holes in the system.” In the best case, everything will work out and you will only have to change the cover. At worst, the expansion tank can easily rupture and then repairs will cost much more.
Signs of trouble
The most critical signs of a faulty cap are steam coming from under the hood (if the engine temperature is not in the red sector, there is a 90% chance that the problem is in the cap) and/or swelling of the expansion tank.
You can also make an assumption that the cover is faulty if there is:
- coolant leaks from the tank;
- antifreeze leaks at joints;
- ruptures and swelling of hoses;
- air jams;
- engine overheating.
Steam, boiling liquid and leaks are associated with improper operation of the exhaust valve. Air locks are usually caused by a malfunctioning intake, or vacuum, valve. Bursts (swelling) of hoses can be caused by failures of both the exhaust and intake valves.
Air entrapment causes air pockets inside the heater core, thermostat, and radiator hoses. As a result, the engine will begin to overheat because the cooling system is unable to maintain a constant temperature.
If air pockets appear, you need to completely drain the old fluid and add new antifreeze. New liquid is poured in gradually, in small portions of 100 ml.
How to check the expansion tank cap
Before diagnosing malfunctions of the expansion tank cap, you must first make sure that there are no visible mechanical damages on it. These may include cracks, scratches or severe wear. In addition, all kinds of dirt, dust and other foreign particles are not allowed on its surface or on the inside. Only after this can valve faults be diagnosed.
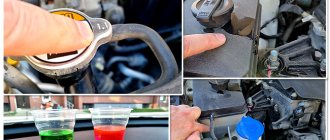
While the engine is running, unscrew the cap. If a hissing sound is heard, it means the valve is holding pressure in the system.
However, it is impossible to measure this pressure, and it has certain standards.
For a more detailed check, you can use a pressure gauge. To do this, use an empty expansion tank and screw the cap on it. Attach a pressure gauge hose to one of the fittings and secure it. All other openings are securely and hermetically sealed. Using a compressor, we create pressure inside the system and wait until the pressure is released. The resulting phenomenon is recorded in the form of pressure gauge readings and compared with standardized values.
Checking the cover
If there is reason that the cap may be faulty, how to check the cap of the expansion tank of a VAZ 2114?
In service centers, the test is performed on special stands with a pump and pressure gauge. The cover is screwed to the stand and the pump begins to supply air. When the pressure gauge reaches 1.5-1.7 atmospheres, the exhaust valve should operate. The operation of the intake valve is checked in the same way, only the air is pumped out from under the cover. If the valves do not operate, the expansion tank plug of the VAZ 2114 is faulty.
How can you test the cover in the field?
Checking the cover
First you need to conduct a visual inspection. Chips, cracks, gaps and other surface damage are reasons to replace the part. Look at the pressure rating listed for the vehicle and compare it to the pressure rating printed on the part. If they do not match, replace the cover.
Visually inspect the condition of the main seal, pressure seal, and return seal. Replace the part if the seals are cracked, hardened, or damaged.
Both the release valve and the vacuum relief valve should spring back easily when released. If there is any binding, replace the part.
The operation of the exhaust valve is checked with the engine running. You need to wait a few minutes after starting the engine until it warms up.
The cooling system will start working and the pressure in the expansion tank should change. Unscrew the expansion tank cap. If you hear a slight pop, like when you open a bottle of sparkling water, this is a sign of high pressure in the cooling system and a working bleeder valve. If there is no pop, the release valve is faulty.
Typically the intake valve is checked on a cold engine. One of the hoses leading from the tank to the radiator is pinched by hand. Once the hose is released, it should slowly level out in thickness. If the hose does not line up, the inlet valve is faulty.
Always check the radiator and expansion tank when replacing a faulty cap. Perhaps the malfunction has led to a dangerous build-up of excess pressure and damage or cracks have appeared.
How to fix a faulty tank cap on a VAZ 2109?
Many owners of VAZ 2109 cars are faced with a problem such as incorrect operation of the expansion tank cap. Its valve either cannot hold the pressure or simply does not release. In this case, the spring is to blame, the stiffness of which was not taken into account correctly by the manufacturer.
First, the cover must be disassembled. To do this, it is better to use a flat-head screwdriver and any pliers. When all the parts are on the table, it is necessary to reduce the elasticity of the safety spring. To do this, the number of its turns is reduced using pliers. As a rule, the safety valve is shortened by 1 turn, and all others by 2. After this, the elasticity of the spring decreases and the expansion tank cap is ready for use again.
This is how it is finalized, as you noticed, this procedure can be performed without the help of auto mechanics and will significantly save money on repairs
Refinement methods
There are several modification options with similar results, but differing in effort and time. Let's look at the most popular of them.
The first method of modernization
It involves purchasing a high-quality locking structure from a foreign car and then disassembling it.
Description of works:
- The cover installed by the factory is removed and the “filling” is removed from it.
- Do the same with the purchased part. For convenience and to speed up the process, the original body is sawn.
- You can also cut the center flange.
- In the purchased part, the working structure is trimmed by 1 mm.
- After this, the mechanism is mounted in a new housing, strengthened with a rubber seal.
Once fully assembled and checked for secure fastening, the cover can be replaced.
The classic way to improve
This option does not require the purchase of a new part - the existing one is improved.
Step-by-step algorithm:
- The cover is removed from its seat and carefully disassembled - the mechanism is removed, controlling the springs. They are compressed and can pop out.
- After removing the working mechanism, you need to remove the springs and shorten them - the large one by 1 link, the small one by 2.
- Then the part is assembled in reverse order, installing the elements in their factory locations.
The performed manipulations make it possible to reduce the valve response threshold - it opens at a pressure of 1 bar.
Modification of the machine tank lid
Automotive technicians recommend cutting off the springs little by little, constantly monitoring the workload. Once trimmed and inspected, the cut end will need to be sanded to prevent damage to the plastic.
Removing and replacing the tank
An expensive and time-consuming, but effective way to fix problems with the cooling system. It involves removing the standard locking element tank and installing equipment from another car (foreign car).
When purchasing a kit, it is recommended to first measure the diameter of the inlet and outlet pipes. If necessary, purchase adapters.
Replacing the expansion tank VAZ 2114
Considering the relatively low price of the part, a full replacement is the optimal solution. All repairs are carried out on a cold machine. Before work, the Lada needs to be de-energized by disconnecting the terminals from the battery. To work you need:
- pliers;
- a piece of sandpaper;
- container for used antifreeze
- a set of new clamps;
- Screwdriver Set.
- Sand the inlet holes of the tank so that the edges are perfectly smooth;
- Open the radiator cap to reduce the current pressure;
- We squeeze the clamps of the old tank, remove the two upper tubes;
- Disconnect the lower wide hose and move it to the side;
- Remove the rubber clamp of the old container, take out the tank;
- We secure the new tank with a clamp, attach a wide hose;
- Further manipulations are in reverse order.
When installing a new part, a complete fluid change is recommended. For Lada you need no more than 8 liters of antifreeze. After performing the manipulations: start the engine; carry out the diagnostic measures described above.
The cap of the expansion tank of a car's engine cooling system, as a rule, does not raise suspicions about its serviceability. This, as many people think, very “modest” in importance part is entrusted with a very important task - to regulate the pressure in the cooling system. When the lid stops coping with this, in the best case, liquid will boil or leak out, and in the worst case, this will lead to the breakdown of some components.
Tank defects leading to system malfunction
Malfunctions of the container often cause antifreeze or antifreeze to squeeze out through the lid. Failures of the tank that require its replacement include the following defects:
- The presence of burrs and burrs on the threads and inlet of the cover.
- Failure of the pressure regulating valve.
- Damage to the sensor indicating the coolant level.
- Rupture of the walls of the container, leading to intense leakage of coolant.
- Wear and aging of container elements leading to malfunctions.
- Mechanical damage to the body due to impacts received during an accident.
Irregularities on the thread create difficulties when tightening the plug and do not allow the connection to be sealed.
Plastic walls often crack due to prolonged exposure to boiling liquid, high pressure, or due to insufficient thickness of the plastic. When purchasing a new tank, you need to make sure that the materials from which this unit is made are of good quality.
Dismantling and replacing the tank on the “ten”
To replace the device, you will need to drain the coolant if it has not leaked out before. The expansion tank VAZ-2110 is dismantled as follows:
- Disconnect the negative cable from the battery.
- Disconnect the wire from the refrigerant level sensor.
- Using a Phillips-head screwdriver, unscrew the screws on the clamps of all hoses, loosening them.
- Disconnect all hoses going to the tank.
- Unfasten the rubber strap securing the tank and remove it.
Installing a new device is carried out in the reverse order. Don't forget to add coolant to the correct level!
What is an expansion tank
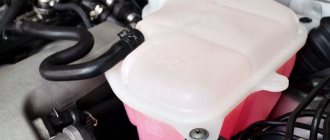
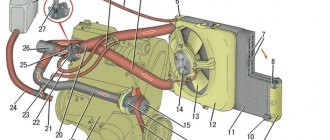
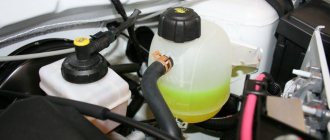
Let's consider the design of the expansion tank of the VAZ-2110. Its factory body is made of translucent soft plastic. It has two holes on top: a filler neck and a seat for the refrigerant level sensor.
The VAZ-2110 expansion tank is equipped with three fittings to which the corresponding hoses are connected. The steam exhaust pipes of the main and heating radiators are connected to the two upper “nipples”. A thick filling hose is connected to the lower fitting. That, in principle, is the whole structure.
