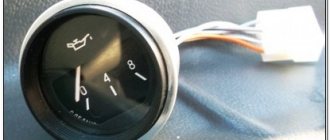
A tachometer is used to measure engine speed of exclusively carburetor cars. This is a device located on the front panel.
It cannot be called super important, but for a novice driver who does not yet “hear” the engine of his car, it helps to calculate the number of engine and crankshaft revolutions. It also plays an aesthetic role. Many car owners like to show off modern instruments on the control panel.
The VAZ 2106 has a four-stroke four-cylinder engine, and during 1 revolution of the ignition distributor rotor, the contacts of the breaker, the so-called distributor, open and close four times.
Other VAZ models have different engines, so you need to take this into account when installing tachometers. The measurement of impulses underlies the operation of the tachometer and directly depends on the engine crankshaft speed.
Important: each brand of car must have its own measuring device, otherwise the readings will be false.
Mechanism design
On a plastic case with a glass holder there is a milliammeter of the usual classical structure with an attached scale. On it, zones of dangerous crankshaft speeds are indicated in different colors: the preliminary zone (5500-6000) is highlighted in yellow, and the dangerous speed zone (more than 6000) is highlighted with red lines.
The device is uniformly illuminated by an AMN 12-3 lamp. At the bottom of the scale there are three colored lights, indicating respectively: the amount of charge, oil pressure and the status of the parking brake. Inside the tachometer there is a moving coil with a permanent magnet, thanks to which the pulse indicator needle is set in motion.
The device is electronic, so it is powered by the car's ignition.
Connecting the tachometer VAZ 2106
When purchasing a new pulse meter, instructions for connecting the device should be included. You can also find installation diagrams in reference books for motorists. But still, if you are not an experienced mechanic and have not dealt with electronics, contact a service station: for a small fee you will save your time.
From this video you will learn how to connect a tachometer! Enjoy watching.
And for those who want to engage in “self-medication”, the connection process diagram is quite simple:
- First, connect the brown wire to the “K+” terminal of the ignition coil. Pulses from the coil through this cord will control the tachometer readings.
- We look for the thick red wire and connect it through the fuse to the ignition switch. The device will receive power from the battery.
- The next one is a white cable with a black stripe, which leads to the “minus”. It is used to connect to ground.
These are the three main wires. Auxiliary ones are used for:
- white – connection of the device backlight;
- black – connection to the charging relay (located on the right side under the hood of the car);
- gray with a black stripe – contact with the oil pressure sensor (located on the left side of the engine).
Installation on a car with a carburetor
Before connecting the tachometer, it must be installed in the location chosen for it. This way you can immediately see how long of wire you will need. Then the negative cable is connected to ground. It is, as previously reported, black and white or completely charcoal.
Connect the brown or red wire to the ignition switch contact. Look at the diagram where the positive from the battery comes. If it is not there, then find it using a tester. This is done like this:
- set the multimeter to 20 V;
- Place the black probe on ground;
- Touch all the contacts in red one by one - the one you are looking for will have 12 volts.
The last posting is used to obtain data on the number of crankshaft revolutions 2105. Its color is not defined, each manufacturer uses its own. This cable in the contact ignition system goes to the distributor breaker. Otherwise, it is connected directly to the voltage switch. If the tachometer has its own backlight, then it is additionally connected to the car’s side lights circuit.
The most common device breakdowns
The TX-193, with its non-separable design, is a complex electronic device, so it is almost impossible to repair faults at home. Most likely you will have to purchase a new device. From this video, you will learn how you can modify the tachometer of the VAZ 2106. Let's take a look!
If the tachometer does not work: you need to check whether all relevant wires are connected correctly. We ring the cable from the ignition coil and check the contact. It is necessary to measure the current resistance.
Mismatch between the TX-193 device and the contactless ignition circuit
Old samples of TZ-193 devices are designed purely for a contact system. Car owners of VAZ model 2106, who personally converted their cars to a contactless system, had difficulties with the tachometer. The reason is the different shape of electrical pulses that arrive at the device from the breaker (contact) and the switch (contactless system). The simplest solution to the problem is to install a capacitor in the section of brown wiring directed from the breaker. However, here you will need to empirically select the required capacity, otherwise the tachometer will show incorrect values. Therefore, if you are not eager to engage in experiments of this kind, simply purchase a device for a contactless system.
Tachometer VAZ 2106
A tachometer is used to measure engine speed of exclusively carburetor cars.
This is a device located on the front panel.
It cannot be called super important, but for a novice driver who does not yet “hear” the engine of his car, it helps to calculate the number of engine and crankshaft revolutions.
It also plays an aesthetic role.
Many car owners like to show off modern instruments on the control panel.
The VAZ 2106 has a four-stroke four-cylinder engine, and during 1 revolution of the ignition distributor rotor, the contacts of the breaker, the so-called distributor, open and close four times.
Connection diagram
2 – ignition coil;
3 – ignition distributor:
The tachometer TX-193 of the VAZ 2106 works on the principle of measuring the frequency of voltage pulses occurring in the primary circuit of the ignition system. In a four-stroke four-cylinder engine, during one revolution of the ignition distributor rotor, the breaker contacts open and close four times. That is, four voltage pulses are generated per revolution of the rotor (or two pulses per revolution of the crankshaft). Thus, the pulse repetition rate is directly dependent on the engine crankshaft rotation speed, which, in fact, is reflected in the instrument readings.
In order to figure out how to connect a tachometer to a VAZ 2106, you just need to find out the purpose of the connected wires:
The white wire is used to connect the device backlight;
The red (thick) wire is connected through a fuse to the ignition switch; it receives power when the ignition is on;
White wire with a black stripe - for connecting to ground in any convenient place;
Brown goes to the “K+” terminal of the ignition coil, signals from this wire control the tachometer readings;
The black wire connects to the relay for turning on the charging current indicator, which is located on the right side under the hood;
The gray wire with a black stripe contacts the oil pressure sensor located on the left side of the engine.
What to consider when installing
If you still decide to install the VAZ-2106 tachometer on the Oka, the diagram for connecting it to the ignition system will be the same. But the choice of installation location needs to be approached more thoroughly. You need to consider the following features:
- The tachometer installed on the panel should not block the view.
- It should not interfere with driving. This is especially true for cars like Oka.
- You definitely need to choose an option for decorating the device. He shouldn’t stand out, but it’s difficult to achieve this.
Sheet metal is perfect for making a housing for a tachometer. Some motorists use large coffee cans. But before you use it to make the body, you need to clean it to a shine, sand it, cover it with a layer of primer and paint it. This will increase the service life.
It is advisable to then cover the body with some material so that it harmonizes with the overall appearance of the interior - leatherette or dermantine is suitable. If you can find an attractive plastic case, that's great - it will look much better. And there is no need to prepare a place for installation - black plastic looks very good in the interior of an Oka or Kopeyka.
How does it work?
To understand how the VAZ 2106 plug-in household or car tachometer works, you need to understand what the design of the device is. In accordance with the tachometer diagram, this device belongs to electromechanical type devices. Accordingly, the tachometer connection diagram for a carburetor or injector is combined - the tachometer needle on a VAZ 2106 is driven by impulses. The device itself reads signals that arise during the operation of the ignition system.
The power unit of domestic “classics” operates in such a way that during one revolution of the crankshaft, the contact group of the ignition breaker must close and open 4 times. Accordingly, here you can already understand how the tachometer on a VAZ 2105 or 2106 works - the device needs to count the total number of signals and divide the resulting value by 4.
Six tachometer connection diagram
Advantages of contactless systems
For an ignorant car enthusiast, the main argument in favor of BSZ is the fact that at the moment not a single manufacturer produces cars with a contact-cam spark generation system. Foreign brands abandoned it in the distant 80s of the last century, and in the Russian Federation mechanical ignition lasted until the 90s. The reasons for the refusal are quite clear:
- sparks constantly flashed across the contacts, causing them to burn and require frequent cleaning;
- the contact group wore out quite quickly, on average it was enough for 15-20 thousand kilometers, after which the element had to be replaced;
- the wear of the bearing on which the contacts were located made itself felt, which caused unstable operation of the power unit;
- the springs of the balance weights were stretched.
Non-contact ignition produces a powerful spark, which makes fuel burn better
All of the listed malfunctions appeared one by one, haunting the owner of the “classic” Zhiguli. Due to an imperfect design, the spark power of the spark plugs was constantly decreasing, engine performance was deteriorating, and fuel consumption was increasing. New BSZ systems are free of such disadvantages; they are characterized by durability and stable sparking. The spark power also increased, since the output pulse voltage increased from 16-18 kV to 24 kV, which contributes to better ignition of the fuel.
Possible faults
Why doesn’t the tachometer work, why does the needle on the installed device twitch and jump, how can I check the device myself? We suggest that you familiarize yourself with the list of the most common malfunctions for the device. If you notice that the arrow on the supplied device begins to twitch, then most likely the jump may be due to the inoperability of the capacitor located at the bottom of the breaker. The capacitor may be broken or its contact is very weak. If you notice that there are signs of damage on the device itself, then it would be best to change it (author - Master Ruslan channel).
In some cases, the needle jumps due to the use of a battery that has expired. One of the most common causes of device failure is wear of the cable; in some cases, the problem may occur due to the failure of the coil, but this happens much less frequently. If you are using an analog device, it may not work correctly due to any damage to the microboard. As for digital devices, they are more reliable in terms of operation, but the weak points in such devices are the board with the processor, as well as the signal counter.
Diagnostics can be done as follows:
- Disconnect the wiring supplying the device.
- Turn the key in the ignition.
- If the needle of the device is at 0, this indicates its performance. If the arrow tends to the maximum value, most likely the problem is a short circuit. If the needle very slowly returns to 0, then most likely the reason lies in the breaker capacitor.
Analog or digital?
Typically, the VAZ 2106 has an analog device, where the arrow shows the number on the scale. Such a tachometer transmits the physical rotation of the flywheel, which cannot be an accurate indicator, so service stations often replace the standard version with a digital one.
The digital device performs a formulaic count of revolutions using a small processor. This calculation includes a variety of jumps in flywheel speed, taking into account all the errors and inaccuracies. The digital version of the device gives a more complete picture of the operation of the vehicle engine.
After all the owners of the “six” began to switch en masse to digital tachometers, analog meters began to gradually disappear from the market. However, VAZ 2106 drivers who value classics, elegance and style prefer analog versions of the device, since the arrow on the dial looks more solid and vintage. And we are talking not only about devices integrated into the panel, but also about remote rotation sensors.
Connection features
So that you can understand how the device should be connected, you first need to become familiar with what these or other wires are intended for.
It should be taken into account that the colors of the wires and their purpose may differ depending on the manufacturer of the device, but for the standard “TX-193” device, which is usually used in “sixes”, the diagram is as follows:
- A white cable is required to connect the backlight.
- The red wire is connected to the ignition switch, a fuse is used for this, this cable supplies power when the ignition is activated.
- A white cable with a black break is required for connection to the car body.
- The brown wire connects to the K+ terminal on the coil.
- The black wire is connected to the charging current indicator relay. The latter, in turn, is installed on the right in the engine compartment.
- The gray-black cable is required to connect to the engine fluid pressure regulator installed to the left of the engine.
Sorry, there are no surveys available at this time.