- Characteristic
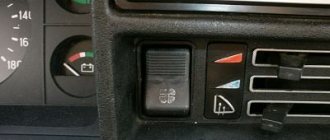
- Warning and indicators
- Major repairs yourself
- What is needed for repair
- Preparing the cylinder head
- Engine assembly
- Video instruction
In order to save money, owners often repair the VAZ 2107 engine with their own hands. The motor of this model has some features. Before repairs without a service station, you need to familiarize yourself with the causes and methods of eliminating problems with the VAZ 2107 engine.
Photo of a VAZ 2107 engine.
Characteristic
The VAZ 2107 “Classic” is equipped with a four-stroke in-line engine with four cylinders. The engine, depending on the modification, can be made with a central mixing injection system (carburetor) or with a distributed injection system (injector). Depending on the modification, it can also develop from 68 to 74 horsepower.
Car engine maintenance must be carried out in accordance with the manufacturer's instructions, adjusted for operating conditions.
Lada 2107 is a rear-wheel drive car. The connection between the engine and the variable gearbox is made longitudinally. This design can cause difficulties when completely dismantling the motor. Almost the entire internal engine compartment space is used to house the engine, air filter and auxiliary systems. This also causes difficulties during repairs.
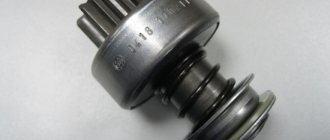
Special tool car-tool.
The need for engine repair can be caused by a number of reasons:
- terms of Use;
- planned wear of parts;
- engine diagnostics;
- unscheduled breakdowns;
- accidents and others.
The car was produced for about forty years. Due to the outdated design, there may be incompatibility with a number of tools. In addition, complete engine overhauls are performed exclusively in private repair shops.
This increases the cost of work so much that it may be easier to buy a new motor. If the damage is minor and can be fixed without complex procedures, or if it is possible to perform a partial overhaul, it is better to do everything yourself
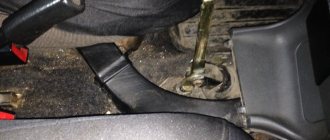
Sequence of work when removing the engine
Disconnect the coolant inlet and outlet hoses from the engine and remove the radiator along with the thermostat, hoses and fan motor.
Remove the air filter by first disconnecting the hoses from it, removing the cover and filter element. Close the carburetor with a technological plug.
Using a spanner, unscrew the nuts securing the front muffler pipe to the exhaust manifold.
Remove the gearbox, proceeding as described in the article on the clutch.
Disconnect the carburetor throttle linkage and the choke control cable from the engine. Disconnect the fuel supply hose and the hoses going to the heater from the engine.
Hang the TSO-3/379 traverse on the hoist and sling the engine on the right side through the bracket installed on the front stud of the exhaust manifold, and on the left side - behind the clutch cover mounting hole.
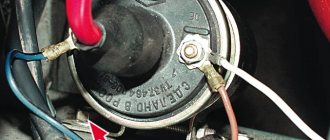
Warning and indicators
The first thing you should pay attention to when there is a need for engine repair is the condition of the oil in the crankcase (color, turbidity and level). Motor oil in the engine lubrication system is the main indicator of the condition of the connections of engine parts.
Cloudy engine oil.
Cloudiness of the oil indicates the presence of running-in parts, blackening indicates possible overheating or a flame breakthrough from the combustion chamber into the crankcase. A decrease in level may indicate leaks or friction wear in overtightened joints.
Checking the oil level is carried out on a cold engine when the car is installed on a flat horizontal surface.
It is also necessary to check the level of antifreeze in the expansion tank. If the level drops, this may indicate overheating or a leak in the cooling system. If the level rises, then we can talk about problems with the thermostat - a device that, depending on the temperature of the coolant, regulates the speed of its movement in the cooling system.
Other malfunctions of the VAZ 2107 engine and their characteristic manifestations can be found in special literature and engine repair instructions.
Disassembly and repair of the VAZ 2110 engine
Video on overhauling and assembling an engine, a VAZ 2112 car, as well as detailed instructions with photos on disassembling a VAZ 2110 engine. Video on overhauling and assembling an engine, a VAZ 2112 car, as well as detailed instructions with photos on disassembling a VAZ 2110 engine.
Repairing a VAZ 2110 engine, like any other car model, is not an easy job, but it can still be done. If you know even a little about technology, you will be able to do it. To carry out repairs, you must at least disassemble the engine. We bring to your attention a hint on how and in what sequence to perform such work.
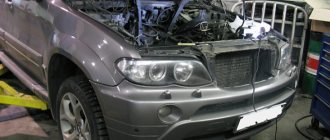
Major repairs yourself
Before proceeding with a major overhaul of the VAZ 2107 engine, it is strongly recommended that you familiarize yourself with special literature in order to better understand the procedures being performed.
Upon completion of the repair, the vehicle must be run in to break in all parts. Typically, break-in occurs within the first 5,000 kilometers.
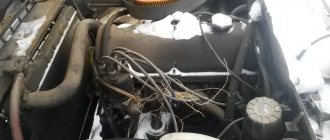
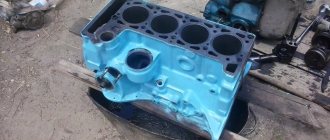
Engine prepared for major overhaul.
Before disassembling, the engine oil must be drained. To do this, warm up the engine to approximately operating temperature and turn it off. If there is a ditch, then the car is driven into it.
If it is not possible to drive into a ditch, you must park the car on a flat surface.
Place a 10-liter container made of heat-resistant material under the oil drain hole. Unscrew the plug and drain the oil.
After this, drain the antifreeze from the cooling system through the drain hole at the bottom of the engine cooling radiator.
IMPORTANT!
The oil can reach temperatures of about 100 degrees. If you try to start the car with the oil and antifreeze drained, the engine will completely fail.
When all the working fluids have been drained, unscrew all the supports and disconnect the bolted connections of the flywheel to the gearbox. Using a winch, remove the engine from the hood space and install it on a stand for repair.
Disassembling the engine does not require a special approach: simply unscrewing the threaded connections.
Photo of the removed cylinder head.
Everything is removed: the cylinder head, electrical components, including the starter and generator, connecting rods, crankshaft, oil pump, and so on. The result should be a separately disassembled cylinder block and crankshaft. Removing the head and all elements is a simple procedure.
It will be difficult when assembling gas distribution and other engine mechanisms that require precise alignment of the position of the working parts. Installing the head will require compliance with the timing marks and other mechanisms.
The removed cylinder head and crankshaft, along with the purchased pistons, are taken to a grinding specialist. The specialist takes all measurements, including all crankshaft dimensions, for subsequent engine boring. Boring is necessary to compensate for wear of non-replaceable parts. The specialist bores the pistons already purchased to size.
Why is it worth disassembling the engine?
Engine disassembly is carried out if the engine is planned to undergo a major overhaul. At the same time, it must be completely disassembled and all worn elements replaced. In addition, boring the cylinder block, which must be freed from all parts of the engine, will be relevant. In addition, you can disassemble the engine in order to simply clean it, in case of serious contamination, when it is not possible to get by with simple flushing oil.
We will try to omit the details regarding its removal, since this is quite simple to do: you just need to unscrew the nuts 19 from the cushions, remove the attached parts (all parts of electrical equipment, hoses and pipes, as well as drives of various elements) and unscrew it from the gearbox. After this, the motor is thoroughly washed and installed on a special stand (the use of a regular workbench is also welcome).
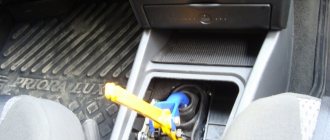
What is needed for repair
First of all, worn out sliding bearings under the crankshaft supports and piston rings (compression and oil scraper) need to be replaced. You need gaskets (for the cylinder head and others) and seals - installing old ones with new working dimensions can lead to the formation of gaps through which oil and antifreeze will leak.
Consumables necessary for major repairs.
You also need to purchase rollers and a belt for the belt drive. If the drive is chain, you need to check the chain.
Temperature and pressure sensors in the lubrication system need to be replaced.
We need filters (air, oil filter and others), new oil and antifreeze.
The list of what is needed to repair an engine on a VAZ 2107 also includes all consumables and fastening elements. For example, sealant or retaining rings. The need for them arises during the repair process and cannot be determined in advance.
Detailed instructions for disassembling and repairing the VAZ 2110 engine:
3. Remove the tension roller, camshaft drive belt and spacer washer, which is installed under the tension roller.
4. Remove the toothed pulley from the camshaft.
5. We unscrew four bolts, three of which attach the water pump. Unscrew the fastening nut on the rear cover of the camshaft drive belt and remove the cover.
6. To remove the water pump, insert a screwdriver between the block and the flange of the pump housing and thus move it from its seat. After completing these operations, remove the water pump.
7. Remove the head from the cylinder block.
8. Unscrew the bolts (there are 16 of them) securing the oil sump, then remove it together with the gasket.
9. Unscrew the bolts (there are 3 of them) securing the oil receiver and remove it. Please note that there are spring washers under the bolt heads.
10. Unscrew the bolt in the oil sump that secures the oil level sensor. Don't forget that there is a spring washer under the bolt head. We remove the sensor from the cylinder block; if necessary, you can rotate the crankshaft so that its counterweight does not interfere with removing the sensor.11. Then rotate the crankshaft so that the piston that is being removed hits BDC (bottom dead center). It is necessary to unscrew the two fastening nuts to remove the connecting rod cover.
12. Now remove the connecting rod cover. In cases where it is difficult to dismantle the cover, you can first remove it with light blows of a hammer. It may be that the cylinder number on the cap will not be visible, in which case the cap should be marked with the cylinder number.
13. Using the handle of a hammer, push the connecting rod inside the cylinder, then carefully remove the piston and connecting rod from the cylinder. During the process, you need to make sure that the lower head of the connecting rod does not touch the cylinder mirror, since this can damage it. We remove the remaining pistons in the same way.
14. If you need to remove the piston from the connecting rod, then mark it with the cylinder number so as not to confuse them when installing them. There should also be a cylinder number on the connecting rod: if it is not visible, then we mark the connecting rod as well.
16. Unscrew the bolts (there are 6 of them), remove the crankshaft rear oil seal holder and the gasket. Remember that there are spring washers under the bolt heads.
17. Remove the toothed pulley from the crankshaft. If the key does not fit tightly in the groove of the shaft elbows, be sure to remove it so that it does not get lost.
18. Unscrew the six bolts, under the heads of which there are spring washers, and remove the oil pump and gasket.
19. We unscrew the mounting bolts on the five covers (each with 2 bolts) of the main bearings.
21. Remove the crankshaft of the VAZ 2110 car.
22. We remove the crankshaft thrust half-rings on the middle support.
23. If you do not plan to replace the liners, then as you remove them, remove them from the block beds and from the main bearing caps.
24. On the non-working side we mark the liners relative to the beds and covers.
25. If there is a need to remove the engine mounts and generator brackets, unscrew the bolts (3 pieces) securing them and remove the water pump supply pipe by unscrewing its fastening.
26. Remove the piston rings using a special puller. If there is no such device, then remove the rings from the piston by carefully releasing the ring locks.
27. Remove the oil scraper ring expansion spring from the auto engine piston.
28. Remove the retaining rings that hold the piston pin on both sides of the piston. There are recesses in the piston bosses for easy removal of the rings.
29. Using a suitable mandrel, push the pin out of the piston, then remove the piston from the connecting rod.
30. Remove the liners from the connecting rod and its cover. If they remain on the crankshaft, remove them from the shaft. If replacement of the liners is not required, then as they are removed, we mark them with respect to the numbers of the covers and connecting rods.
This completes the process of disassembling the VAZ 2110 engine. Good luck with the completion of the renovation.
Detailed video lesson: engine assembly
Video about overhaul of VAZ internal combustion engine:
Video - VAZ 2112 engine assembly:
Source