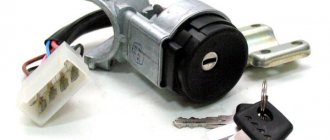
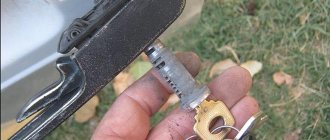
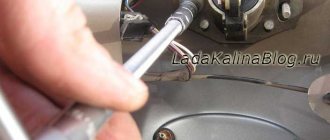
Hi all. The problem was the following: with the onset of cold weather, the car stopped starting with the key, while with automatic winding everything went well. But firstly, the car is not always set to autostart, thank goodness for the original tips, which do not always work, and secondly, this is still a problem that needs to be solved. Another reason for replacing the lock was that the cylinder jams when you turn the key, and sometimes you have to unscrew the lock back and forth several times. Why did we decide that the problem was in the ignition switch? The answer is simple, the car starts with autostart, and autostart bypasses the ignition switch, therefore there is not enough current from the lock itself. A new lock assembly with door cylinders (3 pieces) and bolts with break-away heads cost me 1,140 rubles. I couldn't find it cheaper anywhere. It is important that the kit includes a key for the plastic case for the original alarm system (immobilizer). To replace the lock we will need: 1. Hammer and chisel. 2. Long Phillips screwdriver 3. Well, you can take pliers, but I didn’t need them. I didn’t disconnect the negative terminal from the battery, but everyone advises doing this. So, we need to unscrew 3 small screws: one under the steering wheel, the other 2 almost at the end of the steering casing. Then 4 more around the perimeter.
I had one self-tapping screw stuck, so I had to unscrew all the others, and then slowly and carefully remove the upper and lower panels from the steering column, this must be done VERY CAREFULLY. I struggled with this, but I filmed it without loss.
Then 4 bolts with tear-off heads await us.
The ignition switch on a Lada Priora car starts the engine. In order for it to start, the machine needs to be given a command. The price of a part for a Priora car is from 1,800 rubles. Replacing the ignition switch is a simple procedure that a beginner can handle.
The driver, turning the key in the lock with the immobilizer in several different positions, gives the command to turn on the ignition or start the engine. Only after this everything starts to work: the starter turns, the crankshaft begins to move, and finally the spark plugs give a spark for the first portion of the air-fuel mixture. But the operation of all these parts may not take place due to a malfunction of the ignition switch on the Priora.
If the car does not start, and you are sure that the components are working properly and the battery is charged, you will have to remove it in any case to inspect and identify the fault. Repairs can be done by anyone; it’s enough to understand all the steps in detail. If it does not help, then the ignition switch needs to be replaced.
How to change and remove it on a Lada Priora car and how many actions need to be performed, you will learn from the article.
Once the ignition switch is turned, the car remains in the ignition even when you remove the key. Unfortunately, Priora is not deprived of this; as the lock wears out, this happens.
How long it will work depends on how you use it. If you use force once, you can break the ignition switch.
Standard ignition switch - article number, price, how it works, device
The module on Priora does not work directly with the components that initiate the engine start. For it to work properly, you need to wait a few seconds before starting until the fuel pump creates the required pressure. On the Priora, only wires are connected to it - the paths along which messages pass from the ignition switch to the electronic control unit.
The ECU of the Priora car just receives data about the position of the key and can crank the starter if this operation is “not blocked”. Due to a breakdown, it can only turn on the ignition, leaving the battery to work.
After the ECU key has turned, it gives commands to several parts at once. When you turn on the second position, let the fuel pump run for 5 seconds so that it pumps fuel from the tank closer to the engine.
When the starting process itself begins, the starter rotates - the force it creates goes to the crankshaft;
the ignition system element converts the low voltage current coming from the battery into a high one so that the spark plugs are “charged” and give a spark at the right moment;
The injector creates the first batch of air-fuel mixture to put it into the chamber, where everything is ready for it - the pistons “move”, the spark plugs spark.
In the module itself, everything is simple - there is a cylinder with a return spring inside, between the coils there is a locking ball that does not allow it to curl up more than necessary, and a locking rod holds the structure in place. Finally, as a complication of the entire system, there is an “immobilizer” - an anti-theft system that you can install yourself. It just takes a long time to set it up.
A regular kit with a master key and several door cylinders (with an immobilizer) costs from 1,800 - 2,000 rubles, catalog number - 2170-3704005. A set without a master key (without an immobilizer) can be purchased for 1,200 – 1,400 rubles, article number -2170-3704006.
Life hack: Priora car ignition switch - malfunctions, replacement, price
The ignition switch on a Lada Priora car starts the engine. In order for it to start, the machine needs to be given a command. The price of a part for a Priora car is from 1,800 rubles. Replacing the ignition switch is a simple procedure that a beginner can handle.
The driver, turning the key in the lock with the immobilizer in several different positions, gives the command to turn on the ignition or start the engine. Only after this everything starts to work: the starter turns, the crankshaft begins to move, and finally the spark plugs give a spark for the first portion of the air-fuel mixture. But the operation of all these parts may not take place due to a malfunction of the ignition switch on the Priora.
If the car does not start, and you are sure that the components are working properly and the battery is charged, you will have to remove it in any case to inspect and identify the fault. Repairs can be done by anyone; it’s enough to understand all the steps in detail. If it does not help, then the ignition switch needs to be replaced.
How to change and remove it on a Lada Priora car and how many actions need to be performed, you will learn from the article.
Once the ignition switch is turned, the car remains in the ignition even when you remove the key. Unfortunately, Priora is not deprived of this; as the lock wears out, this happens.
How long it will work depends on how you use it. If you use force once, you can break the ignition switch.
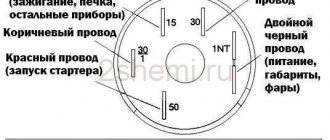
Diagram and pinout of the ignition switch on Priora
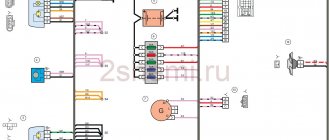
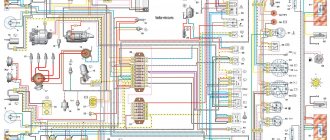
The diagram looks like this:
Using the diagram, you can track the presence of an immobilizer, as well as a blocker for excessive cranking of the starter. It starts from the battery - the pinout transmits voltage from it to point 30. Here the connection to K4 is a fuse relay. The contact group of the ignition switch of a Priora car will only work if the locking rod is in place and holds the key.
What is the Priora ignition switch return spring suitable for?
Added after 37 seconds You most likely have a 10-12 castle
Just put a button, and you don’t need to show off or repair anything))). To remove the old one - only an angle grinder will probably help (((.
Yes, - a button and a couple of relays. There are diagrams on the internet.
21104, and then the code (3704010, I think). I googled it - they write that this is a lock for 2113-2115 and Grants. In addition, it is almost twice as expensive as the Kalinovsky 1118 (although the Kalinovsky is not made by DAAZ, but by some other manufacturer, also supposedly Dimitrovgrad).
Basic faults
Usually the module is “sinned” when the battery is dead - nothing will turn on, even the ECU will not receive a signal. You can solve everything by charging the battery or installing a new one. But if you are sure that the key in the ignition switch has turned, but there is no “effect”, then the problem is in the module.
- Firstly, one of the dangerous problems is a faulty locking rod. As was said, it does not allow you to remove the key when it is in position I or II. If you accidentally notice that the key falls out, try to replace the block as soon as possible. It happens that replacement is taken due to an immobilizer error. This can only be done as a last resort, having accurately checked all possible “escape routes”, because reconfiguring the ECU will take a lot of time.
- Secondly, the wiring connected to the unit may become damaged, and it will become “cut off” from the Priora’s electronic control unit. It is necessary to ring all sections of the wiring and change it. In the same group of problems is the fuse relay. If the fuse is blown, the engine will not start.
- Thirdly, the spring may become deformed or break. This manifests itself in the fact that after cranking the starter and starting the engine, the key does not return to position I.
Car alarm connection points for Lada Priora 2011
Author RA9UBD
Ignition switch: + 12V – brown Starter – red IGN – blue/black
Tidy: Tacho signal - brown/red Handbrake - brown/blue (For more details, see Diagram 1)
Connector X3 (See Fig. 1) BCM: Driver's door switch - blue/black Right front door switch - brown Rear door switches - gray/red Trunk switch - yellow/red Opening the trunk (low-current input, possible without a relay, additional channel directly to alarm) – blue/red
Connector X1 (See Figure 1) BCM: Turns – blue, blue/black
Ts.Z. - brown; The wire is located inside the driver's door, in the harness from the button block. (See Diagram 3 for details)
Hood end cap – white/black; Connector X2-17 (If an engine temperature sensor is used, then according to scheme 2)
The block is located behind the panel, near the gas pedal. To remove the block, remove the left and right panels, unscrew the two 10mm nuts, left and right, securing the block.
Connection to central locking
When connecting the central locking (see diagram 3), if you connect only to the brown wire in the driver's door, then all doors will close and only the driver's door will open. To open the remaining doors, you need to use a wire in the alarm for two-step opening of the central locking system, and connect according to the diagram below.
The remaining doors are opened by the second impulse, relay K1. Relays K2 and K3 are also activated; they are needed to block the right power windows. If this is not done, then when you open the remaining doors, the right windows will open slightly for 0.8 seconds, i.e. from the impulse to open the central locking, the second step. It is necessary to block the power windows due to the peculiarities of the electrical circuit of the Priora doors.
If the configuration does not include power windows on the rear doors, then relay K3 does not need to be installed, and accordingly, cell X1-11 in connector X1 is not used. (The color of wire X1-11 is not known.) If the configuration does not include power windows at all, then there is no need to use relay K2.
Removing and installing (replacing) the ignition switch on a Priora
Before removing and replacing the module, have a few tools ready:
- chisel;
- hammer;
- pliers;
- key "10";
- Phillips screwdriver.
Replacing the Priora ignition switch is carried out according to the following algorithm:
- Put the car on the handbrake, remove the negative from the battery.
- Remove the steering column covers - to do this, insert a screwdriver into the small technical holes and unscrew the bolts.
- In front of you will be a steering shaft, to which the ignition module is attached with four bolts. They are twisted very tightly - so that potential hijackers would have to waste time removing the module; to do this, they would have to tear off all the fasteners. Place the chisel under the bolt head and tap the chisel with a hammer until the bolt head begins to rise.
- By lifting the threaded fasteners, you can unscrew them - but for convenience, it is better to do this not with your hand, but with prepared narrow pliers - there is a lot of space for standard ones.
- As you unscrew each bolt, try to “catch” the falling module.
- All that holds it is a block of wires. Disconnect it, then install a new ignition module for the Priora car instead of the old one. Tighten the fasteners just as tightly, but try not to tear them off when tightening.
What is the Priora ignition switch return spring suitable for?
- To the beginning of the forum
- Forum Rules
- Old design
- FAQ
- Search
- Users
The return spring in the ignition switch broke on 2113.
And this is not the first time I have encountered something like this. I decided to restore the castle. I've been fiddling around for a couple of hours, I'm posting a report with photos. I apologize if this is a button accordion, but I didn’t find it. Use a curly screwdriver to unscrew the three coupling screws and two fastening screws of the steering column casing.
We remove the halves of the casing, and to remove the top one, you need to disconnect the hazard warning switch connector. We also disconnect the turn signal switch connector and the two wires going to the signal contact plate (black and brown). If you are lucky and no one has previously broken off the heads of the lock mounting bolts, then you can easily unscrew the four bolts. I was unlucky, the previous owner was for anti-theft purposes. in my opinion, it is an obstacle for amateurs, it broke off the heads. In our case, we unscrew the bolts with a small sharp chisel, but not applying force, but sharply, tapping with a small hammer. We apply the chisel to the perimeter of the remaining conical part of the bolt head at an angle, as in Fig. 3
I am sure that your bolts will unscrew as easily as mine, it took about ten minutes.
After disconnecting the connecting block, remove the ignition switch. Unscrew three screws, one is visible in Fig. 5 and two - inside the seating surface of the lock, in fact, you cannot make a mistake - there are simply no other screws there.
Carefully separate the parts of the lock, avoiding the loss of the locking ball (Fig. 8), which can jump out under the action of the spring. Most likely, this will not happen if you do not pull out the lock cylinder. Next we see that the spring, designed to automatically return the key position from the “start” position to the “ignition ON” position, is broken. Here it’s worth immediately remembering whether you have a faulty old lock lying around in the garage?
We remove the spring from the cylinder; it is not necessary to remove the cylinder itself. You can, of course, get creative and bend the spring so that by removing one turn you can make a new thrust bar. However, this is quite difficult to do; I made a new spring from a similar one, but softer and bendable. Figure 7 shows both - factory and homemade.
We insert the manufactured spring inside the cylinder, positioning the mustache as shown in Fig. 8.
We assemble everything in the reverse order of disassembly. Let's try. Everything should work. However, a softer spring deprives of some information content, I didn’t like it and I found a worthless old lock, by the way, not of the same modification as the one I had, took the factory spring from it, was not lazy, disassembled everything and installed it.
Source
Lock lighting
Illumination of the ignition switch in a Priora car is a convenient modification in the dark. There are ways to tune anything inside your Priora. One of the most practical ways is to help yourself find the ignition switch by highlighting it. But getting a flashlight or phone out takes a long time and is impractical. Instead, you can put a backlight on this part, which will also be aesthetically pleasing to the car owner.
Such an upgrade can be purchased on Chinese websites - preferably only for Priora. To connect, climb under the steering casing, place the LED strip, and the wire soldered to it needs to be “powered.” When connected to contacts No. 8 or No. 9, when the dimensions are turned on, the backlight turns on.
Step by step repair
To repair this unit, the following tools are required:
- chisel;
- flat screwdriver;
- hammer.
At the beginning of the repair, it is necessary to de-energize the vehicle's electrical system - remove the terminals from the battery (usually the negative terminal).
The steering column is equipped with steering column switches, which must be removed at the beginning of the repair. To do this, use a chisel to unscrew the fastening bolts that connect the steering column switches to the ignition switch using brackets. You won't be able to use a regular screwdriver - the bolts have sheared heads. By the way, pliers will also come in handy. They can also be used after you have turned the bolt with a chisel at least a couple of times.
We remove the brackets and gain access to the ignition switch. It contains an important element of protection for your Lada Priora - the AGS-6 car anti-theft system. Carefully prying up the latch that holds the reel with the system wires, we take it out of the lock. Then we disconnect the AGS-6 system from the vehicle's electrical system. In a similar way, we disconnect the remaining wires of the ignition system from the wiring block.
The Priora ignition system has another degree of protection, so you will have to remove the anti-theft mechanism rod from the mechanism disconnected from the electrical network. The best way to do this is with a screwdriver. Having freed ourselves from the bolts, we proceed to disassembling the ignition. First, we remove the drive and spring from the locking rod, then you can remove the cylinder from the ignition mechanism housing
The cylinder has a spring and a locking ball, small parts that are important not to lose
Button instead of ignition switch
As a replacement, the Lada Granta and many foreign car models have a START-STOP button. We can say that the start button is a matter of driver convenience, but if you want to make your car unique, you can use different options:
- removing the standard module - the steering wheel will not be blocked;
- The standard module remains, but the steering wheel lock does not work;
- The standard module remains in place, the steering wheel lock works.
You can supply a pre-formed kit, or assemble it yourself - it will be several times cheaper, but not faster.
The cost of the set will be from 1,300 to 1,800 rubles, individual parts in total from 300 to 500 rubles.
How to put
To place a button instead of a module, perform the following steps:
- Remove the negative from the battery.
- Remove the steering casing and the plastic panel to the right of the pedal assembly.
- In accordance with the instructions that came with the start button, connect the wires to the block.
- Connect the green cable from the central unit to the brake pedal switch connector.
- The wire from the button should be connected to the three-pin connector of the central unit.
- If you need to disable the steering lock, cut off only the part of the key that fits into the cylinder and leave it in the lock in the first or second position.
- Place the key at the junction of the casing.
- Test the Start-Stop button with a few presses.
To start an engine, two main components must be present: the air-fuel mixture in the combustion chamber and a spark from the spark plug. The first is the responsibility of the car’s fuel system, which supplies gasoline from the tank to the unit that prepares the combustible mixture. The presence of a spark is ensured by the ECU. It delivers a powerful electrical discharge to the spark plug in the final cycle of compression of the air-fuel mixture in the combustion chamber. As a result, the crankshaft and the associated piston group rotate. A failure in the operation of any component will cause difficulty in starting the Priora engine or make it impossible.
The procedure for connecting wires to the ignition switch
Let's consider all stages of work one by one. First, remove the casing from the top and bottom of the steering column. Now, using a marker or regular paint, we mark the wires connected to the rear lock, after which they can be carefully disconnected.
Using a cross-head screwdriver, unscrew a pair of screws located below and directly securing the locking device:
Now we insert the key and turn it to the zero position to disable the anti-theft device that blocks the steering. At the same time, use a thin awl or a screwdriver to press on the fixing element, with the help of which the lock is held in place:
After completing these steps, pull the key to remove the locking mechanism from the bracket:
To install a new lock, all operations should be performed in reverse order.
Troubleshooting Starter Problems
The starter is an important element of the engine starting system. Its task is to ensure vigorous rotation of the crankshaft, which transmits translational motion to the piston group, creating the necessary degree of compression in the combustion chamber and removing exhaust gases.
Basic starter malfunctions:
- short circuit in the traction relay winding;
- oxidation of wire tips;
- bendix jammed;
- break or short circuit in the starter winding;
- worn or damaged starter brushes.
First, you should conduct an external inspection of the Priora starter fuse: check the condition of the contacts, clean the oxidized terminals. It is necessary to evaluate the reliability of the ground connection with the engine and body. Then you need to try to start the car again. If the Lada Priora starter traction relay clicks, but it does not spin, the breakdown needs to be repaired.
If the device fails in the field, when it is not possible to contact a service station, you can jump start the car. For this you will need an assistant. Having accelerated the car with the ignition on, you need to quickly engage second gear and release the clutch: the car starts to twitch, but after two or three jerks it starts. This is the most popular method of starting the engine when the battery is dead or the starter is faulty, but it can only be used on vehicles with a manual transmission.
Repairing the Lada Priora starter can be done by removing it from the engine: this makes it easier to carry out preventive maintenance, unlock the bendex, and replace brushes. If a winding break occurs, you need to install a new starter assembly, and it is advisable to do this on a cold engine.
Repair and replacement of the engine start switch
The ignition switch of the Lada Priora is an electromechanical device consisting of a contact group and electrical communications. This engine starting system component wears out when the tracks are switched on and off repeatedly. When they are mechanically damaged, current conductivity deteriorates, resistance and temperature in the contact area increase, which leads to their burning. Another reason for ignition switch failure is the breakdown of plastic parts.
Malfunctions associated with problems with electrical connectors arise due to overload of the contact group caused by the connection of additional high-power devices. Another problem is short circuit. On the latest car models, modified designs are installed that have a more reliable contact group. If these defects are detected, the Priora ignition switch with immobilizer assembly will need to be replaced.
First you need to disconnect the negative battery terminal, then remove the plastic steering column cover, the electrical connector of the main wiring harness and the instrument mode switch. The next step is the most difficult: you need to remove the screws securing the lock to the steering column. They have round tear-off caps that provide an additional degree of security for access to the ignition switch. For this reason, they should be unscrewed carefully, using a special sharp chisel, lightly tapping it with a hammer. It is enough to make one turn of the screw to be able to unscrew it by hand. By unscrewing all four fasteners, you can remove the lock fixing bracket. The final stage is to disconnect the plug of the contact group. After replacement, installation of the removed parts is carried out in the reverse order.
Repair instructions
The location of the 3Z is known to everyone - this unit is located directly under the steering wheel. To properly replace or repair a device, you must follow the instructions:
- First, disconnect the battery and remove the plastic steering column cover, which is secured with bolts.
- Next, press out the fastening and disconnect the connector with the 33 wiring from the control panel wiring block. When unplugging, be careful not to damage the plug.
- Having done this, you will also need to disconnect the plug with the 3Z wires from the connector with the wiring of the immobilizer control system. Using a hammer and chisel or a drill, you need to remove the four breakaway screws and remove the assembly from the steering column. You can't just unscrew these bolts. VAZ engineers decided to use this method of installing the protection in order to protect car owners from possible thefts. This method of fastening, as you can guess, makes it very difficult to dismantle the protection, so at this stage you will have to tinker. In any case, the bolts can be dismantled or drilled out, but instead you will have to purchase new ones in advance.
- After completing these steps, you can bend the connector mount with wiring from the 3Z. The terminals with wires are removed from this connector. Next, you need to compress the latches again and dismantle the plastic cover of the device itself. If you plan to simply change the node, then this can be done at this stage. We suggest that you familiarize yourself with more detailed information on repairs - it is quite possible that simple steps will restore the unit’s functionality and save money.
- So, if you decide to repair the mechanism, then at this stage you need to press out two more plastic clips and remove the contact group from the cover.
- Next, it is necessary to carry out a thorough visual diagnosis of the contacts. If you notice that the contacts have oxidized or burnt, you can restore their functionality by cleaning them using fine-grained sandpaper. Get rid of oxidation and plaque, but do not go too hard so that the contacts do not wear off. If the damage to the contacts is too severe, then cleaning will not solve the problem - you will only need to change either the contactor itself or only the contact group.
- If everything worked out with the contacts, then you can assemble and install the protection. During assembly, pay attention to the position of the terminals with the wiring in the connector; under no circumstances should they be mixed up.
- After completing these steps, install the locking device back into place, while pre-sinking the locking rod of the anti-theft unit. To do this correctly, install the key in the 3Z and turn it to any position, the main thing is that it is not in the “0” position. If the key is replaced, then the transponders must also be changed - these are special electronic code components on the head of the key. If you do not do this, then you will also have to carry out the training procedure, as well as change the lock cylinder on the trunk and doors, and this is a rather labor-intensive process. Otherwise, you will have to use the old key to open the doors and trunk and the new one to start the engine. Agree, this is completely inconvenient, but this is only relevant for those car owners who have changed their license plate.
1. Remove the plastic casing and disconnect the plug with wires from the mechanism.
2. Knock out or drill out the four bolts that secure the 3Z.
3. Disassemble the assembly and clean the contacts or replace the assembly.
Elimination of breakdowns of the anti-theft system
Sometimes the Priora does not start due to the immobilizer - it simply does not “see” the key. An immobilizer is an electronic anti-theft device that prevents the engine from starting without the original key. The principle of operation of the mechanism is shown schematically in the photo.
The principle of operation of the immobilizer
In the body of the original ignition key there is a transponder chip 3, which contains a complex electronic code. When the driver inserts the key into the ignition, the immobilizer is activated and the electromagnetic waves 2 of the electromagnetic coil 1 begin to read the encoded code. If the codes in the memory of both the immobilizer electronic unit and the transponder match, the engine starts; if there is an error during reading, the engine will not be able to start.
In the event of a breakdown, an anti-theft device can become a serious problem for the car owner, since the location of the micro-immobilizer - a relay that ensures the functioning of the main vital systems of the car - is almost impossible to find. The mechanism can be disguised as a fuse or controller and installed in the most unexpected places, otherwise the entire anti-theft system becomes meaningless. It is possible to revive a car if the immobilizer fails, but it is quite troublesome. If the transponder is damaged, try using a spare key. If the chip is working, but the system still does not “see” the key, you need to buy another one and reflash the electronic control unit.
You will need a PIN code to reinstall the software. If it is not there, you will have to buy a new ECU.
The system may not respond to the key if the reading coil is damaged: in this case, the lock assembly with it will have to be replaced. To avoid causing problems with the immobilizer, you should not try to start the engine in severe frost or if the battery is discharged. It is not recommended to place keys near sources of strong electromagnetic waves (for example, a microwave oven). You cannot keep keys from different cars in one bunch, or remove the battery terminal while the ignition is on.
Sources of the problem
The reasons why the Lada Priora does not start may be a malfunction in the fuel system:
- clogged fuel filters;
- failure of the fuel pump;
- lack of gasoline in the tank;
- clogged injectors;
- condensate freezing in the fuel line.
Having certain skills, every car enthusiast can fix these faults with his own hands. First you should check whether gasoline is supplied to the ramp with injectors. To do this, you need to disconnect the fuel hose from the rail and connect the pressure gauge. Then ask an assistant to start the engine. When the fuel pump is running, the pressure in the fuel line should be 2.7 atmospheres. If the pressure is lower than specified, you should look for the cause in the fuel filters.
A complete lack of pressure when a voltage of 12 V is applied means that the fuel pump has failed. To fix the problem, you need to replace the fine filter, wash or change the fuel pump filter, or replace its electric motor.
If the pressure in the fuel line is normal, the cause should be sought in the injector rail. You need to remove it from the engine, wash it with a special liquid and blow out all the holes with compressed air. To prevent condensate freezing from causing a lack of fuel supply, repair work should be carried out in a warm room.
List of possible malfunctions related to the operation of electrical equipment:
- Insufficient battery charge.
- Battery terminals are oxidized.
- The starter does not work.
- The traction relay is faulty.
- The timing belt is broken.
- Malfunction of the electronic control unit.
- The valve timing is disrupted.
- Severe contamination of high-voltage wires or lack of contact.
- Pulse transformers are faulty.
- The fuses responsible for the operation of the ignition system and starter have blown.
- Spark plugs are flooded or faulty.
- Burnt ignition switch terminals.
- The immobilizer is faulty.
Before you start looking for these problems, you need to make sure that the contacts and connections of all wires are reliable, that there is no oxidation, breaks or abrasions.
What is the device?
The ignition switch is a special device that supplies direct current to the starter traction relay. Such impulses come from the battery and are activated when the lock is turned on. Without the correct operation of the device, the car will not function fully.
Design Features
The mechanism includes two main parts. The ignition key is placed in the lock cylinder, which puts the car into operating mode and activates the lock itself. The second part is the contact group. It closes in a certain sequence, depending on the position of the key in the cylinder.
Why the system might break down
The need to replace the lock may arise for a number of the following reasons:
- wear and tear of individual parts. Burnouts or oxidation of the system drives are common;
- incorrect contacts. Violation of such circuits leads to combustion, oxidation and lack of working abilities;
- cylinder wear. The breakdown is manifested by difficulties when using the key;
- Lost car key. A trivial but compelling reason for replacement.
Troubleshooting
The ignition switch on a Priora often fails due to improper use. The first step before replacing the device is to disconnect the battery. To do this, remove the terminal. Also remember to remove the steering cover and disconnect the electrical connectors.
The Priora ignition switch is bolted to the steering rack. You won't be able to unscrew them with a screwdriver or keys. You need to use a hammer or chisel. Otherwise, use an electric drill, which can remove the bolts.
When removing the bolts, they may break. There is no need to worry about this; such a part can be easily and quickly replaced. To simplify the work of replacing the lock, simple bolts or screws are installed in the future. They can be unscrewed with standard tools.
Replacing the ignition switch on a Priora includes checking the voltage of each contact. This process prevents unwanted problems with the new lock. In order not to confuse the connection of the contact group, their “natural” arrangement is first recorded. This simplifies the work with replacement and provides you with a hint when completing the assembly of the mechanism.
If the Lada Priora ignition switch is not replaced, then problems may arise with its components. Replacing a contact group involves the following process:
- The casing is removed and the lock is pulled out.
- The correct pin connection sequence for reconnection is recorded.
- According to the recorded connection principle, a new contact group is distributed.
- Place the lock in its original position, covering the steering wheel with the removed cover.
Lada Kalina wagon Luta › Logbook › Replacing the ignition switch. Fiddling with keys
Breakdown I left the store with my wife, child and bags of groceries - got into the car and inserted the key - turned the key - something in the lock clanked and the car stopped responding to turning the key in the lock. After the 20th attempt to pick the key in the ignition, the car miraculously started up. But the key could be pulled out and the car would still start. Thanks to Kalina for the fact that, despite the breakdown, she took us home again and again. At home, the car had to be turned off in a barbaric way - to move away by pressing the brake. The car stalled, but the ignition was turned on despite the fact that the key was taken out. In short, some spring in the ignition switch burst and all the modes there were lost. While I was looking for spare parts, I removed the battery terminal and locked the car with the key through the door. (It turned out, by the way, that the passenger door closes with a flag only when it is closed).
Spare parts and tools A DAAZ lock was purchased (with a wire for the immobilizer) + 4 bolts to rip off the heads.
lock with cylinders, red key and key blank with buttons
bolts with shear heads. You need 4 of them
We will also need: 1. Phillips screwdriver 2 chisel and hammer 3 10mm wrench
The repair itself 0. remove the terminal from the battery 1. Remove the steering rack cover. 2. Disconnect the ignition and immobilizer pads
disconnect the immobilizer and ignition terminals in viburnum 3. Use a strong, but short and narrow chisel and hammer. We knock down the bolts tangentially (counterclockwise). They give in pretty quickly if the chisel is good.
unscrew the bolts with a chisel/chisel. Then, either with your fingers or long-nose pliers, unscrew the bolts. 4. We install the lock “in reverse order”, do not forget to connect the wire blocks and put on the casing. We put the battery terminal back on.
5. We put the new key into the new lock. In anticipation... and... AND THE CAR WILL NOT START! Why? Because the immobilizer won’t let you in! What to do: 5.1. Remove the red cap from the new black key and remove the chip from under the cap. We do the same with the old red key. I swap the chips. We use a new key with an old chip - a second old key with a new chip or archive it. Or the old key on a key fob without a chip, and the new chip itself in the archive.
changing 5.2 chips. Changing the tip in a key with buttons changing the tip in a key with buttons on a viburnum
6. In our free time, we try to change the cylinders in the doors and trunks. And before this replacement, we hang the old car key on the key fob (preferably without a new chip, so as not to confuse the immobilizer).
Well now everything should work!
