The sound of a failed front hub bearing 2121 is often practically indistinguishable from road noise, especially in winter when driving in studded tires on asphalt. However, as the unit wears out, it begins to intensify and accompanies the driver continuously.
An additional benefit is the heating of the wheel away from the center without the characteristic smell of brake pads.
At the first suspicion of a specific malfunction, you need to start looking for it and then change the part, otherwise not only acoustic comfort will be affected.
There is a possibility of complete destruction of the bearing, the appearance of wear on the hub with its subsequent replacement, and in the most advanced situation - misalignment and wedge of the wheel, which will make it easy to “make ears” with the help of a short wheelbase and the unique suspension settings of the Niva 21213 and 21214.
Diagnostics
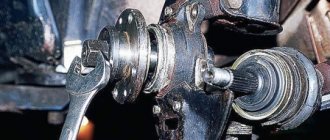
In the absence of a special stand, it is possible to identify the problem. To do this, with precautions, hang up the supposedly faulty wheel. And then grab the extreme points in the horizontal and vertical planes and make swinging movements.
A serviceable bearing has no play or it is insignificant, requiring replacement, on the contrary. In addition, when turning, you can hear rolling or cracking sounds. What then? It is necessary to change the wheel bearing yourself, because there is no talk of adjustment.
Symptoms of a problem
Bearing wear manifests itself as the following symptoms:
- Vibration of the front wheels, which can be reflected in the steering wheel or felt in the cabin.
- Knocking or crackling sounds in the front of the car when driving;
- Heating of the front wheels in the axle area.
If such manifestations occur, you need to check the condition of the wheel bearings. To do this, jack up the car and rock the wheel in different directions. Play and knocking in the bearing area indicates the need for replacement and adjustment. The malfunction may also manifest itself in the form of noise when the wheel rotates.
Separately, it is worth mentioning two problems that arise during the operation of the Chevrolet Niva:
1. The hubs get hot. It is important to understand that when braking, the kinetic energy of the car is converted into thermal energy. As a result, the brake discs and the hubs on which they are attached become very hot. Heating of the part during movement, and not during braking, indicates wear of the bearing or its incorrect adjustment.
The second option is typical for adjustable hubs. The adjusting nut must be tightened with a force of 2 kgf*m. If you tighten it further, the tapered bearings will be too tight.
Their rotation will be difficult. Prolonged operation of the machine in this condition leads to bearing failure and wheel jamming.
2. The adjusting nut is unscrewed while moving. Sometimes this happens literally after 20-50 kilometers. The phenomenon is observed in three cases: the master forgot to tighten the nut, there was a misalignment between the bearing races, or play appeared in the coupling of the CV joint with the hub.
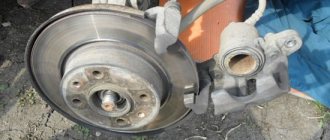
Replacement
To replace the front wheel bearing in the field, it is necessary to remove the front axle brake calipers. Why you should:
- hang out and unscrew the wheel;
- use a chisel to knock the cap off the hub;
- Using pliers, remove the cotter pin located on the lower axis of the clamping lever;
- Carefully remove the axis of the clamping lever with a metalworker's drift and then remove it with pliers;
- Using a flat-head screwdriver, having previously removed the clamping lever and springs, remove the brake caliper from its seat and place it behind the steering knuckle in such a way as not to interfere with the further process (hang).
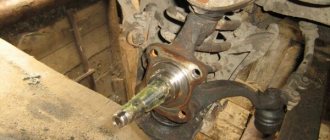
Removing the hub
To do this, dismantle the conical bushing.
Unlocking the nuts is done by gently tapping them through a chisel.
After which, using a size 19 wrench, the rear and front clamps of the lever to the knuckle are unscrewed sequentially,
not forgetting to get rid of the locking plate.
Then, using the keys “17” and “10”, as well as a flat screwdriver, the brake circuit hoses are removed from the steering knuckle.
Having placed the stop under the lever from below, use two “13” keys to unscrew the nut located on the bolt that secures the ball mount to the upper lever. Unscrew 2 more nuts in the same way. And take the knot to the side.
The lower ball joint is also dismantled.
When the part is freed from the fastenings, holding the steering knuckle with both hands together with the hub, brake disc, upper and lower ball joints, it is removed.
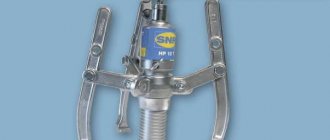
When separating parts, it may be necessary to clamp the steering knuckle in a vice, after which the hub is knocked out without extra effort.
Next, the bolts securing the steering knuckle to the lever are removed.
The brake disc is knocked out by screwing the nuts onto the stud, followed by concentrated blows to the resulting structure.
The result of the work at this stage: the brake system disc and hub are separated from each other.
They hook up the ring that protects against dirt, after which, using a “10” key, remove the casing that protects the steering knuckle.
Video instruction
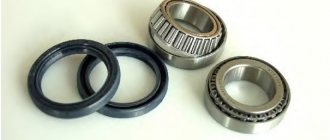
Bearing catalog number 2121-3103020-10/6-2007108-A
We carry out the work on an inspection ditch or a lift. We hang up the front of the car and remove the wheel.
1. Disconnect the caliper from the pad guide (see Disassembling the front brake mechanism) and tie them with wire to the upper arm.
2. Take out the conical bushing.
3. Using a chisel, unbend the edge of the locking plate of the nut for the front attachment of the lever to the steering knuckle.
Similarly, loosen the rear fastening nut.
4. Using a 19mm spanner, unscrew the nut of the rear mounting of the lever to the steering knuckle. Similarly, unscrew the front fastening nut.
5. Remove the locking plate.
6. Having removed the lever from the bolts, we move it away from the steering knuckle.
Disconnect the brake hoses from the steering knuckle.
We disconnect the fastening of the upper and lower ball joints from the levers (see Removing the upper ball joint, and Removing the lower ball joint).
7. From the splines of the front wheel drive outer joint housing, remove the steering knuckle assembly with ball joints, hub assembly and brake disc.
8. Disconnect the steering knuckle and the hub with the brake disc.
9. If it is difficult to separate the parts, clamp the steering knuckle in a vice and use a soft metal drift to knock out the hub
10. Now you can remove the bolts securing the lever to the steering knuckle
The content of the article :
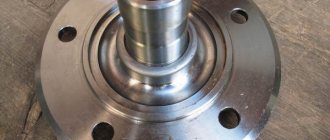
“Reinforced” hub unit for Niva with reinforced hub 2123 (24 splines) from VolgaAvtoprom
I purchased this product:
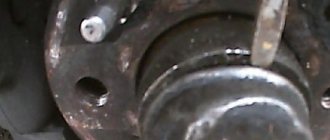
An initial inspection showed the presence of strange holes through which water freely gets to the bearing bypassing the seal...
Holes past the seal
I called the manufacturer to clarify why they were needed, and why the instructions did not say to seal them. To which I was told that these are technological holes for pressing out the inner race from the hub. Then I began to wonder why such tricks were needed. It turned out that the hub shaft with a diameter of 40.03 (personally measured) was made supposedly to prevent the hub race from turning... Although it should be -0.01 ... -0.02 in order to be able to remove the hub without disassembling the bearing.
VolgaAvtoProm has a conditionally dismountable unit (not dismountable) - each time an expensive bearing must be replaced. Because it comes apart and the clip remains on the hub.
Replacing the wheel bearing
The steering knuckle is placed in a vice, then the seal (oil seal) is removed with a straight-slotted screwdriver.
Next, the ring with the separator as part of the inner ring is pulled out sequentially. The bearing components are removed from the inside in a similar manner.
Pay attention to the side of the outer bearing and remove the outer ring from there with a punch. The same manipulations are typical for the opposite outer ring.
Disassembly is complete. Parts are defective and then, if necessary, replaced with new ones, components are cleaned of old lubricant, and filled with a new compound.
It is recommended to use Castrol LMX universal grease for bearing joints and spline units.
Assembly - in the reverse order using suitable pipe sections for pressing in bearings, oil seals, etc.
Adjustment
Having restored the structure until the calipers with pads are returned to their place, a dial indicator clamp is placed on the steering knuckle. The indicator is positioned so that its leg rests against the adjusting nut.
Having built a lever on studs, the mechanism smoothly rotates around its axis.
If the permissible gap exceeds 0.15 mm , the adjusting nut is replaced with a new one. By successively changing the degree of twisting, the clearance in the bearings is measured. At the end of the work, the nut is locked.
Installation of double-row roller bearings from the IVEKO Daily truck into the front hubs of Niva 21213
Wheel unit VAZ 21(21,213,214,218,30…)
one of, I’m not afraid of this word, the most colorful, in terms of purely Russian (obscene) words addressed to him by Nivavodov, an engineering sophistication, and today the managerial stupidity of AvtoTAZ is completely archaic.
When assembling, to adjust the clearance in the bearing according to the book, you need to: “...Install a new adjusting nut. We tighten it to a torque of 19.6 N.m (2.0 kgf.m), simultaneously turning the hub in both directions. Loosen the adjusting nut and tighten it again to a torque of 6.86 N.m (0.7 kgf.m). Then loosen the nut 20–25o. We check the clearance in the bearings: it should be in the range of 0.02–0.08 mm. We lock the nut by pressing its collar into the grooves of the shank of the outer drive joint...” It would be fine if I did it once and forgot, but the need for adjustment often arises, especially if you drive on bad roads. And if you miss the moment a little, the hub will begin to rotate in the inner race of the bearing, and that’s it - the play can no longer be eliminated by simply tightening the nut and I ran to the shops to buy bearings (2 pieces for 250 rubles each), a new hub (750-1000 rubles), and the sellers Thanks to AvtoTAZ engineers, meanwhile, they are happily rubbing their hands.
But okay, if I just went and bought the part I needed in the store, installed it and drove off, but no! After TAZ began installing hubs and grenades with 24 splines in Niva, the production of hubs with 22 splines for spare parts was stopped, like if you need it, then buy external grenades with 24 splines along with the hubs, because rich people drive around in Niva, they There is no problem at all in providing charitable assistance to starving Ketai people. So people are toiling around, buying the devil in stores: Either the diameter of the hub is +/- a kilometer, or the metal is raw meat, or the bearings are like crazy, you’ll understand what kind of fit. In general, again everyone knows parsley with the quality of spare parts for a Russian miracle of engineering.
Once, out of naivety, I bought a new hub and bearings at a car shop. And what did you see? — The new bearing does not fit on the new hub!
Measurements showed: hub diameter 40.01 mm, bearing diameter 39.98 mm?! What the heck? In this case, at the service station, they simply use sandpaper to reduce the diameter of the hub by eye and, if necessary, hammer the bearing onto the hub with a sledgehammer (I’m not lying, I saw it myself). With this approach to the manufacture of parts for cars, Russian vehicles are objects of increased danger to those around them in a cube! Not to mention the fact that this threatens the health and safety of the driver of such a vehicle.
All this parsley persistently drilled into my brain, but finally finished me off and prompted me to take active action.
I've seen enough pictures of the modified unit
I googled drawings for boring a fist,
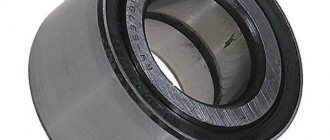
I ordered the best bearings SKF IVEKO BTH-1024 C (2200 RUR/piece) from a truck with a load capacity of 5.5 tons, such a huge margin of safety. The bearing is a fairy tale:
Nobody will do such things in our Russia, that’s for sure, and if they do, it will be a pathetic parody.
Is there an alternative to permanent repairs?
It must be admitted, but the wheel-bearing unit of the Niva 4x4, being one of the most loaded in the car, has never learned to be reliable. Whether the culprit is bad components or design errors is not easy to figure out.
However, the experience of the owners suggests using alternative options, for example, replacing the “stock” with double-row bearings (IVECO, Moskvich, etc.).
Unlike the standard:
- the unit does not require adjustment or lubrication - all settings are made from the factory;
- there is no possibility of rotation;
- wear of seats is minimal;
- has an increased service life.
The difficulty of implementation lies in the need to bore the hub for a double-row bearing, as well as the relatively high cost of the components. But there will most likely be no short-term attempts to change the wheel bearing again.