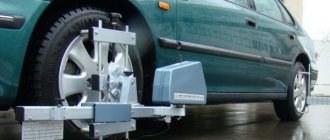
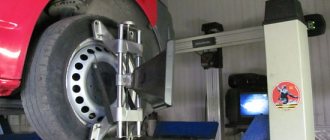
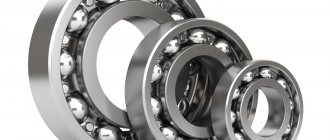
Having correctly identified with how to tighten the hub nut and by stopping in time, you can avoid thread failure and the need to carry out expensive repairs, given today's prices for nuts. Craftsmen perform this work using a special torque wrench. Since a wheel bearing is a rather capricious product and additional equipment is not always at hand, it is very important to know the answer to this question. Before work, it doesn’t hurt to determine what type of it is installed, for example, it can be conical or roller.
Features of tightening the hub nut
Without understanding how hard it is to tighten the wheel nuts, it is better not to take on this job. If you overtighten them, a breakdown will occur, and if you don’t tighten them, then spinning may occur and the seat under the bearing will deteriorate. Anyone who is not confident in their knowledge can use a spring cantor, but you can do it in a simpler way. Ratchet drivers most often cannot provide sufficient force, and the tools designed for this are expensive.
To prevent damage and do the job correctly, it is recommended to use a lever a meter or a little more long for pulling If a fine thread pitch on a car hub may require a force of 20 Nm, plus it will be necessary to turn the key another 90°, in total such efforts will give a very decent tightening torque. Anyone who remembers physics can make a simple calculation. To do this, you need to know your weight and the length of the lever. A value of 20 Nm is equal to a force of two kilograms with a lever length of a meter.
The force, the torque with which to tighten the hub nut , depends on the individual characteristics of the vehicle. Torque recommendations for even the same bearing often vary. They depend on the quality of the metal of the hubs, the strength of the nuts, axles, and threads. Usually 19-23 kgf/m is enough. If the bearing weakens and the gap reaches 0.06-0.08 millimeters, this will significantly affect the reduction in the service life of the entire mechanism.
Experts who have worked in car repair shops for many years recommend tightening the hub nuts every 15-20 thousand kilometers. In this case, it will be useful to loosen them a little by one or two turns. It is best to have the car raised with a jack. To carry out this process, many advise using a tubular spanner, because it has thick walls and there is room for a wrench, and it is more powerful. Thanks to a special adapter, you can use a pipe.
Modern cars are equipped with crimp nuts that do not need to be locked. They have belts and they will press themselves into the grooves of the axle. You don’t need to put all your hundred kilogram weight on the key; it’s actually twice as hard as necessary. Knowing exactly what tightening torque of the hub nut you can avoid losing the wheel on the road, before this a knock will occur when turning, and the car may fly into a ditch.
Is there an alternative to permanent repairs?
It must be admitted, but the wheel-bearing unit of the Niva 4x4, being one of the most loaded in the car, has never learned to be reliable. Whether the culprit is bad components or design errors is not easy to figure out. However, the experience of the owners suggests using alternative options, for example, replacing the “stock” with double-row bearings (IVECO, Moskvich, etc.).
- The unit does not require adjustment or lubrication - all settings are made from the factory.
- There is no possibility of rotation;
- Wear of seats is minimal;
- Has an extended service life.
The difficulty of implementation lies in the need to bore the hub for a double-row bearing, as well as the relatively high cost of the components. But there will most likely be no short-term attempts to change the wheel bearing again.
Read news about the new Niva
- All about non-adjustable hubs and double-row bearings for Niva 4x4 » Lada.Online
- How to remove a wheel bearing in a field. Replacing and adjusting the front wheel bearing Niva.
- Niva Chevrolet front hub repair
- How to remove a wheel bearing in a field. Replacing and adjusting the front wheel bearing Niva.
- Chevrolet Niva bolt pattern: diameter of the holes in the Chevy Niva, what is the bolt pattern of wheels and rims in the Chevrolet Niva, radius 15 and 16
- Chevrolet Niva hubs: front bearing, advantages of non-adjustable Iveko
- Non-adjustable wheel bearings for the field
- How to make reinforced hubs for Niva
Wheel bearing tightening
The wheel bearing tightening torque is the actual force with which the hub nut is clamped. Force is measured in N/m or kg/m, depending on the magnitude and conversion task.
Each bearing in its design has a slight axial clearance. It is necessary for the correct operation of the mechanism, namely:
- to prevent sideways movement;
- reducing the actual friction force;
- uniform distribution of thermal expansion;
- voltage distribution;
- increasing the contact area.
Tightening procedure and torque
Before talking about the tightening torques of the wheel bolts, you need to understand the fastening sequence.
There is a certain principle according to which fasteners should be tightened. This will allow the tightening force of the bolts of installed wheels intended for passenger cars to be evenly distributed.
You need to focus on the number of nuts, that is, wheel and hub fastenings. Most often there are 4, 5 or 6. Each situation has its own sequence:
- If there are 4 fasteners on the wheel, then tightening is performed in the following sequence 1-3-4-2.
- If it's 5 bolts, then the pattern looks like 1-4-2-5-3.
- For 6 bolts the principle is different 1-4-5-2-3-6.
It is very important not to twist clockwise. Choose any first bolt that suits you, and count the rest from there. For convenience, you can put marks so as not to confuse the sequence.
How to properly tighten a wheel bearing
The tightening value of the front and rear bearings is calculated based on a number of factors, such as:
- Minimum and maximum allowable size (parameter) of the bearing.
- The amount of axial clearance.
- Type of thread pitch (large or small).
The above list of data is of a template nature and in each specific situation may be supplemented by new factors. However, the above reasons remain the same, regardless of the situation.
What is the part used for?
Let's look at what this part is, what are the features of its design, how its malfunctions can be diagnosed and how repair work should be carried out. This part secures the vehicle wheel to the following elements:
- to the hub;
- to the steering knuckle combined into a common structure with the hub.
Since the hub is an important component of the chassis of any vehicle, providing a connection between the axle and the vehicle wheels, and wheel bearings serve as the connecting element between the hub and the axle, the rotational resistance of the vehicle wheels when using them becomes minimal.
How to tighten a wheel bearing
To carry out preventive and repair work, it is customary to use a torque wrench.
This practice exists in service stations. A device with a scale is built into the design of the key. Knowing the required indicator, you can easily tighten the nut. The main thing is not to overdo it, as you can break the thread on the fastener. Depending on the modification of the key, various limiters are installed:
- unregulated;
- with adjustment;
- with tightening indicator;
- with installed digital display.
Depending on the type of torque wrench selected, the wheel bearings are adjusted.
Owners often ask the question: is it possible to tighten wheel bearings without actually having a torque wrench. It cannot be prohibited, but it is not recommended either. Because you can't calculate the effort. The consequences of such tightening are obvious: backlash and premature failure.
Now you know how to adjust the wheel bearing yourself. Despite the simplicity of the actions and the design of the mechanism, it is recommended to service your technical device in specialized auto repair shops in order to avoid negative consequences and damage to adjacent parts.
Before carrying out preventive measures, do not forget to purchase only high-quality and original components recommended or approved by the manufacturer. This will increase the service life of the equipment and reduce the number of breakdowns to a minimum.
What can cause a bearing to play?
As mentioned above, there are two factors that lead to backlash:
- Worn or damaged wheel bearings
- Incorrect adjustment.
With the first case everything is clear. But the second one is worth clarifying. Many people notice that after adjusting the hub bearing according to the manual, after some time it begins to play again. This is normal; normal wear and tear on working surfaces and rubbing parts occurs.
After a certain time it is necessary to check and, if necessary, adjust again. It is recommended to do this at a mileage of 5-10-20 thousand km. For example, on Niva, wheel bearings are considered consumables and do not last up to 50 thousand km.
It is worth remembering that after replacing the front wheel bearing, it will also have a certain amount of play. If you don’t pay attention to this, then there will be only a few kilometers left before repairs are completed. Therefore, we make sure to make adjustments. We'll talk about this in detail below.
How to determine the need for replacement?
Strong noise, humming of the rear hub bearing of VAZ 2109, 2110, “howling” from the rear, increasing when turning, clearly indicates the need to check the condition of the rear hubs. The verification methods are quite simple:
- Be sure to stop the wheel diagonally opposite from the jacking side, and then jack up each rear wheel one by one. (Why each? The fact is that very often there are errors in determining the side of the hum, and even more often there is a need to replace both bearings).
- When the wheel is raised, you need to try to spin it as much as possible. If at the same time you hear extraneous sounds similar to a hum, you don’t have to check further - replacement is necessary.
- if in doubt, you can also check the lateral play of the bearing by grasping the edges of the wheel and rocking it towards you - away from you. If you feel the wheel moving on the axle, the bearing needs to be replaced.
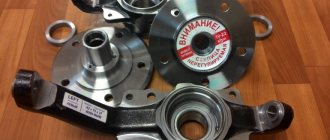
Automotive stores can offer you both a separate bearing and a hub assembly. We see no point in purchasing an assembled unit (except for the cases described below), where replacing the bearing is not at all a difficult matter.
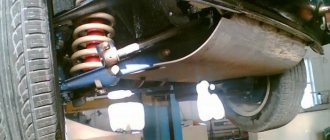
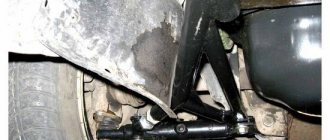
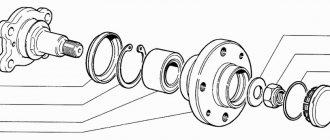
Removing the hub
To do this, dismantle the conical bushing.
Unlocking the nuts is done by gently tapping them through a chisel.
After which, using a size 19 wrench, the rear and front clamps of the lever to the knuckle are unscrewed sequentially,
not forgetting to get rid of the locking plate.
Then, using the keys “17” and “10”, as well as a flat screwdriver, the brake circuit hoses are removed from the steering knuckle.
Also interesting: Luaz or Niva
Having placed the stop under the lever from below, use two “13” keys to unscrew the nut located on the bolt that secures the ball mount to the upper lever. Unscrew 2 more nuts in the same way. And take the knot to the side.
The lower ball joint is also dismantled.
When the part is freed from the fastenings, holding the steering knuckle with both hands together with the hub, brake disc, upper and lower ball joints, it is removed.
When separating parts, it may be necessary to clamp the steering knuckle in a vice, after which the hub is knocked out without extra effort.
Next, the bolts securing the steering knuckle to the lever are removed.
The brake disc is knocked out by screwing the nuts onto the stud, followed by concentrated blows to the resulting structure.
The result of the work at this stage: the brake system disc and hub are separated from each other.
They hook up the ring that protects against dirt, after which, using a “10” key, remove the casing that protects the steering knuckle.
Step-by-step method for replacing the rear wheel bearing on a VAZ 2109, 2110
- stop the car from the front;
- tear off the wheel bolts;
- tear off the central nut (7) of the hub, having first removed the cap (9);
- jack up the side and set the trestles;
- remove the wheel;
- fill the brake drum mounting area with WD-40 or other special liquids (you can use diesel fuel or brake fluid);
- unscrew the guide bolts (it is advisable to lightly tap with a hammer);
- we try to carefully remove the brake drum (if it doesn’t work, we screw the appropriate bolts into a special thread on the brake drum, apply tension and very lightly try to knock it out with a hammer. In most cases, the result will be positive. There are special drum pullers on sale, just in case , if all else fails);
- unscrew the central nut completely (of course, it is possible to unscrew it immediately, and even remove the hub along with the wheel and drum, but then there is a high probability of damage to the brake pads);
- we tighten the hub (if one of the inner races of the bearing remains on the axle, you need to use a puller or just a sharpened chisel to try to move it from its place);
- inspect the axle for signs of bearing rotation (if there are any, we replace it, it is advisable to replace the hub assembly);
- inspect the brake cylinder for leaks and pads for wear;
- remove the retaining ring from the hub using pliers and/or screwdrivers.
- Be sure to clean the edge from rust, moisten it with WD-40 or whatever you have on hand.
There are three options for pressing out the bearing:
- A special press (not everyone has one).
- A puller (not expensive, can be purchased, will be useful for the future).
- Using a heavy hammer (at least 2 kg) or a sledgehammer. AT first glance, the method may seem a little aggressive, but it is practiced by an overwhelming number of masters and service stations, and we will consider it.
- The hub must be firmly installed on a hard surface, and with several sharp blows through the mandrel, the bearing must be moved from its place. When this happens, you need to install the hub, for example, on a yew tree (so that there is a stop for the hub and free space for the bearing to exit)
Adjusting wheel bearings - safety in your hands
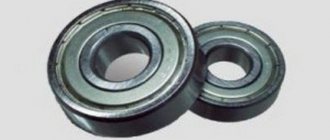
Unlike owners of cars of many foreign brands, owners of VAZ “classics” know how to adjust wheel hub bearings. Currently, the prevailing opinion among designers and automotive engineers is that non-adjustable and non-separable front wheel bearings are safer. We can only partially agree with this. The new bearing is replaced along with the hub into which it is pressed at the factory.
Whether we like it or not, wear and tear is inevitable. After some time, play appears and there is only one way out - to buy an expensive bearing with a hub. The domestic auto industry is on the side of our car enthusiasts.
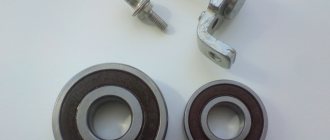
It is much easier to replace only the bearings, which allow you to periodically adjust the hub play. Firstly, it is several times cheaper. Secondly, the operating life of the node increases. Thirdly, the adjustment can be made by the driver himself in a garage.
Why is it possible to adjust the wheel bearings on some cars?
Considering that the design of the hub unit of the classic VAZ series was borrowed from foreign cars, there are foreign cars in which the play of the front wheel bearings can be adjusted. This possibility is provided by the special design of the front wheel hub, which rotates on the axle shaft on two tapered (cone) bearings.
A distinctive feature of tapered bearings is that it is possible to establish play between the hub and the axle shaft by pressing the outer and inner races of the bearings against each other. In the hub, in the direction of the cones, the bearings are directed towards each other. If you gradually tighten the hub nut on the axle shaft, this will lead to stronger pressing of the rollers between the cages. At some point the wheel will stop rotating altogether.
Thus, using just one nut, you can regulate the force with which the clips press the rollers. During operation, even heavy-duty metal alloys of bearings wear out, which leads to excessive play. This puts the life and health of both the driver and passengers and other road users at risk. All that needs to be done to fix this problem is to tighten and secure the hub nut. As soon as the nut, when tightened to maximum, no longer affects the amount of play, it is necessary to change the bearings.
Adjusting wheel bearings - step-by-step instructions
Before embarking on the regulatory process, certain preparatory steps must be taken. For such an important event, you really need a minimum of tools:
- jack;
- hammer;
- screwdriver;
- beard;
- wrenches for wheel bolts at “12”, “27”;
- torque wrench.
Whenever adjusting the bearing play, be sure to change the hub nuts. The nut is fixed on the axle shaft in the required position by riveting the collar of the nut into the groove on the axle shaft. If the collar is bent and bent again, then there is a high probability that the nut will return to its previous position.
With everything you need at hand, you can begin adjusting the wheel bearings.
Wheel bearing adjustment technology:
- the car is fixed on a level surface with a parking brake or other available means;
- using a jack, the front wheel is raised and then removed along with the decorative caps;
- carefully, using a hammer, screwdriver or other spacer, press out the protective cap of the hub;
- the wheel is installed on the hub and tightened with at least two opposite bolts;
- the amount of play and the possibility of tightening are checked for what: with one hand you should hold the wheel at the top and make sharp rocking movements to the sides in the direction of the wheel axis, and with the other hand you need to press the washer located between the nut and the bearing race. If the axial clearance is more than 0.02 - 0.08 mm, adjustment should be taken;
- using a hammer and a pointed metal object (bit, core), it is necessary to unlock the bent sections of the hub nut collar;
- the nut is unscrewed and removed, a new one is screwed on instead (on the right trunnion there is a nut with a left-hand thread, on the left trunnion - with a right-hand thread);
- after tightening the nut with a force of 19.6 Nm, it is necessary to turn the hub several times in different directions so that the bearing rollers take their place;
- the nut is loosened and re-tightened, but with a force of 6.8 Nm. For reference: 10 Nm = 1.02 kg/cm2;
- the nut is turned at an angle of approximately 25 degrees;
- the collar of the nut is jammed into the grooves on the axle shaft of the steering knuckle axle;
- The hub is assembled and the wheel is installed.
Expert advice when making adjustments
Adjusting the wheel hub bearings is a very important and responsible matter, because the safety of people depends on how correctly everything is done. In addition to strictly following all the rules, you need to know and take into account such aspects as:
- the degree of tightening of the hub nut;
- condition of bearing lubrication.
Some drivers mistakenly believe that tightening the nut will extend the mileage. After the nut is fixed, the wheel must rotate absolutely freely and the established minimum technological play must be present. As it moves, all parts of the bearing heat up and expand. If you overdo it and tighten the nut too much, this can even lead to jamming or destruction of the bearing.
The bearings in the hub must be generously lubricated. During operation, the lubricant is subject to destructive effects: friction, overheating, and the appearance of abrasive metal impurities. If it's time to adjust the bearing play, you shouldn't save money on buying new lubricant. As a rule, Litol-24 is universal for wheel bearings. Lubrication is one of the important conditions for increasing bearing life.
Assembly
– that’s it, we begin the process of assembling the rear hub bearing on the VAZ 2109, 2110. To do this, we put the hub on the axle (by removing the bolt with which we tightened the cages);
– tighten and tighten the central nut (be sure to install a new one), not forgetting to put the thrust washer;
– put on and screw on the brake drum and wheel;
– check the rotation (there should be no extraneous noise);
– if all is well, lower the car from the jack;
– tighten the wheel and the central nut (the tightening torque of the hub is approximately 20 kgm, this is quite a strong tightening, if you don’t have a torque wrench, you need to use a lever of at least a meter to tighten the nut with a force twice the tightening force of the wheels);
– tighten the hub nut and tighten the wheels.
The process of tightening wheel bolts: step-by-step steps
To ensure that the structures are securely fixed with the required torque, there is a special table for tightening the bolts with a torque wrench. For example, if there are four of them (1-3-4-2), 5 bolts (1-4-2-5-3) or 6 bolts (1-4-5-2-3-6).
The process itself is carried out as follows:
- You need to put the wheel on the protrusion of the central part of the hub, and place the guide pins opposite the corresponding holes.
- Next, you will have to manually tighten the bolts tightly enough so that the wheel does not jump out of place.
- After completing all the steps, you need to take the tool with the set torque and tighten the wheels in the correct order.