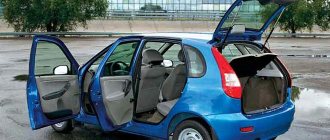
"Nine" and the door lock device
Theoretically, the lock mechanism can be divided into 3 parts: a handle with a cylinder and a button, the main mechanism, and the inner door handle. All nodes and connections between them are shown in the diagram.
The node labeled “2” looks like this.
4 rods fit to it, that is, to this node. Two of them are connected to the external handle, and in order to dismantle it, the rods are disconnected.
If there is no electrical wiring inside the door, you do not need to disconnect the battery before performing repairs.
In other cases, that is, when power windows or locks are installed, the battery must be disconnected. To do this, as many people know, it is enough to remove the “negative” terminal. This means that before repairing locks, the hood is opened first, not the doors. Anyone who violates such a requirement will, at best, have to change burnt fuses.
Replacing the door lock cylinder
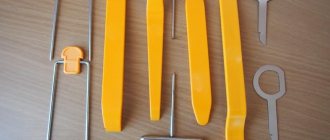
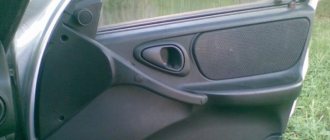
To gain access to the locking mechanism, you need to remove the trim. On the “Nine” it is quite simple to remove it - the casing is held in place by plastic pistons. These pistons are located around the perimeter; they are simply pressed out and, if necessary, replaced with new ones.
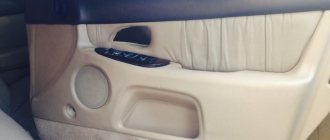
First, as is easy to understand, you need to dismantle three elements: the side handle, the window lifter handle, the socket of the inner handle of the lock. The “dog” must be pulled up, but it is better to remove the seal that protects the glass during the dismantling of the casing.
Removing and disassembling the door handle
When the door trim is missing, you can freely disconnect the two rods that go from the door handle to the lock. The following shows exactly what elements we are talking about.
By squeezing the plastic tab with a screwdriver, the rod is disengaged. We will assume that all of the above actions have been completed. Then, you can move on to the next stage.
The outer handle is attached to the metal using two nuts. One of them is located under the trim, the second is on the back side of the door. Both nuts need to be unscrewed.
After dismantling the specified unit, it will be easy to remove the cylinder. This is done like this:
- Push out the pin holding the outer plastic cap;
- Dismantle the mounting spring (see figure);
- By installing the key and turning it, the cylinder is pulled out.
The appearance of the spring holding the cylinder and the handle together is shown below.
It is important to know that the knot itself, called the “larva,” needs careful handling.
Experience shows that it will be easy to lose the metal pins that ensure secrecy. The cylinder is secured inside the handle body and the pins remain in place. But if you pull the cylinder out, each pin is “free.”
Repair of the outer surface of the door
Tapping shells on the door
- The shell is completely welded to the door.
- Carbon deposits and welding are ground and cleaned.
- Sealant is applied to the joints.
- The bare metal is primed and puttied, and painted in the desired color.
- Polishing is being done.
Advice: Do not leave black transport primer on the surface. The paint adheres very poorly to it and peels off quickly. It is more reliable to use gray primer - the paint lasts on it for a long time.
A high-quality coating of car doors will preserve its attractive appearance for a long time and prevent metal corrosion.
How to disassemble the door of a VAZ 21099
If the door has electrical equipment installed, disconnect the wires before removing.
We recommend that you take two people to remove and install the front door.
When replacing a door, you need to remove all the fittings from the old door and replace it with the new door .
1.
Open the door and remove the two bolts securing the limiter bracket to the A-pillar.
2.
Unscrew the bolts securing the upper and lower door hinges to the A-pillar and remove the door.
3.
The door is installed in the reverse order of removal. Before final tightening the bolts securing the hinges to the A-pillar, close the door and adjust its position so that the gaps in the openings around the entire perimeter are the same. Then carefully open the door and finally tighten the hinge bolts.
Replacing door trim
A lining is installed under the upper end of the handle.
1.
Insert a thin screwdriver between the socket and
the window handle .
Pressing the socket with a screwdriver, move the trim so that the protrusion on it (see note) disengages from the socket. Protrusion on the facing of the window lifter handle .
2.
Remove the window handle trim.
3.
Remove the window handle.
See:
4.
Remove the window handle socket.
5.
Using a thin screwdriver, remove the two plugs from the armrest handle.
Location of the pistons in the door trim.
Replacement of glass and window regulator
lower the window all the way down, remove the door trim and the outside rearview mirror.
To remove the glass, you need to remove the window regulator.
1
–
nuts securing the window lifter guide
Detailed instructions for repairing the lock
> Let's consider what needs to be done if the door of a VAZ 2108 2109 21099 does not open. For example, let's take the fact that the front door on the driver's side does not open. The door does not open from the outside. That is, you press the handle tongue, it falls through, but the door does not open. Possible reasons: — The door key is broken. The key is made of silumin, so if the lock freezes, as often happens in winter, pressing on it with great force can break it. To replace a key, it is not necessary to buy the entire handle; special repair kits for VAZ 2108 2109 21099 door handles are sold. As a rule, a repair kit consists of two keys and handle key leads. The key on the reverse side has two protrusions. Only one protrusion pushes the leash when you press the key; the second protrusion must be bitten off. — The leash that pushes the key is broken. Same story: silumin, frost, pressed a little harder and the leash broke.
Door clip VAZ 2109
- Registration
- Entrance
- To the beginning of the forum
- Forum Rules
- Old design
- FAQ
- Search
- Users
- List of forums AUTOLADA.RU
- Family "Samara"
- 1
- 2
- >
Dear friends, I'm tired of one problem.
The door trim is all old and crooked, and it just doesn’t want to stay on properly on the hedgehog pistons. At first it snaps into place, and then after a couple of days the casing comes off again and rattles. The very places where the hedgehogs are attached to the casing are also broken, sometimes hedgehogs fly out. Only one crude solution comes to mind: At the places where the brushes enter the iron of the door, screw the studs; they just look like a round hole. Make holes in the sheathing for these studs. Insert the studs into the through holes on the casing and tighten with a bolt, under which a wide washer is placed (to increase the pressure area). In general, it will turn out so authentic and hardcore..
Maybe there are more humane dogs?
Glue the pistons to the casing with superglue and everything will be fine, I did the same thing and now the casing is holding up fine.
let’s say it’s not entirely humane, but I did it for myself, look at the link, I’m just too lazy to post the photo again —-> https://lada-forum.ru/index.php?showtopic=7966&view=findpost&p=377271[/list]
It’s cool, I should also do it in my spare time and do the same thing, only mushrooms are still better than black ones IMHO
see the link
let’s say it’s not entirely humane, but I did it for myself, look at the link, I’m just too lazy to post the photo again —-> https://lada-forum.ru/index.php?showtopic=7966&view=findpost&p=377271[/list]
Well, yes, I wanted to do something similar, only in a more brutal version, instead of these white things I wanted bolts with washers. Thanks for the option, interesting solution))
buy Kalinovsky hedgehogs and 2-sided soft tape
pistons for sheathing from viburnum
the price is a ruble more expensive, but I felt the effect: they climb with the characteristic sound of “kryyyynk”
These Kalinovsky mega-hedgehogs are a must try!
Screw it on with self-tapping screws.
The self-tapping screws held up poorly too
The self-tapping screws held up poorly too
Which ones did you use? With a drill tip or just sharp? Metallic or black? What kind of hat is it, wide or narrow? How long? Thread pitch?
Which ones did you use? With a drill tip or just sharp? Metallic or black? What kind of hat is it, wide or narrow? How long? Thread pitch?
Doesn't the upholstery mounting kit for the Samara, which is sold in any store, work? Why bother with collective farms? There are plastic dowels, screws and plugs, and an installation diagram.
Just the other day I bought: “Door trim fastener kit for VAZ2109-99” Included: 1) Plugs for the holes in the door, where the standard barbed tips of the piston go, now we twist self-tapping screws into the plugs 2) Plastic cylinders that need to be pushed into the drilled holes 12 holes in the upholstery. The cylinder has holes for self-tapping screws and a rim for holding it on the upholstery. 3) The screws themselves with double-start threads are black. 4) It’s better not to install plugs for these cylinders, it seems to me, otherwise you’ll have to dig them out to get to the self-tapping screw.
I bought it in Veshnyaki on the circle. I think the last one was given away from the display case, I haven’t installed it yet, but I really want to. True, I don’t know, maybe it’s better to just install black self-tapping screws, why the hell with these cylinders? Moreover, you can tear up a 12mm hole, if something goes wrong, you won’t be able to close it with anything... For self-tapping screws, by the way, you can buy furniture plugs of any color (they are attached to the slot, but it is not always good to hold on)
Door opening method
If the VAZ-2109 door does not open from any side, then the cause of the breakdown is difficult to determine, since there is absolutely no access to the lock mechanism.
A somewhat simplified version of the breakdown occurs when the door does not slam shut completely and gets stuck in that position. Then it is possible to reach the latch from the outside with a sharp object.
To open a jammed door, you must first perform the following steps:
When simple means do not produce results, the door will have to be opened from inside the cabin, which will require removing its trim.
In practice, this is not easy to do, because the casing is pressed by the sash and it is difficult to pull it out without damage. But there is still no other way out: it is better to damage the inner panel than to mutilate the door itself.
Where to begin
Starting with the doors is a good option; the work will take a minimum of time, will not require much effort and will give you the opportunity to practice:
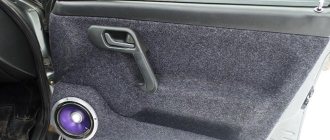
- If you do the job well, you can reduce the noise level inside the cabin by 20-30 percent.
- The soundproofing door no longer allows sounds from outside to pass through and improves the sound of acoustics from the inside.
- In addition, the doors will begin to close much softer, unnecessary noise, rattling and vibration will disappear
- A big advantage of sound insulation for doors is the ability to significantly improve the sound quality of speakers installed inside the door trim
Soundproofing stages
Before we get started, let's first consider all the steps:
Schemes of different degrees of sound insulation of doors
- The first step is gluing vibration insulation, it is necessary to eliminate possible rattling when closing and opening doors, photo above
- If you plan to install good acoustics, this will improve the sound quality and remove unnecessary noise and overtones.
- The second stage is sound insulation on top of the vibration insulation; this stage of work allows you to prevent extraneous sounds from entering the cabin from outside.
- The third stage is the treatment of rubbing parts with anti-squeak (the purpose is clear in itself), here it is necessary to pay attention to decorative and other elements of the interior that are capable of squeaking (for example, upholstery and fixing clips, dashboard elements)
- When you complete all the steps in sequence, you will have a door that is soundproof, acoustic and without squeaks.
Troubleshooting
If a key or silumin rod breaks, you should not immediately buy a new block with a handle. On sale you can find special repair kits for VAZ 2108-099 door handles, which contain these parts in 2 copies.
This way you will save money and easily change the key yourself by removing the handle using the following sequence of actions:
- Remove the decorative panel.
- Disconnect the rod connecting it to the locking device from the handle mechanism.
- With the glass fully up, unscrew the 2 fastenings of the handle to the door card.
- Remove the handle, replace the parts and put it back.
If the rod is disconnected, then you need to remove the inner lining and put it in place, as described above. Using the moment when the facing panel is removed, check what caused the disconnection of this rod so that history does not repeat itself when the door is slammed.
Malfunctions of the locking mechanism can only be eliminated by removing it. In a situation where the device has a lot of wear, as happens on the driver and front passenger doors, it is recommended to replace the lock with a new one.
After installing it in place, adjustment will be required to ensure precise alignment of the locking parts. To adjust, the lock will have to be fixed in different positions, achieving the optimal one.