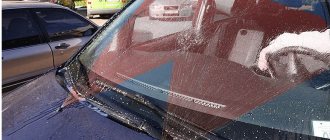
The windshield on a Lada Vesta car has an unlimited service life and needs to be replaced extremely rarely. This becomes necessary in the event of mechanical damage, cracks, impact, or a frontal collision with oncoming traffic.
The process of replacing the windshield of a Lada Vesta is simple, but requires attention on the part of the repairman.
Step by step guide:
- Placing the vehicle within the perimeter of the repair area.
- Preliminary cleaning of the working surface, drains from dirt, drying.
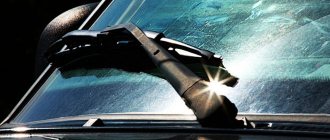
- Dismantling frills and windshield wipers.
- Removing the rubber seal.
- Puncture of the adhesive seam.
- Lower the saw and cut the seam.
- Remove the windshield from its seat.
- Reassemble in reverse order, laying the seal between the windshield and the instrument panel.
Lada Vesta windshield dimensions. Manufacturer prices
| Name of original product | Size in millimeters | Price in rubles |
| Head-on | 1076 * 468 | From 4000 |
| Heated rear | 1074*438 | From 4000 |
| Front side (2 pieces) | 975*560 | From 8000 |
| Rear side (2 pieces) | 727*430 | From 4000 |
| *prices are as of 04/06/2019. | ||
Windshield Installation
_x000D_
You will need : a sharp knife, a repair kit for gluing the windshield (read the instructions), a glue gun, a heated room (recommended air temperature 23°C, humidity 50%).
_x000D_
Procedure:
_x000D_
- _x000D_
- We remove the remaining sealant; the permissible residual thickness at the seam is no more than 2 mm.
- We degrease the painted edges of the windshield with an activator.
- Degrease the edges of the body opening.
_x000D_
_x000D_
_x000D_
_x000D_
Removing remaining sealant from the body
Degrease the painted edges of the windshield with an activator
Degrease the edges of the body opening
_x000D_
- _x000D_
- Apply glue around the perimeter of the glass, retreating 8-10 mm from the edge. The height of the layer should be 10-12 mm and the width no more than 8 mm.
- We place the glass in the body opening using suction cups. There should be even gaps between the side edges of the glass.
- Install the wedges from below so that the upper edge is pressed against the front side of the body roof. We press the glass to the body.
_x000D_
_x000D_
_x000D_
_x000D_
Apply glue around the perimeter of the windshield
Place the windshield in the body opening
install wedges at the bottom of the glass
_x000D_
To prevent the glass from “sliding down”, secure it with three pieces of adhesive tape to the body 250 - 300 mm long.
_x000D_
_x000D_
The entire process (removing and installing the windshield) is also shown in the video:
_x000D_
_x000D_
Reviews
| № | Positive |
| 1. | Valery , 43 years old (www.otzovik.com): the car is in its fourth year, the windshield is intact, the seal is sealed. |
| 2. | Kirill , 39 years old (www.zr.ru): survived two winters, the interior and seals are in good condition. |
| 3. | Vitaly , 23 years old (www.autobann.su): comrades advised replacing the seal with a new one after four years, since cracks and contour deformation often form. |
| 4. | Georgy , 33 years old (www.lada-vesta.net): I won’t complain about the quality of the Lada Vesta, the car is good, there were no critical breakdowns. He eliminated minor defects on his own. |
| 5. | Vladlen , 41 years old (www.otzovik.com): the car overwintered for two seasons in an open parking lot, there is no garage. There are no comments on the interior or seals. |
| 6. | Dmitry , 43 years old (www.zr.ru): mileage 80,000 km, no capital investments. I systematically carry out technical inspections and buy original consumables. |
| 7. | Vitalievich , 25 years old (www.autobann.su): I recommend the car for purchase, good quality, affordable price, wide range of spare parts. |
| 8. | Zheka , 33 years old (www.lada-vesta.net): over four years of use, the rubber has cracked in places, but this is not so critical for me. |
| 9. | Konstantin Vladislavovich , 49 years old (www.otzovik.com): the car is like a car, I won’t praise it, there are defects. For daily trips to work - from work will do. |
| 10. | Leonidovich , 33 years old (www.zr.ru): in comparison with Granta, Priora, Lada Vesta - this is something perfect. I am satisfied with the quality, no comments. |
| 11. | Vasily , 36 years old (www.autobann.su): I have had a car for two years, no special comments, no complaints. |
| Negative | |
| 12. | Ivan , 42 years old (www.zr.ru): a year and a half after buying the car, the seals in the interior dried out. I will have it replaced by an authorized dealer under warranty. |
| 13. | Vitaly , 38 years old (www.otzovik.com): constantly taps the glass when driving, especially on rough roads. |
| 14. | Ivan Vasilyevich , 47 years old (www.autobann.su): the quality of the fit of the windshield and the sealing is poor. It is necessary to modify it yourself, which entails additional expenses. |
Related link:
Lada Vesta - which color to choose
Replacing windshields in Mobiscar®
Thanks to the professionalism of Mobiscar® personnel, the integrity of the paintwork of the body, internal trim elements and dashboard equipment is maintained. More details
Replacement in 1 hour
Thanks to large stocks, our customers do not waste time waiting. Modern materials and technologies allow the vehicle to be operated normally within 1 hour.
High quality work
Mobiscar® is a highly specialized company that performs only the replacement and repair of automobile glass. Thanks to this, the installation quality does not differ from the factory one.
Certified glass
Mobiscar® cooperates with glass manufacturers that supply their products to automobile concerns. The originality of the products is confirmed by the necessary certificates.
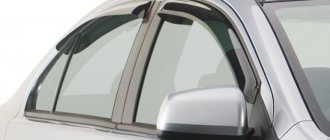
Frameless wipers for Lada Vesta
If the picture is roughly clear with the dimensions, then you should next decide on the manufacturer. Standard wipers on the Lada Vesta are a frame version. They don't need criticism. Reliable and durable. In general, drivers are quite satisfied with their work. But frame brushes still have some minor drawbacks. For this reason, most drivers are inclined to use frameless wipers.
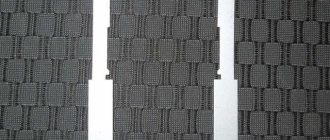
Frame and frameless wipers for example
Based on experience, we can recommend installing frame wipers on your car in the summer. And in the winter, change them to frameless ones.
You may be interested in: Which sedans will win the domestic audience: Vesta or Grant?
Dismantling
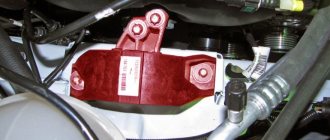
To connect, first of all, you need to gain access to the SAUKU - the heater and air conditioning control unit. On Vesta and X Ray, the algorithm is different, so it’s worth looking into everything in more detail.
Lada Vesta
In a sedan, the SAUKU unit is traditionally located on the center console. To get to it, you will need to remove 3 elements:
- Panel overlay (plastic);
- Key block;
- SAUKU overlay.
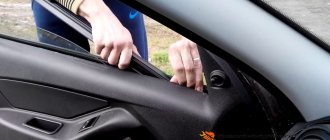
The plastic trim is fixed to the center console using plastic fasteners. To snap them off, you need to pry it at the bottom and pull it towards you.
Next, the panel with the keys is dismantled, which is attached to the clamps, also around the entire perimeter. They need to be snapped off.
The most difficult thing to remove is the SAUKU trim.
It is better to start working on the left side. First you need to get to the fuse box by removing the plastic cover that covers it. You need to turn the 3 plastic handles that secure the lid at the bottom, and then remove the lock from above.
In the end, all that remains is to pull the cover from below, disconnect the clamps that secure it to the device from above, and remove the cover. Once the fuse box cover is removed, you will need to remove 2 mounting screws.
Next, we move on to the central part, where it is also necessary to unscrew the 2 mounting screws, which are located directly under the panel with the keys.
Then all that remains is to unscrew 1 mounting screw on the right side, which is located under the glove box lid.
After this, access opens directly to the SAUKU block, which is attached to the cover plate with Torx screws. They need to be unscrewed and the plug disconnected.
Lada X Ray
Independent connection of a heated windshield on a Lada X-Ray through an additional alarm channel also begins with the removal of the SAUKU unit. Everything here is noticeably simpler than on Vesta. The panel itself with the block is fixed with 2 hooks at the top and 2 iron guides equipped with springs at the bottom.
You need to carefully pry the panel at the bottom and carefully pull it towards you. This will cause the top fasteners to disengage. In the end, all that remains is to disconnect the plug from the wires.
Side glass repair
All windows of a Lada Vesta car, including the side windows, are exposed to environmental factors while driving. This causes various types of damage, repair of which is only possible if you contact our service center in a timely manner. The repair process itself is selected depending on the type of damage, but the following methods are often used:
- Polymerization
- Polishing
In most cases, these methods are enough to give the side window of your car a normal appearance and thereby ensure its repair. Do not try to repair the side glass yourself; this is impossible and may make the situation worse.
We always have glass in stock for model years: 2022, 2018.
What do the inscriptions on the glass mean - decoding
Special markings on the windows for Vesta will help you determine whether you have received the correct copy. This marking is divided into several types. The first one shows the name of the manufacturer, then comes the one that indicates which body type the part is suitable for:
- SD – sedan;
- UN – universal;
- HB – five-door hatchback;
- KP – coupe;
- GR - truck;
- VN – SUV;
- KB – convertible;
- PIC – pickup truck.
*D is the designation of the number of doors. For example, 4D is a sedan, 5D is a five-door hatchback.
This is followed by the series designation – SER.
The next step is the type of steering wheel.
- LVRUL - left-hand drive car;
- PRUL - right-hand drive car.
Next comes the color (shade) of the glass and sun protection coating:
- ZL – green (ZLZL – additionally with a green stripe; ZLGL – additionally with a blue stripe);
- SR - gray;
- PR – transparent (PRGL – additionally with a blue stripe; PRZL – additionally with a green stripe);
- BR – bronze;
- GL – blue;
- PR – dark.
Additionally indicated:
- DD – rain sensor;
- TRIPL – triplex (three layers);
- OTKR – opening;
- DV – double;
- ST PAK – double-glazed window;
- EO – electric heating (heating);
- B/EO – without heating;
- STOP – installation of a brake light on the rear transparent shield;
- DZ – fog sensor.
The following designations may appear:
- Tinted – green athermal glass, additionally – heat-absorbing property;
- Lamisafe – multi-layer.
The manufacturer does not always indicate all the details in the labeling, but he must indicate the type of glass, additional functions and equipment.
Basic faults
The first important malfunction is the incompatibility of the windshield with the windshield wipers. The standard wipers managed to cause a lot of trouble for the owners of the first Vestas.
The second problem is scratches on the side windows. The seals on the doors are very tight against the windows. When grains of sand, ordinary dust and dirt appear between them, vertical scratches appear on the sides. Replacing and slightly modifying the rubber seals on the doors can save you from this.
The problem with the windshield is not only due to chipping. If you hear a squeaking sound from the front, the culprit may be the upper rubber seal. If the interior seal is broken, the windshield will have to be replaced.