Not all drivers understand the benefits of fog lights. Even in daylight, with the onset of fog and rain, ordinary lights noticeably reduce the level of illumination. Fog lights in the Lada Vesta are only available on the most expensive luxury trim levels. The remaining options, instead of front PTFs, are left with plastic bumper plugs for the Lada Vesta, which are replaced with fog lamps in the car showroom of an official dealer. In order not to lose the warranty obligations of the Lada Vesta car manufacturer, it is necessary to carry out partial modifications to the configuration. The work is difficult and expensive. You can purchase the necessary parts to connect PTF (fog lights) to the Lada Vesta in stores that supply equipment for the Lada Vesta, much cheaper.
About the standard set of fog lights
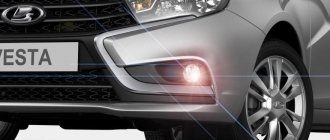
The manufacturer installs a Valeo PTF on the Lada Vesta. They are made in Romania and are suitable for all car modifications: station wagon, sedan, SV cross. The quality of the part can be assessed as high. They illuminate the road well in bad weather and have an aesthetic appearance. The glass is dense and does not break at the slightest contact with it. Fog lights will work for a long time, provided they are used correctly. If you need to install a PTF on a Vesta fret, it is best to focus on original spare parts, although they are more expensive than their analogues. Chinese substitutes often cannot withstand the load, melt, and stop working. Considering that installing lights takes a significant amount of time and money, you should not skimp here.
conclusions
It is necessary to select the lamp correctly.
This article discussed the simplest, but most expensive method of installing anti-fog equipment.
In practice, especially if your Lada Vesta is no longer under warranty, everything can be done at much lower cost using plastic corrugation, simpler wiring, a 16-amp fuse, and a 4-pin relay. In general, the installation sequence will not differ.
By choosing the most suitable method, you can equip your car with enough light for comfortable driving in the dark, when visibility is very limited.
Instructions - installing PTF on Lada Vesta
Installing fog lights on the Lada Vesta is difficult. This is due to the design of the electronic equipment of the Lada model. The fog lights on the Lada Vesta are controlled from the steering column switches, and they do not have a fixed position with the fog lights on. In addition to this, problems are created by the absence of a special electronic fuse box of the EMM type in all but the top-end trim levels of the Lada 2180. The signal about the start of PTF operation in the original design comes here. Owners of cheap modifications of the Lada Vesta have to look for other connection schemes. Despite the difficulties, installing PTF yourself is possible. To do this, you will need to purchase the headlights themselves, brackets for mounting them, a power button, a contact snout, a set of wires with corrugation, connectors and adapters, and a 16 Am fuse.
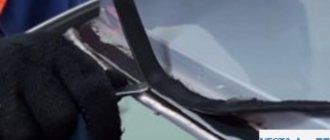
First remove the bumper
Connecting the PTF Vesta begins with disconnecting the battery and removing the bumper, which is simultaneously attached to the body, fender liners and lockers with a large number of bolts and screws. Unscrew one by one:
— 4 bolts in the lower part of the body;
— 4 self-tapping screws from the fender liner;
— 2 screws from each locker;
— 6 bolts on top of the body and 2 more under the license plates.
At this time, it is necessary to hold the bumper by the beam to avoid damage if it falls. The Lada Vesta has a massive bumper, so the help of a second person will not hurt. The detached part needs to be pulled slightly towards you and removed from the side brackets.
Preparing the seats and mounting the headlights
We have already said earlier that instead of fog lights, the fret manufacturer installs plastic plugs in which holes must be cut. This can be done with a bimetallic crown, or an ordinary stationery knife. The second method will take a little longer and require additional care. If it seems that it won’t be possible to cut smoothly, you can buy a new lining for the PTF.
Next, you should install and secure the pre-purchased brackets with self-tapping screws, and then place the fog lights themselves inside them.
At the same stage, the power button is installed. It can be placed wherever it is convenient for the driver, but usually a place is selected on the center console, next to the button used to open the luggage compartment. The hole for the button can be drilled or cut.
The most important point is connecting the fog lights
We lay the output to the button through the corrugated box between the side members, starting from the right headlight. It is more convenient to run the wires inside the cabin itself next to the passage into the pedal assembly.
The light bulb is connected in the same way as in the Lada Priora, Viburnum or Grant. Electricity is taken from the battery and connected to the contact relay through a fuse. The relay can be installed in the engine compartment or inside the cabin of the 2180. We extend the plus contact from the size fuse or from the cigarette lighter.
Lada Vesta. Replacing lamps - part 1
For normal operation of the lighting and light signaling system, use the lamps specified in Appendix 2,
Note. You can replace the lamps yourself using the methods described below. If replacement seems difficult, it is recommended to contact your dealer.
ATTENTION!
Before replacing a lamp, make sure the associated signal light is turned off.
Block lights
To remove the low beam lamp, do the following:
— remove cover 2 (Fig. 11) by turning it counterclockwise;
— disconnect the wire block 7 from the lamp;
— remove the antenna 8 of the spring clamp from the groove;
- remove the lamp;
— Install the new lamp in the reverse order.
To remove the high beam lamp, do the following:
— remove cover 1 by turning it counterclockwise;
— disconnect wire block 6 from the lamp;
— remove the antenna 5 of the spring clamp from the groove;
- remove the lamp;
— Install the new lamp in the reverse order.
To remove the turn signal lamp, do the following:
— turn socket 4 counterclockwise and remove it from the seat assembled with the lamp;
— remove the lamp from the socket by turning it counterclockwise;
— Install the new lamp in the reverse order.
To remove the daytime running light and side light bulbs, do the following:
— turn socket 3 counterclockwise and remove it from the seat assembled with the lamp;
— remove the lamp from the socket;
— Install the new lamp in the reverse order.
Rice. 11. Headlamp
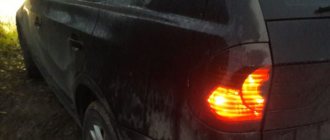
Tail lights
Replacing the turn signal and brake/side light bulbs on the exterior fender light.
To replace the turn signal lamp 4 you must:
— open the trunk trim hatch located in the rear light installation area, providing access to the socket connector 4 of the turn signal lamp;
— turn patron-connector 4 counterclockwise and remove it from the seat assembled with the lamp;
— remove the lamp from the socket by pulling it towards you.
Reinstall the cartridge connector in the reverse order.
To replace the brake/side light bulb 3 you must:
— open the trunk trim flap located in the rear light installation area, providing access to the socket-socket 3 of the brake signal/side light lamp;
— turn the socket-socket 3 counterclockwise and remove it from the seat assembled with the lamp;
— remove the lamp from the socket by turning it counterclockwise.
Reinstall the connector cartridge in reverse order.
Replacing the reverse and side light bulbs on the interior light located on the trunk lid of the car
To replace the reverse light bulb 1 (Fig. 12), you must:
— unlock the two outer holders 1 (Fig. 13) of the trunk trim 2. The trim holder is a structure of a fixed base and a movable fixing “fungus” 3 (Fig. 13). When the “fungus” is raised, the holder is unlocked;
— to unlock the trim holder 3 (Fig. 13), it is necessary, for example, to slightly lift the moving part of both holders using the blade of the ignition switch key 4 (Fig. 13);
Rice. 12. Tail lights
Rice. 13. Replacing the reversing and side light bulbs on the outside lamp
— overcoming the resistance of the holders, bend the trunk lid trim to gain access to the connector cartridge 1 (Fig. 12). To avoid damage to the upholstery, bend back no more than 7-8 cm;
— turn the socket connector 1 (Fig. 12) counterclockwise and remove it from the seat assembled with the lamp;
— remove the lamp from the socket by pulling it towards you.
Reinstall the connector cartridge in reverse order.
To replace the side light bulb 2 (Fig. 12), you must:
— using the same sequence as for replacing the reverse light lamp 1, provide access to the connector socket 2 of the side light lamp;
— turn the socket-socket 2 counterclockwise and remove it from the seat assembled with the lamp;
— remove the lamp from the socket by pulling it towards you.
Reinstall the connector cartridge in reverse order.
To replace the reverse and side light bulbs in the right headlight, a similar sequence is used.
Video on the topic “Lada Vesta. Replacing lamps"
Replacing DRLs of standard Lada Vesta lamps with LEDs.
How to replace the low beam headlight bulb on a Lada Vesta
Lada Vesta. Replacing a burnt out STOP lamp in the rear light
Do Vesta need fog lights?
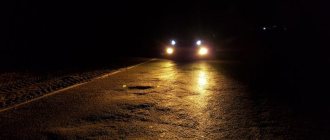
To answer the question of whether fog lights are needed on a Lada Vesta car, let’s figure out what functions this part of the lighting performs. The luminous flux of PTF allows you to direct the lighting lower above the road surface than conventional headlights do. Because the peculiarity of any fog is not contact with the surface of the earth.
The light easily avoids fog and continues to brightly illuminate the road, while the running and driving lights focus directly on the natural phenomenon. In addition to the road, fog lights illuminate the shoulder and left road markings, which allows you to avoid driving into the oncoming lane during bad weather.
If fog rarely appears in the area where the car is driven, this is not a reason to decide not to install PTF. The roads are mostly winding, at times similar to a mountain serpentine, the combination of the turned on PTF and low beams allows you to continue driving even at night. The decision to install fog lights on the Lada Vesta in this case depends on the conditions of use of the car.
Preparation for equipment installation
The main difficulty is that the electrical system design of this machine is significantly different from previous versions.
The lighting will be controlled using a switch mounted under the steering wheel, but does not have suitable positions for fixing the light output. The electrical signal comes from the lever through an additional unit, available only in the luxury version. So the most acceptable solution is to install a kit with a separate connection and a special button output.
List of tools needed for installation:
- pliers;
- screwdriver with Phillips bits;
- self-tapping screws;
- 76 mm bit for drilling holes;
- stationery knife;
- a set of keys for removing the bumper and installing optics.
Choosing fog lights for Vesta
The choice of fog lights should be based on the appearance of the PTF. High-quality spare parts have a sealed, dense case that can withstand serious impact. It is better if the PTF has glass rather than plastic lenses, since they are less strong and durable. The last selection criterion is simple disassembly of the part if it is necessary to replace the lamp. All these requirements are met by the original headlight from Valeo, installed on the Vesta fret. Its price is approximately 4,000 rubles for a set of two PTFs; the set includes Osram light bulbs. You can purchase the set without light bulbs. Then the cost will decrease significantly.
Other manufacturers offer good foglights for the Lada Vesta. For example, FranceCar and Autostol63. Their price ranges from 1500 to 2500 rubles, and the kit includes regular lamps. Chinese sellers also offer their products for owners of domestic Lada cars, but their quality is significantly inferior in all respects.
Removing the front bumper
Considering the massiveness and aesthetic component of this element in the exterior, dismantling the front bumper should be done carefully and strictly according to the instructions.
First of all, you need to disconnect and remove the battery from under the hood. Then, using a “10” head, unscrew the 2 bolts securing the air filter unit, which also hold the upper part of the bumper.
The registration numbers are removed, under which there are 2 screws securing the bumper to the central beam. Using an L-shaped TORX “20” key, unscrew these 2 screws and 2 of the same self-tapping screws that attach the bumper to the wings in the wheel arches.
Then, using an L-shaped TORX “30”, unscrew 4 screws securing the lower part of the bumper, and TORX-20 – 2 more screws securing them to the side panels on each side.
After this, the bumper is pulled forward, alternately on each side of the wheel arches, until its latches come out of the mounting sockets.
The bumper remains hanging on the top four TORX-30 key bolts, of which the central one (opposite the hood lock bracket) is unscrewed last, while keeping the bumper from falling, after which the accessory is completely disconnected from the car.
It is advisable to use this situation to simultaneously clean the radiator from insects and debris.
How much does installation work cost?
If you don’t have enough time to install fog lights yourself, you can turn to specialists for help. An official Lada dealer carries out such work for an amount approximately equal to 60-70 thousand rubles. Of this, at least 10 thousand rubles will have to be paid to an electrician for installation. The price consists of the cost of original spare parts required for installing the PTF and complex work that will completely copy the luxury version.
Installing foglights yourself will reduce the required budget. In addition to the headlights themselves, you will need to purchase other equipment, with a total cost of at least 5,000 rubles. To summarize, we can say that installing PTF on fret 2180 without outside help is about 5 times cheaper than from an official dealer.
What difficulties does the master face during installation?
Unlike previous generations, Lada Vesta has a new system of electrical power supply, distribution, processing and signal transmission.
Standard control of fog lights is implemented via the steering wheel paddle. The activation signal does not go directly to the fog lights, but to the EMM control module. After which the unit redirects the signal via the CAN bus.
Installation according to the described scheme is quite expensive; the cost of the service including consumables reaches 55 – 65 thousand rubles. The price is prohibitive for most car enthusiasts. In this regard, owners are forced to install PTF themselves.
Review of Manufacturer Prices
| Name / catalog article | Price, rub.) |
| FranceCarFCR220029 | From 1500 |
| Autostol63261500097R | From 2300 |
| Valeo 47401 | From 4300 |
| Valeo 02539 | From 3300 |
| Bracket for fog lamp 657845163 | From 250 |
| Facings - frames | From 1000 |
| DLAA | From 1300 |
| Tune-auto (body) | From 890 |
| Wesem | From 2000 |
| LED bulbs in fog lights | —/— |
| Valeo | From 4000 |
| Lens | From 5000 |
| Rear fog lamp Lada Vesta 2191-3757010-20, size 223 * 12 mm | From 650 |
Wiring diagram
Preparatory stage:
- set of automotive tools, screwdrivers;
- rags, plastic spatula;
- fog lights, wiring kit, limit switches, 4-pin relay, insulation;
- elastic clamps – ties for electrical wiring;
- 16 A fuse for replacement in the fuse box;
- plastic corrugation of at least 5.0 meters.
Sequence of actions for connecting Lada Vesta fog lights:
- We install the car within the perimeter of the repair area, provide safety measures, and secure the rear row of wheels with wheel chocks.
- We gradually unscrew the top, middle, bottom row of screws.
- We remove the side clamps from the grooves.
- We remove the front bumper assembly and fix it on a workbench for ease of work.
- Using a crown (diameter 76 mm), we drill the left and right holes for the PTF. If you purchased ready-made brackets, then install them and secure them with three self-tapping screws.
- We lay the wiring under the plastic buffer amplifier and clamp it with clamps. Screw the buffer into place.
- We lay the cable to the fuse block.
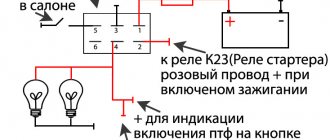
- We install a mechanical button in the interior. The location is determined at personal discretion. We bring the limit switches to the fuse and relay block.
- We take the load power from a 12 V battery. We connect the control “plus” from the side lights or the cigarette lighter. We install the relay in the cabin under the dashboard above the pedal complex.
- As an alternative option, a steering column switch from Renault Duster with a fixed engagement is installed (article 8201167981).
With this scheme, the fog lights are activated when the headlights and low beam are turned on.
There is a third activation method: using a pulse relay, using the steering column switch, which are equipped with the Standard and Comfort versions. Installation work is carried out exclusively in the cabin, outside the engine compartment.
Is this really necessary?
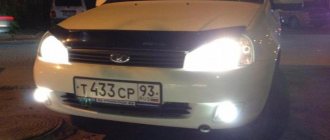
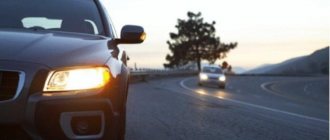
Road safety comes first! Installing fog lights on Vesta will improve this indicator (subject to proper adjustment) during bad weather conditions, when visibility is significantly reduced. Thanks to the beam angle and beam strength of these headlights, the driver can see the road better. And it’s easier for other motorists to notice such a car.
PTFs are also useful at night, they allow you to avoid dangerous situations on the roads, since the driver can see not only the space in front of the car, but also beyond the curb or side of the road.
From an aesthetic point of view, the Lada Vesta with fog lights looks more expressive and respectable.
How do fog lights work?
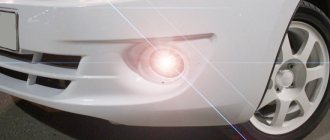
The presence of fog lights in a car gives the driver the opportunity to feel calmer while driving in poor visibility and fog. Due to the location of the PTF in the lower part of the bumper and below the level of the head light (and fog, as you know, spreads above half a meter from the road), the light passes through the curtain and is visible to other road users.
LED fog lights for Vesta. Photo source: https://www.drive2.ru/l/476399147935597172
Also, such headlights have a clear cut-off line due to their placement and the shape of the reflector, and the light-optical design has a screen of direct rays that prevents light from scattering and reflecting from small drops.
Let's sum it up
Do-it-yourself installation of such an element in a car as PTF in LADA Vesta allows you to save a lot of money (more than tens of thousands). Auxiliary materials and devices for installing fog lights will require the owner to part with 5-6 thousand rubles. The procedure will take several hours to complete, but now the car will not only look good, but will also provide improved visibility in bad weather and at night.
A fog lamp (FFL) is a necessary part of the external image of a car. More importantly, such lights should illuminate the road space for the driver even in heavy rain and snowstorms. The part must dissipate a white or light yellow tone, which forms a horizontal beam spreading over the route. Their design is such that they do not affect the upper layers of fog, and, therefore, improve visibility. In the event of a breakdown and the desire to repair the lights on their own, the owner will need a kit for connecting the PTF to Vesta with wires, relays and special buttons. This also includes the bracket.
Most of the latest products from AvtoVAZ have holes and fasteners for installing PTFs, but the plant itself practically does not install them. There have been numerous complaints about fog lights from the manufacturer. Car owners note that the lighting from them is very weak. Hence the rational solution: it is better to buy high-quality PTFs for Vesta and install them yourself.