September 01, 2017 Lada.Online 65 494 33
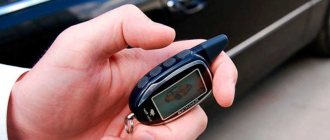
One of the popular accessories among car enthusiasts is a window closer. This unit allows you to automatically raise the windows when the door locks are closed. Let's look at the features of self-installation and connection of the door closer on Lada Vesta.
This instruction uses the Zeepin universal door closer, which costs about 500 rubles (available in the AliExpress catalog).
You can buy a MAX-2 glass closer for Lada Vesta with delivery throughout Russia in our online store.
Attention!
Closers have different wiring diagrams, so compare the wiring diagram carefully. You perform all actions at your own peril and risk.
Other little-known functions of the Lada Vesta car
In addition to the functions described above, you can change other parameters in Vesta. This will increase the comfort of operating the machine and working with its systems.
MMS shortcuts can be dragged and dropped
The media screen has various shortcuts. They can be installed at your discretion. You need to click on the shortcut and hold it there for a few seconds, after which it will be highlighted and you can move it.
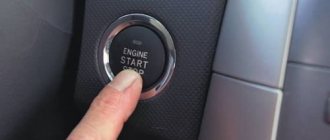
Separate heated windshield
Heating is activated without using maximum airflow by pressing the “Defrost MAX” key on the heating system control. After this, press two buttons at once - “Defrost MAX” and with the image of a person and the glass heating icon (both keys are located vertically opposite each other). After this operation, the glass heating operates separately from the climate system fan and functions as before.
Fuel tank hatch hook
Almost every gas tank flap of the new LADA model has a small hook on the bottom. It is made in the form of a small protrusion and is designed to engage the cap while refueling the machine.
“Nychka” in the trunk of a Lada Vesta station wagon
Vesta's trunk has a well-thought-out organization of space. It has many pockets, hooks and niches. The cigarette lighter for connecting electrical appliances and side lighting are located separately. However, there is one closed niche that few people know about. It is located on the left side on a large ledge - this is a small shelf that is removable, there is a small space under it. It is worth noting that removing it is quite difficult and must be done carefully so as not to damage the plastic latches.
Activating hidden functions
DDT4all software is used, which transmits information from control units. Synchronization occurs when ELM327 is connected. This is a small adapter designed to work with the car system. Connection is made via Bluetooth or USB.
What is necessary
To scan a car you must perform the following operations:
- Python 2.7 and PyQt4 are installed (32/64 depending on the version of Python, depending on the version of Windows);
- install DDT4ALL (the program is constantly improving), unpack it to drive “C” in Python27\Scripts\ddt4all;
- install the latest DDT database and unpack it into the program installation folder;
- run ddt4all.py on the command line;
- In the main window, click search; after scanning is completed, blocks will be displayed on the left.
To install the software database, copy the special “ecus” directory from your database and move it to the root of the source code tree. After this, ddt4all.py is launched.
Connection and preparation for use
- You need to install DDT4ALL software on your computer, and connect the ELM327 transmitter to your car. In Vesta, the connector is located on the driver's side, closer to the door. It is located at the bottom of the dashboard.
- After starting the program, you need to select the COM port if the connection is via Bluetooth.
- Click “Connect”, after which a new window will open, where you need to click “Scan blocks” (button with a magnifying glass) and in the window that opens click “CAN”. You must wait while the program scans.
- After this, the blocks on the left side of the window are highlighted in green; below there will be a “Screens” menu, where the necessary actions are selected individually.
- Then, after selecting the required parameters, click the button with the image of Einstein on the top left (Expert mode) and click “Send”.
Launching the DDT4ALL program and working with it
Depending on the operating system, the application starts as follows:
- Application. Open “File” and click “Zip database”. Next you need to remove “ecus”.
- Terminal. Run “python parameters.py”, go to “zipconvert”. After that, move or delete "ecus".
- Linux. Write "python ddt4all.py".
- Windows. Run the file DDT4ALL.BAT.
Having written the “DDT2000 XML” file in the “JSON” format, it can then be edited. You can also create your own windows in the software, which will display ECU parameters.
Characteristics of the automatic door window lifting module
First, let's look at the main characteristics of the module. A window closer is a device designed to automatically close the windows in a car after setting the car to an alarm system. Thanks to the use of such a module, the driver does not have to worry about forgetting to close the windows in the car.
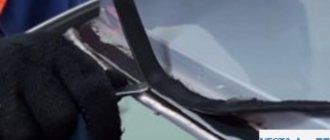
Module board disassembled
Principle of operation
The module block itself for 2 or 4 windows is connected to the control unit for the anti-theft system and power windows. In particular, this unit is mounted between the electric motor and the power window control buttons. That is, the use of door closers is only possible in vehicles equipped with electric windows.
We recommend: Full decoding of car tire markings
As for the operating principle itself, it is identical for all closers. Voltage is supplied through the block and supplied to the electric motor. The closers themselves are never used when opening and closing the windows if the car is not set to an alarm. But when the anti-theft installation is activated, a signal from the unit is transmitted to the device itself, as a result of which the electric motor begins to be powered and raise the windows.
If we are talking about a multifunctional system, then it can also perform the following functions:
- With the help of such closers, you can control several glasses either in one or in different directions.
- The function of automatically returning the windows to a certain position can be activated if the alarm was activated no more than two hours ago.
- If the anti-theft system is activated, the door closer will automatically block the power window button.
- It is possible to configure the controller to work with various types and designs of lifts.
- In addition, if necessary, the owner of the multifunctional system will be able to additionally connect several buttons to control the power windows (video author - AvtoGSM).
Kinds
Closers for two or four glasses can be either multifunctional or designed to perform one task.
- The first, in addition to closing the windows, when the anti-theft system is activated, can remember the location of the windows, and after removing the car from the alarm system, they will return them to their original state. In addition, it is possible to return the system to its original position if there are obstacles during closing. The module can also be equipped with additional functions. The car owner has the ability to disable or configure the functionality if necessary. Of course, a module for covering four glasses will always be cheaper than one for two. But it is necessary to take into account that most of the options in fact may simply turn out to be unnecessary for the car enthusiast.
- The second type is simpler. It is intended only for closing window glass, and such options are not equipped with additional functions.
Diagram for installing the unit in a car
Peculiarities
Now let's move on to the features. The complexity of installing the system may be due to the connection of the module to a larger number of doors, as well as the presence of other functions. For example, a module for closing only two windows can be installed by virtually every car enthusiast, even if he has no experience in carrying out such work.
If the vehicle has only one component installed on the driver's side that provides the functionality of the windows on the passenger door, then the module is mounted on it. If the system itself is divided or the control buttons are located on the center console or in the tunnel, it is advisable to install it under the dashboard. If the windows do not rise well from the button, then the closer may not completely close the glass, the load relay in it will trip and it will turn off - so we repair and lubricate the window regulators (video author - Lone Vagrant).
We recommend: What is the difference between iridium and platinum spark plugs?
Description of functions and procedures for their activation/deactivation
Using the program, Vesta owners can change various functions of the car. The car is optimized for the personal needs and desires of the driver. It is important to remember that the car owner makes any changes at his own risk. It is necessary to understand that the person who makes changes to the system knows exactly what and how to do. If a mistake is made, serious problems with the operation of the machine may occur. It is recommended to make a copy of the ECU system.
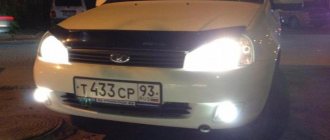
Follow Me Home function
The function is activated as follows:
This completes all changes. But to activate the function, turn off the engine and then blink your high beams. After leaving the car, the headlights should glow for half a minute. You can blink the headlights twice and the light will stay on for 1 minute.
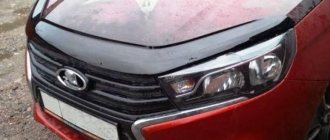
Cornering Front Fog Light
Until 2022, this function did not exist. After connecting it, the fog lights come on, but only when you turn the steering wheel. Requires DDT4ALL software and adapter:
Disabling automatic activation of the rear window wiper
New models have a function that automatically turns on the windshield wiper if you engage in reverse gear. This is not entirely rational, since the brush rubs on dry glass and scratches it. You can disable this function using the adapter and software:
Signal function when working with a security system
Allows you to use an adapter and software to switch the alarm setting with horn accompaniment:
Changing central locking parameters
You can change the following parameters:
- The “BCM” block (on the left), the “Doorlock” function (below the block) and in the same place “Doorlock - Configuration”.
- Enabling “AntiHiJack” in the line “ANTI_HIJACK_CF (-)”, specify the required value, click “TRUE”, “Send”. Initially, AntiHiJack is deactivated on the machine. If you activate it, then with one click on the key fob the car will be disarmed, and with a second click it will be unlocked. When opening a door from the inside, only one door will open, the others will be closed, provided the central locking is activated. You can deactivate the functions by selecting the “FALSE” command and then “Send”.
- Speed threshold for activating a signal about an unlocked door - go to “DOOR_WARNING_SPEED_THRESH_TP (km/h)”, specify the required speed on the right and click “Send”.
- Changing the speed threshold for automatic central locking - go to “LWS_SPEED_THRESH__CF (km/h)”, specify the required speed, click “Send”.
- Auto-arming timeout (triggered when the system is turned off by the key fob or if the door is not closed) for this period of time in “AUTO_RELOCK_TIMEOUT_CF (min)” specify the required number of minutes, then click “Send”.
Do-it-yourself installation of glass closers on a VAZ
The closer is designed to work together with a car alarm or other device that has a special output on which a pulse, negative or positive polarity, appears when the state of the system changes (for example, when arming).
To begin the installation, you need to check whether the car windows open and close with the buttons when the ignition is off; if not, then you need to find in the fuse block the relay responsible for opening and closing the power windows, remove it and install a jumper in its place as shown in the photo. Without this jumper, the window closers will not work.
Fig.1. Mounting block of fuses and relays for a VAZ 2114 car
Fig. 2 A jumper instead of a glass lift relay is a guarantee that your glass closer will work.
After the preparatory stage, remove the driver's door trim (the passenger door trim remains in place)
Fig.3. We remove the driver's door trim to install the door closer.
And install the closer on the car door as shown in the photo.
Fig.4, Fig.5. Installing the door closer module on the driver's door
Let's look at the installation diagram for door closers.
Fig. 6 Window closer connection diagram
Fig.7. Comments on the glass closer connection diagram.
And the wiring diagram of your car (as an example, the door closer was installed on a VAZ 2114 car, we are only interested in the fragment with the window lifts themselves and look.
Fig. 8 A fragment of the electrical equipment diagram of the VAZ 2114 car, only the side of the electrical equipment from the driver's door is shown.
{banner_x}
We connect the red wire with a 25 A fuse to + 12V, to do this we connect it to the white wire with a black stripe on any of the driver’s door buttons, see photo.
We connect the black wire to the ground of the car. Or bluntly to the black wire, because it connects with the mass.
We connect the white/yellow wire and the yellow wire to the central locking system of your car.
We are looking for the wire responsible for opening the power windows of the driver and passenger doors, and connect 4 wires to them in a gap.
“Break connection” means that the wire is cut in half and the connection is made from the button side and the motor side.
We cut the orange wire in half and connect the wires from the closers to it from the button side. On the button side it is green with a black stripe, and on the motor side the window closer wire is green.
We cut the blue one with the black stripe in half and connect the wires from the closers to it on the button side. On the button side it is blue with a black stripe, and on the motor side the window closer wire is blue.
We carefully solder and insulate all connections.
We assemble the door trim and use door closers.
Alexander Borisov, Samara
Connection
Attention!
The colors of the wires may vary depending on the vehicle configuration, or may be absent altogether.
On cars before 2022, the connection is made to the glass control unit, which is located in the driver's door (wires from the middle, large connector):
- Constant, non-switchable + (blue with black stripe)
- Constant, non-switchable - (black wire)
On cars after 2022, the “+” in the door is disabled, so the plus must be pulled separately from the passenger compartment.
Wires that control the closing of windows:
- Front left electric window: red with blue stripe
- Front left electric window: orange
- Rear left power window: yellow
- Rear right electric window: blue
The wire that supplies a positive impulse when closing the central lock to the window closer unit is pink with a red stripe (two-pin chip on the door lock).
Since the ESP is controlled by positive wires that go to the electric motors, you should connect the red wire to the red and black.
Further connection of the closer:
- Orange wire (input trigger, impulse when closing the car) - to pink with a red stripe (goes to the window lift motor).
- Yellow thin wire (negative input trigger) - cut off.
- Brown wire (plus after turning on the ignition switch) - connect if the function of automatic door locking when driving is activated. Otherwise we cut it off.
We connect according to the diagram (in the wire breaks), single-color wires to the buttons, and two-color wires to the wires going into the doors.
- Red with fuse + (to blue with black stripe).
- Black - (to black).
Detailed video instructions for installing and connecting glass closers to Vesta:
Will installing a door closer yourself affect the warranty? The dealer can refuse warranty service only if an examination shows that the breakdown was your fault. But this does not remove any warranty obligations from all other parts of the car. More details about the guarantee here.
By the way, if Vesta does not have rear ESPs, then you can install them yourself.
What to do if the window closer does not work
"Dial" mode on a multimeter
Sometimes situations arise when the window closer module stops working. Unfortunately, its repair is hardly possible, and if it fails, it is more advisable to buy and install a new one. Especially considering its low price. However, before making a “fatal” diagnosis of the device, still try to check the operation of the entire circuit.
First of all, it is necessary to “ring” the power and signal wires in order to determine their integrity. This can be done using a tester. Remember that a standard passenger car's electrical system operates at 12 VDC. Therefore, the device must be turned on in the appropriate mode (in the English abbreviation, direct current is denoted as DC). To “test” the wires, the multimeter is set to the resistance measurement mode or to a mode specially designed for this (on models equipped with an audio speaker, it is indicated by the image of a musical note, sound waves or speaker).
Checking the fuse
There are two ways to check the fuse - by measuring the voltage in the circuit or its resistance. In the first case, the algorithm of actions will be as follows:
Checking the fuse with a multimeter
- Set the multimeter to direct voltage (DC) measurement mode with a limit of about 20 V (depending on the multimeter model).
- Turn on the ignition.
- With one probe we touch the “incoming” contact (to which the “+” comes from the battery), and with the second we touch the “ground” in the fuse box or simply the body of the car.
- If there is voltage at the “incoming” contact, then on the multimeter screen you will see a voltage value of 12 V (it can fluctuate within 2.3 V in one direction or the other). If there is no voltage at the “incoming” contact, then you need to look for an open circuit from the fuse box to the battery.
- If voltage comes to the fuse, then you need to check the “outgoing” contact. To do this, touch it with one probe and touch the “ground” with the other. If there is voltage, then the fuse is intact, otherwise it is broken.
Checking the fuse by measuring resistance is performed according to the following algorithm:
- Set the multimeter to resistance measurement or “continuity” mode (the second mode is preferable, but it is not available on all multimeter models).
- With the ignition off, remove the fuse from its seat.
- Touch one fuse contact with one probe, and the other with the other.
- If the fuse is intact, then the resistance value will be 0; in the “dialing” mode, the multimeter will beep. If the fuse is blown, then the resistance value will be equal to infinity, and in the “dialing” mode there will be no sound signals.
If the fuse housing is made of transparent plastic, you can assess its condition visually. In a working fuse, the wire inside will be intact, but in a failed one, it will be broken.
Checking the circuit
If the fuse is intact, then you should check the power circuit behind it. In this case, it is impossible to give unambiguous recommendations, since everything depends on the specific model of the closer, the method of wiring, the model of the machine, and so on. First, you must visually inspect the integrity of the insulation and the wires directly that go from the closer unit to the electric window drive. You need to inspect carefully, especially in places where the wires are tied into bundles with plastic ties, as well as at their bends. Check if any of them are frayed.
If a visual inspection does not produce results, then it is necessary to “ring” the circuit. This can also be done using a multimeter. Approximate algorithm of actions:
- Figuratively divide the circuit from the closer module to the control buttons into several sections.
- At each of these sections, “ring” the power and control wires (if this is impossible to do with some wires, then you should limit yourself to a visual inspection).
If you visually or using a multimeter find damage to the wires, try to repair them. If the insulation is damaged, you can use electrical tape or heat shrink. If the wire breaks, install a new one (with a similar cross-sectional area).
Start your own blog
In the original, when the alarm was installed, this most comfortable device was not included in the car system and therefore I was annoyed several times when the glass was left uncovered due to forgetfulness. And what was even worse was that the day was unusually rainy. Well, now I always remembered to close the glass. Even when I had to hurry, I looked at the car and checked. But the extra wasted nerves go away when you need to open the car again, start the engine and complete the process of closing the windows.
Why do you need a glass closer?
I count on your understanding. After all, a person from the street can easily get inside the car and take away things that are important to you, or it can simply render the interior unusable. This is the character of cultured youth in our time. There are plenty of vandals. I installed the window closer myself in my garage during my free time. Everything was done without special keys, as well as puller parts and special devices. Nothing like that was needed. I have tested it from my own experience and confirm that all door closers can be installed efficiently at home. The main thing in this process is the good hands of an amateur master.
Installation of door closer on Granta.
When installing door closers, you need to lay one wire in each door, and before that you should buy a regular five-contact relay for a VAZ
In this case, the most important thing is that there is an alarm system with an unoccupied, unclosed channel that would be well suited for connecting glass closers. For this output signaling channel, a negative pulse is supplied at the time of arming, when polling sensors
To properly begin installing glass closers on the Lada Granta, you must disconnect the negative power cable from the battery. Thus, we will protect the car’s electronic system from a possible short circuit, which may well occur due to one of our manipulations.
The second thing to do in the process is to remove the driver's door card
At the same time, you need to do this as carefully as possible, so that God forbid you do not harm or deform the door itself. It will be good if you have hedgehog clips in your household
They will attach and fix perfectly. They are also needed in case something doesn’t happen to the old ones according to plan. Now you can remove the modular connectors of the Lada Granta window lift controllers. They are easy to recognize.
You will need to find and cut wire number six. And it is very advisable not to mix up anything during the cutting process. No one needs additional coils of electrical wiring. After all, all the wires that are routed inside the car must be completely insulated, and also assembled using a common coil harness. At the other end of this bundle, they must be soldered together, also insulated and soldered to the wire, which will be located in the interior of the Lada Grant. It is always more convenient and safer to pull wires through the original holes, which can easily be found in doors and racks. In this way you can carry out the entire operation so that no one can find out who installed the closers in your car - you yourself or the “service men”.
Next, it is recommended to find a white wire with a black stripe in the cable bundle. You need to cut into it and hang two mother terminals. If you read the instructions for the device, then at the output of the alarm controller block you can find the control that is responsible for this protected zone.
We get all the ready wires to connect them to the relay. Connections must only be made in a specific order. Each relay output has its own wire.
There are also disadvantages of my method - you will have to set the time during which the alarm will give impulses to close the windows. From my experience, I recommend five to seven seconds. Something like this
It is also important that when installing glass closers in the Lada Granta, a short circuit of contacts under numbers 87 and 30 may occur
I made a similar jumper for this and now everything works like a charm. Now I’ll tell you about the meanings of the contacts. 30 – denotes the glass controller with buttons that are located on the driver’s door of the car, 87 is the value of the car’s weight, and 86, respectively, is the plus number of the white cable with a black stripe. But the last 85th is an additional channel for signaling.
For everything to work out, you just have to try!
Installing a glass closer
When purchasing the device, the connection diagram for the glass closer must be included. Therefore, all further work must be carried out in strict accordance with it. The window closer unit itself can be installed anywhere in the car interior. Most often it is mounted under the door trim or under the front panel. The main thing that needs to be taken into account in this case is reliable protection of the device from moisture.
To work you will need the following tools:
- Phillips and flat screwdrivers;
- side cutters and pliers;
- electrical tape and/or heat shrink.
Now let's move directly to the question of how to connect a glass closer... As mentioned above, first of all you need to study the existing circuit. For ease of understanding, consider a door closer designed to work with 2 window regulators. Its typical connection diagram will look like this:
Depending on the design of the housing, the module is attached to one or two self-tapping screws (although there may be other options). If you decide to install a door closer under the driver's door trim, be careful when removing it. There are many different wires laid under the trim that ensure the operation of the power windows and central locking. Directly for work you will need a Phillips screwdriver, with which you need to unscrew the mounting screws and remove the trim (installation of the panel may differ for different cars).
The connection diagram for the glass closer involves connecting three wires to its module - power (“plus”), ground (“minus”) and a signal wire, which is connected to the car alarm (together with the central locking). As a rule, the electrical circuit of the closer has its own fuse. It is necessary to protect the device from a possible current surge during switching processes or emergency situations.
Installing a door closer on a VAZ Kalina
The most difficult moment when connecting a window closer is that it is necessary to make an insertion into the wires going to the electric window regulator. The insertion locations can be seen in the diagram above.
At the same time, it is important not to confuse the “pros” and “cons” of the existing circuit and the connected device. Otherwise, the direction of rotation of the engine, and therefore the movement of the glass, will be opposite
In other words, when installing a car alarm system, the closers will not close, but open the windows.
As for the closer, designed to work with four glasses, the approach will be the same. The only difference in this case is the larger number of wires. If for a 2-window closer three wires are used for power and control, as well as four for raising the windows (two for each window regulator), that is, seven in total, then in the case of a 4-window closer their number will increase by four more (2 more wires each). per additional drive).
Once you have connected the appropriate wires, be sure to insulate them well. For this, you can use mounting insulating tape or so-called heat-shrink tubing (an insulating material that “shrinks” when exposed to high temperatures, for example, a portable gas burner). For reliability, you can use both materials.
Install the door panel on the car door only after checking the functionality of the circuit. Hide the mounted wires under the panels so that, firstly, they do not interfere with the driver and passengers, and secondly, they cannot be damaged. To do this, you can use plastic ties, electrical tape, corrugated mounting tubes, and so on.
Installing a window closer on a HYUNDAI CRETA
Installation of door closer on AUDI 80
As you can see, installing a glass closer is not difficult. The main thing is to connect the module according to the diagram, and then carefully insulate the wires and hide them.
How does a car window closer work?
Automotive window closers are very popular today, as this automated device is convenient and functional; Drivers do not have to check whether all the windows of a car with an alarm are closed. If previously door closers were a privilege only for the premium class, now this mechanism is universal and affordable. This article will tell you what a glass closer is and how it works.
Interesting! The first anti-theft systems were activated using the drive shaft. At the moment of the theft, the car was choked by the sound of a siren, crying out for help.
Operating principle of the glass closer
The door closer is an electronic unit connected to the alarm system or central locking and glass control system.
It is located between the electric motor that moves the windows and the control keys. The operating principle of the glass closer is simple: the voltage transmitted to the motor from the keys passes through the block. In this case, the mechanism does not turn on when closing and opening, in normal operation without setting the security mode. When the alarm is connected, the unit receives a signal from the device, the motor charges and raises the glass on the door.
Did you know? In the car owned by Al Capone, the windows were bulletproof, their thickness was two centimeters.
What types of door closers are there?
The difficulty in choosing a closer module lies in determining the number of glasses it will support. Mechanisms responsible for closing two or four glasses are produced and sold. Next, you should clarify whether there is a glass control system on the rear doors of the car.
Simple modules are responsible for the windows only in vehicle security mode. Smart window closer devices can have a number of other functions: remember the position of the windows and return them to their original position after the alarm is turned off, and return them to their previous position if the glass hits an obstacle. The functions of the module can be customized as desired.
Attention! All the capabilities of a multifunction device may not be needed, and setting up the mechanism is difficult to maintain and costs significantly more than a conventional one.
Installation and connection of glass closer
Let's consider connecting a glass closer operating on two doors.
For self-installation you will need: a set of screwdrivers, a knife, insulating tape and thin wire cutters.
First, turn off the ignition and make sure that the windows open and close when you press the button. If not, remove the relay from the fuse block and install a jumper in its place.
The window closer unit is installed in the driver's door. To remove the trim, you must first unscrew the door handle screws and remove it. When freeing the door from the trim, be careful, as there are blocks with wires going to the door. The module is attached with one self-tapping screw to a metal plate and fixed to the base of the door.
Important! With separate systems located on two doors, installation under the dashboard is more acceptable. Connect the positive contact and ground to the device block to power it
Connect the positive contact and ground to the device block to power it.
Find out which wires transmit voltage from the control buttons to the electric motors.
The closer comes with instructions and diagrams. Determine the insertion points of the unit wires and power wires; in the diagram they are distinguished by different colors.
Check carefully whether the wires are selected correctly. Two wires run from the power buttons to the electric motor: one under voltage raises the glass, the second lowers it. If you mix them up, the windows will automatically open in security mode.
Then connect the wire that transmits the impulse from the security system unit to the closer.
A car window closer is an extraordinary mechanism: it has an output for both positive and negative impulses, do not confuse them.
Before insulating and removing the wires, check the operation of the closer. The work is completed, assemble the doors, install the handles and use them.
Using the same method, the power window closer is connected to 4 windows. The difference from a simple device is only in the number of inserts in the wiring.
Every driver who understands electrics and can read diagrams can independently install a window closer on his car.
Subscribe to our feeds on Facebook, Vkontakte and Instagram: all the most interesting automotive events in one place.
Review of popular models of glass closers
We present for you an overview of popular glass closers in our country, which are installed by owners of a wide variety of cars - VAZ (Priora, Kalina, 2110, 2114), Hyundai, Nissan, Mazda, Kia, " Toyota" and many others. For ease of perception, the information is summarized in a table.
| Closer model | Description and features | Price as of fall 2022 |
| Mongoose PWM-4 (colloquially car enthusiasts call them “Mongooses”) | There are several varieties of such closers. Designed to work with four glasses. There is no “memory”; windows are closed one by one. Trigger pulse - positive or negative. Output polarity - positive or negative. There is built-in overload protection. | 1200 rubles |
| Pandora DWM 210 | Works with two windows. There is a position memory. The type of trigger pulse is positive or negative. There is overload protection. Automatic stop of moving glass when it encounters an obstacle in the window opening. Automatic shutdown of the window lift motor when its cable breaks. Automatic detection of the type of security alarm control signals. The ability to disable security alarm sensors while the windows are moving to prevent false alarms in security mode. | 1300 rubles |
| Convoy CL-200 | Designed to work with two windows. The control pulse is negative, the outgoing polarity is positive. There is overload protection. | 800 rubles |
| Convoy CL-450 | Works with four windows. The control impulse is positive or negative. Outgoing polarity - positive or negative. There is overload protection. | 1300 rubles |
| Cyclon PWM-2b | Designed to work with two glasses. The control impulse is positive or negative. There is overload protection. | 850 rubles |
| Cyclon PWM-4 | Works with four glasses. The control impulse is positive or negative. There is overload protection. | 970 rubles |
We recommend that you buy glass closers manufactured under well-known brands. Do not buy cheap Chinese devices, since there is a high probability of purchasing a door closer with a low working life. In addition, there are many defective products in the low price category. Therefore, we recommend that you do not save money.
Conclusion
A window closer is a very useful device, so if your car does not have one installed, we recommend that you buy one. Installing a door closer with your own hands is quite possible for a car owner who has basic installation skills and knows how to read electrical diagrams. The main thing is that before installation, carefully study the attached documentation, and especially the connection diagram. As for choosing a model, buy devices from the middle or highest price category. They will not only be reliable, but also durable.
Surely everyone is already accustomed to the fact that virtually any car is equipped with an alarm system, and this is not even discussed. As with any rule, there are exceptions here too, but exceptions are exceptions, and the rule remains the rule. However, the anti-theft system is a delicate issue, especially if the car is expensive, then the alarm system must correspond to it, and not only by the presence of a CAN bus, but also by available functionality, one of which is the Pandora DWM 210 automatic window closer.
There are several reputable and well-established companies on the modern market of anti-theft systems, but it is worth noting that in terms of the totality of their advantages, many put Pandora systems in first place, at least among domestic manufacturers.
Types and features of door closers
First, you need to decide on the operating algorithm of glass closers, their types and features. This information will help you make your choice in the future. So, let's start with a description of how this device works.
The door closer is an electronic control unit that is installed between the electric drive (electric motor) of the windows and its control button on the car doors. When the alarm is disabled, it does not work, passing command signals through itself to lower or raise the windows. And when the alarm and central locking are turned on, it automatically checks the condition of the windows, and if they are open, the control unit sends a command to the electric drive to close them.
There are several types of door closers, each of which has its own characteristics. Let's look at them in more detail:
Internal part of the door closer
- Window closers for 2 glasses and 4 glasses . Accordingly, they can be installed in cars equipped with two or four electric windows. There is no fundamental difference in their operation, except for the complexity of the connection. We will touch on this issue a little later.
- Availability of memory . The point in this case is that the device remembers the height of the glass before closing it, and returns it to the same level when the alarm is turned off and the central lock is opened. This function can be canceled if, for example, it is raining outside. The procedure is performed through the control unit interface, and differs for each model.
- Availability of protection for glass and external objects . This implies the presence of a safety mechanism that stops the glass from closing if an object gets between it and the upper edge of the window space. Thanks to it, you can avoid injuries (for example, if such an object turns out to be a human finger), damage to the glass itself, as well as failure of the corresponding electric drive.
Naturally, the price of a glass closer will differ depending on the presence of the listed functions in it, as well as the brand under which the device is produced. As a rule, the connection diagram of the closer does not change due to the presence of additional capabilities. Next we will consider this issue in more detail.
Standards and schemes from different manufacturers
There is no standard scheme for connecting a car security system. This can be understood by analyzing the electrical circuits of signaling systems from different system manufacturers. The color of electrical circuits in systems from different brands may be intended to solve different problems. Almost every manufacturer has a certain method of installing and connecting devices.
The colors of the cables in each electrical circuit may differ depending on the standards adopted in a particular country. In order to correctly connect the signaling elements, you need to focus on electronic measuring equipment for ringing. When installing an alarm system on a car, it is not recommended to use conventional lamps for dialing.
Depending on the location of the main units, the user may need to purchase additional electrical circuits. During installation, it must be taken into account that the cross-section of the additional and standard signaling wires must be identical.
Map of the location of the component signaling devices
Principle of operation
Externally, the closer module looks like a mechanism in a plastic case, which is small in size and connected to several wires. Those, in turn, are connected to the window lifting mechanism and power source. The power window unit has a special chip that sends a signal to the electric motor to change the position of the windows at the right time.
This operating scheme can significantly reduce the load on car door hinges and the window opening mechanism. If the car is equipped with such a closer, then the interior has greater security: for example, when closing the windows according to the standard scheme, you don’t have to worry that you didn’t raise the windows all the way, accidentally leaving a gap that could be used by intruders to open the car. The required temperature is maintained inside, which allows you not to suffer from the heat in summer. The closer unit also allows you to automate the ventilation process, and, if necessary, protect the car interior from dust and dirt.
Similar products
Do you like the store? Rate it on the Market!
Familyevich Evgen
Very good store, I recommend it!
Aminev Maxim
The best window lift store in Russia! :)
Latysheva Julia
Fast? placing and sending an order, complete and accurate information about the order.
Osipov Alexey
They called back right away and clarified the order. The order arrived ahead of schedule.
Safarov Oleg
Well done. You work quickly. And most importantly, the prices are reasonable. Keep it up!!
Nikolay Sotnichenko
Advantages:
Good order processing speed. Pleasant communication from employees. Flaws:
No.
Ruslan Lukoyanov
I am very pleased with the work of the store, everything is without deception and fast delivery. Keep it up!
Dorofeev Timofey
I definitely recommend the store. Very quickly and clearly. Other online stores could do it.
Vitaly Sukhovlovsky
Advantages:
Malenkin Roman
Ordered on Sunday, they called back within 10 seconds. Sent on Monday. Lightning-fast comrades! Well done!
Fedotov Nikolay
Advantages:
great store Disadvantages:
no
Comment:
fast, cheaper than in other stores, high quality.
Korolev Alexander
Very responsive sellers, after placing the order they immediately called back and discussed the order and sent it out the next day.
Sulin Vladimir
Excellent store, received the order clearly, shipped quickly, received it earlier than expected. The product corresponds to the order. Well done!
Bogumilov Valery
Advantages:
Everything is super, fast and high quality. Flaws:
No
Comment:
Thank you, well done, everything is high quality and fast.
Bobrovsky Igor
Advantages:
convenient, fast, no problems Disadvantages:
no
Comment:
They work quickly and ship quickly. Thank you!
Semyon Semyokhin
Advantages:
Quick response to orders, polite technical support, prompt assistance in questions that arise Disadvantages:
Not found
Bohun Orest
How to connect a window closer to an alarm system?
Installation and connection of door closers:
The devices are installed in the car doors; to do this, their upholstery is dismantled. The closers are powered from the vehicle’s on-board power supply; a positive contact and ground must be connected to the device
It is important that the electrical circuit to which the closer is connected is active when the ignition is turned off. Using the tester, electrical lines are determined that are intended to supply voltage from the control buttons to the electric window motors. In accordance with the wiring diagram for the closers, the cables are inserted from the control unit to the power supply circuit. To connect to the doors, the outlets in the device are used; they have different colors
The cable that goes from the control button to the electric motor is cut into the ends of the power line. The contacts of the block are connected to the electrical circuit. When connecting, you need to choose the right cables; there are two of them from the control buttons to the electric motor. When voltage is applied, one of the power lines raises the glass, and the other lowers it. If errors are made during connection, activation of the protection mode will be accompanied by automatic opening of the windows. Then a cable is connected to the closer, designed to transmit a signal from the control unit. You will need a signal that is sent to the unit within a second when the protective mode is activated. Depending on the type of device and system, negative or positive contacts may be used for this. Immediately before connecting, you will need to find out exactly what signal the signaling control unit is sending. When the wires are connected, device operation is diagnosed. Provided that everything works correctly, the consumer isolates all tie-ins of electrical circuits and masks them. The procedure for connecting a four-door closer is carried out in a similar way, only more connections will need to be made into the standard electrical network.
Types of door closers for cars
These devices are divided according to their capabilities and are standard and multifunctional. If the first type only closes the window when the alarm is turned on, then the diagram of the second mechanism for adjusting the window lifters implies the presence of a number of additional options. These include the following functions:
- Lowering or raising the glass according to the classic algorithm (the module works as long as the button on the key fob is pressed) or with one touch.
- Control of several windows, which is carried out in one direction (closing/opening at the same time) or in different ways (raising one glass and lowering another).
- The module triggers automatically when the alarm is set.
- Auto return to original position: the door closer unit can return the windows to their previous state if the car has been disarmed for 2 hours.
- Blocking of electric windows for the duration of the alarm mode.
- The controller is configured automatically depending on the operating pattern of the window regulator in a particular model.