A generator is an important part of any car, which is responsible for its power supply. With the help of this unit, it is possible to provide a continuous supply of electricity to all components, various systems and sensors, making its operation possible.
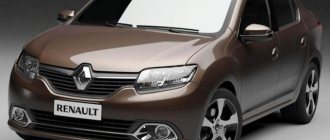
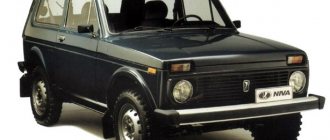
On the car, a unit with article number 9412.3701 is used as a standard generator. Such a generator can also be found on the injector of the VAZ-21214, VAZ-2131, VAZ-2123.
If the generator on a Chevrolet Niva fails, you can replace it with analogues, the most popular of which are presented in the table.
| Generator | vendor code | Cost, in rubles |
| VAZ-2123 (produced after 2003) | 5112.3771-30 T | 5370 |
| VAZ-2123 (produced after 2003) injector 14V 80A PRAMO | 5112.3771 | 4460 |
| VAZ-2123 (produced after 2003) | 9402.3701-04 | 4380 |
A generator for a Chevrolet Niva costs between 5,000 and 7,000 rubles. The price of the original unit depends on the region of purchase. Many owners prefer to use Start Volt at 120 amperes when the factory generator fails.
Removal
Place the car on a lift, turn off the ignition, and apply the parking brake.
Raise the hood of the car and remove the wire from the negative terminal of the battery.
Remove the oil filler cap and engine screen.
Reinstall the oil filler plug.
Fig.7-12. Removing the air filter:
1 – air filter bracket mounting bolt; 2 – air filter; 3 – mass air flow sensor; 4 – ignition system wiring harness; 5 – inlet pipe hose; 6 – spacer; 7 – clamp for fastening the intake pipe hose; 8 – generator.
Unscrew 4 bolts 1, fig. 7-12, fastening the air filter bracket 2 to the body. Loosen the fastening clamp 7 and disconnect the hose 5 of the intake pipe from the spacer 6. Disconnect the harness block 4 of the ignition system wires from the mass air flow sensor 3.
Remove the air filter with the mass air flow sensor and the intake pipe hose assembly.
Unscrew the 2 nuts securing the tension roller bracket by 3-4 turns and loosen by rotating bolt 1, Fig. 7-13, auxiliary drive belt tensioning mechanism, belt tension 3.
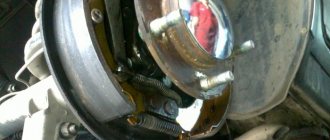
Fig.7-13. Removing the generator:
1 – bolt of the auxiliary drive belt tensioning mechanism; 2 – nut of the bolt securing the generator to the bracket; 3 – generator belt; 4 – generator; 5 – generator electrical wires.
Remove the accessory drive belt from the pulley.
Disconnect electrical wires 5 from the generator.
Unscrew the 2 nuts and bolts that secure the 2 generator to the bracket, remove the 2 bolts and remove the generator.
Select a vehicle modification to search for a generator bearing
Engine: volume - 1.7 liters, power - 80 hp, type - petrol. Drive: full. Year of manufacture: 2002-2009
Engine: volume - 1.7 liters, power - 83 hp, type - petrol. Drive: full. Year of manufacture: 2010-2009
Engine: volume - 1.8 liters, power - 125 hp, type - petrol, model - Z 18 XE. Drive: full. Year of manufacture: 2007-2009
In the next step, for an expanded selection, you can enter the vehicle's Vin code to go to illustrated catalogs, where you can find the layout of parts down to the bolt and duplicates that are not in the catalog of analogues.
Installation
To install the generator, perform the operations in the reverse order of removal.
Install the auxiliary drive belt, adjust its tension following the recommendations set out in the subsection “Adjusting the tension of the auxiliary drive belt”. In this case: the tightening torque of the bolt nuts is 15.24 Nm (1.5.2.4 kgf m).
Replacing the alternator belt on a Chevrolet Niva with air conditioning
Niva Chevrolet - replacing the generator and drive belt
Chevrolet Niva replacing the alternator belt in the field☝
no charging Niva Chevrolet. generator repair
How to replace the alternator belt on a Chevrolet Niva with air conditioning?
how to replace a belt on a Chevy Niva
Chevrolet Generator Repair
Diode bridge and how to replace it without errors.
Replacing the NIVA alternator belt. Alternator belt after 25 km. on NIVA 21214
Generator brushes. How to replace.
The real favorite among SUVs in the modern automobile market of the country is the Chevrolet Niva. It combines the excellent qualities of both a touring SUV and a car for family trips. Thanks to its light weight and short overhangs, the Chevrolet Niva can drive off-road and ford. It can handle steep climbs with ease.
But the electronics system is one of the most vulnerable parts of a car. With regular inspection of electrical elements and timely removal of dirt and moisture from them, repairs will not be required even throughout the entire operation of the vehicle.
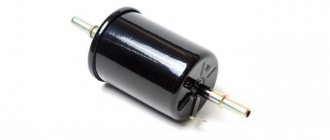
The process of replacing the fuel filter on Lada Kalina
There is nothing complicated about replacing the fuel filter on the Lada Kalina. You can change it at home with your own hands. Its location is behind the right rear wheel. So, let's take a closer look at how to replace it yourself:
- To make it more convenient to change the filter, you need a pit or a lift. If they are not there, then you will have to secure the car from accidentally rolling and remove the rear right wheel. For safety, it is best to lift the rear right side of the car and place a stump.
- We clean the workspace from dirt, dust and other debris, spray with WD-40.
- Using a 10mm wrench, loosen the clamps of the fuel mixture inlet and outlet pipes. You should be careful, since there is pressure in the system, and protect your face from accidental contact with the fuel mixture.
- Unscrew the clamp securing the Lada Kalina fuel filter.
- Remove the filter element.
- Installation is carried out in reverse order.
When starting for the first time after replacing the Lada Kalina fuel filter, you should turn the ignition key for 3-5 seconds so that the fuel pump can restore pressure in the system and charge fuel. Turn off the ignition, wait 5-7 seconds and start the car without any problems.
Refinement of the fuel filtration system
Some car enthusiasts modify the fuel filtration system. This is quite easy to do, since anyone who has owned a Zhiguli Classic is familiar with this. For modification you will need: a Zhigul class fuel filter with a removable mesh, wire cutters and 2 clamps marked “10-12”.
The modernization process itself:
- We find the fuel line under the hood of the car.
- Carefully cut it in half.
- We install the filter and tighten it with clamps.
Everything is like the good old “Classic”. Thus, the car receives additional fuel filtration, which increases engine protection.
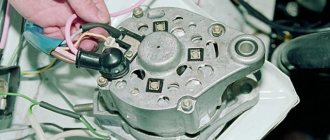
Malfunctions that occur in the operation of the generator
The Chevrolet Niva generator, the photo of which is provided in our article, may have the following malfunctions:
- the pulley is damaged or completely worn out;
- current collecting brushes are worn out;
- rectifier failure;
- voltage regulator failure;
- the collector is worn out;
- the bearing is worn out or completely destroyed;
- The charging circuit wires are damaged.
The car owner needs to become familiar with the main reasons why generator malfunctions occur. In addition, you need to know how to fix these breakdowns, as well as preventive measures to prevent them.
Troubleshooting
Repair of the Niva Chevrolet generator may be necessary only in some cases when replacing parts does not solve the problem. There are several signs after which it is worth checking the serviceability of the generator assembly. They are as follows:
- After starting the engine, the indicator light indicating the battery should go out. If after the engine starts running the signal still works, then the battery is not being charged, the generator voltage is not enough to charge.
- When the engine was turned on, the headlights became dim. Although there is a charge from the battery, it is too small to support the normal operation of electronic devices in the car; measuring instruments show low voltage characteristics - 12 V.
- There is noise from the motor side, in addition, points 1 and 2 are observed. The sounds may resemble metallic surfaces colliding or whistling. Most likely, the bearing has broken and needs to be replaced.
Also interesting: New Niva: what AvtoVAZ will produce in 2022 :: Autonews
These 3 signs will help identify, but not recognize, a problem. Without special devices, it is very difficult to guess which part is damaged. Only service diagnostics can give a clear idea of the breakdown.
The diagram and design of the generator, of course, will help in finding a breakdown, but if a person has not previously made such repairs on his own, it is better to take the car to a service center.
Generator "Niva Chevrolet"
Depending on the type of current, generators can be either direct or alternating current. Owners of the named car sometimes do not know what generators are used for this model? The Chevrolet Niva was provided with an electromechanical alternating current device. There is a built-in diode bridge - rectifier. To provide work to electrical consumers, it converts alternating current into direct current. The diode bridge with the generator is one mechanism; they can be located both in the housing and in the cover of the generator.
The operation of the latter is affected by the speed of the vehicle and its engine speed, since the generator is connected by a belt to its crankshaft. To regulate the output current, a voltage regulator relay is installed. In addition, modern generators have built-in integrated voltage regulators.
The Niva Chevrolet generator may be subject to the following malfunctions:
If the malfunction is of a mechanical type, then it includes a breakdown of the fastening, housing, faulty condition of the pressure springs, bearings, belt drive or other breakdowns that are not related to the electrical system.
With the first type of malfunction, the winding may break, the brush may burn out or wear out, the rotor may break through, and a short circuit may occur between the turns. The diode bridge and the relay regulator may be faulty.
Sometimes signs appear indicating that the Chevrolet Niva generator is faulty, but this problem can be caused by completely different breakdowns.
Specifics of operation
The generator on the Niva Chevrolet works thanks to the effect of electromagnetic induction - when a moving electromagnetic field creates alternating current.
The design has several coils that create the field. And also a receiver that removes electricity from them. Basically, it is these elements that are subject to the fastest wear. For example, the coil windings may be damaged during generator operation. The only repair option is to rewind them, which is a complex and time-consuming procedure. Rewinding is carried out by repair services, but there is no guarantee that the current in the windings will be the same.
Another structural element that can cause a problem is the bearing.
The relay regulator often breaks down. After a run of 100 or even 120 thousand km or more, this part has the risk of almost falling apart at any time if it is not replaced in time. Relay regulator 2123 KZATE series C3, article number 845.3702, is suitable for replacement.
Replacing the alternator belt
To change the Chevrolet Niva alternator belt, you need to use the following tools:
In a Chevrolet Niva car, replacing the alternator belt is as follows:
- You need to remove the connector from the crankshaft position sensor.
- Unscrew and remove the bolt that secures the sensor.
- The nut securing the generator needs to be loosened slightly and moved towards the block. If the generator is displaced, its belt will loosen and can be removed without problems.
- Using a jack installed on the side where the generator is located, raise the car by engaging first gear.
- Pull the belt until it moves away from the pump pulley. Rotate the wheel so that the place of the guy moves onto the pulley.
- Then remove the belt from the other pulleys.
- The new one must first be put on the generator pulley and the crankshaft pulley, and only then put on the pump pulley.
- Turn the wheel until the belt is on the pulley.
- Put the generator in place, and tighten the belt, attach it to the bracket with a nut.
- Replace the crankshaft position sensor.
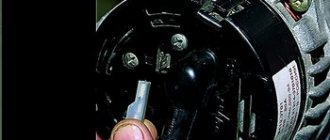
Removing the voltage regulator
The voltage regulator can be removed from the Niva Chevrolet for replacement using a flat-head screwdriver and a size 8 wrench. The procedure is as follows:
- This is worth doing if the voltage in the system does not correspond to the norm - less than 13.5 V.
- Disconnect the wire from the negative battery.
- Disconnect the generator block with terminal D. Turn the rubber boot to the side and unscrew the nut.
- Disconnect the wires from the stud.
- Unscrew the nut securing the generator excitation circuit terminal, and then remove the terminal itself.
- Loosen the 3 screw fastenings of the plastic casing of the generator set and remove the casing.
- Next are 2 more fastening nuts that secure the voltage regulator.
- We disconnect the screw securing the terminal to the D bus from the rectifier, after which you can finally remove the voltage regulator itself.
Also interesting: How to connect a speed sensor in a field
The generator on Niva works for a very long time and will remain in operation for several years without any problems. Over time, its power drops noticeably, then it is worth replacing several of its parts or the entire assembly. If after replacement the problem with a drop in power cannot be eliminated, you should go to a service center for diagnostics.
How to replace the tension roller
The design of the generator roller is quite simple. The bearing is its main part. If the belt loosens or slows down, you need to check the bearing itself by turning it by hand. A serviceable roller rotates quietly, without jerking or biting. If the roller is faulty, it is necessary to replace it, which is possible even in the garage, with a minimum set of tools.
Install a pry bar or other tool that can prevent the crankshaft from moving so that the clutch disc is blocked. By loosening the bolt that secures the roller, relieve the tension on the belt. Having completely unscrewed the axial bolt, the tension roller is removed. Then a new roller is installed and the belt tension is adjusted.
After replacing the roller, you need to re-inspect and check its operation. The instruction manual contains detailed instructions regarding the problem described.
Generator drive and mounting it to the engine
The generator is driven from the crankshaft by a belt drive using a V-belt. Accordingly, for this belt the generator drive pulley is made with one groove.
To cool the generator, plates are spot welded on the back side of the pulley. On the pulley they are located almost perpendicularly and perform the function of a fan.
The lower mounting of the generator on the engine is made on two mounting legs, articulated with the engine bracket with one long bolt and nut. The top one is through the pin to the tension bar.
Generator brushes
Worn brushes on the Chevrolet Niva generator can lead to a voltage drop in the vehicle's electrical system. This is considered one of the main and common causes of this type of malfunction. But since the generator has a simple design and is easy to access, even an inexperienced car enthusiast can replace its brushes.
The main signs of brush failure are:
- voltage drops occur;
- the battery does not hold a charge;
- weak headlights at night, blinking;
- The radio turns off, etc.
Usually, when passing a technical inspection, small elements of the generator are rarely checked. Therefore, worn brushes can make themselves known unexpectedly. But before you decide that replacing the Niva Chevrolet generator brushes is necessary, you need to find out if there are other faults that can cause similar symptoms. And only after making sure, you can disassemble the generator housing.
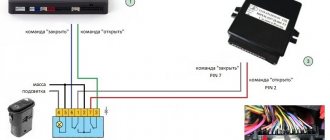
Electric windows on VAZ
Our company and the Glazov Metal Products Plant offer electric windows for VAZ. These window lifters can be installed on the front (with and without windows) and rear doors of any VAZ model. The advantages of electric windows are obvious; they allow you to easily regulate the air flow while the car is moving, without being distracted from the process of driving the car. Installing FORWARD electric windows on a VAZ is not difficult, and there is no need to modify the door. In addition, thanks to the compact size of electric windows, you can free up additional space in the door, which can be used, for example, to accommodate various acoustic devices. The electric window lifter on the VAZ is exceptionally reliable and durable; its design allows minimizing friction losses and wear of elements during operation. Thanks to the use of special plastics in the manufacture of window regulators, their operating temperature range is from −45 to +100 degrees. In addition, the special design of the self-braking mechanism of the gearbox provides reliable protection of your car from opening.
Replacing the generator brush
When replacing brushes, the voltage regulator is removed together with them as an assembly. In this case, the negative terminal of the battery is removed and the wires that come from the generator casing are disconnected.
Then the wiring block is disconnected. From their tips with a positive terminal, it is necessary to remove the rubber cap, which performs protective functions. Then from these wires you need to unscrew the nut with which they were attached to the generator block and remove them.
After disconnecting the spring clamps of the generator, you should remove its black casing, made of plastic. Using a Phillips screwdriver, unscrew the voltage regulator fasteners. Get it complete with brushes. Then disconnect the wire block from it.
Replace the generator brushes and install them back, following the reverse order.
If the length of the brush rods is less than 0.5 mm, they must be replaced. But if the brushes are in working order, and the Chevrolet Niva generator does not supply a charge, it is necessary to check the operation of the voltage regulator and the circuit from the regulator to the brushes.
Tools:
There seemed to be a service in the area where we worked. I'll give the car back and go to the office while they fix it. The charge was just enough to get to the box.
The last meters were walked by hand. The electrician came out and said in a menacing, confident voice that everything was full today and he couldn’t do it. But the problem was solved immediately by itself.
My property was already in a box and I couldn’t leave on my own. But the comrade who was supposed to come has not yet appeared. In general, they quickly diagnosed me that the diode bridge had burned out.
The auto parts were a block away from the service station. An hour later I was back on the wheels. Hooray!
Parts and consumables:
The diode bridge burned out photo from the network. When overcoming puddles, it will be much more difficult to fill it than the lower ones. So I started thinking, maybe I’ll install a more powerful generator, because I plan to install a trunk and, of course, a chandelier; I think 4 lamps from hella will fit in quite well.
Plus I will also install a winch, and it also drains the battery pretty badly.
And if the gene is weak, then when fighting off-road, we can get a situation where we are skidding in the dark, the chandelier is turned on, the engine is boiling - both fans are threshing at full strength, we are pulling with a winch - will the gene be enough for 80 amperes? Such energy consumption, of course, will not happen often, but when it happens, it’s better to be safe, isn’t it?
So I’m looking at a gene for the Pramo ampere, it costs about rubles.
But first, let's check the generator that I got with the car by default. It seems to me that either the brushes there are worn out, or something else - well, it cannot charge the battery normally; in 4 months of summer operation I have already recharged the new battery 3 times. Apparently the gene charges only superficially. On the other hand, wouldn’t it be bad to drain the battery per ampere? After all, the battery is new and it would be wrong if it only lasts a year or two. If there is wear, the bearings or generator covers must be replaced. Check for a break in the stator winding.
Connect a test lamp one by one between all winding terminals. In all three cases the lamp should be on. If the lamp does not light up, there is a break in the winding.
Replace the stator or winding Check if the stator windings are shorted to the housing. Connect the lamp to the terminal of the stator winding, and the wire from the current source to the stator housing. If the lamp lights up, it means there is a short circuit: Inspect the drive-side generator cover assembly with the bearing. If, when rotating the bearing, you feel play between the rings, rolling or jamming of the rolling elements, the protective rings are damaged or there are traces of lubricant leakage, and cracks are found in the cover, especially in the places where the generator is attached, it is necessary to replace the cover assembly with the bearing; the bearing in the cover is rolled.
Check the ease of rotation of the bearing on the slip ring side. If, when rotating the bearing, you feel play between the rings, rolling or jamming of the rolling elements, the protective rings are damaged, or there are signs of lubricant leakage, the bearing must be replaced.
To do this, use a puller to press the bearing off the rotor shaft and press on a new one using a suitable mandrel, applying force to the inner ring of the bearing. Inspect the generator cover from the slip ring side. If cracks are found, the cover must be replaced. Damage to the capacitor or loosening of its mounting on the generator; deterioration in contact with ground is detected by an increase in interference to radio reception when the engine is running.
Generator from PRIORA to CLASSICS[PVS][FullHD]
Source
Removing the generator
For this process you need to take a Phillips screwdriver. In addition, you need to use a car tester or ohmmeter, a 10mm wrench and a test lamp.
To change the generator, it must be removed from the engine compartment. First, disconnect the wire and terminal of the battery with a negative charge. Next, disconnect the block with wires and the generator output, and take out the protective cover from there. Then, unscrewing the nut, disconnect the wires on the generator contact bolt. Then unscrew the bolt that secures the generator to the tension bar and pull it out. It is also necessary to unscrew the bolt-shaped fastening at the bottom of the generator.
Then you should remove the belt. After removing all the bolts, the generator must be removed from the bracket using a mounting spudger. To install a new one, you need to go through the entire process in reverse order.
After replacing the described electromechanical device, you need to inspect its drive belt and adjust its tension. But before you replace the old Niva Chevrolet generator with a new one, you need to make sure that the replacement is really necessary. There are times when you can do repairs yourself, without the help of specialists.
In order to avoid confusion, you need to note how the generator covers are correctly positioned. Next, you need to remove the plastic protective casing by unfastening the three latches on it. The voltage regulator and brush holder are removed together. In order to release the rectifier unit and capacitor, it is necessary to disconnect the wires from the regulator terminal. The stator winding has three terminals. And in order to carry out the operation to remove the rectifier unit and capacitor, you need to bend these leads a little. Use a flat-head screwdriver to pry off the side where the slip rings are located and remove the cover from the generator.
Holding the generator rotor in a vice, unscrew the fastening from the pulley. Then remove the spring washer, pulley and thrust washer. Then the rotor and spacer ring are carefully pulled out and their condition is checked. If the ring shows signs of damage, scratches and is noticeably worn out, it needs to be sanded with regular sandpaper. If the result is poor, the ring is ground on a lathe to remove a small layer of metal.
Having connected the rotor to the slip rings, check the resistance of its winding with a tester. If the wiring is broken, the meter will show an infinite reading. For this reason, the rotor must be replaced.
To check whether the rotor winding closes or not, you need to connect the test lamp to a network carrying 220 V alternating current. One wire of the lamp is connected to the rotor, and each ring is connected to the second in turn. If the lamp lights up, the rotor needs to be replaced.
Principle of operation
The basis for obtaining electric current is the phenomenon of electromagnetic induction. It represents the occurrence of an induction current in a closed circuit under the condition of a change in the magnetic flux penetrating this circuit. There may be several ideas for implementing a generator set. It is enough to recall all the experiments on observing EMR.
But rational and technical components impose their limitations. It is irrational to use a permanent magnet as a source of magnetic field, since it will be impossible to regulate the magnetic flux. By changing the current strength in the electromagnet, you can ultimately influence the output parameters of the induction current.
The rotor includes not only the windings of the electromagnet, but also the shaft with slip rings. Thanks to the sliding contact of graphite brushes with slip rings, the movable winding is excited. Current is supplied to the voltage regulator through one of two circuits. Initially, when the engine is turned off, the winding is powered by the battery.
Also interesting: Pros and cons of the Chevrolet Niva car suspension
The operation of the generator is monitored by turning on the lamp on the instrument panel.
When the device is operating, the potential at the generator contact and at the output of the diode bridge is the same, therefore, current cannot flow through the lamp. If the light is on, this means low voltage at the diode connector, which indicates a faulty power source. The rectified current powers the on-board network and recharges the battery.