Photo instructions for repairing a carburetor on a VAZ 2107
Checking the needle valve for functionality
This photo instruction shows the process of removing and checking the needle valve; I recommend following it in order to easily check the valve for functionality.
How to disassemble and check carburetor cover parts for malfunctions
If you need to check the carburetor cover parts, this photo instruction is for you!
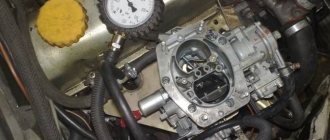
How to repair the pneumatic throttle actuator on a VAZ 2107 carburetor
Has your pneumatic throttle valve on your carburetor broken? Then this instruction is for you!
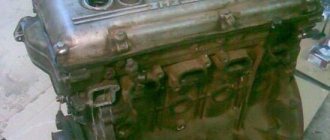
Repair of the body and the process of disassembling the carburetor for a VAZ
Is it time for a hull repair? Then I recommend following the instructions below and you will not have any problems with disassembling and repairing the carburetor body.
Throttle body repair and disassembly process
Has the throttle valve exhausted its service life or has its operation simply been disrupted? Look at the photo instructions that I prepared for you!
Basic carburetor malfunctions
- Failure - when you press the gas pedal, acceleration occurs only after a couple of seconds;
- A jerk is the same failure, only shorter in time;
- Twitching - several successive jerks;
- Rocking - several failures in a short period of time;
- Sluggish acceleration - slow acceleration.
These problems are identified during the movement. There are malfunctions that can be detected when starting the engine:
- Complete inability to start the engine;
- A cold engine does not start the first time;
- It is difficult to start a hot engine;
- At idle, the speed “floats”;
- Fuel consumption increases sharply.
Very often, unstable carburetor operation is associated with engine wear. Crankcase gases clog the jets and settle on carburetor parts.
If the engine cannot be started. The reason lies either in the absence of gasoline in the chamber, or in a sharp change in the proportions of the composition of the fuel mixture. By looking into the mixing chambers and pressing the throttle valve actuator, you can see whether the fuel mixture is flowing. If it does not arrive, it is worth checking the operation of the fuel pump. If the pump is working properly, you need to check the entire cycle of gasoline supply from the tank. Often the problem is a pinched hose or a clogged fuel filter.
If there is gasoline, but the engine does not start, the problem is in the composition of the fuel mixture. This malfunction may occur due to a stuck throttle shaft or a malfunction of the carburetor trigger. A low fuel level in the float chamber and air leaks from the hoses and pipes of the carburetor can lead to a lean fuel mixture. Diagnostics in this case consists of a thorough inspection of all carburetor connections.
If the idle speed fluctuates, this may be due to a clogged carburetor, incorrect idle speed adjustment, and a bunch of other reasons. It may be necessary to dismantle the carburetor and completely rebuild and adjust it. In this case, carburetor repair should begin with a visual inspection. If everything is in order with this, you need to start with the simplest thing - adjusting the float mechanisms, since most problems with the carburetor are associated precisely with an increased or decreased fuel level in the float chamber, for which the float mechanism is responsible.
The most difficult thing is to find the reason for the increase in fuel consumption during normal carburetor operation. First, you should check the brake system for wheel jams. Installing larger diameter jets can also lead to increased fuel consumption. Most often, fuel consumption problems are associated with a clogged carburetor. To check and remove the blockage, you will need to dismantle and completely disassemble the carburetor.
All dips and jerks of the car are associated with blockages, incorrect adjustment of the floats and interruptions in the fuel supply.
How to assemble the lower part of a VAZ 2107 carburetor with your own hands
In this video clip, the famous carburetor specialist Nail Poroshin tells how to assemble and disassemble the lower part of the VAZ 2107 carburetor with his own hands, I recommend that you carefully read this video, although it is long, you will learn a lot of useful things about assembling the lower carburetor of the VAZ 2107.
Eventually.
As a result, after repairing, washing and adjusting the carburetor with your own hands, a check is necessary. Press the accelerator pedal and release quickly. The engine should run smoothly. No failures and of course no stalling. If you find any deviations. Then simply unscrew the “quality” screw another half turn. Repairing a carburetor with your own hands is not the most difficult job, but it involves a lot of emotions. When you hear how quietly and smoothly the engine runs after your repair. I hope you found a solution to your problem in this article. Thank you for your attention, see you soon!
I also advise you to look at: REPAIR OF INTERIOR HEATER
Technical characteristics of the chainsaw
The Husqvarna 137 chainsaws are no longer produced today, as they have been replaced by the new, improved 236th model. However, in everyday life, almost every fifth farmstead still has such a device. In addition, for many he is a permanent assistant in the household. The device turned out to be so perfect that even the most picky critics found it difficult to name even one of its flaws.
Judge for yourself:
| Technical characteristics of the Husqvarna 137 chainsaw | |
| Country of origin and assembly | Sweden |
| Engine type | petrol |
| Type | household |
| Fuel tank volume | 0.41 l |
| Oil tank volume | 0.20 l |
| Engine capacity | 36.3 cm 3 |
| Engine power | 1.64 kW |
| Dimensions: -length -width | 33 cm 38 cm |
| Weight (without chain and bar) | 4.6 kg |
| Chain pitch | 8.25 mm |
| Chain thickness | 1.3 mm |
| Number of links | 64 pieces |
| Chain speed | 16.3 m/s |
| Idle speed | 3000 per minute |
| Tire length | minimum 33 cm, maximum 38 cm |
| Maximum tire end radius | 10T |
| Noisiness | 98 - 108 dB |
| Guarantee | 12 months |
Did you know? The world's first chainsaw with a gasoline engine, the Dolmar, was presented by German entrepreneur Emil Lerp. The tool was equipped with a 245 cm3 engine with a power of 8 hp. s., and weighed 58 kg.
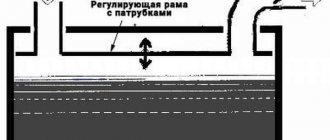
Boring large diffusers
One of the drastic ways to remake a carburetor is to increase the air flow by boring the diffuser.
The car gains improved dynamics under heavy and medium loads. This method is not without its drawback - at low speeds, failures in engine operation appear. Large diffusers
Boring of diffusers should be part of a comprehensive carburetor tuning. After this, the selection of new jets is mandatory. If the required diameter is not available, they will need to be drilled out. This operation is especially relevant for forced engines of 1.7 and 1.8 liters, since nozzles of increased diameter are not available for sale for them.
Not all car owners agree to put up with dips at the bottom. To improve dynamics at low speeds and at light loads, use:
- Fuel nozzle, which has a larger diameter compared to the standard one. Installed in the EPHH valve;
- Enlarged spray nozzle. It is usually installed in the first chamber, and in the second, at the discretion of the car enthusiast, you can put the same spout;
- Cam UN, with an increased size.
For boring you can use:
- special scan;
- feather drills for wood.
To improve the aerodynamic properties after boring, the roughness on the surface of the diffuser should be removed. For this, sandpaper with a gradual reduction in abrasiveness is used. It is recommended to do the final treatment with zero-grit sandpaper. For more thorough processing, you can use Goya paste or a woolen rag.
How to remake a carburetor completely depends on the skills and financial capabilities of the car owner. Tuning should be done with a reasonable approach, so that instead of increasing power, you do not end up with increased fuel consumption and unstable engine operation.
About Husqvarna
Adjusting the VAZ 2109 carburetor
The trademark of the Swedish industrial company Husqvarna has been known to consumers for more than 300 years. The company was founded in 1689 in the city of Husqvarna, and was initially positioned as a weapons factory.
Did you know? Canadian craftsmen perceived the chainsaw as a wood sculptor's tool. The art of chainsaw carving has gained particular popularity in the town of Hope in British Columbia, whose streets and squares are now all decorated with the creations of chainsaw masters.
Since 1872, she tried herself as a manufacturer of sewing machines, and since 1918, lawn mowers and chainsaws began to roll off the factory conveyors. Today it is a world leader in the manufacture of wood and stone cutting tools, as well as garden equipment.
But even this is not the end of the achievements of the oldest European company. Among its latest developments is a line of robotic battery mowers from the Automower brand.