Many car enthusiasts, during the operation of their car, make various modifications to it, aimed at increasing comfort and giving the car a certain uniqueness. This type of tuning also includes replacing light bulbs in the buttons of a VAZ 2114. It can be done quite quickly, and such an operation itself will be within the power of every driver. Today we will talk about how to do it correctly.
Illuminated buttons VAZ 2114
Why change the backlighting of individual buttons on the VAZ 2114 dashboard
On the VAZ 2114, the illumination of the buttons for controlling the dimensions, low beam, front and rear fog lights, as well as the rear window heating is green from the factory. Over time, many owners get tired of this glow and there is a desire to replace it, make it non-standard. After making a decision about such modifications, you need to decide: do this work yourself or contact the service. Since the process of replacing button backlighting is not a complicated procedure, in most cases, car owners carry out such an upgrade with their own hands.
Reasons for replacing the interior courtesy lamp
As a rule, most drivers do not pay attention to the interior lamp as long as its operation completely suits them.
Therefore, the procedure for dismantling the lampshade may be due to the following reasons:
- The interior lighting has stopped lighting - this occurs both due to a burnt-out light bulb and due to a lack of contact at the input of the lamp itself.
- Insufficient lighting - in most cases is due to the fact that low-power or outdated devices are installed in the ceiling, producing a weak luminous flux. It can also occur due to the burnout of any part of the lighting devices in the ceiling.
- Flickering of the lamp - occurs due to poor contact or malfunction of the LED lamp driver. To diagnose the cause, it is necessary to remove the ceiling light.
- A broken lens glass or a cracked lamp housing is caused by careless actions of both the driver and passengers. It also occurs during the natural aging of plastic and the loss of its mechanical properties.
Regardless of what reason led to the need to dismantle the lampshade, you should take this procedure as carefully as possible, since careless actions can easily cause damage to both the lamp itself and the ceiling lining. Which will entail additional costs for their repair and restoration.
Do-it-yourself overexposure of buttons on a VAZ 2114
Replacing the standard button backlighting on a VAZ 2114 will require the preparation of certain tools, materials, as well as some time. To work you will need the following list of necessary things:
- soldering iron with a thin tip;
- solder;
- tweezers;
- small knife or flat screwdriver;
- LED elements of the desired color.
Which LEDs and in what quantities should I buy?
The buttons installed on the dashboard of the model in question come in old and new styles. In the first case, small light bulbs or LEDs are used as a backlight element, and in the second, boards with sealed SMD LEDs are used.
Each button is equipped with two LED elements: one is responsible for illuminating the button itself, and the second indicates the activation of a particular function. The exception is the low beam headlight button - it does not have a power indicator LED. Therefore, if you plan to replace the LEDs on all five buttons, you will need to purchase 9 backlight elements. The type of the latter can be determined only after disassembling the button. The old model requires 12 V LEDs with a diameter of 3 mm. The new sample uses elements marked 0805. When using standard LEDs, it is recommended to additionally install a resistor with a resistance of 500 Ohms to 1 kOhm along the power circuit (directly in the button), which will prevent the element from burning out.
It is better to purchase LEDs with a small margin, since there is a possibility of damage to the element during installation.
How to remove buttons
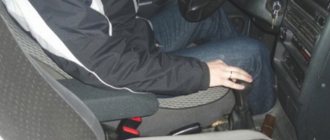
To remove the buttons on the front console, do the following:
- Remove the negative terminal from the battery.
- We take out the plug of the on-board computer or the BC itself, if it is installed. To do this, just hook it with your finger and pull it towards you.
Replacing the backlight of the front panel buttons
Since replacing LEDs on old and new button versions is somewhat different, each process should be considered separately.
Overexposure of old-style buttons
After removing the buttons from the instrument panel, perform the following sequence of actions:
- Pull the top of the button and remove the lid that is pressed.
The LEDs on all instrument panel buttons change in the same way.
Overexposure of new buttons
On modern buttons we change the LEDs this way:
- We disassemble the button, as in the previous paragraph.
- After opening we find a board with installed LEDs. We determine the polarity of the elements and solder them with a soldering iron with a thin tip.
To make it easier to replace LEDs, the board can be removed from the button. Depending on the button itself, the board can be inserted or soldered onto the legs.
Video: overexposure of VAZ 2114 buttons
Modernization of the buttons for turning on the headlights and low beam
The buttons for turning on the headlights and low beam headlights are made as a single element. The absence of an LED indicating that the headlights are on low beam causes inconvenience to many motorists. This is due to the fact that it is often unclear whether the headlights work or not. To solve this problem, they resort to modernizing the button. In addition to the tools listed above, you will need a similar button from which the necessary parts will be removed. The finalization process itself consists of the following steps:
- Remove the button from the panel.
Video: refining the low beam switch button
Dismantling filters
We have already talked about how to change the light bulbs in the buttons of a VAZ 2114, but this is not enough to completely replace the backlight, because the buttons are equipped with light filters that give the glow the desired shade. In order for colored LEDs to shine correctly, these filters must be removed.
You can also do this here in various ways:
- remove the filter using a soldering iron;
- cut it with a strong thin knife;
- drill out.
Replacing button illumination bulbs on a VAZ 2114
We can recommend the last option, since the first two are quite complex to implement and are not always effective (if you work carelessly, you can simply ruin the button housing).
Drilling should be done strictly along the contour of the pictogram (icon) with a small thickness drill (0.8 - 1 mm). The holes should be placed as close to each other as possible so that as few areas as possible remain with the filter film. Once the entire outline has been drilled out, its inner edges can be very carefully cleaned using a small blade (such as a scalpel or utility knife).
Option for modified button illumination on the VAZ 2114
At this point, the process of replacing the backlight can be considered complete - now when you turn on the button, instead of the usual color, a new one will light up (depending on which LED you install). In a similar way, you can replace all other buttons located on the dashboard.
Published October 20, 2018
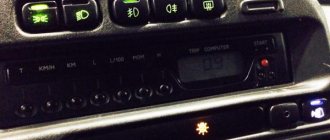
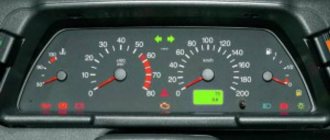
The instrument lighting on VAZ series cars in the factory version has a green speedometer and tachometer scale and red arrows. Many are not happy with this combination, given that the panel buttons are also highlighted in green. If the car is with one driver for a long time, this color scheme begins to get quite boring, and then there is a desire to make the VAZ-2114 buttons overexposed non-standard.
After the decision is made, the question arises: how to do it yourself or seek help from a service station. Replacing the backlight on the dashboard is a simple process, so most car enthusiasts prefer to overexpose the buttons without resorting to outside help.
Experience of car enthusiasts
There are buttons with both lamps and diodes, there is a choice. Resistors are soldered directly into the diode, this is AvtoVAZ know-how