There are a lot of videos of the same type on YouTube on how to make footwell lights with your own hands, where the wires lead from the door limit switches or the ceiling lamp, but my laziness found a new and quick way to make footwell lights on a VAZ-2114. I may not be the discoverer of this method, but I have never seen anything like it anywhere. So, let's look at the contacts of BI BSK.
Contacts BI BSK VAZ 2114
In my car, the footwell lighting is implemented through an open door indicator, the signal of which comes to the BI BSK, so this method can be considered the fastest and simplest. Operating principle: when the driver's door is opened, the signal comes to pin 6, and when the other doors are opened, the signal comes to pin 7. If you look at the signal table (below), pins 6 and 7 are ground. To make the backlight quickly, you will have to “work around” the car electrician a little. We power the positive wire of our backlight from wherever it is convenient, even from the cigarette lighter, and connect the ground wire to pins 6 and 7 of the BI BSK chip. Everything is ready, all that remains is to power the LED strip to the connected wires. In the end, we spent about half a meter of wiring and saved a lot of time.
It is worth noting that in order for the footlights to work correctly, you will have to connect pins 6 and 7 to each other, this did not affect the operation of my car in any way, at least I personally did not notice any changes. You can also theoretically consider other conditions under which the foot lighting will work; if interested, read after the signal table.
Signal table BI BSK VAZ 2114
How interior lighting works
All electric interior lighting can be divided into the following components:
- dashboard lighting (we have already talked about it, as well as its malfunctions, earlier, so today we will not dwell on it in detail);
- main interior lamp of VAZ 2114;
- lamps for individual lighting;
- illumination of glove compartments and cigarette lighter.
The most important and basic light source of all the elements listed above is the VAZ 2114 lamp. It is mounted on the ceiling of the passenger compartment in the front part and is turned on using limit switches located in all doors of the car. When you open even one door, the light instantly lights up, and when all doors are closed, it turns off.
In addition, it is also possible to force the lamp to be turned on/off using special buttons located on the side pillars.
Where does car modernization begin?
The main stages of modernization here are as follows:
- Seat replacement.
- Re-upholstery of doors and roof with new upholstery.
- Installation of a more powerful lighting source.
- Change of dashboard.
- Modernization of small parts.
It’s easiest to implement the last point, because here everything depends on the cost of accessories. So, you can easily buy covers for the steering wheel and gear knob, new sun visors, armrests and floor mats. But the new upholstery will make more sense. It will not only add comfort to the VAZ 2114 car, but will also serve as thermal insulation.
The interior light does not come on - how to find the problem
If you notice that the light in the interior of the VAZ 2114 has stopped turning on, then troubleshooting should start with the fuse. This is very easy to do for the reason that the ceiling fuse located in the common block is also the brake light fuse. If the light in the cabin stops lighting, and the brake light along with it, then the fuse should be replaced. If the brake light works, then the search should continue.
The next thing you should pay attention to is the condition of the incandescent light bulb. To check it, simply remove the cover and check whether the hair has burned out. In case of malfunction, the lamp simply needs to be replaced with a similar one.
Many experienced motorists advise immediately changing the interior lighting from conventional to LED. This will help you forget about the problem of burnt out light bulbs for good.
If, after examining the light bulb, it turns out that its filament is intact (or after replacing the light bulb the light still does not light up), then you should carefully inspect its socket and, if necessary, clean all its contacts with fine sandpaper.
If, even after removing the oxides, the light in the interior of the VAZ 2114 does not light, then you should check the presence of voltage at the contacts of the lamp using a voltmeter (or tester). If there is no current, then you will have to ring the entire circuit one by one and, if a break is detected, replace the wiring. This operation is not difficult, but can take a fair amount of time.
It is for this reason that the continuity test of the chain can begin not from the lampshade, but from checking the limit switches. As many 2114 owners report, very often the problem lies with them. If the limit switches turn out to be faulty, they will have to be replaced, since this part is practically beyond repair.
Before throwing away the old limit switch, you can try to adjust it. Very often, the cause of the malfunction may be insufficient pressing force or poor contact, as a result of which the switch simply does not operate.
What kind of light bulbs are there?
In the VAZ 2114 car, two lamps are responsible for interior lighting. One of them, also called the navigation one, is responsible for individual lighting and is located in the front part of the ceiling between the sun visors.
Individual interior lighting lamp for VAZ 2114
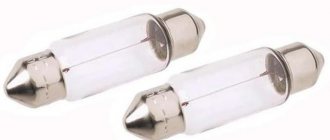
It uses an A12-4-1 (T4W) lamp with a power of 4 W.
Individual lighting lamp
The general interior lighting of the VAZ 2114 is also located on the ceiling, but a little deeper: between the pillars to illuminate the entire interior.
Lamp for general interior lighting of VAZ 2114
The manufacturer installed a 5 W AC12-5-1 (C5W) light bulb in it.
Lamp used in a general lighting lamp
Both bulbs are ordinary incandescent.
Why the light in the cabin does not light (main reasons)
Car electrical circuit diagram, which must be studied before starting work
Car interior lighting is part of the electrical system , and therefore, in any case, it is worth looking for the problem in this part of the car. Of course, it is recommended to study, at least superficially, technical electrical diagrams in order to be at least a little up to date .
So, what do you need? A detailed diagram of the car's electrical components, a little ingenuity and a minimal set of tools. Let's look at places where the problem may be hiding:
- Bulb.
- Ceiling lamp.
- Fuse.
- Wiring.
We fix the lights and get acquainted with electrics
Since the main fault locations have been identified, you can safely move directly to methods for solving the problem. It is worth noting that with automotive electrics, not everything is so simple, but since this is a VAZ-2114, everything can be said very clearly here. Let's move on to methods for solving the problem.
Bulb
The first thing that needs to be checked is the lighting lamp, since its burnout can cause the light to go out in the car interior.
In order to get it out you will have to remove the lamp cover. After this, you need to check whether there is a filament, and insert the lamp into the control device or simply connect it to the battery. If the lamp lights up, then it is not the cause of the malfunction.
Ceiling lamp
The problem may be hidden in the ceiling lamp
More than once, the cause of the malfunction was the lamp itself, where the contact group simply melted and closed, which caused a burnout or a blown fuse.
To diagnose it, you will need to remove it from the car and visually inspect it. It is also recommended to ring the contacts going from the lamp to the wiring.
Tuning the ceiling
Such a pleasant and exciting thing for a car enthusiast as do-it-yourself tuning is also possible with a courtesy lamp. Instead of the usual one, a lampshade with a programmable LED lamp is installed. It has advanced features:
- selection of three brightness modes, this selection is made by switching the switch at intervals of one second, the last switching on is remembered;
- shutdown delay 6-8 seconds with smooth extinguishing of the lamp;
- automatic shutdown when the door is not closed or not tightly closed after 30 minutes.
The price for such a lamp is only about five hundred rubles, so the choice is obvious.
The procedure for installing and connecting a lamp with a programmable LED lamp:
- the plastic diffuser of the standard lamp is removed;
- the wires are disconnected from the contacts of this device;
- the four self-tapping screws holding the light housing on the body ceiling are turned out and the body of the old device is removed;
- the LED illuminator is released from the plastic transparent diffuser cover;
- the electrical wiring is connected to the plugs of the LED illuminator in accordance with the diagram;
- the body of the new lamp is attached to the ceiling of the body in a regular place with self-tapping screws;
- The plastic diffuser is fixed on the body.
It should be noted that such a lighting device produces brighter light, which in the dark is a good help for all people who are in the car.
Why there is no light in the VAZ 2114 interior: the secrets of an electrician
The electrical equipment system of the VAZ 2114 car includes a whole range of different lighting devices.
It's good when it's light in the cabin
Conventionally, they can be divided into the following groups:
- Headlight;
- Tail lights;
- Lighting in the cabin.
To make it easier for the driver to navigate the road at night, halogen low and high beam lamps are installed in front of the car in the headlight unit. Turn signal lamps are also installed in one unit with them, so that when repairing the car the entire unit can be removed. At the rear there is one block on each side, which includes brake lights, turn lamps and reverse lamps.
Operating procedure
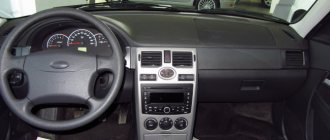
Replacing the backlight on a VAZ 2114 begins with purchasing a set of LED lamps in the color you need. On the instrument panel, there are several sensors and indicators that require a certain number of diodes to ensure their normal visibility for the driver, especially at night. Therefore, before buying a set of lamps, calculate the required number of LEDs for each device. For example, a brake sensor requires 3 bulbs.
Location of light bulbs on the dash
It is advisable to buy with a reserve, at least 5 - 10 lamps more. Since, during installation, you can damage one of the circuits and the LEDs will not work. This often happens to those who are doing this work for the first time.
You need to start work by removing the instrument panel, as well as turning off the resistance. Next, carefully remove the old backlight bulbs from the factory sockets. On the reverse side of the VAZ 2114 panel, there are special sockets designed for installing LED backlight bulbs.
After the old backlight is removed, carefully grind off the heads of the LED lamps to the required size. If this is the first time this work is being done, then you will most likely need spare diodes. Next, when the heads are prepared, they need to be installed on the instrument panel. Replacement of light bulbs must be carried out strictly according to the same polarity as in the standard version.
After the diodes are in place, they need to be secured. Do not under any circumstances use screws for this. Scotch tape is also not suitable for this type of thing. When choosing a fastening element, you need to assume that it will heat up a little. Silicone glue is ideal for this. It will not damage the surface of the panel, thanks to its soft consistency, and will securely secure the light bulbs in the sockets.
Now, you need to check the quality of the work done. To do this, without putting the panel in place, turn on the ignition and look at the result. If everything works as it should, then the replacement was made correctly. If there are any inconsistencies, then you most likely have violated the polarity of connecting the backlight bulbs on the VAZ 2114. To fix the problem, you will need to find the connection diagram and double-check whether all the bulbs are in their places. If, after turning on the ignition, the backlight does not light up at all, then you need to check the integrity of the wires. The wires installed on diode lamps are quite thin and can easily break under the insulation or even break completely. So, be careful when handling them.
INTERIOR OF THE CAR
The interior lighting is worth a separate discussion. The interior of the VAZ 2114 is illuminated using the following devices:
- Interior lighting;
- Individual light lamps;
- Instrument lighting on the control panel;
- Light in the glove compartment, cigarette lighter and separate bulbs for some buttons and switches.
The general light in the VAZ 2114 is located in the car interior and illuminates it. The engineers decided that it would be optimal to place it above the heads of the driver and front passenger, so it is simply built into the headliner and bolted there. Usually this lamp lights up when one of the doors is open, and goes out when it is closed. This is familiar to us from the classics, where a similar system was organized with light bulbs on the door pillars.
Interior lighting
Here the lamp lights up when the VAZ 2114 door limit switch, which stands on the racks and is pressed by the door itself, is triggered. There are also separate buttons for the passenger and driver to turn on this lamp if desired.
Tuning the ceiling
Such a pleasant and exciting thing for a car enthusiast as do-it-yourself tuning is also possible with a courtesy lamp. Instead of the usual one, a lampshade with a programmable LED lamp is installed. It has advanced features:
- selection of three brightness modes, this selection is made by switching the switch at intervals of one second, the last switching on is remembered;
- shutdown delay 6-8 seconds with smooth extinguishing of the lamp;
- automatic shutdown when the door is not closed or not tightly closed after 30 minutes.
The price for such a lamp is only about five hundred rubles, so the choice is obvious.
The procedure for installing and connecting a lamp with a programmable LED lamp:
- the plastic diffuser of the standard lamp is removed;
- the wires are disconnected from the contacts of this device;
- the four self-tapping screws holding the light housing on the body ceiling are turned out and the body of the old device is removed;
- the LED illuminator is released from the plastic transparent diffuser cover;
- the electrical wiring is connected to the plugs of the LED illuminator in accordance with the diagram;
- the body of the new lamp is attached to the ceiling of the body in a regular place with self-tapping screws;
- The plastic diffuser is fixed on the body.
It should be noted that such a lighting device produces brighter light, which in the dark is a good help for all people who are in the car.
BACKLIGHT DOESN'T WORK
In cases where the light in the interior of a VAZ 2114 does not turn on, drivers who do not understand the electrical equipment of the car and its repair immediately begin to go to the Internet and try to find some advice or a solution to the problem there. But, no matter how strange it may be, you can fix the interior lighting of a VAZ 2114 yourself, you only need a minimum of tools for this and a detailed action plan, which we will analyze today.
INITIAL CHECK
It is better to start repairs by checking the functionality of a specific lamp - perhaps the light bulb has simply burned out and will simply need to be replaced. If the light in the interior of the VAZ 2114 does not go out or, on the contrary, does not turn on when the doors are opened, then you need to check the door switches for functionality, you need to see if the contacts are in order, if they have oxidized, then it is better to clean them and wipe them with alcohol.
Installation of new equipment
Now let’s figure out how to install an LED lamp on a car; for this we will definitely need a VAZ 2114 interior lighting circuit.
This is done in the following sequence:
- Remove the lampshade;
- Unscrew the base of the case;
- We connect the new lampshade;
- Screw the LED lamp into place.
First we need to remove the original lampshade and disconnect the wires from it, all the contacts, we also need to remove the diffuser. The housing is screwed to the roof sheathing with four self-tapping screws; they are simply unscrewed and the housing is removed. Next, you need to take a new case and connect all the plugs in accordance with the diagram to the contacts that go to the battery. The new housing is screwed in exactly the same way onto the same four self-tapping screws, and the lens is snapped into place.
In this simple way you can update your car interior and make the interior lighting of the VAZ 2114 more comfortable and convenient.
IMPROVEMENT OF INTERIOR LIGHTS
The interior lighting of the VAZ 2114 can be customized with your own hands to suit your purposes and needs. The most interesting option is considered to be the complete removal of the standard lampshade, and the installation of a programmable analogue along with integrated LEDs instead. It is better to do such an upgrade as soon as it was noticed that the light in the VAZ 2114’s interior does not work - why repair an already broken old lamp if you can replace it with a new and much better one.
In addition, the new lamp will have the following functions that the standard version does not have:
- The ability to select brightness from three possible options, adjusted by pressing a button;
- Automatic shutdown after a certain time if the door is not completely closed or just open. This will prevent the battery from draining overnight;
- Smooth extinguishing of the lamp, switching off occurs within 10 seconds.
Solution
The stores offer several options for light sources for replacing lamps in the instrument cluster:
- traditional incandescent lamps,
- LED in a plastic socket,
- SMD LED is a more expensive and reliable option, a super-bright diode.
The choice will always depend on financial capabilities and lighting preferences.
The number of backlight and control lamps is up to 19 pieces. It varies slightly depending on the design of the instrument cluster and the modification of the vehicle. Many car owners choose LEDs due to lower energy consumption and longer service life. This backlight is brighter and gives an interesting bluish color instead of the standard green. But due to the design of the diode, the brightness control of the instrument illumination will not work, always turning it on at full power. On a long road trip at night, this can be distracting and irritating to the eyes. But in any case, the choice of light sources is yours.
Checking and replacing lamps
Now it’s time to arm yourself with a tester (the simplest Chinese one will do) and start ringing the light bulbs. To do this, put the device in resistance measurement mode (for LED light bulbs, the tester must be put in diode testing mode), and the lamps are removed one by one and dialed.
A tester is necessary for the reason that some light bulbs do not always light up and it is visually impossible to determine their serviceability. We won’t drain brake fluid or fuel from a VAZ to check the low level indicators of one or the other. If it is reliably known which light bulbs are working (for example, the illumination of dial gauges is normal), then these lamps can be left alone.
Nevertheless, I would recommend changing them all, especially if the VAZ modification has incandescent light bulbs (and this is almost always the case). Since it is unknown how long the old ones will last, and disassembling the instrument panel again, say, in a week is irrational.
After installing the new lamps, we connect the shield, without installing it in place yet, and check what can be easily checked visually: turn on the ignition, handbrake, turn indicators, etc. If everything is in order, then the dashboard can be assembled.
Dashboard lamps
The dashboard provides the driver with a lot of useful information that allows him to monitor the condition of the car, the driving process, diagnose breakdowns in a timely manner and correct them. So, the panel light comes on for the following reasons:
- The battery is not charging.
- For one reason or another, the handbrake is stuck.
- Not enough fuel in the tank.
- The oil pressure has decreased (which indicates the need to urgently stop the engine to avoid more serious consequences).
- Excess water in the filter. To prevent water from entering the pump, which could lead to damage, you need to drain excess water from the filter.
- The fuel system is malfunctioning.
- There was a failure in the propulsion system and much more.
As you can see, the panel lamps allow you to determine what is wrong in the car; if the lamps themselves fail, then you can miss a very important breakdown, which can even lead to an accident
This is why it is so important not to delay replacement (lamps cannot be repaired)
Today, the car market offers a wide range of lamps for the control panel, ranging from the standard version, which is cheaper but also has average characteristics, to modernized versions that give the panel, and therefore the entire atmosphere of the car, a different, more expressive atmosphere.
Professionals also advise replacing standard lamps with LEDs, which largely decorate the panel. So, we list several of the currently most popular options suitable for the VAZ 2114.
- LED lamps Sho-Me SM-T5 (blue, white and red). Country of origin: Korea, price: 80 rubles. for a couple.
- High-brightness SMD LED module – 20 rubles.
- LED Sho-me SM-T5-cap-super (white) – 50 rub.
- Halogen lamps from Osram and Philips cost approximately 40-80 rubles apiece.
As you can see, prices for lamps are not high. It is worth noting that replacement takes very little time, which we will talk about later.
Assembly
When you have made sure that all the light bulbs on the VAZ 2114 are working correctly, you can begin assembling the panel. To do this, all the backlight wires are brought out onto the board and carefully attached using a soldering iron. They should also be attached to the board in a certain sequence, otherwise the backlight may not work. If the wires are too long, they should be shortened so that they do not bend and do not fall into the grooves of the latches between the dashboard and the dashboard during installation. Otherwise, the wires will easily get damaged.
When connecting the pointer drive, also make sure that they are not deformed. Now, the instrument panel can be inserted back into the grooves and fixed with screws. The indicator arrows must be set with the ignition off, at the zero mark. Next, the last check: turn the ignition key, and if everything works, then the replacement procedure was completed correctly, and the new backlight will please the eye. Well, if something doesn’t work, then most likely you damaged the wires when installing the panel on the dashboard. In this case, disassemble everything again and check the integrity of the wires.