The Russian automaker VAZ produces a sufficient range of cars. Brand models are in great demand among domestic car enthusiasts and in the CIS countries. The popularity is due to the moderate cost and cheap repair of cars. However, problems happen with any vehicle and the plant’s products are no exception. Error codes for the VAZ 2114 injector can guide the motorist regarding the area of the breakdown and help in troubleshooting the problems.
Diagnostics
There are two ways to set error codes for VAZ 2114 injector 8 valves. However, each method has unique advantages and disadvantages.
Self-diagnosis of VAZ 2114: error codes and their interpretation
The self-diagnosis method does not require the driver to have complex instruments or additional units. To complete the procedure, the car itself is enough.
The standard sequence of actions looks like this.
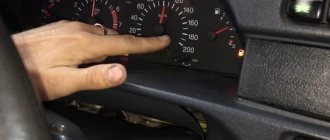
- Press the odometer reset button.
- Turn the ignition key to position No. 1 (turn on the on-board electrics).
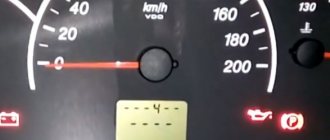
- Release the mileage reset button. After this, the instrument arrows will make a full revolution and return to their place.
- Press the reset button a second time and release. The command displays the firmware version indicator.
- Repeat step No. 4 - this will display error codes on the on-board computer.
If the sequence of actions is performed correctly, all indicators will light up and the display will show a two-digit fault code.
Note!
A failure signal may be a lack of response from the indicator. In this case, it is necessary to check the circuit coming from the device.
The most common error codes for the VAZ 2114 panel, occurring in 90% of cases:
- 1 – microprocessor failure, flashing required;
- 2 – error code 2 VAZ 2114 indicates that there is an interruption or disruption in the wiring of the float sensor inside the gas tank;
- 4 – electrical wiring short circuit, voltage limit exceeded;
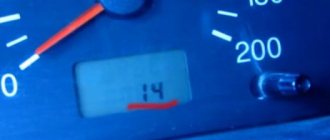
- 8 – error code 8 on the VAZ 2114 indicates a drop in voltage in the network, the battery may have run out;
- 12 – in the VAZ 2114, error code 12 indicates that the warning lamp is not functioning properly;
- 13 – open circuit of the oxygen sensor;
- 14 – error code 14 on the VAZ 2114 warns the driver that the engine has overheated or the antifreeze temperature sensor has shorted;
- 15 – short circuit or DTOZh has failed;
- 16 – exceeding the permissible voltage limit of the on-board network;
- 17 – BS voltage has dropped critically, battery discharge is allowed;
- 19 – DPKV does not respond or there is a short circuit on the line;
- 21-22 – incorrect response of the TPS, possible short circuit or wiring break;
- 23/25 – short circuit of the throttle position sensor;
- 24 – speedometer failure, power cords may be broken;
- 27/28 – CO sensor worn out or broken;
- 33/34 – problems with the mass air flow sensor, possible power loss or short circuit;
- 35 – IAC sensor has failed, can only be treated by complete replacement;
- 41 – incorrect phase distribution covered or shorted;
- 42 – the circuit has failed or the wires of the electronic ignition unit have been broken;
- 43 – mixture detonation sensor is faulty;
- 44/45 – there is a violation of the fuel supply to the engine, the system may trip, jerks appear during acceleration, and it picks up speed poorly;
- 51 – ROM is acting up;
- 52 – similar for RAM;
- 53 – potentiometer failure;
- 54 – break in wiring for octane corrector;
- 55 – excessive leanness of the mixture during acceleration;
- 61 – interruptions in the operation of the lambda probe.
In some cases, errors may be superimposed on each other if the failure is similar. For example, if errors 1 and 4 intersect, the panel will indicate "5".
It is important to know that after viewing, VAZ 2114/2115 error codes do not disappear on their own after repairs are performed. They need to be forced reset. To complete the work you will need a simple sequence of actions:
- turn on the car ignition;
- remove the terminals from the battery;
- wait 20-30 seconds;
- return the clamps to their place.
This also needs to be done if you are planning a trip to a service station. Having discovered the instructions from the on-board computer, the technicians will correct these problems, which will definitely be more expensive.
The disadvantages of an independent procedure include the low accuracy of the data. On-board diagnostics only show the general direction vector where the fault should be looked for.
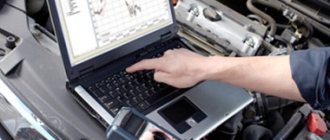
Check using diagnostic equipment
You can identify error codes for VAZ 2115 and 2114 using a laptop with a special program. The tool is connected to the vehicle's test socket through a set of adapters. The wizard configures the software, and after diagnostics, one or more faults will be displayed on the computer screen in the form of a five-digit code.
The first part is the letter:
- B – damage to body panels;
- C – chassis or suspension malfunction;
- P – electrical, engine or transmission disorder;
- U – damage to the terminal for information exchange.
The second part is a single digit:
- 0 – typical indicator according to the SAE standard;
- 1/2 – conveyor failure code;
- 3 – reserve.
The next element is the breakdown group indicator:
- 1/2 – defect in the fuel/air line;
- 3 – ignition and related elements;
- 4 – catalyst;
- 5 – XO of the power plant;
- 6 – ECM and related wiring;
- 7/8 – transmission blocks.
The final two numbers point directly to the problem itself.
PRINCIPLE OF OPERATION AND LOCATION OF THE DEVICE
The electronic engine control unit starts working when the ignition is activated; it continuously functions while driving, collecting information from various fourteenth sensors. The received information is analyzed by the processor and, based on the results of the analysis of the received data, the device controls the functional systems of the VAZ-2114.
The VAZ 2114 engine control unit receives information from the following fourteenth sensors:
- (sensor) speed of movement;
- Oxygen;
- Detonation;
- Fuel injection phases;
- Crankshaft position;
- Throttle position;
- Instant air flow;
- Liquid temperatures in the cooling system.
Based on the information received, the ECU on the VAZ 2114 controls the following systems and components of the vehicle:
- Adsorber;
- Ignition system;
- Injectors and fuel pump;
- Ventilation;
- Automatic diagnostic programs;
- Idle speed control unit.
The brains on the VAZ 2114 consist of 3 separate devices, each of which has an individual type of memory:
- Random access storage device - a RAM block is a system with short-term memory. RAM contains information about recent errors that the ECU detected in the fourteenth systems and various current vehicle parameters. The RAM memory is completely updated when the ignition is turned off.
- A programmable permanent storage device is the main memory unit; it stores the ECU firmware. The PROM contains information about the results of calibrations of the fourteenth systems, as well as the power unit control algorithm. The EPROM memory is permanent; it is stored when the ignition is turned off. With certain skills, the EPROM block can be reprogrammed, which will improve the power and dynamics of the VAZ 2114.
- An electrically reprogrammable storage device is the main functional purpose of the unit - protecting the machine. The EEPROM contains data from the fourteenth anti-theft system - passwords and their encoding. It will be possible to start the engine only after the EPROM and the immobilizer compare data with each other.
The VAZ 2114 ECU is hidden inside the dashboard, right under the dashboard. In order to get to the brains, you need to use a Phillips screwdriver to unscrew the fixing screws and remove the side panel of the dashboard from the passenger seat. There you will see a longitudinal plastic brain housing, which is inserted inside a stainless steel retainer.
To remove the control unit, you need to unscrew the fixing bolt and pull the lock towards you, after which the device can be freely removed (you must first completely de-energize the car by removing all terminals from the battery).
Basic error codes for VAZ 2114 injector: decoding
Note!
The table is also relevant for version 2115.
Exhaust system – 0000
- 30 – open circuit of the oxygen sensor heater to the catalytic converter;
- 31 – also with a short circuit to the car body;
- 32 – similar with a short circuit to 12V;
- 36-38 – the same value as 30 only for the output sensor.
Air line defects – 0100
- 102/103 – Mass air flow sensor open circuit or signal violation;
- 112/113 – sensor lines t ˚ overboard, impulse violation;
- 116 – engine overheating;
- 117/118 – damage to the DTOZH circuit;
- 122/123 – TPS line, short circuit or insulation failure;
- 130 – failure of the oxygen sensor in front of the catalyst;
- 131/132 – similar element, signal level violation;
- 133 – slow response of DK1 to commands;
- 134 – break in the power cable DK1;
- 136 – DK2 is broken;
- 137/138 – short circuit or violation of wiring DK2;
- 140 – fuse DK2 burned out;
- 141 – the heater of the same device is broken or damaged;
- 171/172 – excessively lean or enriched fuel mixture.
Error codes VAZ 2114 1.6 liters related to fuel supply - 0200
- 201/204 – break in the injector control line for all injectors in series;
- 217 – motor overheating;
- 230 – the fuel pump has failed or the corresponding relay has burned out;
- 261/264/267/270 – short circuit of the injector control circuit at +12 V, respectively, for each insert;
- 263/266/269/272 – failure or defect of the injector driver for each in series;
- 262/265/268/271 – Short circuit of highways to the car body.
Error codes on the VAZ 2114 on-board computer indicating a breakdown in the ignition system - 0300
- 300 – there are misfires;
- 301-304 – similarly for each cylinder, respectively;
- 326-328 – DDS is broken or there is no signal;
- 335-338 – failure, short circuit or interruption of the DPKV wiring;
- 342/343/346 – malfunction of the phase distribution sensor;
- 351-354 – open circuit for all pistons in series;
- 363 – the mixture in the cylinders does not ignite, emergency fuel supply cut-off.
Additional attachment that does not have a direct effect on the motor – 0400
- 422 – the catalyst may have clogged or the exhaust gas flow rate has dropped critically;
- 441 – failure of power supply to the adsorber purge valve;
- 444 – power failure above the specified element;
- 445 – short circuit of the gearbox to the car body;
- 480 – power wires to the main radiator cooler are damaged;
- 481 – failure of the coolant fan control circuit No. 2.
Failure, malfunctions in the SU speed control system – 0500
- 500 – speedometer sensor is broken;
- 506/507 – low or high speed of the vehicle;
- 511 – XX regulator – lines from the relay and ECU are interrupted;
- 560 – the battery is low or the power cable is broken.
- 562/563 – Short circuit on on-board wiring.
On-board network of auxiliary or main equipment – 0600
- 601 – ECM, ROM error;
- 615 – secondary starter relay, wiring damage;
- 616/617 – also with short circuit to ground or 12V;
- 627 – fuel pump control relay, possible line break;
- 628/629 – similar with a short circuit to the body or on-board system;
- 645-647 – compressor clutch, damage to the wiring with contact with the housing or other cables;
- 650 – the “Check Engine” lamp is broken, check the engine, there may be damage to the wiring;
- 654 – tachometer failed;
- 685-687 – malfunction of the main engine control relay, complete replacement of the part is required;
- 691/692 – problems with the main cooling fan relay.
Auxiliary systems – 1000
- 102 – breakdown of heater DK1;
- 115 – failure or malfunction of the above device;
- 123/124 – violation, too rich/lean mixture at idle;
- 127/128 – similar, only for partial load on the internal combustion engine;
- 135 – rupture of heating line DK1;
- 136/137 – incorrect fuel supply at low engine load, the throttle drive may be malfunctioning;
- 140 – discrepancy between measured and actual load;
- 141 – failure of heater DK2;
- 171/172 – incorrect information comes from the potentiometer;
- 301-304 – the ignition in the cylinder does not work correctly, consistently for all combustion chambers;
- 386 – incorrect sequence of testing the detonation channel;
- 410/425/426 – wiring of the canister purge flap, short circuit or line damage;
- 500 – the fuel pump relay line is damaged;
- 501/502 – similarly with a short circuit to the body or wiring;
- 509/513/514 – control center of the XX regulator, open or short circuit on board or 12V;
- 541 – damage to the wire of the BN relay, possible oxidation of the terminal;
- 570 – break in immobilizer control cables;
- 602 – no power to the ECM, oxidation of the pads is allowed;
- 606 – the bump sensor is broken, the part needs to be replaced;
- 616/617 – similarly with a change in signal level, there may be a short circuit inside the device;
- 2301/2303/2305/2307 - the ignition coils are shorted to 12 volts, in series for each piston.
Important!
Only the most popular error codes for the dashboard of the VAZ 2114 and similar models are listed here. There are other indices, but due to their low prevalence they are not mentioned.
Throttle valve
The on-board computer issues two unpleasant errors - 0122 and 0123 when there is a problem with the throttle sensor. Moreover, 0122 will be displayed if the signal level of this sensor is low, and 0123 – if it is high.
Both one and the other, naturally, are not good. Especially if the on-board computer readings are accompanied by increased idle speeds, jerks at low speeds and dips. In this case, replacing the sensor does not always help.
Throttle position sensor
If codes 0122, 0123 are issued, be sure to check the signal and power wires for breaks, and also pay attention to whether there is any leakage through the injector rings. Remember: the main enemies of DPZD are engine washing and also the manufacturing plant, since there are a lot of defects here.
How to fix the problem
After diagnosis, the problem should be repaired. When reading a signal, it is necessary to check the circuit and devices following it. The most accurate method is to replace the damaged part with a known good one (new). This will eliminate the possibility of incorrect repairs. If the device is in working condition, the lines are checked; usually a primitive test is sufficient. However, if the control unit or relay fails, you will need a special tester and the ability to use it.
Separately, it is necessary to take into account that factory terminals and blocks become loose and oxidize over time. If the contact on the hitch deteriorates, the on-board computer or laptop program will say that the part is damaged, even if it is not.
You can prevent this from happening in the following way.
- Check the condition of the connectors once every 5000 km. The pads should sit in place tightly, without play. If necessary, elements must be replaced with new ones.
- Check plug connectors two to three times a year for oxidation. Oxides reduce the flow of electricity through on-board wiring, which leads to incorrect display of information.
- Experts recommend purchasing and using oil for electrical terminals. The liquid is similar in composition to transformer lubricants. The formula prevents water and oxygen from reaching metals, which prevents them from rusting.
Important!
You can diagnose VAZ 2114 error codes on the instrument panel and ECU yourself, only if you understand the essence of the process. If you don’t have confidence in your own abilities, it is recommended to contact a qualified technician.
If you have the appropriate knowledge and the necessary equipment, you can find and correctly decipher the error codes of the VAZ 2115 injector and other elements yourself. Due to the simplicity of the car's electrical circuit, the user does not require deep knowledge of mechanics or electronics.
Determining the fault yourself
Of course, we, like real drivers, always strive to solve any problem with our own hands. Well, you don’t like it when someone else’s guy treats your “swallow” and I understand you perfectly. However, if we consider the issue of the on-board computer, then everything is somewhat different, but in certain cases you can handle it yourself. I warn you right away: do not listen to pessimists who will foam at the lips to prove that you cannot defeat computer errors. But remember once and for all, the error codes will differ from the service station options, since by and large we will be testing the dashboard without resorting to the help of that same “on-board driver”. Instead of a number with a four-digit value, we will be presented with a two-digit one.
Before I tell you about the different combinations, follow a few simple steps. They will help not only determine the firmware version, but also find out about existing faults. Self-diagnosis begins with these actions!
If the Check Engine light is on, this means a failure in the electronics system, then you cannot do without specialists. In other cases, after carrying out these actions using the following information, it will be possible to read errors. Combinations that may appear on the instrument panel:
Even after eliminating the malfunction, the corresponding codes will still appear on the error panel. “How to remove these readings?” you ask. Yes, very simple! Turn on the ignition and disconnect the positive terminal from the battery for a few seconds.
After which, we check the result, there is almost a 100% guarantee that if the error is corrected, the problems will disappear. Another nuance that can mislead you is the addition of errors. That is, if there are several of them, for example: 24 and 41, then you will see the number 65.
How to decipher and eliminate errors on a VAZ 2114
After self-diagnosis of errors and elimination of their causes on a carburetor or injection engine, a malfunction message may remain on the standard panel. If the problem has been deleted, this means that the code combination remains in memory. We'll look at the description of the faults below, and now we'll tell you how to remove the code from memory. To remove it after testing the device, when VAZ 2114 errors appear, the codes themselves must be written down. After this, the daily mileage reset button is pressed again, this will clear the fault from the control unit’s memory.
Resetting the "Check Engine" error
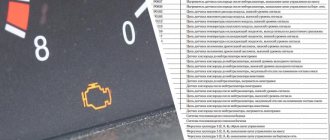
It often happens that the instrument panel 2114 8 or 16 valves displays a check error - engine malfunction, the orange icon is on. Self-diagnosis does not always allow you to accurately check and determine how to fix such a problem. To fix the problem and find a solution, you should perform more detailed diagnostics of the car using a computer and additional equipment. Perhaps, during diagnostics, an unknown error indicates a malfunction in the microprocessor, on-board network or sensors. After the problem is fixed, the receipt may remain.
The "Check Engine" indicator indicates a problem with the engine.
How to reset the fault code:
- First, turn on the ignition; you do not need to start the car engine.
- Then open the hood. Use a wrench to loosen the bolt on the negative terminal of the battery.
- Wait about one minute, after which the battery terminal must be replaced.
- Close the hood and turn off the ignition.
- After that, turn it on again and start the car engine. If the check remains, it should go out on its own after some time. If the instructions given did not work and the solution did not help, then you need to look for the cause of the problem and fix it.
Removing the error from the device memory
This procedure is used in three cases:
- the occurrence of an error blocks the ability to operate the car (you need to get to the service station under your own power);
- a complete check of all components was carried out and no fault was found;
- The damaged part has been repaired or replaced.
To reset the on-board control system data, you must remove all terminals from the battery and then plug it back into the vehicle's power circuit. It will only take a few seconds to disconnect the battery. After this, the error record will be erased from the system memory. If you want to carry out this procedure for further operation of the vehicle, then remember that the trip should be short - to the nearest car service center.
Meaning and interpretation of error codes
To read the faults, first consider the list with a table of UEr errors that self-diagnosis produces (the author of the video is Ivan Vasilyevich).
| Number | Description |
| 1 | Problems with the functioning of the microprocessor. |
| 2 | Self-diagnosis of the VAZ 2114 detected problems with the electrical wiring of the fuel level indicator controller. The signal level coming from the sensor may be too high or low. It is necessary to test the controller and check the wiring. |
| 4 | Increased voltage in the on-board network. |
| 8 | Low voltage. What to do: in this and in the previous case, the battery and generator must be checked. |
| 12 | There is a problem with the diagnostic indicator circuit on the instrument panel. |
| 13 | The control unit cannot detect the signal coming from the oxygen controller. |
| 14 | An increased signal is received from the refrigerant temperature controller. |
| 15 | The problem is in the operation of the coolant temperature sensor (coolant temperature sensor) - the on-board computer records a reduced signal level. |
| 16 | There is increased voltage in the car wiring. |
| 17 | Reduced voltage in wiring. |
| 19 | Problems have been reported in the operation of the crankshaft position sensor (CPS). An incorrect signal is sent to the control unit. |
| 21 | Problems with the operation of the TPS controller (throttle position sensor). There may be problems with the throttle valve. Check the connection circuit and sensor. |
| 22 | A reduced signal is sent from the TPS. |
| 23 | The intake air temperature controller gives an increased signal. |
| 24 | There are problems with the speed controller. Its failure can be diagnosed by a non-working speedometer. |
| 25 | Reduced signal from the incoming air temperature controller. |
| 27,28 | Incorrect signal coming from the CO sensor. |
| 33,34 | Malfunctions of the mass air flow sensor (mass air flow sensor). Check the flow meter connection circuit and its functionality. |
| 35 | The ECU has detected a deviation in the idle speed values. The sensor may be faulty. |
| 41 | Incorrect pulse coming from the phase controller. |
| 42 | Problems with the electronic ignition wiring. |
| 43 | An incorrect pulse is supplied from the detonation controller. |
| 44,45 | Problems with the composition of the combustible mixture. It can be depleted or over-enriched. |
| 49 | Check for vacuum loss. |
| 51,52 | Problems in the functioning of the PROM or RAM. |
| 53 | There is no CO controller pulse. Open circuit or sensor failure. |
| 54 | No impulse is received from the octane corrector controller. |
| 55 | When the load on the power unit is reduced, the ECU detects depletion. |
| 61 | Problems with the oxygen controller. |
These codes can add up; if you see the number 6, this may indicate errors 2 and 4, or if the number 9 is displayed, errors 1 and 8.
In order to immediately read and decipher problems when diagnosing, it is advisable to download and always carry with you a printout with a description. When diagnosing using a computer, codes on engine 21124 may differ depending on the car model. To read the codes, you need to know how they are supposed to be deciphered. Errors must be reset after they have been deleted (the video was filmed and published by the KV Avtoservis channel).
| Number | Decoding |
| p0102, p0103 | An incorrect pulse is supplied from the mass air flow sensor controller. This means you need to check the wiring. |
| p0112, p0113 | 112 or 113 - the incoming air temperature sensor needs to be replaced. |
| p0115-p0118 | Errors from 0115 to 0118 - the antifreeze controller sends an incorrect impulse. There may be problems with the wiring or the sensor itself. |
| p0122, p0123 | TPDZ. The controller is sending an incorrect signal. If the wiring is damaged, interference may occur. |
| p0130, p0131 | The lambda probe requires diagnostics and replacement. |
| p0135-p0138 | Error 0135 and higher - the lambda probe heating regulator needs to be replaced. |
| p0030 | The ECU reports problems in the electrical circuit in the area from the lambda probe heater to the converter. If error p0030 occurs, you need to test the electrical circuit and the sensors themselves. |
| p0036 | P0036 - a break in the wiring of the heating device DK-2 was detected. |
| p0300, p0302 | When codes 300 and 302 appear, the ECU reports a misfire. |
| p0301 | Gaps were detected in the cylinders of the power unit. Compression needs to be checked. |
| p0325 | The knock sensor is not working correctly. In particular, we are talking about a break in the connection wiring. |
| p0335, p0336 | P0036 error VAZ 2114 or 10335 - the DPKV has failed or its connection circuit is damaged. If the wiring is intact, then the sensor is replaced. |
| p0340 | Phase sensor malfunction. |
| p0341 | Error VAZ 2114 0341 means a problem with the camshaft controller. |
| p0342, p0343 | Problems with the phase controller. With such an error, detonation of the car engine is possible. Most likely, only replacement will solve the problem. |
| p0346 | P0346 VAZ error - also a problem with the phase regulator. |
| p0363 | P0363 - misfire of the combustible mixture was detected. In cylinders that refuse to work, the fuel supply is cut off. |
| p0422 | Failure to operate the neutralizing device. |
| p0443, p0444, p0445 | Malfunctions 0443, p0444 and 0445 - adsorber regulator, purge is not carried out. |
| p0480 | The engine cooling fan device has failed. The power unit may overheat if it is not replaced in a timely manner. Before replacing, you need to check the connection contacts to the wiring. |
| p0501-p0504 | Error 0501 VAZ 2114 and error code 0504 - the speed controller refuses to work. The device needs to be replaced. |
| p0505, p0506, p0507 | The idle speed sensor does not work or does not work correctly. Its failure can lead to floating idle speed. Possible engine tripping. The controller itself is tested and the wiring is checked. |
| p0607 | The knock controller operates intermittently. |
| p1135 | Error 1135 VAZ 2114 - you need to test the oxygen controller. |
| p6060 | Processor failure. If the fault remains after resetting the code, then the controller must be replaced. |
| p2020 | It is necessary to test the intake flap position sensor. |
| p1617 | Error 1617 - Rough road controller, wiring damage. |
| p1513 | There is a short circuit in the wiring of the idle speed sensor. It is necessary to test the electrical circuit and check the contacts. |
| p1602 | Failures in the voltage supply to the vehicle's electrical network are detected. |
| p0560 | Incorrect voltage level in the on-board network. This parameter can be overestimated or underestimated. The car battery, as well as the generator unit, are subject to testing. |
| p1514, p0511 | The appearance of these errors indicates a problem with a break or short circuit in the IAC (idle speed regulator) wiring. First of all, diagnose the sensor contacts, and then test the circuit, if possible. The sensor itself may also be damaged. |
| p1303 | P1303 - A detected misfire of the air-fuel mixture in the third cylinder is reported. The malfunction must be corrected as quickly as possible, since it can be critical for the neutralizer. |
| p1578 | Throttle valve malfunction. Literally, the problem stands for “zero adaptation parameter is outside the permissible value.” There are several options to solve the problem. The first thing you need to do is clean the throttle valve. If this does not help, then the throttle is adapted. To do this, you need to activate the ignition, and then start the engine after 40 seconds. Alternatively, you can test and tighten the contact terminals on the throttle. |
| p1621 | Malfunction of the RAM, memory problems in the control unit. Detailed testing of the computer is required. |
| p0650 | Problems in the control circuit of the on-board computer error code indicator State. |
| p2135 | P2135 - malfunction of the throttle assembly. If replacing the sensor and cleaning the damper did not help, then the problem may have to be solved by flashing the on-board computer. |
| p2187 | Lean mixture in internal combustion engine cylinders. You need to do a detailed diagnosis of the problem. |
Will the car go
Every motorist will be interested to know in what situations your vehicle will flatly refuse to travel further. And there are only two such breakdowns:
- The case when the crankshaft sensor breaks. This sensor is the only one of its kind; if it breaks down, the car will travel 100 meters. The rotation of the crankshaft and the deduction of the response time of the injectors and the ignition module depend on it.
- You won't get far with a broken fuel pump either. The main reasons for its breakdown are low-quality fuel, which contains a large amount of dirt and water. If it is partially broken, you will notice a decrease in power and a kind of popping noise. If it breaks down completely, your car will not move.
It is very difficult to determine a fuel pump failure without qualified help, since there are a number of other malfunctions with similar “symptoms”. For example, a failed throttle position sensor. Its inoperability is characterized by a loss of engine power, “dips” and jerks with a sharp increase in speed (while overtaking), and unstable idle operation.
In order to avoid the above problems, you need to remember 3 digital codes that indicate these malfunctions:
- P1602 - the failure is guaranteed to be in the engine controller.
- P0340 – malfunction of the crankshaft.
- P0217 - this error may indicate two breakdowns - either the need to change the engine oil or overheating of the engine.
During all other cases of breakdowns and errors generated by the ECU, the engine is able to continue operating, but the on-board computer will go into emergency mode. If such malfunctions occur, you will definitely get to the nearest service station (subject to a low speed limit).
Problems with engine operation can occur at the most unpredictable moments, and that is why the ability to independently diagnose the error will always be useful. Having a computer or scanner with specially installed software at your disposal, you can carry out diagnostics in your own garage.
Don't forget that your car is a VAZ car. Yes, it is a more modern 8-valve injection car, but before a long trip it would still be better to “look” at a specialized service station. They have qualified staff and the most modern equipment, which will help you save a lot of time. If you think that everything is in order with your vehicle, it won’t hurt to take a fuel pump, crankshaft sensor and ignition coil on the road.
Source
Diagnostics using special equipment
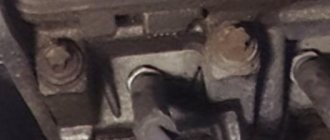
1. Diagnostic connector
2. Connecting a wire with an adapter to the diagnostic socket
3. Connecting the wire to the computer
4. Launching software for testing
The diagnostic process using special equipment consists of checking the car using a laptop. To connect to the diagnostic connector you will need a cable with an adapter. Using this cable, we connect the computer to the connector via USB output. For testing you will also need software; the power of the computer used is not important. There are many versions of different testing programs on the Internet.
Diagnostics is performed as follows:
- It is recommended to inspect the vehicle before starting the inspection. Check the volume of consumables - engine oil, brake fluid, coolant.
- Find the diagnostic connector and connect your laptop to it. If you have a special scanner, then that's even better. But since finding a scanner is not so easy, and buying one is not cheap, you can use a laptop. Before testing can begin, the ignition must be activated. There is no need to start the power unit.
- After connection, the testing utility starts. The software interface may vary. When you launch the software, graphs or a list of parameters with numbers may appear. This information will allow you to draw conclusions about the operation of the power unit.
- The scan starts. Fault codes will appear on the laptop screen. To decrypt, use the information provided in this article. We could not describe all the codes, but we deciphered those that occur most often. Usually, when downloading a program to a computer, users are provided with a separate file describing the faults.
- After decryption, the problem is repaired.
Instructions for performing diagnostics via a laptop with your own hands
For diagnostics you will need a laptop and a diagnostic adapter. The laptop can be of any power, it does not matter for diagnosis. The adapter is universal and suitable for all VAZ models (the author of the video is KV Avtoservis).
There may be a mismatch between the diagnostic pads. In this case, you can buy an adapter. A diagnostic program is supplied with the adapter, but the software can be downloaded from the Internet on specialized sites. They have the same set of functions, but may differ in unique features.
When connecting a laptop, the ignition must be turned off.
One end of the adapter is inserted into the DR, and the other directly into the USB port of the laptop. After connecting the adapter, turn on the ignition. At the next stage, we launch the program and begin diagnostic work. When the program starts, the computer connects to the electronic control unit.
The interface will depend on the downloaded program. These can be lists with indicators or graphs with values. Based on these readings, we can draw the first conclusions about the operation of the engine and the main systems of the car.
Diagnostic Tool Interface
When a list of detected errors is displayed, their decryption can be found in the test file, which is usually attached to the program. It deciphers all the errors that may appear during malfunctions.
Having deciphered the codes of detected errors, you should begin to eliminate them. First of all, it is worth checking the sensors, since the correctness of the readings and operation of the ECU depends on their serviceability. A sensor malfunction may cause the error to appear. For more accurate diagnostics, additional checks of machine components may be necessary. After fixing all the problems, be sure to run a test to make sure everything is working without errors.
Don't forget that all data is stored in the microcontroller's memory. Therefore, before a new check, they need to be reset.
To do this, turn off the ignition and turn off the diagnostic equipment. To reset data from the microcontroller, simply disconnect the negative terminal on the battery. Then the process is repeated: the laptop is connected and diagnostics are repeated. The process is repeated until all errors are eliminated.
VAZ 2114 malfunctions: error codes
The presence of an on-board computer on a car allows you to identify faults in a timely manner and take appropriate measures before the breakdown becomes serious and expensive to fix.
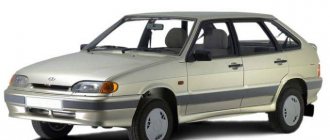
VAZ 2114 car
The main thing here is to be able to correctly read error codes when diagnosing a VAZ 2114. Not everyone understands what exactly a car indicates by issuing certain designations. Therefore, today we will try to talk about the most common error codes and note what each of them means.
Self-diagnosis
Let us immediately note that the result of do-it-yourself diagnostics in your own garage and at specialized car services is somewhat different. Service stations have at their disposal all the necessary equipment, with the help of which the maximum number of error codes is calculated from the on-board computer of your car.
On-board computer
Self-diagnosis with your own hands will allow you to achieve a certain positive result. But alas, it is possible to detect all errors in extremely rare cases.
Nuances of self-diagnosis
Indications for self-diagnosis and contacting specialized service stations will be different, error codes are also displayed differently. Therefore, today we will consider two options.
It is not at all necessary to use the on-board computer to diagnose problems with the car. Not all VAZ 2114 owners know about this method, so we will definitely tell you about it.
It consists of the following steps.
- Sit in the driver's seat and hold down the odometer button.
- Then turn the ignition key to the first position.
- Release the odometer button. After this, the arrows will start moving.
- Press the button again and turn it off. This will allow you to see which firmware version is used in your case.
- Press and release the button a third time. So you will see codes indicating the presence of certain errors in the operation of the car.
Let's now look at the most popular errors that occur during such diagnostics and figure out what the code means. Even without an on-board computer, you can detect faults on the VAZ 2114 using the odometer codes.
We suggest you familiarize yourself with them in the table.
| Code | Description |
| 1 | Problems with the microprocessor |
| 2 | There are problems in the fuel level indicator sensor circuit in the tank. |
| 4 | The power supply voltage is too high |
| 8 | Voltage too low |
| 13 | There is no signal from the oxygen sensor |
| 14 | Coolant temperature sensor signal level is very high |
| 15 | Coolant temperature sensor signal level is very low |
| 16 | The voltage in the on-board network is too high |
| 17 | Very low voltage in the on-board network |
| 19 | The crankshaft position sensor is sending an incorrect signal. |
| 24 | Vehicle speed sensor is faulty |
| 41 | Phase sensor sends incorrect signals |
| 51 | Problems detected with the persistent storage device |
| 52 | Problems detected with the random access memory device |
| 53 | CO potentiometer does not work |
| 61 | Lambda probe sensor does not work |
Plus, all fault codes will be stored in memory until you manually reset them. To do this, you need to disconnect the terminals from the battery while keeping the ignition on, wait a few seconds and connect it back. Don’t forget to do this, especially if you are going to go to a service station for diagnostics. They will find these errors and will eliminate them, although in fact you have already done everything yourself before. Pay extra money? No, it's not worth it.
How to reset errors yourself
Video on how to reset the error code on a VAZ 2114, 2115
After checking the components and repairing, it is necessary to reset the errors. In principle, this can be done at any time, even without checking, if you want to make sure that it was not erroneous.
To reset the self-diagnosis codes of the on-board computer on the VAZ 2114 panel, after displaying the firmware version and the code itself, press the button again and hold for 4-5 seconds. As a result of resetting the error codes, “0” will be displayed on the VAZ 2114 injector.
Such a system for checking error codes is available not only on VAZ 2113, 2114, 2115, but also on models 2110, 2111, 2112, Priora and Kalina. The principle of checking and resetting errors is similar.
Source