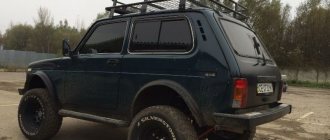
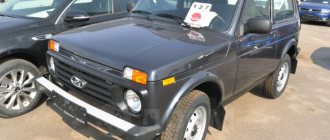
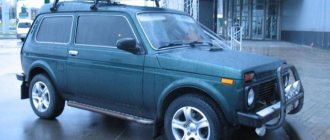
VAZ 2121
Among the models of the domestic automobile industry, the VAZ 2121 stands out somewhat from the general range not only due to its excellent cross-country ability, all-wheel drive and monocoque body, but also due to the fact that the Niva is the first independent VAZ development to reach serial production. The car began serial production at the beginning of 1977 and immediately began to enjoy great success among the population not only in the Soviet Union, and later in Russia, but also in many countries both near and far abroad. In its class, an SUV from Russia is considered the most successful model. It found its consumers in France, Portugal, Spain and Canada. And although Niva cars equipped with the French Peugeot diesel engine are in great demand, cars with the domestic 1.6 are also selling quite well.
Body replacement
In Russia, several companies are engaged in the sale of metal bodies for domestic cars, either assembled or in separate parts. Having familiarized yourself with the assortment of these products, you can see that such stores offer a wide range of colors, which allows the car owner to quickly choose the appropriate option.
You may be interested in: Design, diagnostics and repair of the rear suspension of the VAZ-2106
As a rule, bodies intended for Niva cars, equipped with three doors, were painted at the factory in several standard colors. All of them are listed below:
- Snow white (factory code 202).
- Nessie (factory code 368).
- Jasper (factory code 140).
- Baltika (factory code 420).
- Glacial (factory code 221).
- Nice (paint serial number - 328).
- Snow Queen (paint serial number – 690).
- Quartz (paint serial number – 630).
- White cloud (paint serial number – 240).
You may be interested in: Hyundai Porter: body dimensions, technical specifications, engine, photo
The VAZ-2121 car with five doors was painted at the factory in three color options:
Replacement
ATTENTION! A completely simple way to reduce fuel consumption has been found! Don't believe me? An auto mechanic with 15 years of experience also didn’t believe it until he tried it. And now he saves 35,000 rubles a year on gasoline! Read more"
Today, various companies offer owners of universal all-terrain vehicles to purchase assembled or metal bodies. Accordingly, the price will differ. In addition, a wide selection of colors allows each owner to choose their favorite option.
For example, an assembled body on a Niva will cost about 300 thousand rubles, but a metal frame will cost almost half as much.
Niva bodies are sold in the following colors.
| Colors of VAZ Lada 4x4 3-door | |
| Color | Code |
| Jasper | 140 |
| Snow white | 202 |
| Glacial | 221 |
| Nessie | 368 |
| Baltika | 420 |
| Color range of VAZ Lada 4x4 5-door | |
| Color | Code |
| White cloud | 240 |
| Nice | 328 |
| Quartz | 630 |
| The Snow Queen | 690 |
Getting rid of scratches
Minor rust and blistered paint that appears on a car is not a reason to completely replace the body. In this case, the operation to restore the Niva can be easily carried out independently, while saving a decent amount of your own funds.
For example, scratches can be removed by polishing the paintwork. To carry out this operation, various grinding compounds and special materials are usually used. With their help, you can easily and quickly remove the top layer of paint, thereby smoothing out shabby areas on the body. Complete elimination of scratches is only possible if the outer layer of paintwork is not severely damaged. It is also not recommended to remove too much paint when restoring the Niva -2121 with your own hands.
Geometry restoration
You may be interested in: Air-cooled engine: operating principle, advantages and disadvantages
If the body is severely damaged as a result of a vehicle collision, craftsmen have to restore the car to its former geometry. Metal deformation also occurs as a result of sudden temperature changes or obsolescence of the structure.
Active operation, as well as the use of a car in harsh natural conditions, will inevitably lead to rapid wear and tear of the body of personal transport. Poor quality road surfaces often lead to excessive tearing of bolted and welded joints, reducing the life of the vehicle.
If it is necessary to restore an old Niva and eliminate severe damage to its body, it will be necessary to diagnose and restore the geometry of the car using high-tech equipment in a car service center. It is impossible to perform such an operation correctly on your own in a garage.
Born again! (report on the restoration of VAZ-21213 NIVA)
- Go to page:
Born again! (report on the restoration of VAZ-21213 NIVA)
Post by fast » Mar 30, 2006 03:12
It is no longer a secret to many that for a whole year I have been restoring the VAZ-21213 NIVA, which came to me in an extremely “killed” condition! This car, manufactured in 1995, has seen a lot during its existence... Despite its rather good appearance, the car has hardly been driven lately, because... there were serious problems with the engine. The fact is that one day, in one of the car repair shops, her engine was bored out. But they did it in a “clumsy” way. As a result, after several thousand kilometers traveled, the engine suddenly and very noticeably lost traction... In addition, the build quality of the car at the factory was not very good. But it was the intervention of some “specialists” from the car service over the past couple of years that became the decisive moment on the way to the end of life for this car.
In this topic, I would like to briefly talk about the restoration work carried out on this machine at the moment. I want to immediately note that I do not pursue the goal of making this car a “SUPER-SUV ROAD”. However, after a preliminary assessment, even at the beginning of the work, it was clear that a simple repair would not suit her... The fact is that she was no longer drivable, and repairs would have been so expensive that she could have simply bought a newer used Niva (albeit in not very good condition, but she would drive). It was decided not only to restore some parts, but also to make a lot of changes, including to the design of the car. The goal is to create a good, RELIABLE, durable and, most importantly, QUALITY car for going out into nature (fishing, hunting and just walking...)
Types of body repair
If after diagnostics it turns out that only some parts of the body have been deformed, the Niva is restored by tapping or squeezing out the damaged parts of the car. This work is carried out in several ways:
Body care
You may be interested in: Replacing the cabin filter of Lada-Kalina
To extend the life of the car body and avoid costly repairs, a responsible vehicle owner carries out a number of preventative measures. Such do-it-yourself Niva restoration measures include:
Why should the body be strengthened?
The procedure for restoring a Niva-Chevrolet, like other car models, is not an easy task for a beginner in this matter. Such work takes a lot of time and effort, but the result will extend the life of the car for several years, keeping your personal vehicle in good condition.
First of all, to restore the Niva’s body, as well as to modernize it, the side members on an old car are strengthened. To do this, steel sheets up to 5 mm thick are welded onto them. At the same time as this work, the suspension elements are being strengthened. It is especially important to strengthen the front side members in the following cases:
Body reinforcement 2121
To protect himself from problems, a caring driver uses preventative measures. These, in addition to anti-gravity treatment and other procedures, include strengthening.
All operations related to strengthening and restoration of the car body are very complex, take a lot of effort and time, but give an excellent result.
When it comes to upgrading the body, strengthening the side members comes first. It is often carried out using a steel sheet up to 3-4 mm thick. At the same time, the suspension fasteners are strengthened.
Let us immediately note that strengthening the side members in front is more important than ever if stiffer shock absorbers, springs and larger wheels are installed on the Niva. It is also recommended to do this after installing power bumpers and winches.
Algorithm for strengthening the side members on 2121
Here's what we recommend:
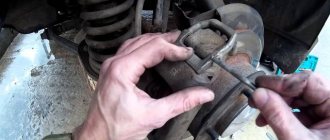
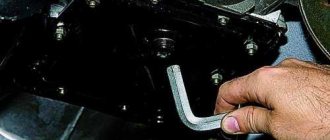
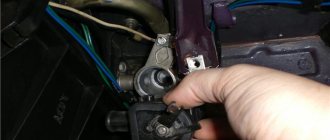
- First you need to provide access to the spar. To do this, the car is driven onto an overpass or lift, and the wheel is dismantled.
- Next, remove the caliper and unscrew the clamp from the top of the support.
- A knot is knocked out under the lever by hitting a hammer or using a machine.
- The shock absorber fasteners (upper and lower) become loose.
- The brake system cylinder is hung on the hoses.
- The upper arm is removed, as well as the cup and upper bump stop.
- The gearbox and steering pendulum are released.
This provides access to the spar:
- Next, the condition of the space for the shock absorbers is checked. If the part is not rusted, then it should be removed.
Note. In order to dismantle the “house” without any problems, you should drill the weld points. The drill is first loaded with a 5-number drill, and marks are made. Then, the weld spots are finally drilled out using a 10-number drill. And one more thing: you can see all the weld points only after a good cleaning of the metal.
- The “house” is removed, and then the entire surface of the spar is cleaned again for the purpose of diagnostics for possible minor defects.
- Thorough cleaning again, because it is the basis of everything.
It's time to make the overlay:
- The part is cut out according to a pattern from cardboard. Everything is precisely marked on paper, including the locations of bolts and fasteners.
- After the layout is ready, you need to put a sheet of 3 mm iron on it and cut it out with a grinder.
Note. It is very important to follow the rule: measure seven times. In addition, the lining must fit tightly to the spar.
- The required holes are drilled on the part and the spar.
- The cover fits onto the bolts and is firmly fixed.
- Then the part is welded semi-automatically around the entire perimeter.
- The “house” is put in place and also welded.
At the final stage of work, it is necessary to cover all working surfaces with anti-corrosion agent. In this case, mastic is ideal, as it dries in one day.
How to strengthen the spars
First of all, to restore the Niva-2121, the side members are strengthened. To carry out such an operation? you should prepare, namely:
Cars
They asked me to patch up a couple of these holes in the NIVA I had just bought for 130 thousand. The owner dismantled the interior to treat it with anti-corrosion agents, and there was a surprise.
After cleaning the metal from the resin that filled the entire car, small holes began to turn into these huge patches.
Trunk, transverse spar area. All the rot was cut out, the spar was cleaned (it turned out to be alive, but full of dirt) and this patch was installed.
Manufacturing of the spar amplifier
In order to correctly carry out the restoration process of the Niva 21213, an amplifier for the spar should be made. To do this, you first need to cut out a pattern from thick cardboard. Next, you need to mark the points on the paper where the bolts and clamps will be screwed in. After this, you need to cut a three-millimeter sheet of steel according to the layout using a grinder.
Next, you need to drill holes to attach the new part to the car body. During fastening, you should make sure that the piece of metal fits tightly to the spar; only after that can it be secured with bolted connections and welding around the entire perimeter of the part.
After completely assembling the car, it is necessary to coat all cleaned metal parts of your VAZ-2121 with anticorrosive. As a rule, such a coating dries within 24 hours. After this operation, the machine is ready for further operation.
Do-it-yourself Niva body repair video
Among the models of the domestic automobile industry, the VAZ 2121 stands out somewhat from the general range not only due to its excellent cross-country ability, all-wheel drive and monocoque body, but also due to the fact that the Niva is the first independent VAZ development to reach serial production. The car began serial production at the beginning of 1977 and immediately began to enjoy great success among the population not only in the Soviet Union, and later in Russia, but also in many countries both near and far abroad. In its class, an SUV from Russia is considered the most successful model. It found its consumers in France, Portugal, Spain and Canada. And although Niva cars equipped with the French Peugeot diesel engine are in great demand, cars with the domestic 1.6 are also selling quite well.
Strengthening other areas of the car
The metal body of the Niva car has several more places that need strengthening over time, since they can no longer withstand increased loads during operation of this vehicle. All of them are listed below:
Lada 4×4 3D Khokhlushka › Logbook › It’s not a cheap pleasure to restore a Nivas)))
I want to dispel the myth that restoring Niva costs pennies!
Many people say what the hell, I’ll now take a dead Niva, throw thirty into it and I’ll have the same thing! I assure you brothers that this is a myth.
Of course, you can do everything with your own hands, like many Drayvovites, but... not everyone’s handles are designed for repairs. At least mine are definitely not sharpened. Yes, there is practically no time. I don't do most of the work myself.
For the first time in my life, I decided to calculate all the costs of restoring the car. To dispel this myth. Every bolt was appreciated. And this is the picture I got. I am posting an almost complete list of work and spare parts that I had to spend money on))))