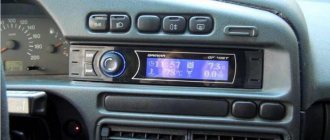
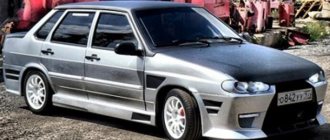
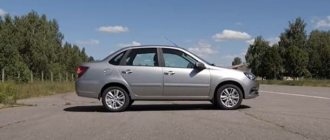
The one hundred and fourteenth car model is AvtoVAZ’s own development. The car belongs to the Samara-2 family and is the result of a deep restyling of the VAZ 2109. The 2114 has new headlights, a bumper, a hood, and a spoiler that looks very impressive. And in the cabin, a European instrument panel and an on-board computer appeared, allowing you to find out the error codes of the VAZ 2114. From the point of view of maintainability (compared to the nine), the car has become more complicated: diagnosing the VAZ 2114 and self-repairing are difficult. The same can be said about the repair of the VAZ 21140, which was the original model in the Samara-2 line.
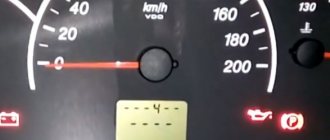
For the VAZ 2114, the injector was first supplied as standard; an 8-valve engine with distributed fuel injection was installed on the car. And since 2007, they developed a new engine for Euro-4, at the same time an electronic gas pedal appeared, and a speedometer and tachometer were installed. Fault codes from the on-board computer began to be transmitted to the dashboard. Thanks to this, preliminary diagnostics of the VAZ 2114 became possible.
In 2009, a 16-valve version of the engine appeared. The engines began to be equipped with electronic control. There were even examples equipped with an exhaust system with a neutralizer. But in 2013, the VAZ 2114 was removed from the assembly line.
Repair at the service center
Repairing a VAZ 2114 with your own hands is a difficult task that requires certain knowledge and skills. The car manufacturer, in the official document “VAZ 2114 Operating Manual,” urges car owners not to try to fix malfunctions on their own every time. Only at the service center will technicians be able to connect the diagnostic connector and read the VAZ 2114 error codes.
The error codes from the dashboard do not match the professional ones. The fault code for the coolant temperature sensor on the dashboard is 15, and on a professional computer it is 0115. Before going to the service, you should read the fault codes from the car’s on-board computer and compare them with professional ones. To read the codes on the dashboard, do the following:
- Without inserting the key into the ignition, press and hold the odometer reset button;
- insert the key into the lock, turn it to position 1, release the button, at this moment testing of the devices will begin;
- Press and release the button again - the software version will be displayed on the monitor;
- Press and release the odometer button again, then a fault code will appear. If two errors occur, the sum of their codes is reflected.
A more in-depth diagnosis will be carried out by professionals. The manufacturer leaves little for the car owner to do independently. Judging by the typical set of spare parts, these are only two points (the repair manual describes them): installing a spare wheel and replacing fuses.
For a VAZ 2114 car, repairs and maintenance are often best performed at a service facility.
Cost of the kit and work with it in the service
The service station carries out the full range of work to restore the body. You can weld the bottom of a VAZ 2115, the price of work without the cost of dismantling, materials and components starts from 15,000 rubles. It is also permissible to change rotten jacks, sills and replace part of the bottom, the cost of work is up to 10,000 rubles.
Repairing the underbody, like any other part of the body, is classified as labor-intensive and complex. The cost of the repair kit must be added to the cost of the work.
- original floor from AvtoVAZ - from 3,000 rubles;
- bottom with thresholds ─ from 5,000 rubles;
- sound insulation ─ from 500 rubles per 1 sq. meter;
- anticorrosive ─ from 600 rubles per 1 kg.
Simple calculations show that self-repair will cost three to four times less, but only if the driver understands the complexity of the work and has minimal skills in using electric welding and working with metal.
Spare wheel installation
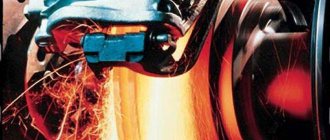
Modern tubeless tires allow you to drive for quite a long time with a small puncture. And if during your daily morning inspection it turns out that the tire is somewhat flat, do not rush to get the spare tire and jack. It is quite possible that by pumping up the tire you will be able to get to the nearest tire shop. There they will install a spare tire on the car, repair the broken wheel, balance it, and check the wheel alignment.
If there is a serious breakdown on the road, further operation of the car is impossible without installing a spare wheel. Smoothly stop the car on the side of the road, turn on the hazard warning lights, and put up a warning triangle. The procedure, as described in the repair manual, is as follows:
- Stop the engine, engage first gear, and put the car on the parking brake. Place chocks under the wheels on the good side.
- Place the jack under the thrust bracket. Raise the car slightly and use a wheel wrench to remove all four wheel bolts.
- Raise the car until the broken wheel comes off the road, remove the wheel bolts, and remove the wheel.
- Install the spare wheel, screw in (without fully tightening) the wheel bolts.
- Lower the car, tighten the bolts, remove the jack.
After this, you should go straight to the tire shop. It is unlikely that there is another spare tire in the trunk, and in the event of a new breakdown, the driver's position will be difficult.
Final processing
Primer, anti-corrosion treatment, installation of new sound insulation and installation of the interior with electrical connections are the final stage of work on the bottom. For external treatment, you will need bitumen mastic or anticorrosive Body 930. The product has a budget cost and is highly resistant. The mastic forms a dense but elastic protective layer that does not allow moisture to pass through and protects the iron.
Final work step by step:
- Clean weld seams.
- Treat welding areas with a primer containing zinc.
- Cover the inner surface with mastic and install new sound insulation.
Rotten metal destroys the skimmer sheets in 3-5 months, so if the car needs the bottom to be overcooked, the sound insulation definitely needs to be changed.
- Treat the outer part of the bottom with bitumen anticorrosive. You can use paraffin aerosols; it is convenient to reach the hidden cavities of the bottom with an anticorrosive agent.
During operation, during routine inspection, it is recommended to periodically remove the plugs in the parts and pour the oil composition into the internal pockets.
- Install interior, doors. Connect the electrical.
Replacing fuses on a VAZ 2114
An automobile fuse is a protective device that prevents the failure of electrical components of a car. Models of the Samara-2 family (as well as other AvtoVAZ models) use low-voltage fuses. They are a housing with two contacts connected to each other by a protective element made of a metal alloy.
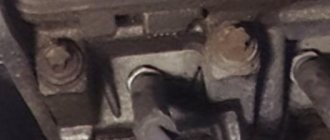
For VAZ 2114 fuses, repairs include their replacement. The fusible elements are clearly visible, and the fact of fuse failure is easily determined visually. This element melts and is destroyed when the limit value of the passing current is exceeded. Depending on this limit value, fuses vary in color.
| Limit value of passing current. | Color. |
| 5 A. | Orange. |
| 10 A. | Red. |
| 20 A. | Yellow. |
The VAZ 2114 relay and fuse box is located in the engine compartment. It is located directly under the windshield on the left in the direction of travel of the car. The operating instructions state that on the cover of the unit (on the inside) there is a diagram of the location of the fuses. Using it you can determine the location of the required protective element. In the upper right corner of the block there is a bracket for special tweezers. These tweezers make it easy to remove and install fuses.
After replacing a burnt-out element, do not forget to stop by a workshop so that the cause of the problem can be determined and eliminated.
What is needed for replacement
If, during checking the condition of the timing belt, it turned out that replacing the VAZ 2114 valve is still necessary, then to carry out the operation itself you will need:
- a set of new valves (exhaust and intake);
- valve seats;
- guide bushings;
- Screwdriver Set;
- set of sockets and keys;
- valve stem seals;
- valve desiccant;
- oil seal remover.
Valves VAZ 2114
In some cases, it may also be necessary to purchase and install new fasteners (if they are found to be damaged).
Additional spare parts for the trip
If you plan to travel a long distance (more than 500 km), experienced motorists recommend taking with you not only a spare tire and fuses, but also having:
- lamps for headlights, parking lights and brake lights, rear lights. Driving with burnt out lamps is dangerous (especially in the dark and in poor visibility);
- spark plug set. One of the common causes of engine failure or abnormal operation is flooded spark plugs;
- timing belt;
- set of high-voltage wires.
It is better to buy new and original spare parts, and a VAZ 2114 dismantling shop is sometimes not the best place to purchase them. On a long trip you should also take a supply of consumable fluids (oil, antifreeze, antifreeze), cigarette lighter wires and a tow rope. And if maintenance is carried out in a timely manner, this will minimize the risk of breakdown of any nature.
We recommend reading:
- Repairing the air flow sensor VAZ 2114
- Injectors for VAZ 2114
- We make a spoiler for the VAZ 2114
- Depreciation of the gearbox of a VAZ 2114 car
- Generator VAZ 2114: repair stages
- Adding an amplifier to the steering rack of a VAZ 2114
When repairs are required
For all VAZ models, the body was made of black or low-carbon steel of class 08Yu, 08KP. The parts were not galvanized, but were coated with a polymer anti-corrosion composition; the film protected the bottom from moisture for up to 6 months, then natural oxidation processes began. After the purchase, drivers had to carry out thorough anti-corrosion treatment of the metal.
Repair or complete over-welding of the bottom of the VAZ 2114 will be required in the following cases:
- It is impossible to jack up the car; the jacks fall through.
- The floor in the car became uneven, the metal sagged from corrosion.
- The driver's seat cannot be adjusted; when the doors are closed, increased gaps appear.
- Noticeable areas of corrosion on the sills and wheel arches. If you lift the car onto an overpass and check it with an awl, the anti-corrosion layer from the bottom will fall off, and traces of rust will be clearly visible.
How is the rear suspension disassembled?
To repair the rear suspension of a VAZ 2114, you need to know how to disassemble it correctly. We will tell you how to do this correctly below.
To begin with, the car must be placed above the inspection hole or raised using a lift. In the trunk, you need to disconnect the rear and side trim, as well as the seat belt retractor. Also here you need to find the fastenings of the struts to the car body and loosen them, but do not unscrew them completely.
Then you need to loosen the rear wheel mounts by removing the hubcaps and completely unscrewing the wheels. The machine must stand on reliable jacks - one on each side.
Front pillar
Remove the brake system cables. They should be removed as an assembly by disconnecting the cable fastenings to the chassis arms and body. After this, you need to remove the brake drums. Remove the ends from the manual drive levers and disconnect the flanges from the brake flaps. Before removing brake hoses and pipes, be careful not to leak. Next, remove the elastic drive lever, which is necessary for the operation of the brake pressure regulator. To remove the lever, disconnect it from the bracket by removing the lock washer, and then remove the shackle from the wheel axle.
Disconnect the shock absorbers by removing the rubber cushions, body mounting nuts and washer. Next, support the front wheelbase and lift the rear. Having done this, you can remove the compression stroke buffers, shock absorber covers and springs.
Once the body mount brackets are detached, you can remove the entire beam. In front of you will be a rear suspension with risers. If necessary, disassemble the shock absorber - this will not cause any special problems.
To remove the shock-absorbing spring, you will need special ties. Without them, you could be seriously injured because the spring is held in place under high pressure.
Rear suspension design
In the picture, the numbers indicate the main elements of the rear suspension of the VAZ 2114, which usually fail on bad roads.
Rear suspension diagram
- Number 1 in the picture shows a rubber-metal hinge - the main attachment to the car body.
- Bracket for attaching the rear suspension arm to the body.
- Shock absorber protective cover.
- A buffer that takes the load during compression.
- Casing cover.
- Main support washer.
- Cushion for shock absorption.
- Spacer sleeve.
- Shock absorber, also called strut.
- Insulation gasket.
- Spring.
- Connecting beam for levers.
- Beam lever.
- The bracket that secures the rack structure.
- Flange.
- Lever type bushing.
The beam design includes a connector and a pair of trailing arms. They are indicated in the diagram by numbers 12 and 13. The parts are connected by welding. In the rear part, flanges numbered 15 are attached to the levers, as well as brackets for fixing the shock absorbers.
The rear wheel axles with brake blocks are screwed to the flanges. There are bushings on the rear suspension arms at the front. They are held on rubber-metal hinges. One end of the spring rests on the support through a rubber gasket, and the other on the shock-absorbing cup.
Replacing parts or the entire bottom
Repairs begin with inspection and repair of thresholds. Rotting of the central part of the body begins with corrosion of the sills and wheel arches, so if rust has destroyed parts of the bottom by 30%, then we can confidently say that the sill is rotten by 60% and requires complete replacement. The bottom of the VAZ 2114 consists of the following elements:
- underbody panels under the seats;
- threshold extension;
- crossbars;
- side member amplifier;
- space for a jack or jacks;
- central support platform;
After cleaning the underbody from anticorrosion, the jacks, side members and panels under the feet of the driver and passenger are inspected. These are the most vulnerable parts. If the general condition is satisfactory, then it is recommended to cut out the problem areas and install the original floor parts from the repair kit. The process of partial overcooking of the bottom in steps:
- Drill out the spot welding points and cut out the rusted metal with a chisel.
- Clean the edge of the future weld with a grinder and treat with a degreaser.
- Attach the original part or the cut out patch. The metal patch should protrude 1 cm beyond the edges of the trim; welding will be carried out overlapping.
- Spot weld the edge of the metal. Weld the patch in increments of 2 cm welding, 4 cm skip.
It is not recommended to weld a one-piece sealed seam; when the engine vibrates, the body experiences torsional loads, and the solid seam may crack.
- Clean the weld seam.
- Treat with primer, apply a layer of oil anticorrosive or bitumen mastic under the sound insulation layer.
- After complete cleaning, treat the outer part of the bottom with bitumen mastic.