Correction of the angle in the closed state of the contacts.
So, if our car has a transistor or classic ignition system, we can start setting it up.
- First of all, remove the distributor cover and clean the distributor contacts with a file to ensure a tighter fit between them (important for a classic ignition system).
- After which we need to set the maximum distance between the contacts, a special crankshaft wrench will help us with this; we turn the crankshaft with it until there is the greatest distance between them. If there is no key, you need to enable
4th gear and push the car to the desired position.
- Unscrew the screw that secures the contact group to the plate.
- Using a 0.4mm probe, we adjust the contact group so that it fits flush with the contacts. Then tighten the screw and fix the position of the contacts.
- Now we check the position of the contacts using two probes 0.35mm and 0.45mm. If we did everything correctly, the smaller diameter probe should pass freely while the larger probe should not pass at all.
This operation helped us set the required gap of the distributor contacts. Critical condition when contacts are closed. New distributors have a precise angle. Many people advise checking the angle after adjustment; it should be in the range of 52o-58o degrees. If we succeeded, we proceed to the next stage.
Distributor malfunctions, their symptoms and causes
Taking into account the fact that the designs of contact and non-contact type distributors are almost the same, their malfunctions are also identical. The most common breakdowns of the breaker-distributor include:
- failure of the cover contacts;
- burning or wear of the runner;
- changing the distance between the breaker contacts (only for contact distributors);
- failure of the Hall sensor (only for contactless devices);
- capacitor failure;
- Damage or wear of the movable plate bearing.
Let's look at the malfunctions in more detail in the context of their symptoms and causes.
Failure of cover contacts
Considering that the cover contacts are made of relatively soft materials, wear is inevitable. In addition, they often burn out, because a current of several tens of thousands of volts passes through them.
The more wear on the contacts, the greater the likelihood of them burning.
Signs of wear or burning of the cover contacts are:
- “triple” of the power plant;
- complicated engine starting;
- reduction in power characteristics;
- unstable idle.
Burnt or worn contact of the slider
The situation is similar with the slider. And although its dispensing contact is made of metal, it too wears out over time. Wear leads to an increase in the gap between the contacts of the slider and the cover, which, in turn, provokes the formation of an electric spark. As a result, we observe the same symptoms of engine malfunction.
The runner is also subject to wear and tear over time.
Changing the gap between contacts
The intercontact gap in the VAZ 2101 distributor breaker should be 0.35–0.45 mm. If it goes out of this range, malfunctions occur in the ignition system, which affects the operation of the power unit: the engine does not develop the required power, the car jerks, and fuel consumption increases. Problems with gap in the breaker occur quite often. Owners of cars with a contact ignition system have to adjust the contacts at least once a month. The main reason for such problems is the constant mechanical stress to which the breaker is exposed.
When changing the set gap, the sparking process is disrupted
Hall sensor failure
If problems arise with the electromagnetic sensor, the engine also begins to experience interruptions: it starts with difficulty, periodically stalls, the car jerks during acceleration, and the speed fluctuates. If the sensor breaks down altogether, you are unlikely to be able to start the engine. It rarely fails. The main sign of its “death” is the lack of voltage on the central high voltage wire coming out of the ignition coil.
If the sensor fails, the engine will not start
Capacitor failure
As for the capacitor, it also rarely fails. But when this happens, the breaker contacts begin to burn. You already know how it ends.
If the capacitor is broken, the breaker contacts burn out
Bearing failure
The bearing serves to ensure uniform rotation of the movable plate around the shaft. If it malfunctions (biting, jamming, backlash), the ignition timing regulators will not work. This can cause detonation, increased fuel consumption, and overheating of the power plant. It is possible to determine whether the moving plate bearing is working properly only after disassembling the distributor.
If a bearing malfunctions, interruptions in regulation of the SOP occur
Installation of ignition on a VAZ 2101 by spark
To correctly install the installed breaker, you must first check the functionality of the spark plugs. If they have a strong coating and carbon deposits on them, it is pointless to install and adjust the torque. You can learn more about the reasons for the formation of soot and how to remove plaque in this article. As you know, adjustment is one of the main nuances in car maintenance.
Stages
To adjust the BSZ contactless or contact ignition, you will need a strobe light - thanks to it you can get the most accurate result. If you do not have a strobe, then adjustment is carried out by spark. So, how to install SZ?
Installation is carried out as follows:
- First of all, before turning on the ignition on the VAZ 2101, the vehicle must be warmed up to operating temperature. Start the engine and wait about 10 minutes, after which the power unit can be turned off.
- The next stage of installation will be to loosen the distributor. After the knot is loosened, the central cable should be removed from it.
- To adjust the ignition of a VAZ, the first cylinder of the engine must be placed at top dead center.
- Next, you need to turn on the car’s ignition, while holding the cable from the coil in your left hand. With your right hand, in turn, you should slightly twist the distributor clockwise. The rotation should be about 10-15 degrees, but no more. At the same time, hold the cable above the metal.
- Then, the distributor must be turned very slowly counterclockwise. This procedure is carried out until you notice a spark jumping between the cable and the metal. When the spark jumps, we can assume that the device is configured. At this point, the installation can be considered complete. If the spark still does not appear, the distributor may need to be repaired, but only diagnostics can make an accurate diagnosis. Sometimes the problem lies in the operation of the ignition coil. All further actions, including connecting the VAZ distributor and connecting wires, are carried out in the reverse order.
Contactless (electronic) ignition of VAZ 2101. Scheme. Installation procedure
Since more and more owners of VAZ 2101 and “classics” are replacing the old ignition system with a contactless (electronic) one, it would not be a bad idea to talk about it.
Explanation of the scheme:
- Non-contact sensor.
- Ignition distributor sensor.
- Spark plug.
- Switch.
- Ignition coil.
- Mounting block.
- Ignition relay.
- Ignition switch.
The following equipment will be required:
- Switch. Recommended models: K563.3734, K562.3734. The device includes 2 parts: the main unit and an additional one. Additional - serves as a reserve and can take over the tasks of the main unit or Hall sensor in the event of component failure.
- Candles (it is better to use A17 DVR or any similar option).
- Ignition coil marking 27.3705 (magnetic conductor must be open).
- Ignition distribution sensor (marking distributor 38.3706).
- Wire harness.
- High-voltage silicone wires (recommended manufacturers - TESLA or CEZAR).
You will need a set of tools:
- keys for spark plugs, 8, 10, 12, 13 millimeters;
- probe 0.7-0.8 millimeters;
- drilling equipment;
- strobe
Ignition installation steps:
Replace the original spark plugs with a new one (the gap should be set to 0.7-0.8 millimeters). Install the switch. The optimal location of the VAZ 2101 is the inner side wall of the compartment. For installation, you will need to drill 2 holes and screw the device to the splash guard with the emergency switch facing up. It is necessary that the switch radiator has a large contact area with the surface of the body (this will increase thermal output). The switch can also be fixed with self-tapping screws. Remove the distributor cap and start turning the crankshaft until the slider turns towards the first cylinder on the distributor
It is worth paying attention that the mark on the crankshaft pulley and the middle mark on the gas distribution system cover must match. Using the key “13” you need to unscrew the distributor and remove it
Take a new distributor and remove the cap from it. Then, turning the rod, scroll it until the slider turns in the direction of the 1st cylinder (as it was on the original distributor). Install a new distributor and tighten the nut to thirteen. Next, scrolling it in a circle, relative to its axis, position it so that the central point of the Hall device coincides with the edge of the beginning of the window cutout in the screen. Then, you can tighten the nut securing the distributor to the end. Replace the ignition coil. The procedure includes the following steps: unscrew the old coil (in this case, the conductors do not need to be removed from its terminals); replace with a new part; the wiring harness is connected using connectors to the switch and ignition distribution device; the black conductor is connected to ground (the terminal must have a tight connection to the car body); the red conductor is connected to terminal “K” on a new copy of the part; the brown wire from the tachometer (disconnected from the previous part) is also connected to “K”; The blue wire and the black-blue wire (disconnected from the previous part) are connected to terminal “B”. It must be taken into account that components “K” and “B” cannot always be placed symmetrically.
Put on the distributor cap and high-voltage conductors. Check each fastener and you can try to start the car.
If you can't start, the problem may be the following:
- A non-working switch has been installed.
- The problem is in the coil.
- Defect in the Hall sensor.
- There is a break in the wiring harness, or they are badly tangled.
- The distributor is not placed correctly.
- The ignition has failed.
- High-voltage conductors are tangled.
- An error was made when installing the conductors on the coil.
- The defect is located in the spark plugs or the gap is incorrectly set.
Adjustment methods
In general, system adjustment is carried out in three stages. The first includes adjusting the angle of the closed state of the contacts. Keep in mind that it depends directly on the size of the gap in the contacts of the distributor. The second stage includes setting the angle at which the ignition advance occurs, and the third stage allows you to check and correct the results obtained
It is necessary to pay special attention to the fact that all results must be clarified directly during the ride.
Adjustment will be needed if you use a classic or transistor ignition system in your car. In order to get started, you will first need to remove the cover covering the ignition distributor of the VAZ 2106. If your VAZ 2106 has a classic system installed, then before you begin the adjustment process, clean all the supplied contacts and check the care with which they fit to each other.
If you notice any deviations, carefully put the system in order by bending the necessary places in the contacts. Next, turn the crankshaft so that the maximum permissible distance is formed between the contacts of the VAZ 2106 distributor. Then unscrew the screw that secures the group; it is located on the bearing plate. And insert the probe, the thickness of which is 0.5 mm. Move the contacts so that it can move with little force.
To rotate the crankshaft, use a special wrench. If you don't have one, start moving the car slowly with fourth gear engaged. Of course, this will require some effort, because using a starter to carry out such work becomes almost impossible. This is due to the fact that it will be quite problematic to find the optimal rotation angle.
Proceed to directly measure the angle. Remove the high voltage wire from the distributor cover and connect it to the car. Next, using the ignition coil and the 12V bulb attached to it, attach to the wire that runs directly from the distributor to the coil.
If the installation was completed correctly, when you turn on the ignition, the light will start to light, and as soon as you open the contacts, it will go out. Then start rotating the engine crankshaft so that it moves clockwise. This work must be carried out until the light goes out. Remember the position in which the slider is located and mark it somewhere for yourself.
VAZ 2106 car and its ignition switch
Unit for car ignition system
Sometimes when operating a domestic VAZ car, the following situation arises: you get into the car, insert the key into the ignition, turn the key to position I, but the indicator lights on the dashboard do not light up. If you don't notice this and try to start the engine, the starter doesn't turn or even click. Experienced drivers in such cases immediately check the serviceability of the lock.
The VAZ classic ignition switch consists of two parts: a mechanical (secret) into which the key is inserted, and a contact group to which the wires are connected. The mechanical part is inseparable from the body, and if it fails, the lock must be replaced. The contact group is removable; it is inserted into the back of the device and secured with a spring ring. Due to the simplicity of the design, the ignition switch of a VAZ 2106 car breaks down extremely rarely, almost as rarely as the engine or gearbox.
There is only one malfunction that may require replacing the VAZ classic ignition switch assembly - a breakdown in the secret part mechanism. You can perform the operation of replacing the device yourself, even in an open field, in 10 minutes.
Removing a faulty device
To remove the ignition switch of a VAZ 2106, the following tools are required:
- positive screwdriver;
- slotted screwdriver;
- awl.
Replacing the ignition unit
If you do not have an awl, to dismantle the device, you can use a long thin nail with a cross section of 1.5-2 mm with a wide head or a screwdriver to unscrew small screws from the body of mobile phones.
Before carrying out the main procedure, it is necessary to remove the negative terminal from the battery
Despite the fact that a 12-volt current is practically harmless to the health of an adult, when removing the device, you can accidentally short-circuit the wires, which, in turn, can lead to the failure of important electrical equipment of the car
Step-by-step instruction:
- To begin, insert the key into the ignition switch and turn it 90 degrees to the “0” position. This is necessary so that the pin holding the steering shaft from turning fits slightly into the secret part and does not interfere with dismantling.
- Next, you need to remove the plastic steering column cover. To do this, sequentially unscrew the 5 screws connecting the lower and upper parts of the casing.
- Then carefully lift the upper part of the steering column housing and pull it up. After this, remove both parts of the casing to the side.
- Next, find and unscrew the screws securing the device itself. There are two of them, they are located at the bottom of the switch, on the right and left.
- Then disconnect the wires from the ignition switch contacts.
- Next, find a flat slot on the bracket to the left of the device, insert an awl there and forcefully press the latch with it.
- After this, you can remove the device from the bracket by prying it with a slotted screwdriver.
If, despite all the efforts made, the switch “refuses” to come out of the bracket, it means that the latch is not pressed all the way. You need to press the latch with an awl, and then move the key slightly left and right without turning it. The latch will compress completely, and all that remains is to pull out the switch.
Replacing the contact group and installing the ignition switch
Often the cause of a malfunction of the ignition switch is the burning of the contact group. Replacing the contact group is very easy. It is enough to remove the spring ring using a slotted screwdriver, and the contact group will fall out on its own. After this, you need to insert the new part into the device body so that the groove of the contact group fits exactly onto the rod of the secret part, and secure it in the device body with a spring ring. After this, you can install the ignition switch in place.
Installation algorithm:
- First you need to insert the key into the lock and turn it to position “0”.
- Press the latch and insert the switch into the bracket.
- Then you should connect the wires correctly.
- Install the casing on the steering column, fasten the upper and lower parts of the casing with screws.
Where should the wires be attached?
The hardest part about installing the switch is connecting the ignition switch to the wiring. Lucky are those VAZ 2106 owners whose wires to the switch are connected through a special block. This block can be connected with your eyes closed.
If your car does not have a special block, a colored wiring diagram will help you correctly connect the wires to the switch.
The color of the arrows shown in the diagram corresponds to the color of the wires. Please note that the wiring of older cars may have an orange wire instead of a pink one. Good luck with the renovation!
expertVAZ.ru
INSTALLING THE IGNITION TIMING ON A VAZ 2101-VAZ 2107
Ignition timing - it plays a very important role in a car, it is thanks to it that the mixture ignites, we will explain to you in more detail if you do not understand what we are talking about, you already know that a car has pistons in its engine, and so thanks to them it works, but in order for them to go up and the engine to work, a mixture of air and gasoline is needed, this mixture then enters the car engine during its operation, and so after it gets into operation, the ignition is turned on, that is, it ignites this mixture when the pistons are at the very top and This is how the engine works, but what will happen if the ignition is installed a little earlier while the pistons are still at the lower mark, do you know? It can be assumed that the mixture will also ignite, but the engine will already work much harder, the piston cannot turn back, and when it strives upward, it will be stopped, as it were, by this earlier ignition and thus the engine will work worse, so after that when the mixture will ignite, you need to monitor and, if necessary, adjust the ignition angle so that it is as even as possible.
To set the ignition timing, you just need to take: Wrenches, as well as a special light bulb (it’s called a control) that runs on 12 volts or instead (If you have one) use a voltmeter, also don’t forget to stock up on a strobe light, thanks to it you will check whether you have adjusted the ignition timing correctly or not!
When should ignition timing be set?
If you notice that your car has started to work incorrectly, namely, the car has lost power, the speed has started to fluctuate (Especially at idle, this is noticeable), the engine has started to stall, and also to overheat strongly, although this never happened before, or to detonate (If you If you don’t know what detonation is, then study “This article”, everything is described in it), then most likely your ignition has gone wrong, it can go wrong because of your fault (This is when you climbed into the engine and did something with the distributor, removed for example), due to a faulty bearing in the distributor, the ignition timing may be off (For information on how to repair the distributor, read the article: “Repairing the distributor on a VAZ”), but install it first and if this is not enough for a long time, then you can think about repairing the distributor or replacing it with a new one (For information on how to replace the distributor, read the article: “Replacing the ignition distributor on classic cars”).
Distributor-distributor VAZ 2101
The name “distributor” itself comes from the French word trembler, which translates as vibrator, interrupter or switch. Considering that the part we are considering is an integral part of the ignition system, we can already conclude from this that it is used to interrupt the constant supply of current, or more precisely, to create an electrical impulse. The functions of the distributor also include distributing current to the spark plugs and automatically adjusting the ignition timing (IAF).
The distributor is used to create an electrical impulse in the low-voltage circuit of the ignition system, as well as to distribute high voltage across the spark plugs
What switch-distributors were used on the VAZ 2101
There are two types of distributors: contact and non-contact. Until the early 1980s, “kopeks” were equipped with contact devices of the R-125B type. A special feature of this model was the cam mechanism for interrupting the current, as well as the absence of the usual vacuum ignition timing regulator. Its function was performed by a manual octane corrector. Later, contact distributors equipped with a vacuum regulator began to be installed on the VAZ 2101. Such models were and are still produced today under catalog number 30.3706.
R-125B distributors were equipped with a manual octane corrector
In the nineties, contactless devices replaced contact devices. Their design did not differ in anything except the pulse formation mechanism. The cam mechanism, due to its unreliability, was replaced by a Hall sensor - a device whose operating principle is based on the effect of the appearance of a potential difference on a conductor placed in an electromagnetic field. Similar sensors are still used today in various automotive engine systems.
A non-contact distributor does not have a low-frequency wire to control the breaker, because an electromagnetic sensor is used to generate an electrical pulse
Let's learn about the distributor on the VAZ 2106
How correctly the ignition system is configured in your car has a strong impact on the overall performance of the car. Therefore, it is necessary to know exactly what actions will have to be taken if the VAZ 2106 distributor suddenly fails.
Distributor 30.3706 VAZ 2106.1 - ignition distributor shaft; 2 — wire for supplying current to the ignition distributor; 3 — latch for fastening the distributor cover; 4 — vacuum regulator housing; 5 - diaphragm; 6 — vacuum regulator cover; 7 — vacuum regulator rod; 8 — pipe for the vacuum hose from the carburetor; 9 — lubricating wick (filt) of the cam; 10 — support plate of the ignition timing regulator; 11 — ignition distributor rotor; 12 — side electrode with a terminal for the wire to the spark plug; 13 — ignition distributor cover; 14 — central terminal for the wire from the ignition coil; 15 — central carbon electrode with a spring; 16 — central contact of the rotor; 17 - resistor for suppressing radio interference; 18 — external contact of the rotor; 19 — driving plate of the centrifugal regulator; 20 — weight of the centrifugal ignition timing regulator; 21 — lever axis; 22 — breaker cam; 23 — breaker lever; 24 — stand with breaker contacts; 25 — breaker contacts; 26 — movable breaker plate; 27 - capacitor; 28 — ignition distributor housing; 29 — roller oil deflector clutch; 30 — bearing lock plate; 31 — bearing of the movable plate of the breaker; 32 — oiler body; 33 — screws for fastening the rack with breaker contacts; 34 — terminal clamp screw; a — groove for distinguishing ignition distributors 30.3706; b - groove for moving the stand with contacts
Contact ignition
The system consists of: high voltage coil, contact group, distributor, distributor cover, vacuum and centrifugal regulators, resistance, spark plugs and wires.
- The system works as follows. When the piston is at TDC, the coil windings open.
- At this time, high voltage is directed from the distributor cover through the wires to the spark plugs, with the help of which a spark appears in the combustion chamber and, accordingly, the working mixture ignites.
As the engine speed increases, the advance angle undergoes changes, and the centrifugal regulator changes it to the required level.
In turn, the vacuum regulator changes the angle in proportion to the vacuum in the intake manifold. Thanks to this, the engine operates with the required power at any crankshaft speed.
Ignition performance monitoring
The results of the ignition adjustment must be tested while the car is moving. Before this, pre-warm the engine and after accelerating 45-50 km/h, engage 4th gear and vigorously press the gas pedal. If the ignition is adjusted correctly, at this moment characteristic popping noises as a result of detonation should appear briefly (1-2 seconds) and immediately disappear, followed by a vigorous increase in speed. If this does not happen, turn the distributor body 1 position counterclockwise. When detonation continues for more than 2 seconds, the housing must be turned clockwise by 1 division.
Electronic ignition design
To install a contactless system on a “classic” VAZ 2107 with a carburetor, it is advisable to study how it works. This will help you correctly assemble the circuit and successfully put it into operation. BSZ for old carburetor Zhiguli models consists of the following elements:
- distributor, also known as the distributor of the ignition system;
- high-voltage coil of a new design (different from the old one, which works with mechanical contacts);
- switch responsible for system management;
- high-voltage and ordinary wires with connectors and terminals connecting the listed elements;
- spark plug.
Reference. Since the new ignition system does not have a contact group, and its operation is controlled by an electronic unit, the names “contactless” and “electronic” are equally suitable for it.
Elements of the electronic ignition system of the VAZ 2107
The new high-voltage coil has 2 windings. The primary one is made of a large cross-section conductor and is connected to the vehicle's electrical network through the ignition switch relay. The secondary winding is wound with a large number of turns of thin wire and connected by a high-voltage wire to a distributor consisting of the following parts:
- a housing with a centrally mounted shaft;
- a movable contact (the so-called slider) is fixed at the end of the shaft;
- A cover is placed on top of the body, where high-voltage large-section wires leading to the spark plugs are connected;
- there is a protrusion (cam) on the shaft, opposite which there is a Hall sensor;
- a vacuum diaphragm is attached to the side, providing ignition advance.
The switch is connected by small cross-section conductors to the distributor and coil; its task is to control the timely supply of sparks to the spark plugs.
Reference. In newer modifications of the VAZ 2107, where there is an injector instead of a carburetor, there is no separate switch. There is no need for it, since the on-board computer controller is in charge of spark generation and fuel supply.
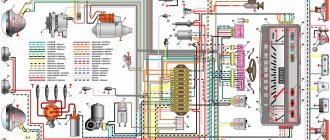
Connection diagram of contactless system elements
Setting the timing using a light bulb
The need to adjust the ignition switch circuit, in particular, the timing of the advance, arises among owners of “kopecks” quite often. Adjusting the ignition distributor is necessary in case of increased fuel consumption, decreased power of the power unit, as well as in case of detonation and ring knocking. So that the set parameter no longer bothers you, the unit must be repaired, that is, configured correctly. Please note that before making a connection and adjusting the ignition distributor, you need to make sure that the spark plugs are working, and if necessary, dismantle them and clean them, as we reported above.
Before you begin, you need to find the marks on the chain pulley and crankshaft, these marks should be cleaned. The room where you are working should have good lighting, otherwise use a flashlight. If you have doubts about whether you can do everything correctly, it is better to contact a service station.
Stages
- First of all, you are required to rotate the crankshaft so that the mark on it is aligned with the mark located on the chain drive housing. If our “penny” has a power unit with a cylinder diameter of 79 mm, the crankshaft mark should be aligned with the middle mark of the chain drive. If the cylinder diameter is 76 mm, then the mark on the crankshaft should be combined with the outermost mark on the cover. This mark allows you to install the crankshaft in the MT.
- When all the marks on the shafts are aligned, you need to disconnect the cable that goes from the coil to the breaker-distributor device. The wire is disconnected from the terminal itself on the distributor, then you will need to connect the cable from the test lamp to it, which we will use for adjustment.
- The second lamp cable will need to be connected to the positive terminal of the battery.
- Using a 13mm wrench, loosen the screw that secures the breaker-distributor device.
- Then turn the body of this assembly slightly counterclockwise. Once you've done this, start slowly turning it in the other direction. As you can see, in general the adjustment principle is quite similar to that described above.
- The mechanism body rotates until the light goes out. Having achieved this, the assembly fixing nut should be tightened. All you have to do is install the cable from the distributor in place.
In principle, connecting the lamp and setting up the unit is not a problem. The ignition system of the VAZ 2101 is designed in such a way that in any case it will need periodic adjustments, this need especially often arises for drivers at the onset of a new season. If you are faced with a problem with the lock itself, then the VAZ 2101 ignition switch connection diagram will help you replace the device and connect it.
When installing a new VAZ ignition switch, it is necessary to correctly pinout the wires. After adjustment, check the quality of the work performed - if the engine knocks a little when accelerating to 50 km/h and switching to fourth gear, this indicates that the procedure was performed correctly.
Each car owner chooses which adjustment method he likes best!
Why is adjustment needed?
Before describing the adjustment process, you must first decide why it is needed at all. The fact is that for proper engine operation, the combustible mixture in the cylinders must be ignited a little earlier than the piston reaches TDC. This is necessary so that the fuel has time to burn completely, this will ensure full power output. If the fire is a significant distance before TDC (pre-ignition), detonation combustion will occur, which can ultimately lead to significant engine damage.
But if the combustion occurs in a position where the piston has already reached TDC (late ignition), the fuel will not burn completely, the power output will be less, and in addition this will be accompanied by increased fuel consumption and unstable engine operation.
Therefore, it is necessary that the fuel ignite strictly at a certain distance from the piston approach to TDC. If we consider this from the side of the crankshaft, then ignition must occur at a certain angle of rotation before TDC. Therefore, the ignition adjustment of the VAZ-2101 is often also called the ignition timing angle.
Related link:
Description and installation of the “Lunfey” heater on a VAZ

