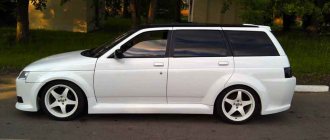
In principle, the main differences between the various modifications of the “sixes” are in the engine and gearbox, respectively, and in tuning you need to start from these parts of the car. Among all the “sixth” Zhigulis, the most powerful engine, 54.5 kW, was installed on the VAZ 21063 model - therefore, if you don’t already have it, the first thing you need to do is install it.
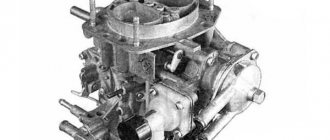
Do you already have a powerful engine? There are no limits to perfection, let's improve it! It is advisable to start modifying the fiery engine of your “six” with a carburetor: usually it is “Ozone”, but Pekar or Solex will also be good.
Cable drive from an injection classic on a carburetor VAZ 2106
By the way, do not forget that during tuning, additional electricity consumers will appear on your Zhiguli, so you will need a more powerful generator, and the battery capacity must be at least 62 Ah.
We make a turbo engine for a classic with our own hands from scrap materials (video instructions):
Expert opinion
It-Technology, Electrical power and electronics specialist
Ask questions to the “Specialist for modernization of energy generation systems”
Do-it-yourself tuning of VAZ 2106 headlights and suspension, forward flow, angel eye and spoiler, photos and videos of the modernized six Engine power increased slightly due to a change in volume, the electrical system was revised, the interior was slightly changed, the rear optics were replaced, plastic glasses appeared on the front grille dual headlights exactly like on a Fiat. Ask, I'm in touch!
Tuning the "Classics" salon
But replacing the standard Lada clock with an ammeter will not cause trouble, but will turn out to be useful. The ammeter can be taken, for example, from the 469 UAZ; it will be powered by the glove compartment lighting wiring.
It also doesn’t hurt to replace the seats - now car seats for “sixes” are produced in Izhevsk, and they are very comfortable. However, seats from the “seven” will also be suitable - if you have a modern cover with pleasant “features” - massage, heating, ventilation - the driver and front passenger seats will become especially comfortable.
By the way, about heating. As mentioned above, our winters are harsh, and the opportunity to get into a warm car in thirty-degree frost, immediately start and drive to the envy of other drivers is priceless. This means that he needs to be taken care of in advance. For this, an engine heating system (any one, for example, Webasto will do) and the installation of autonomous interior heating will be useful.
What kind of lighting do you prefer?
Built-in Chandelier
Understeering's shifter
- Place the body level, check the tire pressure - the parameters must meet the requirements specified in the operating manual.
- Remove dirt from the optics - with water or a solvent (if the dirt is persistent, a soap solution will not remove it, an organic composition will help).
- Lubricate the adjusting screws with a liquid with pronounced penetrating properties, treat the fastening points, and test the degree of reliability of fixation of each optical device (the screws are located in niches).
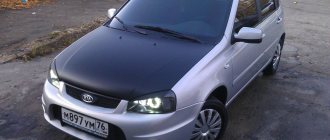
External tuning.
External tuning of a VAZ is carried out if you want to change the appearance of your six. Before starting work, check the condition of the car body.
If there are traces of rust or dents, remove them first. Otherwise, a little time will pass and your tuned car will have to be redone.
Their appearance and quality leave much to be desired. Installing halogen or xenon lamps will significantly improve lighting. When replacing lamps, do not forget about the standards. It's better to choose a good manufacturer.
Body kit
These include bumpers, rear and front, side skirts. Tuning with body kits is the most inexpensive way to change the appearance of a car.
Wheel disks
One of the elements of external tuning is replacing classic wheels with cast ones. Such discs look more aesthetically pleasing.
Forged wheels SLIK for VAZ 2106
In addition to beauty, replacing disks is utilitarian in nature:
•alloy wheels are lighter, which means the load on the suspension will be reduced;
•alloy wheels are cooled better. Some alloy wheel models have additional ventilation holes, which provide additional cooling to the brakes.
Selecting disks
The diameter of the disc can be increased by reducing the rubber profile. Here we will get a significant advantage to handling, since the car will be less shaky in corners. Before you buy new disks in a store with the planned diameter, remember that the width of the disk and its offset are also very important technical characteristics of the disk.
VAZ 2106 on fire
If these parameters are not selected correctly, it may happen that the wheel sticks out beyond the arch and “scrapes” against it on uneven roads. Agree, this is not a very pleasant phenomenon. Plus, dirt from the wheels will be widely scattered throughout the car. You will have to wash it more often.
In addition to cast wheels, there are also forged or light alloy wheels. These wheels are called forged because they are produced using the die forging method. In terms of strength and ductility, forged wheels are superior to cast wheels. And their weight is 30% less. True, their price is much higher than cast and stamped steel wheels.
Expert opinion
It-Technology, Electrical power and electronics specialist
Ask questions to the “Specialist for modernization of energy generation systems”
Do-it-yourself tuning of VAZ 2106 headlights and suspension, forward flow, angel eye and spoiler, photos and videos of the modernized six. The next working stage is changing the trim on the seats, ceiling, door panels, gear shift lever, steering wheel and other parts. Ask, I'm in touch!
Tail lights
Of course, the exterior of any car begins primarily with the frontal part. However, if you are tuning lighting fixtures on a VAZ 2107, then you must not forget about the rear of the car.
Rear lighting devices are made in rectangular headlights
American lights - tuning
The principle of operation of American headlights comes down to the following: this is a type of tuning that, when using the existing equipment on the car, allows you to perform a different connection scheme. So, the operation diagram of American headlights on a VAZ 2107 will look like this:
- When the lights are turned on, both turn signals come on.
- If one turn signal turns on, it begins to blink, and the second one begins to shine with a uniform light.
- When the turn signal is turned off, both light up again.
- When the emergency button is turned on, the turn signals blink in time with the emergency lighting system.
According to this diagram, you can connect standard lighting devices and make American headlights
That is, the main decoration of the car in this tuning option is the non-standard operation of lighting devices.
Find out more about the rules for using the rear lights of the VAZ-2107: https://bumper.guru/klassicheskie-modeli-vaz/elektrooborudovanie/zadnie-fonari-vaz-2107.html
How to make American headlights on a G7
In order for the headlights on the VAZ 2107 to start working “American style”, you will need to prepare the following materials and tools:
- two capacitors of 4700 uF and 25 volts;
- two diodes marked IN5819;
- two five-pin relays;
- two relay connectors;
- terminals for connections;
- soldering iron
Connect existing standard equipment according to the diagram.
Video: 3 ways to make American cars on a VAZ
LED light bulbs
LED lights are inexpensive and immediately improve the car's bodywork. And installation of such equipment is not considered labor-intensive. The cheapest tuning of VAZ 2107 rear lights today is the use of LEDs.
To work you will need to purchase in advance:
- LED lights themselves;
- resistors;
- wiring;
- sealant.
You will definitely need an electric drill and a drill bit to create a socket for installing the LED.
Using different colors of diodes, you can get a headlight of a wide variety of colors
Progress
During the work process, you will need to carefully calculate each subsequent step, since the slightest error in size will be noticeable: the location of each LED must be adjusted to the nearest millimeter.
- On the surface of the rear headlights, make markings for the placement of LEDs (in one line, in two, around the perimeter, etc.).
- Holes must be drilled in the headlights to accommodate the required number of LEDs.
- Place LEDs in the holes.
- According to the connection diagram, connect the negative and positive terminals to each other.
- Next, combine the nearby LEDs into groups of four with resistors. That is, every four LEDs will need to be connected to one resistor.
- Connect the resistors to the standard wiring of the VAZ 2107 lighting equipment.
Video: DIY LED taillights
Some car enthusiasts do not drill headlights, but separate transparent polycarbonate plates and insert them into the headlight housing. In this way, they manage to avoid mistakes, since in case of calculation errors they can always take another plate and drill the holes again.
The LED taillights have an attractive appearance. In addition, their service life is measured in years (depending on the manufacturer), so you don’t have to think about frequently replacing light bulbs.
The shape of the LEDs is limited only by the driver's imagination
Toning
Tinting the rear (and sometimes even the front) lights on the “Seven” is another affordable method of do-it-yourself tuning. The work does not take much time at all, and the external effect of the modifications will make everyone look after your car.
Tinting tuning involves the use of any materials: from varnish to film. For example, glass-tinting varnish can be bought at any auto store in the form of an aerosol in a can. It is important to read all the manufacturer’s instructions in advance, since different companies have different approaches to safety requirements when working with a spray can. Film is not considered a scarce material, but the cheapest way is to order it through online sites.
Headlight tinting is equally suitable for both dark and light cars
Varnish application procedure
It is necessary to work with any tinting materials in a dry and warm room. In summer, work outside is allowed, but in winter it is better to drive the car into the garage.
- Thoroughly wash the surfaces of the rear headlights and dry them.
- Cover the outline of the headlights with masking tape to prevent the material from being applied to the body parts.
- The varnish is sprayed on the surface of the headlights from a distance of about 30 centimeters (according to the manufacturer's instructions).
- After applying the first tinting layer, it is recommended to wait for the varnish to dry. Typically, one coat will have little darkening effect, so a second coat of tint may be necessary.
- Any varnish drips must be removed immediately.
- The hardened varnish on the headlights must be polished - this way all defects are eliminated and the surface acquires a mirror shine.
If necessary, varnish tinting from headlights can be easily removed with acetone.
To achieve the greatest effect, it is recommended to varnish the lantern in 2–3 layers
Film application procedure
Gluing the film on the surface of the rear headlights of the VAZ 2107 also does not involve any difficulties:
- The surfaces of lighting devices must be washed and wiped dry.
- Next, cut out the required size from the film according to the dimensions of each headlight. Leave a centimeter of film on each edge.
- Spray the surface of the lanterns with a solution of water and soap, and remove the protective layer from the film.
- Immediately apply the material to the lantern and smooth out the film.
- After fixing, use scissors to trim off the extra centimeters of film on the device.
It is recommended to choose shades that are not the darkest, as there may be problems with traffic police inspectors.
The tinting film may not be applied to the entire surface of the headlight.
Thus, tuning the headlights on a VAZ 2107 can be easily done with your own hands. It is important not to use xenon and double-row placement of identical lighting devices, as this is prohibited by law and traffic regulations.
You can make a direct-flow muffler yourself
A direct-flow muffler, in some cases, is an integral part of car tuning. You can buy a ready-made device in a store and simply mount it on your car, or you can make it yourself. To do this, prepare the following items:
•Two pipes. The diameter of one of them should be equal to the diameter of the inlet pipe of a standard muffler. The diameter of the second pipe is 200 mm. The length of the pipes is about a meter.
You will learn how to properly prepare a car for painting in our article.
DIY making
- Disassemble the muffler.
- Make holes in the first pipe with a diameter of no more than 8 mm.
- Weld a second one onto this pipe.
- Install the resulting structure into the muffler and weld it.
- Place a cylinder made of heat-protective foam onto the muffler body.
- Cover the entire structure with a stainless steel sheet and roll it.
- Make an eye for attaching the muffler to the bottom of the car.
- Reinstall the muffler.
Or maybe just change the light bulb to a powerful one?
One of the options for solving the problem of poor light on domestic cars is to install high-quality lamps. And if cars of foreign origin have quite good light bulbs installed from the factory, then our cars are equipped with something cheaper. Almost every buyer has to face this problem. Choose one of the following options:
- replacing with a new one is one of the easiest ways, but even to do this work you need to know how to properly disassemble the headlight on your car;
- gluing the working part with metallized tape from one of the well-known manufacturers is not the best option, but a temporary solution to the problem;
- glue the working part with metal foil - it is very important that the foil lies as evenly as possible, nothing prevents it from reflecting light, there is no refraction;
- painting with chrome paint is not the best option, since no paint will give the desired reflection, but in general you can partially solve the problem or drive around with restored headlights for a while;
- purchase and install mirror film, which is sold in various stores, but you need to choose the highest quality material.
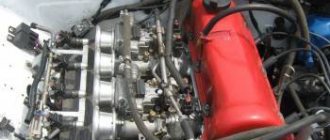
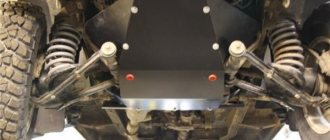
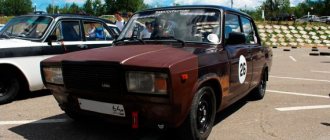
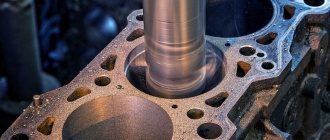
Tuning the VAZ 2106 engine
Cylinder block boring
Video: boring the engine block
Crankshaft modifications
Installing a lightweight crankshaft and flywheel reduces the moment of inertia, which has a positive effect on dynamics
Carburetor tuning
Tuning the “six” carburetor involves replacing the diffuser in the primary chamber from 3.5 to 4.5. To increase acceleration, the pump nozzle must be replaced from 30 to 40. With a more serious approach, it is possible to install several carburetors, which will require not only knowledge, but also large financial investments.
In the process of modernizing the carburetor, the diffuser in the primary chamber must be replaced from 3.5 to 4.5
Other engine modifications
Expert opinion
It-Technology, Electrical power and electronics specialist
Ask questions to the “Specialist for modernization of energy generation systems”
Do-it-yourself tuning of VAZ 2106 headlights and suspension, forward flow, angel eye and spoiler, photos and videos of the modernized six You should not install wheels with a diameter of more than 14 inches on a VAZ, since a larger diameter will reduce the car’s handling and may require modification of the wheel arches; Ask, I'm in touch!
How to adjust headlights, work progress step by step
If the headlights are not adjusted correctly, this can cause headlight problems. Correctly adjusting headlights is a very delicate process, however, it is very important and extremely necessary. Very often, it seems that small differences in the angle of the light flow are not capable of creating discomfort for the driver, even when driving on unlit roads. However, as practice shows, not only the health, but also the life of the car owner can depend on the correct setting of the headlights.
If your headlights are not adjusted correctly, you will dazzle motorists passing you, often leading to head-on collisions. Most drivers do not notice that the headlights are scattered; this can occur even with completely invisible damage to the bumper, although it is difficult to notice visually.
To check the direction of the light, just drive up to the wall in the dark. Deviations from the norm can be determined by eye. If there are discrepancies, adjustments should be made. Of course, you can contact a workshop or specialized service center, however, you can adjust the headlights yourself.
What does that require? A flat area, for example, the area in front of the garage is suitable for this. One side of this platform should rest against a vertical wall without corners or various irregularities.
On the wall you need to draw a line with chalk dividing the vehicle into two identical halves. The easiest way to do this is to drive the car close to the wall and determine the middle. Then you need to turn it back. For subsequent marking of the wall, you will need to know the distance from the lamp to the ground and from the center of the vehicle to the lamp. Now we draw another line on the wall, but five centimeters lower than the first. We measure the distance from the center of the car to the lamp and from the center of the lamp to the ground. The center of the headlight is the intersection of both lines.
Now let's move on to the adjustment. To do this, we drive the vehicle seven meters back and turn on the headlights. It is necessary that the angle of the headlights coincides with the line we drew. In addition, the place where the light spot goes up must coincide with the lines that intersect.
Radiator grille
Crankshaft modifications
The modernized optics immediately catches the eye, so special attention is paid to tuning the headlights
Expert opinion
It-Technology, Electrical power and electronics specialist
Ask questions to the “Specialist for modernization of energy generation systems”
Tuning the body of a VAZ 2106 Of course, you can put anything and anywhere if you really want, but in this case the game is not worth the candle, and the swap process will be very difficult from a technical point of view. Ask, I'm in touch!
Installation of lighting devices
Installing components on a VAZ 2107 car will not cause any particular difficulties. The procedure is as follows:
- Open the trunk and use a screwdriver to remove the canopy cover that closes it from the inside.
- Use a wrench to unscrew the fastening nuts and unplug the electrical connector.
- Carefully remove the flashlight unit from its seat and clean it of dirt with a rag.
- We install new taillights instead of the old ones and secure them, after inserting a sealing gasket.
Upon completion of the installation of the lights, we connect them and check their functionality in all modes. The installation of new lighting devices on a VAZ 2107 car that complies with regulatory documents does not require registration.
Source
Modification of the stove - installation of a pump from a GAZelle
The material was provided by a user of our forum “Olezhek”, for which many thanks to him. For a long time, the noise of the stove was disturbing and the poor airflow of the left driver's window irritated me. On the advice of members of the forum (from autolada.ru), I completely disassembled the stove and cut out the third engine support for the stove (the one that is directed towards the engine), leaving the motor on bushings (about which later I literally regretted it for a couple of months and had to disassemble it again and replaced it with a bearing one) after this alteration, the blowing into the left air duct became much stronger, with the lid closed, but I think that I still need to cut off one jumper that I didn’t cut off the first time...