Preparation
The work is best done on a flat, paved area - most typical garages will be a bit cramped. Find a suitable support in advance - hanging a car on a standard jack is dangerous, especially considering the state of the jacking sockets on cars, the youngest of which is almost ten years old. Also for work you will need:
- narrow nose pliers;
- a thin drift (at worst - a piece of 4 mm electrode or a thick nail);
- metal brush;
- powerful flat screwdriver;
- rubber bulb or large syringe.
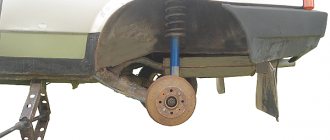
First, you need to pump out the old brake fluid from the reservoir - when the working pistons are recessed, it can overflow, and replacing it with fresh one would be quite reasonable. It is worth placing stops under the wheels and, having removed the tightened bolts, hang the car, place a support under the threshold and release it down.
Problems when braking
The parking brake is a mechanical lever-type device with a cable drive. In this case, braking is carried out only by the rear wheels. These brakes include a brake lever, cable, pads. All brake system problems can be divided into several types. Moreover, each malfunction has a list of specific causes and methods for eliminating them. Problems that arise during the operation of the braking system usually have the following manifestations:
- braking is not fast and effective enough;
- incorrect and untimely braking;
- during braking, the car drifts to the side;
- jamming of the cable when turning the handbrake on and off.
The braking process may not be fast or effective enough if brake fluid leaks. This can happen in the area where the VAZ brake cylinders are located. To fix this problem, you need to remove the broken parts and install new ones. It will be necessary to clean and dry all the pads, drums of the VAZ 2106 brake system, and the hydraulic brake drive.
Problems with braking can arise due to the accumulation of air in the depths of the VAZ system itself. If you get rid of it, the car will work perfectly. Malfunction of hoses leads to disastrous consequences, so they need to be changed on time. Rubber seals located in the brake system affect the operation of the machine, so they require timely replacement.
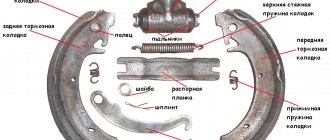
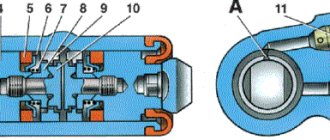
1 – cap; 2 – clamp; 3 – wheel mounting bolt; 4 – brake drum; 5 – hub; 6 – axle; 7 – brake shield; 8 – brake pad; 9 – pressure spring; 10 – emphasis; 11 – the tip of the spacer bar is long; 12 – tension spring (long); 13 – dirt-proof cover; 14 – cylinder; 15 – piston; 16 – cuff; 17 – thrust ring; 18 – air release valve; 19 – valve cap; 20 – flexible hose; 21 – lock washer; 22 – axis; 23 – adjusting nut; 24 – the tip of the spacer bar is short; 25 – expansion lever; 26 – cable end; 27 – cable spring; 28 – cable; 29 – tension spring (short); 30 – split washer; A – threaded holes for removing the drum
Another common malfunction of the brake system is incorrect and untimely braking. This can happen when the car engine is still running, and the VAZ system begins to slow down. It may occur due to the fact that the vacuum brake booster of the VAZ begins to malfunction. If its cover or seal wears out, the part is poorly secured.
If such a malfunction occurs, you need to completely replace the entire vacuum brake booster of the VAZ 2106. The lubricant may have been used quickly, so you need to add it to the vacuum seal, having first unscrewed the cap. The wheels of the vehicle may not fully release the brakes. This happens because there is no travel in the brake pedal. This in turn is caused by an incorrect position of the brake light.
To remove this malfunction, it is enough to adjust the switch correctly. It is necessary to monitor the protrusion of the bolt in the brake booster. The protrusion itself should be approximately 1.25-0.25 mm. But if the vacuum booster has stuck valves due to swollen seals and diaphragms, then it needs to be completely replaced.
Replacing the brake pads of the rear brake mechanism on a VAZ 2106 car
Replace brake pads with new ones if the thickness of the linings is equal to or less than 1.5 mm. In addition, oiling of the lining, disruption of the connection between the lining and the base, chipping and other damage to the surface of the brake lining are not allowed. If the indicated defects are present, replace the brake pad.
USEFUL TIPS Replacement of the rear brake pads should be carried out on a VAZ 2106 car with the rear wheels hanging (on a lift or a car raised on a jack and placed on supports). The manual brake lever must be lowered all the way down (the car is released). Replace rear brake pads only as a set (on both sides of the vehicle).
To replace the rear brake pads on a VAZ 2106, you will need: calipers, a hammer, a 8-mm, 17-mm wrench, a drill bit or a screwdriver, a file, two mounting blades, pliers, a wrench for wheel nuts, a jack, supports . 1. Remove the brake drum (see “Removing and installing the brake drum”). 2. Clean the brake mechanism with a brush and rag from dirt and wear products of the brake pads.
WARNING Do not use gasoline, diesel fuel or any other mineral solvents to clean brakes.
3. Disconnect the end of the upper tension spring from the front brake shoe (see “Replacing the rear brake cylinder boot”).
4. Disconnect the end of the upper tension spring from the rear brake shoe and remove the spring.
5. Press the upper cup of the front brake pad pressure spring, rotate the cup 90° and remove it.
Hold the pressure spring rod on the back of the brake shield.
6. Remove the pressure spring.
7. Remove the lower pressure spring cup.
8. Remove the pressure spring rod.
9. Remove the front brake pad while holding the lower tension spring.
10. Remove the lower tension spring.
11. Remove the spacer bar.
12. Remove the rear brake pad pressure spring in the same way as you did for the front one, and remove the pad from the brake shield.
13. Disconnect the end of the parking brake cable from the drive lever.
14. Measure the thickness of each brake pad in several places. In any place it should be at least 1.5 mm.
15. To replace the rear brake pad, unpin the parking brake lever pin.
16. Remove the washer...
18...finger of the parking brake lever. 19. Install the removed parking brake drive parts onto the new brake pad in the reverse order of removal.
NOTE If for some reason the rear brake pad pressure rod of the left brake mechanism was removed, install it through the hole in the transverse rod bracket on the rear axle beam.
This is where the hole in the crossbar bracket is located for installing the pressure spring rod (view along the crossbar).
20. Insert the rear brake shoe pressure spring rod of the left brake mechanism into the hole in the crossbar bracket on the rear axle beam.
21. While supporting and guiding the rod with one hand, push it with the other until it fits into the hole on the brake shield. USEFUL TIPS The method of installing the rear brake pad pressure spring rod of the left brake mechanism, shown in the photo for paragraphs 26 and 27, requires some skill, so we recommend...
... attach a piece of wire about 200 mm long to the rod.
Then insert the wire into the holes of the crossbar bracket on the rear axle beam and the brake shield.
While pulling out the wire, insert the clamping spring rod into the hole in the brake shield. Remove the wire after installing the brake pad. Before installing the brake drum, remove the wear flange and check the inner diameter of the brake drum.
22. To remove the shoulder, install the brake drum on the axle flange with the reverse side, center the drum along the mounting holes with the barb and secure the drum with two wheel mounting bolts, placing them in opposite holes. 23. Start the engine. With the engine running at minimum crankshaft speed, engage first gear in the gearbox. The drum will begin to rotate.
WARNING Check that the vehicle is securely positioned on supports or a lift.
24. Use a file to remove the collar around the circumference of the brake drum. Turn off the engine. Remove the brake drum.
WARNING Remove only the collar around the circumference of the brake drum. Do not touch the working surface of the drum. Do not apply much force to the file.
25. Install the rear brake pad in the reverse order of removal.
26. Orient the spacer bar with the double slot towards the rear brake pad and install the spacer bar into place.
27. Install the lower tension spring onto the brake pads, then install the lower end of the front pad into the slot on the brake shield and install the front brake pad in the reverse order of removal.
28. Install the upper tension spring onto the rear brake shoe. 29. Using a punch, install the front end of the upper spring into the hole in the brake shoe. 30. Install the brake drum (see “Removing and installing the brake drum”). 31. Press the brake pedal several times to set the wheel cylinder pistons to their working position. 32. Reinstall the wheel. Check that it rotates easily. 33. Replace the rear brake pads of the other wheel in the same way. Adjust the parking brake drive (see “Checking and adjusting the parking brake”).
Replacing the front brake pads of a VAZ 2106
Always replace brake pads in pairs, on a vehicle with the front wheels suspended, either jacked up and placed on supports or on special lifts. If the thickness of the linings of the old pads has reached a thickness of 1.5 mm, then they must be replaced with new ones.
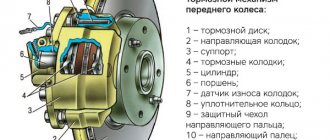
To carry out repair work we will need: a wrench for wheel bolts, a mounting blade, a punch, a caliper, pliers, a file and a hammer.
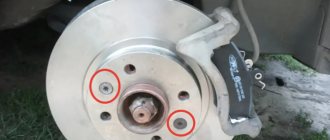
- Remove the front wheel and clean the brake mechanism from dirt with a metal brush, especially clean the pad mounting pins well.
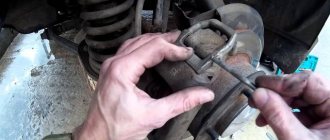
- Remove the locking pins from the fingers and pull out the fingers; partial removal of the fingers from the cylinders is allowed. If your fingers are dry and do not move well, use a liquid like WD-40.
- Remove the pad pressure springs and remove the brake pads.
When removing the brake pads, do not press the brake pedal to avoid pushing the brake pistons out of the cylinders.
- Wipe the inside of the wheel cylinders with a clean cloth, conduct a visual inspection and check the condition of the dust caps, which should not show cracks or other signs of aging, and replace them with new ones if necessary.
- Using a caliper, measure the thickness of the brake disc; if the disc already has a groove in the form of a flange on both sides, then it must be removed with a file in three places and it is in these places that the thickness must be measured. The thickness of the disc must be at least 9mm. If the thickness is less or varies in different places of the brake disc, then the disc must be replaced with a new one.
- Next, using a mounting blade, through the spacer, resting the mounting against the brake disc, you need to press the brake pistons into the cylinders one by one. When the pistons are pressed in, the brake fluid level in the reservoir rises, so if the brake fluid level is at maximum, to avoid overflow, pump out the fluid a little.
- Install new pads in the reverse order of removal. After that, press the brake pedal several times so that the pistons return to their place.
- Replace the brake pads on the other wheel.
At this point, the repair of replacing the brake pads of the VAZ 2106 is completed. After replacing the pads, do not rush to drive out onto a busy street, since under heavy braking you will quite possibly notice a significant decrease in the effectiveness of the brakes, which is caused by the fact that the brake disc also has wear and tear and, accordingly, the new pads do not fit tightly to it, so run it in before driving out. and grind the new pads to the disc, to do this, simply accelerate and slow down slightly and do this several times until braking efficiency is restored.
Replacing front pads
The need to replace brake pads on a VAZ 2106 arises when they are worn out or damaged due to the use of low-quality parts. If you don’t drive the car, you can drive about 50 thousand km on high-quality pads. However, there are situations when a part must be replaced after 5 thousand km. To replace the front pads on the “six” you need to prepare the following list of tools:
- "balloon" key;
- mounting blade;
- calipers;
- beard;
- pliers;
- new pads;
- hammer;
- file.
For repairs, the front wheels of the car are hung on a lift or raised with a jack.
Removal
The procedure for removing old pads is as follows:
- Unscrew the bolts and remove the wheel.
Installation
The assembly procedure consists of the following steps:
- We wipe the cylinders with a rag where they contact the pads.
- We inspect the anthers for rupture. If there is damage, replace the protective element.
Video: replacing front brake pads on a “classic”
About grooving brake drums
As mentioned above, some defects that arose during the operation of brake drums can be eliminated using the so-called groove. It should be said right away that it is not possible to sharpen a drum yourself in a garage. Because for this, firstly, you need a lathe, and secondly, you need the skill of working on this machine, and a serious skill at that. A novice driver can hardly boast of having a machine in his garage and the corresponding skills. Therefore, he has only one option left: to seek help from a qualified turner.
For high-quality drum turning, you can’t do without a lathe.
So what is a brake drum groove? It usually consists of three stages:
- preparatory stage. The turner removes about half a millimeter of metal from the inner walls of the drum. After this, the machine is turned off, and the drum is carefully inspected for internal defects. The preparatory stage allows you to determine the general level of wear of the drum and the feasibility of further work. Sometimes, after the preparatory stage, it turns out that the groove is useless due to severe wear, and it is easier to replace the drum than to grind it;
- main stage. If, after preliminary processing, it turns out that the drum is not very worn, then the main stage of turning begins, during which the turner smoothes and grinds all small cracks and grooves. During this work, about 0.3 mm of metal will be removed from the inner walls of the drum;
- The final stage. At this stage, the sanded surface is polished using a special paste. This procedure eliminates even the smallest defects that are not visible to the naked eye, and the surface becomes perfectly smooth.
It should be noted here that the groove will help get rid of internal defects on the drum, but it will be useless if the geometry of the drum is broken. For example, the drum was warped due to an impact or due to severe overheating. If the drum is cast iron, then it will have to be changed, since it is extremely difficult to straighten brittle cast iron using metalworking tools. If the drum on the “seven” is light alloy, then you can try to straighten it. And only after that start grooving.
When product replacement is required
Both the front and rear wheels are characterized by the use of 4 brake pads to ensure effective braking. Only in design these products are very different, although the principle of operation is similar.
The rear pads of the VAZ 2107 are presented in the form of an arched steel structure, on the outer part of which a friction layer is applied. It is due to the friction of this layer against the inside of the drum that the car stops. If you do not replace the brake elements in a timely manner, this will be fraught with the development of unpredictable consequences, because the most important thing for any car is the serviceability of the braking system.
It will not be possible to determine this fact without removing the wheel and dismantling the drum. But this is one of the main ways to determine whether the brake system is faulty. There is a second option, which is more convenient and does not require dismantling the rear wheel. To do this, you need to listen for signs of squeaking of the rear wheels, as well as grinding and lack of braking effect, but this can lead to damage to the drum itself. You can squeeze the handbrake while standing on a slope and check that it is working correctly. Of course, the cable on the handbrake may become loose, but if you tighten it and still have no effect, then it’s time to start replacing the pads. If the rear brakes are not functioning, then it is time to change the pads. It is recommended to change them as a set on both rear wheels, since they are often worn out at the same time. What is the process of replacing rear brake pads on a VAZ 2107 will be determined further.
On a note! All four pads on the rear wheels need to be replaced at the same time, even if the friction linings are worn unevenly.
Instructions for replacing rear pads
At the beginning of the work, it should be noted that the handbrake must initially be lowered to its lowest position. This will allow you to dismantle the brake drum and thereby get to the worn parts. To begin replacing the brake pads of a VAZ 2107, it is necessary to remove the rear wheel:
- There is a drum behind the wheel, which also needs to be removed. There are no problems with this, so we move on.
- After removing the drum, it is necessary to inspect the worn pads. If the thickness of the friction lining exceeds 1.5 mm, then there is no need to replace the products. Before carrying out further work, it is necessary to clean the mechanism from dirt and dust. To do this, you can use a brush or cloth.
- If the products need to be replaced, then you need to take a screwdriver and then remove first the upper, then the lower connecting springs. If you can’t dismantle it with a screwdriver, then you should use pliers. The photo below shows the springs that should be removed.
- Next, you need to remove the clamps, which consist of a rod, a washer and a spring. These washers must be rotated 90 degrees to remove them through the slots. This is what the washers that hold the pads look like.
- Similar procedures are carried out with the second block.
- After removing the springs and clamps, the pads are removed independently.
- The parking brake locking pin is straightened. The photo below shows the location of the locking pin. Now you need to unscrew the parking brake lever. This can be done using pliers. After this, the washer is removed, then the lever.
- During the dismantling process, you will have a question, what to do with the parking brake tip? It must be disconnected from the product and then left hanging.
- If necessary, it is recommended to replace all parking brake parts that were removed from the old product with new ones.
The rear brake pads on the VAZ 2107 should be installed in the reverse order of removal. Before installation, remember to bring the brake cylinder pistons as close as possible. Despite their simple design, installing them is much more difficult than the front ones.
But having completed the procedure once, all subsequent repairs will be much easier for you.
The cost of new pads starts from 800 rubles per set, but it is important to purchase high-quality products, and not Chinese “consumer goods”. Not only the service life of the products, but also the braking of the car will depend on this. This completes the replacement procedure, if you have any questions, be sure to ask them
This completes the replacement procedure; if you have any questions, be sure to ask them.
We remove the old ones
We jack up the rear wheel of the VAZ 2107 and remove it. You must first take the necessary safety measures: install shoes under the wheels, place a safety stand under the body. This task is usually not difficult. Next it will be a little more difficult. It happens that the brake drum gets stuck to the axle shaft, and it is impossible to remove it using standard means.
In this case, the drum is “torn off” - the guides are unscrewed, the car is started, the gear is engaged and the speed is increased, and then the brake is sharply pressed.
Be very careful when performing this operation - ensure that the VAZ 2107 is securely secured so that it does not fall off the jack.
- We remove the brake drum and check the condition of the brake pad linings. In addition to wear, there may be a partial breakage of the linings, since, unlike the front ones, the rear ones are not solid. We determine whether one or both pads need to be replaced.
- Using a flat-head screwdriver, remove the lower tension spring;
- Using pliers, remove the spring clamps from the guides, turning them until the slots match;
- Using a screwdriver, press on one end of the upper spring and remove it.
This is the last action, after which nothing holds the pads anymore, and they fall.
Instructions for replacing rear pads
Raise the rear of the car with a jack from either side. Install wheel chocks under the front wheels. Remove the wheel by unscrewing the mounting bolts and lockers. Now you need to remove the drum from its seat. As a rule, during the operation of the car, it settles and “sticks,” which complicates the dismantling process. It is recommended to use a hammer to give several gentle blows to the surface of the drum between the studs. After removing the drum, it is necessary to clean the brake mechanism itself and the seat from dust and dirt with a brush. Check the drum for wear
If there are severe chips, cracks or burrs, replace with a new one. Remove the upper tension spring using a screwdriver or pliers. Press the support spring plate with pliers. Turn the plate ¼ turn. Remove the support strut of the second block in the same way. Move the brake pads apart and remove the clearance adjuster. Remove the lower tension spring by hand. Now you need to pay attention to the handbrake mechanism, which is located on the rear block. It needs to be dismantled. To do this, you need to remove the locking ring and remove the pin using pliers. Check the condition of the brake pads
If necessary, replace with new ones. After replacing the pads, it is necessary to adjust the gap between the pads and the drum itself. To do this, you need to remove the rubber plug from the inside of the dirt shield and use a flat-head screwdriver to turn the regulator gear. The wheel rotates only in one direction to spread the pads. It is necessary to achieve light contact between the pads and the drum. Before assembling all parts of the brake drum system, it is necessary to wash all parts in gasoline, disassemble the clearance adjuster and lubricate it with graphite or silicone grease. Assembly is carried out in the reverse order of dismantling. Place the vehicle on the ground and secure the wheel mounting bolts. Repeat the procedure with the second wheel.
To do this, you need to remove the locking ring and remove the pin using pliers. Check the condition of the brake pads. If necessary, replace with new ones. After replacing the pads, it is necessary to adjust the gap between the pads and the drum itself. To do this, you need to remove the rubber plug from the inside of the dirt shield and use a flat-head screwdriver to turn the regulator gear. The wheel rotates only in one direction to spread the pads. It is necessary to achieve light contact between the pads and the drum. Before assembling all parts of the brake drum system, it is necessary to wash all parts in gasoline, disassemble the clearance adjuster and lubricate it with graphite or silicone grease. Assembly is carried out in the reverse order of dismantling. Place the vehicle on the ground and secure the wheel mounting bolts. Repeat the procedure with the second wheel.
After replacing the brake pads on the drums, you need to drive to a quiet place and check the functionality and effectiveness of the pads. It is highly recommended that you replace any damaged or worn brake drum parts. Adjustment of the pads must be done once a year, or 15-20 thousand km. This is necessary for uniform wear of the rear pads and maintaining the braking efficiency of the rear wheels. It is recommended to perform this procedure in a lifting box, but if necessary, a jack with an inspection hole will do.
Replacement of rear brake pads VAZ 2113, 2114, 2115
Safe and comfortable driving of a VAZ 2113, 2114, 2115 car largely depends on the rear brake pads, which must be replaced in a timely manner, without bringing them to a state of complete wear.
Depending on their quality, the pads have a noticeably long service life, so it is worth choosing new spare parts that have been certified by the car manufacturer and have its part numbers.
List of necessary spare parts and tools for work
When selecting new parts for replacing the rear brake pads on a VAZ 2114, video instructions for the stage of work are given at the end of the article, you should pay attention to the availability of original part numbers for the following spare parts:
- Set of rear pads (art. 2108 – 3502090 – 55)
- Brake drums (art. 2108 – 3502070) which may be needed in case of severe wear of old parts due to long service life
Replacing parts does not require specialized tools; all work is carried out using the most common kits, namely:
- wheel wrench;
- jack;
- Screwdriver Set;
- 12 mm head and knob;
- pliers;
- rear brake drum puller if available, or you can use a hammer;
- protective gloves.
Having purchased all the necessary new spare parts and tools, carrying out all the repairs yourself will not cause problems and will help you save money, since at the end of 2022, replacing rear brake pads in official Lada car repair shops costs from 1,500 to 2,000 rubles, and in private repair shops, this the service will cost approximately 1000-1200 rubles.
Stages of independent work
Having carefully studied the following stages of work on replacing the pads, any car owner will understand how to fix this breakdown and continue to operate his car safely, namely the following:
- The car is driven onto a flat surface into a room, preferably with an inspection hole. The important point here is that you need to wait some time for the brake drums to cool down; during driving and constant braking, they heat up and in order to carry out work, they need to cool down.
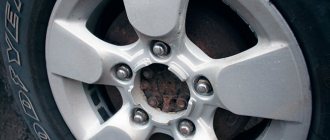
- Having placed a wheel chock under the front wheel, loosen the wheel mounting bolts with a wheel wrench, jack up the car, and completely dismantle it.
- Having removed the wheel, we proceed to dismantling the brake drum, having first checked whether the car is on the hand brake, otherwise this will cause great difficulty in removing it and can lead to mechanical failure of the part. The drum is attached to the rear hub with two 12 mm bolts, unscrew them, treat the seat with a brush and remove it with a specialized puller. If you don’t have a puller, you can use a hammer and tap it through the piece of wood from the back side, constantly rotating it after each blow.
After removing the drum, it is necessary to loosen the tension on the parking brake cable; this is done on a special adjusting pin located under the bottom of the car, next to the middle part of the muffler.
Having loosened the handbrake cable, we begin to remove the brake pads. First of all, we pull out the fixing pin on the parking brake mechanism pin on the rear block, then press out the fixing spring (the so-called soldier), remove the lower and upper return springs from the bottom of the block, the brake mechanism spacer bar and remove the old, worn pads from their seats brake cylinder.
- Having removed the old pads and carefully inspected the brake cylinder drum for wear, it is necessary to thoroughly clean the protective shield and all seats of new parts from old dirt. Next, we proceed to install new pads; it is advisable to assemble the entire brake mechanism in advance (spacer bar and upper return spring) and then mount everything in its seats. Having carefully installed the new pads, we fix them with a lower spring and soldiers, after which we mount back the brake drum and all previously removed parts. Having completely assembled one side, we proceed to replacing the pads on the second side, performing all the steps again.
- Having changed the pads, we begin to adjust the handbrake, pulling the cables until the lever in the car’s interior rises two-thirds up or up to four clicks
Also watch a detailed video of replacing rear brake pads on VAZ 2113, 2114, 2115 cars:
Pads for VAZ 2106
Despite the fact that the model has long been discontinued, there are plenty of original spare parts on the car market. In addition to factory parts, a number of components manufactured by foreign companies are available for sale. Obviously, the price of domestic brake system elements will be cheaper than their foreign counterpart.
Brake pads must be replaced if the limiting friction lining thickness of 2.0 mm is reached. Below this norm, there is a high probability of deformation and splitting of the lining into pieces. Elements of the brake system must be immediately replaced if engine, transmission oil or antifreeze gets on the surface.The process of replacing pads is not complicated; every driver can do it, even without experience in servicing equipment.
Original
| vendor code | Price, rub.) | vendor code | Price, rub.) |
| 21013501090 “Cedar” | 450 | 21010350180083 | 470 |
| 21010350180082 | 470 | 21010-3501800-84 | 510 |
| 21010350180087 | 450 | 21010-350180085 | 470 |
Substitutes
| vendor code | Price, rub.) | vendor code | Price, rub.) |
| 0026400 TRW | 570 | 41062 | TRW |
| GDB140M ABS | 650 | ADB0281 | ABS |
| 98271307 Allied Nippon | 750 | Delphi 65139 | 780 |
| LP92/S | 800 | Delphi 0065139 | 780 |
| 98271307 Allied Nippon | 750 | Delphi 65139 | 780 |
| 98271307 Allied Nippon | 750 | Delphi 65139 | 780 |
| Allied Nippon | 65139 |
What rear brake pads can be installed on a VAZ 2106
The original rear brake pads are 3.5mm thick. With use, the friction lining wears out and is erased. When the thickness reaches 1.5 mm, the part must be replaced. Further operation of the machine is unsafe.
The process of replacing rear pads is as simple as replacing the front ones. Unless a handbrake cable is added, which should be removed. It is not necessary to have any special experience or skills. Please resort to the help of service station workers if you identify a large-scale breakdown that requires prompt intervention from professionals.
Original
| vendor code | Price, rub.) | vendor code | Price, rub.) |
| VIS 0021929 | 550 | VIS 0005937 | 570 |
| 68822 | 550 | 21010-350209002 | 570 |
| 2101-3502090 | 550 | START 12151 | 570 |
| 63276 | 570 | 21010-3502091 | 570 |
Substitutes
| vendor code | Price, rub.) | vendor code | Price, rub.) |
| Delphi 65140 | 850 | Finwhale 23593 | 800 |
| LS1219/S | 850 | VR311 | 800 |
| Bosch 17888 | 950 | TRW 26401 | 800 |
| 986487217 | 850 | GS8164 | 850 |
| HZTS 79927 | 800 | 2101-3502090 | 800 |
| Start 63275 | 800 | 21010-3502092 | 850 |
| MASTER SPORT 2103-3502093 | 850 | 030137-02332 | 800 |
The lists are presented for informational purposes. Before purchasing, be sure to consult with a specialist from a service center or auto store to determine the compatibility of the catalog article with the make/model of your car.
How to independently replace the front and rear pads on a VAZ 2106
Preparatory stage: a set of automotive tools, rags, new pads, liquid to remove layers of rust and corrosion.
Place the machine on a level platform. The option with an inspection hole or road overpass is excluded due to inefficiency; We jack up the front wheel with a hydraulic jack, remove it, having previously installed the wheel chocks; Use pliers to remove the guide pins
Please pay attention to the pressure springs; they may fly out during the work; Using a flat-tip screwdriver, press the slave cylinder into its original position. We widen the gaps to remove the brake pads; We remove worn pads, carry out preventive maintenance on the brake caliper, clean it from rust and deposits
If necessary, use a liquid like WD-40; Replace with new pads, assemble the structure in reverse order.
Subject to the above recommendations and the purchase of original spare parts, the service life of the brake system elements is 20 - 25 thousand km. mileage A moderate driving style and average ambient temperatures will increase the service life by 5 - 7 thousand km.
Original
ArticlePrice (RUB)ArticlePrice (RUB)
| VIS 0021929 | 550 | VIS 0005937 | 570 |
| 68822 | 550 | 21010-350209002 | 570 |
| 2101-3502090 | 550 | START 12151 | 570 |
| 63276 | 570 | 21010-3502091 | 570 |
Change the brake pads of the rear wheels should be designed to have a minimum thickness of 1.5mm, if they have different chips and cracks, the connection between the pads and the surface of the pads is broken. To make it easy to replace brake pads, the rear wheels of the vehicle are suspended or raised and mounted on supports. Replacement brake pads must be created in pairs machine side.
During the repair we will need: wrenches “8”, “17”, a hammer, a screwdriver, a caliper, a reflector, two fastening blades, pliers and a wrench for wheel nuts. If so, proceed to replacing the blocks.
- The left brake shoe can now be removed to disengage the lower clutch spring.
- Remove the gasket.
- Now remove the pressure spring of the right pad in the same way and remove the pads from the brake flap.
Replacement of rear pads on VAZ 2101-2107 (CLASSIC) (Lada).
in the video, make rear trims for the VAZ 2107. Changes are similar to VAS 2101,2102,2103,2104,2105,2106.
- Disconnect the parking brake cable end, unscrew the parking brake lever pin, remove the washer, lever and drive lever pin.
- To reverse removal, install the parking brake lever parts into the new assembly.
Now we start installing new brake pads on the car.
- Visual inspection of the brake drum, the internal diameter of which must be no more than 251 mm. If the diameter meets the requirements, it is necessary to get rid of the shoulder resulting from wear. To remove the shoulder, attach the brake drum to the half flange at the rear, center the drum and rim along the mounting holes, and secure with two bolts. Then start the engine at minimum speed and engage first gear. The drum will rotate and, at the same time, lift the bead while capturing the file. Simply grind the beads without touching the working surface of the drum; Don't press the file too hard.
- Now install the rear right brake pad reverse.
- Next, install the spacer bar in place. Please note that the bar is not symmetrical and has a single slot on one end and a double slot on the other. The end of the strap, which has a double slot, should be oriented towards the right rear shoe.
- Attach the lower tension spring to the right rear shoe first at one end, then insert the lower end of the front shoe into the brake shoe slot at the other end at the front left.
- Install the front left shoe in the reverse order of removal, install the upper extension spring.
- Install the brake drum.
- Install the wheel and check that it rotates easily.
- Press the brake pedal several times until the pistons are in the working position.
This work is the replacement of the rear brake pads of the VAZ 2106 completed.
Problems when paying with bank cards
Sometimes difficulties may arise when paying with Visa/MasterCard bank cards. The most common of them:
- There is a restriction on the card for paying for online purchases
- A plastic card is not intended for making payments online.
- The plastic card is not activated for making payments online.
- There are not enough funds on the plastic card.
In order to solve these problems, you need to call or write to the technical support of the bank where you are served. Bank specialists will help you resolve them and make payments.
That's basically it. The entire process of paying for a book in PDF format on car repair on our website takes 1-2 minutes.
If you still have any questions, you can ask them using the feedback form, or write us an email at
Auto repair school – DIY car repair
Jun 14, 2022 VAZ 2101, VAZ 2102, VAZ 2105, VAZ 2106, VAZ 2107, Zhiguli, Classics by admin
Let's return to our immortal and beloved Classics! In this article we will look at the process of replacing the front brake hose on VAZ-2101, VAZ-2102, VAZ-2104, VAZ-2105, VAZ-2106, VAZ-2107, Classic cars. I hope that it will be useful to you and after reading it, you will be able (or will have information) on how to replace the front brake hoses yourself. I, in turn, will try to describe the replacement process in as much detail as possible and warn you about possible problems that may arise during operation.
Pay special attention to the list of necessary tools and the quality of purchased spare parts. In general, please...
Let's start, perhaps, with the tool that you will need to replace the front brake hose on a VAZ-2101, VAZ-2102, VAZ-2104, VAZ-2105, VAZ-2106, VAZ-2107, Classic car: 14mm socket wrench, socket wrench for 10, pliers, an open-end wrench for 17, a rubber cap from the bleeder fitting (after disconnecting the tube and hose, it will be necessary to “plug” the brake pipe to prevent brake fluid leakage), special keys for unscrewing the brake fittings for 10 - split or crimped (photo 1).
The presence of at least one special key is necessary. Without it, in 9 out of 10 cases, you will not unscrew the brake pipe fitting!
What you should pay attention to when purchasing spare parts... First, we buy brake hoses from “Balakovo” or “Dimitrovgrad” production. Hoses from these manufacturers, although not cheap, are of high quality and durable
As they say - time-tested.
Included with the front brake hose you should buy two new copper sealing washers
When purchasing washers, you should pay attention to their thickness. According to the standard, the thickness should be 1.5 mm
But unscrupulous sellers may sell washers of thinner thickness (see photos 2 and 3), using which you will not be able to tightly tighten the brake hose bolt.
We can also advise you to buy a new brake hose mounting bolt. This is not necessary, but believe me, this cheap detail can save quite a lot of nerves. Since the old bolts are generally very stretched (photo 4) and even with new copper sealing washers, such a bolt will have to be pulled long and hard until there is no brake fluid leakage (and don’t forget that the threads in an aluminum brake cylinder are very easy to break).
We're done with the tools and spare parts. Now let's move on to a step-by-step description of replacing the front brake hose on VAZ-2101, VAZ-2102, VAZ-2104, VAZ-2105, VAZ-2106, VAZ-2107, Classic cars:
1. Use pliers to pull out the fixing bracket (photo 5)
2. Using an open-end wrench size 17 and a special clamp wrench 10, unscrew the brake pipe fitting (photo 6). We disconnect the hose and brake pipe, and put a rubber cap on the end of the pipe.
3. Using a 10 mm spanner, unscrew the fastening bolt securing the brake hose bracket (photo 7), if you have one, of course))).
4. Using a 14 mm socket wrench, unscrew the bolt securing the brake hose to the brake cylinder (photo 8). We remove traces of dirt and sand from the brake cylinder.
We carry out assembly in reverse order. We install the brake hose as shown in photo 9, with the bevel down. We install two sealing copper washers. When tightening the brake hose and tube, tighten the tube fitting and do not twist the hose, thereby preventing the brake hose from twisting.
When using an article or photographs, an active direct hyperlink to the website www.avtorem.info is required!
Substitutes
| vendor code | Price, rub.) | vendor code | Price, rub.) |
| Delphi 65140 | 850 | Finwhale 23593 | 800 |
| LS1219/S | 850 | VR311 | 800 |
| Bosch 17888 | 950 | TRW 26401 | 800 |
| 986487217 | 850 | GS8164 | 850 |
| HZTS 79927 | 800 | 2101-3502090 | 800 |
| Start 63275 | 800 | 21010-3502092 | 850 |
| MASTER SPORT 2103-3502093 | 850 | 030137-02332 | 800 |
The lists are presented for informational purposes. Before purchasing, be sure to consult with a specialist from a service center or auto store to determine the compatibility of the catalog article with the make/model of your car.
Downloading a book
After successfully completing the payment (by any method) and returning to the KrutilVertel store from the payment system website, you will be taken to the successful payment page:
The book you purchased will be in your personal account, from where you can always download it.
Please note that after making the payment, you need to return back from the payment system website to the KrutilVertel website. If for some reason you did not return back to the site and closed the payment system tab with a message about the successful completion of the payment, please let us know - we will send you a letter indicating access to download the book
If for some reason you did not return back to the site and closed the payment system tab with a message about the successful completion of the payment, please let us know - we will send you a letter indicating access to download the book.
Replacing rear pads
The brake elements front and rear wear unevenly. Therefore, rear pads are changed much less frequently. However, you should not delay the repair, since both the braking efficiency and the holding of the car when using the handbrake directly depend on the condition of the pads.
To carry out the procedure you need to prepare the following tools:
- screwdriver with flat and Phillips blade;
- pliers;
- long nose pliers;
- "balloon".
How to remove a brake drum
We dismantle the part in the following sequence:
- We hang up the rear of the car and remove the wheel.
- Unscrew the guide pins.
Removing drums on “classics” is a “disease” of these cars. Pulling the part together is very problematic, especially if it is done rarely. However, there is an old-fashioned method that is used not only by me, but also by other motorists. To dismantle, screw the pins into the drum, then start the engine and engage fourth gear, causing the drum to rotate. Then sharply press the brake. You may need to repeat the procedure several times. After that we try to knock the drum down with a hammer again, usually it works.
Removing the pads
We dismantle the pads in this order:
- Remove the spring-loaded bolts holding the brake elements.
Video: replacing rear brake pads on a “six”
Installation of pads and drum
The brake elements are installed in reverse order. Before putting the drum on the axle shaft, you need to clean it from the inside from corrosion and dirt, for example, with a metal brush. It should also be taken into account that with new pads the drum may not sit in its place. Therefore, you will have to slightly release the tension on the handbrake cable. When the drums on both sides are installed, you need to adjust the handbrake.
It is not recommended to brake sharply for some time after replacing the pads, as they need to get used to the drums.
When replacing pads, it is recommended to also check other elements of the brake system and suspension. There should be no visible damage or leaks on the brake hoses. The pads are replaced only as a set. Otherwise, the car will pull to the side after repair.
Note!
Replacing the drum is carried out with the car hanging and the handbrake released, so keep this in mind when you start replacing!
Removal:
1) At the very beginning of the operation, you will have to remove the wheel you need from the car and then leave the car hanging in the air. (For information on how to remove a wheel, see the article entitled: “Replacing wheels on a car”)
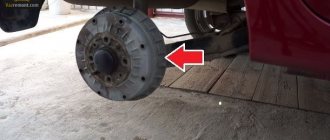
2) Then pick up a wrench or a spanner (it doesn’t matter which is more convenient) and use it to unscrew both guide pins that secure the drum to the hub, and after the pins are unscrewed, pull the drum and thereby remove it from the car .
Note! If the drum will not be removed, then take two M8 bolts and screw them into the holes in which they will fit, but screw both bolts evenly, that is, tighten both bolts first and tighten each one a little and thus you will see how the drum starts get off the car!
Driving M8 bolts evenly into tapped holes
3) After the drum is removed, use sandpaper to clean the mounting surface of the axle shaft flange as shown in the figure below from dirt and rust.
Note! When there is no dirt on the surface of the axle shaft flange, then using graphite grease or LSC-1 grease, lubricate this very surface of the flange, and in addition to it, lubricate the entire place where the drum itself is installed on the axle shaft flange (This place is also indicated by a blue arrow)!
Installation:
1. The new drum is installed in its place in the reverse order of removal, but during installation you will have to perform some operation, namely, sit in the car and pull the handle to open the hood and then go to the engine compartment, there you will find the tank in which the brake fluid (Indicated by an arrow), after finding it, look at it from the side and thereby you will find out how much brake fluid is in it, if it reaches the MAX mark, then in this case take a medical syringe or a rubber bulb and use it to pump out a little fluid from the reservoir so that it does not spill out of it when you bring the brake pads together.
2. Now about bringing the brake pads together, firstly, take two mounting blades in your hands and with their help carry out the entire operation of bringing the pads together, to do this, rest against the flange of the brake shield with both blades (One of the two places where you need to rest against brake shield is indicated in the photo with a blue arrow) and using the blades as a lever, use them to bring both brake pads towards each other, as shown by the red arrows, until they stop.
Note! If, after the above instructions, your drum still won’t be installed in its place (That is, it is not given brake pads), then crawl under the bottom of the car and look for the handbrake cable there (Before climbing under the car, check whether your handbrake is lowered or no, if it is lowered, then do this work, and if it is raised, then lower it and try again to install the brake drum in its place) and then loosen the adjusting nut that tightens this cable until it stops, more details on how to do this , read the article: “Adjusting the handbrake cable” you will need to study points 1-2 to understand how to loosen the adjusting nut!
3. Then install the new drum in its place and center it with a bolt or bit so that it fits the mounting holes, this is all done so that when screwing in both guide pins that secure the drum, they twist and do not rest against the hub.
Note! When the entire installation is completed, get into the car and press the brake pedal several times so that the brake mechanisms of the rear wheels begin to work for you!
Downloading a book
After successfully completing the payment (by any method) and returning to the KrutilVertel store from the payment system website, you will be taken to the successful payment page:
The book you purchased will be in your personal account, from where you can always download it.
Please note that after making the payment, you need to return back from the payment system website to the KrutilVertel website. If for some reason you did not return back to the site and closed the payment system tab with a message about the successful completion of the payment, please let us know - we will send you a letter indicating access to download the book
If for some reason you did not return back to the site and closed the payment system tab with a message about the successful completion of the payment, please let us know - we will send you a letter indicating access to download the book.
Replacing rear pads
The brake elements front and rear wear unevenly. Therefore, rear pads are changed much less frequently. However, you should not delay the repair, since both the braking efficiency and the holding of the car when using the handbrake directly depend on the condition of the pads.
To carry out the procedure you need to prepare the following tools:
- screwdriver with flat and Phillips blade;
- pliers;
- long nose pliers;
- "balloon".
How to remove a brake drum
We dismantle the part in the following sequence:
- We hang up the rear of the car and remove the wheel.
- Unscrew the guide pins.
Removing drums on “classics” is a “disease” of these cars. Pulling the part together is very problematic, especially if it is done rarely. However, there is an old-fashioned method that is used not only by me, but also by other motorists. To dismantle, screw the pins into the drum, then start the engine and engage fourth gear, causing the drum to rotate. Then sharply press the brake. You may need to repeat the procedure several times. After that we try to knock the drum down with a hammer again, usually it works.
Removing the pads
We dismantle the pads in this order:
- Remove the spring-loaded bolts holding the brake elements.
Video: replacing rear brake pads on a “six”
Installation of pads and drum
The brake elements are installed in reverse order. Before putting the drum on the axle shaft, you need to clean it from the inside from corrosion and dirt, for example, with a metal brush. It should also be taken into account that with new pads the drum may not sit in its place. Therefore, you will have to slightly release the tension on the handbrake cable. When the drums on both sides are installed, you need to adjust the handbrake.
It is not recommended to brake sharply for some time after replacing the pads, as they need to get used to the drums.
When replacing pads, it is recommended to also check other elements of the brake system and suspension. There should be no visible damage or leaks on the brake hoses. The pads are replaced only as a set. Otherwise, the car will pull to the side after repair.
Removing and replacing rear brake pads on VAZ 2101, 2102, 2103, 2104, 2105, 2106, 2107
Hello, in this article you will learn how you can independently replace the rear brake pads on a VAZ 2101, 2102, 2103, 2104, 2105, 2106, 2107 and what tools may be needed for this operation. The average mileage without replacing rear brake pads is usually greater than that of the front ones, since they bear less load, and is 30-40 thousand kilometers. When the pads are heavily worn, a squeaking noise usually begins to be heard when braking. To make sure that the brake pads have worn out, you need to remove the brake drum and measure the thickness of the pads, it should be at least 1.5 millimeters, if less, then you need to change the pads as soon as possible. To replace the rear brake pads you will need pliers, a flat head screwdriver, a 7mm open end wrench (or a 7mm socket) and possibly a hammer and some wood. The average price of rear brake pads on the market is 1000 rubles, you can get it a little cheaper or more, it depends on your financial capabilities. First of all, jack up the rear of the car and remove the wheel. Next you need to remove the brake drum, to do this, unscrew the 2 pins with a 7 key and try to pull it towards you
If you can’t pull it off, you need to use a hammer with a piece of wood and gently tap the drum from the back side in a circle (you don’t need to apply much force, as you can break the edge of the drum and then it will be unbalanced)
Now we begin to remove the rear brake pads. First, we press on the cup of the support post and combine it with the slot (we do the same with the other block)
Next, use a flat screwdriver to pry up and remove the lower tension spring
After this, unhook the handbrake cable from the shoe lever using pliers
The next step is to remove the brake pads along with the spacer bar and the upper spring, and disassemble them
The lever that holds the handbrake cable? you will need to remove it and put it on a new block, to remove it you just need to remove the cotter pin
Install the rear brake pads in the reverse order of removal. If the brake drum will not fit on the new pads, then squeeze them on both sides so that the pistons of the brake cylinder, which is located between them, are pressed inside the cylinder. New brake pads will need to get used to, so for the first 100 km, avoid sudden braking and drive carefully, as the brake performance will be slightly worse at first.
Brake pad malfunctions
The following characteristic signs indicate problems with the pads:
- sounds unusual for brake operation (creaking, squealing, grinding);
- car skidding when braking;
- the need to apply more force to the brake pedal;
- black or metal dust on wheels;
- increased braking time;
- The pedal does not return to its initial position when released.
Brake pads must be changed when the friction material thickness reaches 1.5 mm. If this is not done, a grinding (squealing) sound will occur. In addition, such sounds may be present when installing low-quality pads.
Shocks when braking
The appearance of shocks during braking can be caused either by the condition of the pads themselves, or by a damaged surface of the brake disc or drum, soured pistons in the cylinders, or other malfunctions. To identify the problem, you will need to disassemble the brake mechanism and carefully inspect the parts for wear and damage.
Principles of operation of the braking system
The model in question has service and parking brake systems. The working system includes a hydraulic drive. It, in turn, consists of several circuits. They work independently and, accordingly, use the mechanism of the entire braking system of the wheels (rear, front). The composition of the service brakes is as follows:
- amplifier (vacuum);
- pedal system;
- brake cylinders;
- brake fluid sensor;
- pipelines;
- front and rear disc brakes on a VAZ with all adjacent units.
The clutch pedal and brake pedal are located on the same axis. The brake pedal has a return mechanism. There is also a switch for signals that indicate the braking process. The vacuum booster is designed to reduce the force on the brake pedal when the engine is running. This is possible due to the fact that the intake pipeline is discharged.
Bleeding the brake system of VAZ 2106
Bleeding the brakes is done to remove air trapped in the brake system. It is easy to determine the presence of air: the brake pedal is initially pressed too softly, and after several presses it suddenly acquires an unusual “hardness”. These are signs of an air lock.
Sequencing
First of all, it should be said that it is best to bleed the brakes with an assistant. But with some skill, this can be done alone.
- First, check the brake fluid level.
The tank must be filled to the upper marks. The reservoir must be filled with liquid to the level of the upper edge of the mounting plate - The fitting on the rear brake drum is unscrewed, a rubber hose is inserted in its place, and the other end of the hose is lowered into a plastic bottle.
The fitting is slightly unscrewed and a hose is inserted into it, with the other end lowered into the bottle - After this, the assistant sitting in the cab should press the brakes two or three times and then hold the pedal down for one minute.
- At this moment, the fitting is unscrewed so that brake fluid flows out of it through the hose. Air bubbles will be visible in it.
- After some time, the brake pedal will finally fall to the floor, which will be reported by the assistant. As soon as this happens, tighten the fitting and repeat all the above steps. This must be done until liquid with bubbles stops flowing from the hose.
- When the leaking brake fluid becomes normal, the bleeding procedure should be done with other wheels.
