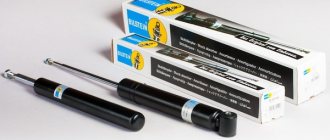
The VAZ 2109 and VAZ 2108 cars use the same shock absorbers. On newer models (2110, 2115, etc.) the suspension is similar and all elements are interchangeable. SAAZ shock absorber struts were installed at the manufacturer - oil double-pipe.
The quality of original elements depends on the year of manufacture of the car. The newer the car, the worse the shock absorbers. Owners of front-wheel drive Ladas are faced with replacing shock absorbers on average once every 3-5 years. This is exactly the resource at the racks.
Failures of these elements are almost always visible or audible - smudges appear, knocking noises when moving over bumps. This is fraught with the fact that the entire body becomes uncontrollable - when driving on an uneven road, the car begins to jump. Shock absorbers do not stop these vibrations, although ideally they should dampen them.
Note! The struts will have to be removed when carrying out suspension repairs - replacing cushions, silent blocks, protective casing, rod stroke limiter, etc.
How the front suspension works
The front suspension of the VAZ-2109 car consists of several levers, a shock absorber strut, a support bearing and other elements. All these elements are interconnected, the failure of one leads to the loss of comfort and safety. The shock absorber strut is connected via a movable hinge to the steering rack. The lower part of the rack is rigidly fixed to the front wheel hub. The hub is attached from below to the suspension arm using a ball joint.
The shock absorber rod is installed in the support bearing. With the help of this element, the rack rotates around its axis. In some cases, to restore functionality, it is necessary to replace the front strut liner of the VAZ-2109. At the same time, all important elements are also replaced and fresh oil is added. But it is a very controversial question what is better to do - repair the shock absorber struts or install new ones.
Leveling up
You can first remove the old strut, but before installing the new one, you must bleed it.
There is no need to pump single-pipe struts due to the fact that the container with high-pressure gas is reliably isolated by a piston.
If you avoid the bleeding procedure, or do this work incorrectly, the twin-pipe shock absorber may fail due to air or gas entering the inner sleeve, depending on the type of strut, through the valve. This happens when the unit is not transported in an upright position.
Now let's see how to pump the racks with your own hands.
Check the stroke of the rod after bleeding. If there are no dips, no bubbling sounds, everything is fine. If such phenomena occur, it is necessary to repeat the pumping procedure several more times.
Please note that gas-oil struts, unlike oil struts, are pumped only in the position with the rod up. The shock absorber must remain in this position until installation begins.
Repair kit: main components
If you decide to repair the installed shock absorber strut, then you will need to purchase a special repair kit. It includes all the most necessary components of the shock absorber itself: oil seals, gaskets. In any case, you will need to purchase additional items such as boots, bolts, nuts, and support bearings. If you plan to install new racks, then you should consider one feature. Springs tend to lose elasticity. If the springs on your car have sagged very much, it is advisable to install new ones.
As a result, the cost of repairs increases. If you are replacing the front struts of a VAZ-2109 with your own hands, you need to make sure that all other suspension elements are in good condition. If the tie rod ends become unusable or the ball joints begin to knock, it is advisable to change them immediately. It is mandatory to replace the front strut support of the VAZ-2109. After the repair, it is necessary to carry out the procedure for adjusting the toe and camber angles of the front wheels. Without this, you risk being left with bald tires.
How to check a shock absorber
Before checking the operation of shock absorbers, you need to assess their condition visually.
Important! The presence of oil stains, even covered with a layer of dust, indicates that the inside of the case is empty. The stand will no longer work correctly.
Also pay attention to the presence of mechanical damage, the condition of the spring and other suspension elements. It is best to carry out diagnostics after a long trip, so that the oil in the struts (if it is still there) warms up.
There is no need to remove the stands. Sequencing:
- Place the car on a level surface.
- Vigorously swing one corner up and down, applying force to the top of the wing.
- Release and observe the behavior of the body. If the shock absorber is working properly, the car will swing up and down 1-2 more times, after which the body will stop. If three vibrations occur, this indicates that the rack is in good condition, but still it is not in very ideal condition and will have to be replaced soon.
All other shock absorbers are checked in the same way. Pay attention to the presence of dips, jamming, and extraneous sounds when swinging.
You can diagnose the removed shock absorber. To do this, you will need to fully stretch and compress it several times. If it is working properly, then it will pump without failures, smoothly. There should be no noise or looping. When stretching, you need to apply more force than when compressing - this indicates normal operation of the rack.
Tools and accessories
When carrying out repairs, you will need some tools, and wrenches alone will not do. First, you need a special wrench to remove the shock absorber rod nut. Of course, you can use wrenches 17 and 8. Lastly, hold the rod from turning. If you plan to completely replace the rack, you can use a pipe wrench to clamp the rod. Secondly, a puller for the tie rod ends is a must. Without it, it will not be possible to dismantle the tip. Be sure to have a jack, supports, and wheel chocks on hand. The presence of wrenches, pliers, and screwdrivers is also mandatory; no repair can be done without these tools.
Why do shock absorbers fail?
Now I won’t go into the structure of the rack, I’ll just say that it is a pneumatic - hydraulic system. It is designed to dampen vibrations from the springs, that is, to eliminate body sway.
Thus, with the help of oil seals, bypass valves, oil, cylinders inside and so on. The working rod extends and retracts very weakly. It takes a fair bit of effort.
BUT if the seal (usually located on top) leaks, the seal is lost. The oil and gas that were inside flows out (evaporates). There is nothing to brake the rod, it moves without effort - the rack begins to knock.
It is worth noting that the reason may also be in the rod; it was simply bent upon impact or the mirror began to corrode. All this again affects the oil seal, destroying it.
The internals fail, but very rarely, and most likely it will be a factory defect.
Preparing for repairs
Before replacing the front strut shock absorber of the VAZ-2109 begins, preparations must be made. The most important thing is to securely position the car so that it does not roll away. It is enough to raise one side of the car above the ground, the one on which the repair is being carried out. If you plan to replace the entire rack, then no additional manipulations are necessary. But in the event that repairs take place, it is advisable to mark the position of the strut relative to the front wheel hub. For this purpose, you can use a marker, a can of paint, a metal scriber, or even a nail. It is not advisable to use chalk, since it can simply be erased during repairs.
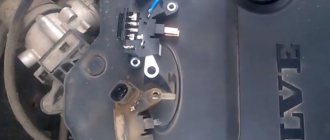
Removing the shock absorber strut
First, loosen the bolts on the wheel, lift the side to be repaired using a jack and place it on a reliable support. After this, you can finally remove the wheel. Remove the cotter pin from the tie rod end using pliers. Use a 19mm wrench to unscrew the nut. Loosen the nut fastening to the support bearing. There is no need to unscrew it completely; it is best to do this immediately after removing the shock absorber strut. Using wrenches 19 and 17, unscrew the nuts from the bolts that secure the strut to the wheel hub. Move the brake hose to the side and secure it with a small piece of wire. Using a 13mm wrench, unscrew the four nuts that secure the support bearing to the car body. At this point, the dismantling can be considered complete; the shock absorber strut will completely come out of its place. Now you can disassemble it into small elements.
We will need:
- Puller;
- Devices for compressing rack springs;
- Key for unscrewing the rod;
- Socket wrenches 24, 22, 19, 17 and 13;
- Pliers;
- Chisel;
- Hammer;
- Wheelbrace for further wheel removal;
- Workbench with a vice (optional)
- Jack
We begin replacing the front struts in the case of non-collapsible struts:
Non-collapsible stand
- Put the car on the handbrake and place wheel chocks under the rear wheels.
- Next, loosen the wheel bolts and jack up the car. Next, place supports under the bottom of the car (you can use wheels, put a board on them).
- Remove the wheel from the side of the rack being removed. Turn the steering wheel in the opposite direction until it stops.
- We take out the cotter pin and use a 19mm spanner to unscrew the nut securing the steering tip pin.
- Use a puller to press the finger out of the lever.
- If there is no puller, unscrew the nut not completely, insert the mounting blade into the spacer between the steering rod and the strut arm and hit the end of the strut arm with a hammer.
- Carefully remove the front brake hose from the strut holder. (the hose must not bend)
- Open the hood.
- Release the strut support bearing from the plastic plug.
- Loosen the shock absorber rod nut using a special wrench.
- Next, before unscrewing the “camber” bolt securing the strut to the steering knuckle, you need to mark its location.
- Using the “19” socket, unscrew the nut of the “breakup” bolt, holding the bolt from turning with a similar wrench. If you haven't done an alignment for a long time, this bolt may become so stuck that it will be difficult to move it. In this case, you can heat and pour all sorts of means. But it’s better to start preparing it for unscrewing in advance. A few days before repair, clean the bolt from dirt. And pour WD-40 on it at night, every evening - this may help you unscrew this bolt.
- Next, unscrew the lower mounting bolt.
- Next, use a 13mm spanner to loosen the three nuts between the car body and the A-pillar.
- We remove the rack.
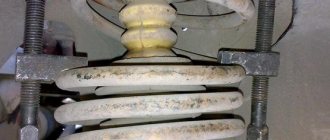
- We install two spring ties diametrically opposite each other so that they capture five turns of the spring.
- After the spring pressure on the support cups weakens, unscrew the rod nut. Remove the upper support, the upper support cup, the spring with ties, the compression stroke buffer and the protective cover from the rack.
- We assemble in reverse order.
Disassembling the rack
The first step is to install special brackets for the tie on the spring. Pull the spring coils evenly, after which you can completely unscrew the nut on the shock absorber rod. If a new spring is to be installed, the puller can be removed immediately. But if you plan to reinstall the spring on a new strut or use it in the future after repairing the old one, you need to carefully put it aside. In this case, it is advisable to tighten the turns with additional steel wire. If the puller suddenly moves, the spring will remain in its original state. If the front struts of a VAZ-2109 are being replaced, then further disassembly is pointless. You may only need large metal washers and rubber rings.
Checking the serviceability of shock absorbers
But before we describe the work process, we will consider ways to identify a shock absorber malfunction.
The first sign, as already indicated, is a knocking sound on one or both sides of the car when passing strong bumps.
A visual inspection will also help to identify the malfunction. Oil leaks can often be seen on the outside of the damaged element.
This indicates that the shock absorber has lost its seal and some of the oil is leaking out.
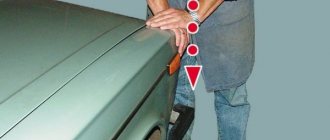
You can also assess the condition by rocking the body. To do this, you need to go to one of the front wheels and with both hands press firmly on the body to overcome the resistance of the springs.
You need to press several times to set the amplitude of oscillations as large as possible, and then suddenly stop swinging.
If the shock absorber is working properly, the body will immediately return to its original position, without any vibrations.
If there are vibrations, even minor ones, the shock absorber is faulty.
It is necessary to check by rocking on both sides of the car, since replacement must be done at least in pairs - two shock absorbers of the front suspension or rear suspension are changed at once. It's even better to change all the elements at once.
We will not consider replacing the rear shock absorbers for now; everything stated below will concern only the front suspension.
Installing a New Rack
Installation of a new shock absorber strut on the nine is carried out in the complete reverse order of dismantling. Be sure to install a new boot, preferably an elastic one. For example, a standard boot for a VAZ-2109 car has the shape of a glass and is made of hard plastic. The work of the anthers that are installed on cars, starting with the VAZ-2110, is much more efficient. Be sure to install at least new nuts. The fact is that they have a plastic thread lock. Only if high-quality elements are used, replacing the front body pillar of a VAZ-2109 will give a noticeable result. Driving on uneven roads will become smoother and vibration will be reduced.
What is the difference between gas-oil products and oil products?
From the name itself it is already clear that their main difference is the working composition that is used inside the device.
In oil shock absorbers, the working space is filled with hydraulic oil.
The main disadvantage of these types of devices is aeration (oil foaming), which occurs as a result of changes in the physicochemical properties of the liquid when a piston acts on it in a small space.
This is manifested by a failure in the operation of the device and uncharacteristic sounds.
A partial reduction in aeration is achieved by replacing air with nitrogen gas; as a result, gas-oil analogues have appeared, which come in one or two pipes.
Single-pipe ones are often called gas ones, because there the oil and gas are separated by a movable jumper and do not mix.
Strong backpressure ensures gas pressure in the region of 10 - 30 atmospheres; there are also regulated analogues. Mainly installed on sports cars.
Twin-pipe gas-oil shock absorbers have less gas pressure - from 3 to 10 atmospheres.
But he won’t delve into the topic, because that’s not what you came here for. The shock absorber structure can be seen in the photo below.
Replace completely or repair?
A rather controversial question: change the racks or make repairs? If you come across high-quality repair kits, then why not restore them? The cost of work can be reduced by more than two and a half times. But this is only relevant for racks that have a collapsible design. But if the repair kit is of dubious quality, then it is better not to risk it and install new racks. It is also worth mentioning one small feature. If you do not fill in enough oil, the shock absorber will not work effectively. If you fill in too much oil, the oil seal in the upper part of the housing will most likely be destroyed. The error when pouring should be minimal. Therefore, a complete replacement of the front struts of the VAZ-2109 will be the most effective repair option.
1200 rub. for the photo report
We pay for photo reports on car repairs. Earnings from 10,000 rubles/month.
Write:
If you conduct a small test, taking five front-wheel drive vehicles produced by VAZ at random and simply rocking the cars, then it will not be so easy to find a car without knocking or noticeable play. Four machines show either large backlashes or backlashes with a knock. All this speaks to the low quality of the manufactured parts, but it is the strut that is the weak point in the front suspension, which is the main source of the car’s rumble transmitted into the cabin. Even if the knocking starts to show itself only due to unevenness, soon the rack will really rattle, and it is better to get ahead of the repairs and do preventive maintenance in advance.
Main principles of the operation
The technology for changing the front shock absorbers on the “nine” looks simplified like this:
- hang up the body and remove the wheel;
- Unscrew the nut securing the strut to the body;
- disconnect the steering joint;
- remove the two screws securing the strut to the rotating knuckle;
- loosen the three nuts securing the upper support relative to the body;
- remove the stand;
- compress the spring;
- remove the rod nut, upper support, cup, compressed spring, boot, compression buffer;
- Perform preliminary assembly and installation of the shock absorber in the reverse order.
The technique for replacing the rear suspension struts of a VAZ 2109 is formed by the following transitions:
The front and rear pillars deteriorate over time. In order to replace them, it is not necessary to contact a service center. The replacement procedure can be done independently.
Changing the front struts
Step 1: select tools.
In order for the replacement of the front struts 2109 to occur in accordance with the requirements established by the manufacturer, it is necessary to have a set of equipment that allows you to perform these manipulations without negative consequences for the car.
Before you get started, you will need the following tools:
- hydraulic couplers for compressing springs;
- Screwdriver Set;
- wrench;
- container for shock absorber fluid;
- chisel.
Step 2: determine the degree of damage.
Effective replacement of the front struts of a VAZ 2109 is impossible without first determining the extent of their damage. Before making it, you should determine whether intervention is necessary, because in many cases the racks can last for some time.
So, replacing the front struts of the VAZ 2109 is appropriate if:
- the casing has lost its elasticity;
- there is a rupture of the casing;
- the fittings, made of metal, have peeled off from the rubber shell of the casing;
- axial movement of the automobile bearing is observed directly in the upper support body itself;
- while cranking, the car bearing begins to jam and slow down;
- lubricant begins to leak from under the special protective rings;
- cracks appeared on the spring;
- deformations of the spring coils are observed;
- if the total length of the spring together with the manufacturer's marking of class A is less than 20.7 cm
In some cases, you can get by with replacing just one part: a casing, a car bearing or a spring. But professionals advise, upon noticing a malfunction, to completely replace the front struts. This will protect your car and you from unforeseen road situations.
Step 3: replacing the front struts 2109.
In order to do quality work, you should do it in stages:
- remove the front pillar and thoroughly clean it of dirt;
- take the ties and compress the spring with them until it stops putting pressure on the car’s support cups;
- take a screwdriver and unscrew the nut from the upper support of the car shock absorber;
- Now you should remove the support stop, the upper support itself and its bearing;
- remove the spring and the upper cup;
- check the process of releasing the front strut from the compression stroke buffer and casing;
- carefully inspect the swing arm, housing, lower spring cup and bracket, if you find signs of deformation, replace them;
- now install the front strut in a vertical position, then lift the shock absorber rod all the way and lower it, repeat the procedure several times; the shock absorber is not subject to restoration or repair work if knocking, jamming or failure is detected during this mini-diagnostics - in this case it must be replaced with a new one; if these signs are not observed, you can continue repair work on the front pillar;
- take a chisel and knock down the support of the buffer responsible for compression, then unscrew the nut with a wrench from the shock absorber body;
- After removing the nut, remove the working cylinder and rod;
- take a clean bottle and drain the liquid from the shock absorber into it;
- rinse the housing from the inside, install an oil or gas cartridge into its interior;
- now assemble the upper strut, replacing all those components that cannot be restored (casing, buffer, support, spring and bolts);
- install the compressed spring very carefully, follow safety precautions.
Changing the rear struts
Step 1: getting ready for replacement
It is known that replacing the rear struts of 2109 requires thorough preparation. Rear struts are much more difficult to change than front struts. However, you can do this yourself if you know cars well or want to learn how to repair them.
First, prepare the tools you will need:
- wheel chocks;
- Screwdriver Set;
- wrench;
- container for shock absorber fluid;
Step 2: for what faults should the rear struts be replaced?
Before replacing the rear struts of the VAZ 2109 , you need to determine for which faults the parts should be replaced:
- the appearance of cracks or other deformations on the surface of the silent side;
- if the boot has lost its elasticity or is torn;
- if the compression buffer is deformed, damaged or completely destroyed;
- if the insulating gasket has lost its elasticity or is torn;
- if the spring coils are deformed or the spring is covered with cracks;
- if the length of the class A spring is less than 20.7 cm.
Step 3: replacing the rear struts of the VAZ 2109
To replace the rear struts, follow these instructions:
- place supports under the car's wheels, lift the vehicle itself, then install additional supports next to the jack and remove the rear struts - the car must be in first gear;
- remove the boot and power buffer from the spring; if they are in poor condition, replace them;
- the shock absorber should be thoroughly washed and then fixed in a vice;
- the strut needs to be installed vertically, raise and lower the shock absorber rod all the way, repeat the procedure several times, as in the case of the front struts, if knocking, dips or jamming is detected, the shock absorber must be replaced with a new one;
- replace, if necessary, the rear strut mounting silent box, shock absorber cushion, boot, power buffer, gasket and spring;
- pull out the shock absorber rod all the way, unscrew the nut with a wrench, then remove the rod itself, its parts and the working cylinder;
- pour the shock-absorbing fluid into a bottle or other container, keeping the container clean;
- replace the shock absorber parts with new ones;
- reassemble the entire shock absorber, after you reassemble the compression valve, check the movement of the valve discs and valve plates, it should be absolutely free.
Now you can be convinced that replacing 2109 struts is quite within the capabilities of an ordinary car owner. However, if you are afraid to risk your car, contact a specialized center where you will receive fast, qualified assistance at an affordable price.
Signs of malfunction of VAZ 2109 racks
The following signs indicate the need to replace VAZ 2109 struts:
- The first and inevitable sign indicating the need to replace the strut is a leaking shock absorber . On VAZ 2109 cars they do not sag, but shock absorber struts leak already at 40,000 km.
- The second symptom indicating the need for replacement is noises and squeaks in the suspension , especially when driving over rough terrain.
- Sometimes the beating of faulty struts is transmitted to the steering wheel, which can also indicate a malfunction.
- As a consequence of the previous symptom, the car may partially pull to the side or skid to the sides .
- When the car turns, the skidding trajectory increases, and the braking distance also increases .
General information about car struts
Replacing struts on a VAZ 2109 yourself
From a practical point of view, the VAZ rack performs the function of a mechanical stabilizer, being a kind of rational connecting link between the body and the track. Many motorists often confuse a car strut with a shock absorber. In this regard, the most logical solution would be to consider the functions and structure of the shock absorber and strut.
VAZ 2109 do-it-yourself replacement of front struts
Main functions of the rack
- ensuring stabilization of the car body during movement;
- accumulation of kinetic energy during vehicle movement;
- ensuring the correct orientation of the vases body in space;
- ensure not only the comfort of the vehicle, but also its safety.
Main functions of the shock absorber:
- assistance in stabilizing stands;
- increasing the degree of smoothness of the car during movement;
- dynamic adaptation of the car to rapidly changing track conditions, etc.
Note. From a practical point of view, a shock absorber is a dynamic spring with liquid that stabilizes the functioning of the strut, and that, in turn, directly stabilizes the car body itself.
Replacing front struts on a VAZ 2109
Over time, the racks lose the proper degree of functionality and must be replaced immediately. It is quite possible to carry out the replacement yourself, which allows you to save a very significant amount of financial resources by refusing the services of a car service in this matter.
Replacement of rear and front parts
- jack;
- special key for the rod and a set of keys;
- spring tie.
Now let's consider a situation where it is necessary to repair the rear pillars of a VAZ 21099.
Replacing the rear struts on a VAZ 21099 requires one condition to be met: parts must be replaced in pairs. Otherwise, the car will become unbalanced while driving, which will lead to rapid wear of the axle and suspension. Therefore, it is better not to save money and change both racks at once. After all, good and high-quality elements will serve you for a long time!
Good luck on the roads!
The main causes of malfunction of the front struts
- premature failure of racks due to mechanical damage;
Replacing the front strut liners of a VAZ 2109
- long service life;
- manufacturing defect;
- poor quality of the road surface, etc.
Objective signs of a faulty front strut
- easily noticeable creaking of the suspension while overcoming road irregularities;
- knocking when the car stops or starts moving;
- the presence of shock-absorbing liquid, which can be seen even with the naked eye;
- The stand itself is constantly wet and dirty and cleaning it does not help.
Note. Objectively, you need to be aware that temporary repairs to the front struts will not have any significant effect; their complete replacement is necessary.
You can replace the strut apron either at a car service center or in your own garage.
Why remove and disassemble a bicycle fork?
A bicycle fork, like all other components, may need to be replaced, repaired or serviced. Therefore, before proceeding with these procedures, we need to remove it from the bicycle, and in some cases, disassemble the shock absorber for spare parts. In what cases will we have to remove it? First of all, this is when replacing it with another. Secondly, it may be necessary to replace bearings and/or support cups, apply new lubricant, and there are also cases when it is necessary to align the steering tube or carry out other repair work.
It is most often necessary to disassemble a bicycle fork shock absorber to replace lubricant or worn components. For example, these could be oil seals (cuffs), etc.