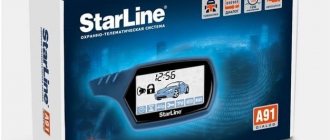
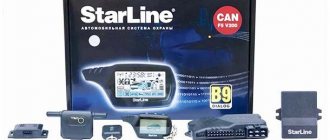
Contents of delivery
StarLine alarms, with the exception of those with the ECO prefix, come with two key fobs: the main one with an LCD display and an additional one, which has three keys.
Moreover, unlike most alarms, the additional one works with feedback, which is due to the very essence of the dialogue protocol: when an alarm is triggered, the alarm first transmits information to the main key fob, and not finding it, communicates with the additional one, and it sounds an alarm sound. The batteries in them are different: the most energy-intensive and frequently used main key fob uses a standard “pinky” AAA battery, which lasts for a month. This is due to the fact that the alarm regularly tries to communicate with the key fob, even if nothing happens - and these regular reception and transmission sessions reduce the battery life. Therefore, when purchasing a StarLine alarm, buy a pair of nickel batteries with a charger: these costs will be recouped by not having to regularly buy batteries.
If desired, the owner buys additional key fobs (the second main one if other family members use the car). The alarm memory has space for four key fobs of any type. At the same time, you need to understand that when you start the process of recording key fob codes, the previously registered ones will be erased, that is, it is impossible to “add” another one - the entire set is registered at once.
Conclusion
Starline brand car alarm key fob often encounters malfunctions. To prevent them, you will need to install a cover and be careful during use. Spare parts for the device are low cost and easy to install. It is possible to repair the key fob yourself if you follow the recommendations of specialists and follow the suggested instructions. With a minimum of effort, the car owner will be able to use the car’s security system again.
Subscribe so you don't miss anything important
This means that it will not be possible to see anything on it. Even a small height (from hand to ground from a sitting position) can damage the display and require replacement and repair of the key fob.
Any motorist who finds himself in such a situation will begin to look for companies that are capable of repairing Starline key fobs. But what if they simply don’t exist, and instead of the broken one you have to buy a new keychain? In this case, it is best to make the repair yourself. After all, a new keychain will cost, at best, 1500 rubles, and at worst, 2500 rubles and more. Some motorists would simply be “strangled by a toad” for such expenses. Still, the keychain is not completely broken. It is in working condition, although it does not display anything on the LCD display. And in order to repair a car alarm, you will need a minimum of costs and time to study the information, which describes in detail how to replace the LCD display on the starline a91 key fob.
How to register?
To do this you need to prepare all the key rings:
- After disarming the car, with the ignition off, quickly press the Valet service button seven times.
- Turn on the ignition - the alarm emits seven signals, confirming that it has entered the code programming mode.
- Quickly press buttons 1 and 2 on the first key fob of the set at the same time.
- The car and the key fob will give a single signal.
- With a pause of no more than five seconds, perform the same operation with the second and so on.
- Turn off the ignition.
- The car gives three light signals, confirming the end of the procedure.
A common mistake is the delay between registering two key fobs for more than five seconds, so they must be at hand.
Installing the system yourself
We will skip the process of choosing a suitable anti-theft agent, but we will recall the main points. Before purchasing, take several factors into account and determine which ones are most significant to you:
- Siren volume;
- Additional control sensors;
- Antenna range;
- Feedback keychains.
Anti-theft components
The main selection criterion is the storage location of your car. In the alarm set we are talking about today, Starline a 91, you will find:
- Siren;
- Control block;
- Light-emitting diode;
- Shock and engine temperature sensors;
- Antenna;
- Two keychains;
- Instructions;
- A set of all kinds of wires.
A standard set of tools will be useful for your work, which will include a multimeter to correctly connect the wires, and a probe with a lamp to connect to the central locking system, if available.
Alarm installation
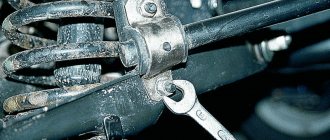
First of all, we fix the control unit. The recommended location is under the dashboard, but you can change it if you wish. The main thing is that the surface is flat, not conspicuous, and not subject to external influences and strong vibration when moving. Next, we glue the transceiver (antenna) onto the windshield with double-sided tape; you can determine the location yourself, the main thing is to step back about five centimeters from the body parts. The shock sensor is attached to self-tapping screws in the car interior, pay due attention to it, it must be secured very firmly, you can use self-tapping screws.
Installation process
A light indicator (a light that flashes when you arm the car) is also mounted on the dashboard; the service button (Valet) can be located in any place convenient for you, but preferably not in plain sight. It is thanks to it that you can rewrite key fobs or reprogram anti-theft functions. We install the siren and engine temperature controller under the hood. For the first device, we select a dry place, away from moisture and heating parts, the horn is directed downward. The temperature sensor is mounted as close to the engine as possible to provide the most up-to-date information.
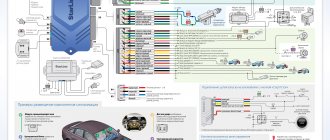
Working with wiring
Connecting wires and all electrical work in general must be carried out in strict accordance with the connection diagram. Perhaps it is present in the instructions that are included in the alarm kit. In any case, you can use the diagram below.
Electrical diagram
Important! When working on the car's electrical system, remove the negative terminal from the battery!
Do not forget about the correct connection to the central locking. In this case, everything depends on the method of controlling the central locking. In most cases it is controlled by a negative pulse, but it is better to check with the manufacturer or find this information in the instructions for the central locking. For negatively controlled locks, the following scheme is suitable:
Connection to central locking
After finishing work with the wires, we return the battery to its place and perform a test. If connected correctly, the alarm will go off automatically, so keep the keys with you or do not close the car doors. And now there is the last moment - working with key rings.
Key fob repair
Although the company uses impact-resistant plastic, the need to replace the case or glass of the key fob may arise. It is difficult to find individual original parts - the manufacturer itself sells complete keychains, but you can find them on Aliexpress if you wish. And taking into account the fact that the Chinese have long and fruitfully collected clones of StarLine alarm systems (for some time now they have been officially sold in Russia under the Red Scorpio brand, and even the printing of instructions and booklets is the same (!)), and outright fakes, spare parts for key fobs StarLine is represented in abundance on Asian trading platforms.
To disassemble the main key fob, remove the battery by sliding the battery compartment latch, then remove the small Phillips head screw. In addition, the halves of the case are held in place by latches: carefully prying the back cover off from the side of the ring (it’s convenient to use a guitar pick, a thin metal plate), remove the cover from a pair of latches, and then continue to unclip them around the perimeter.
After this, we remove the internals - the main board, the transceiver board and the display. At the same time, it is worth noting the quality of soldering of microbuttons - if in cheap alarm systems they are soldered by the body to the board at two points, then in StarLine they are soldered at four points, so they are less likely to be pressed through, coming off the board.
But you won’t be able to simply replace the display on this key fob - the cable is fixed to the board, and without experience with such installation, success in replacement is very doubtful. It is better to replace a broken screen in a workshop - there are many similar offers on the market. A faulty key fob often causes the alarm to not open the car doors.
Starline equipment compatibility
Equipment compatibility in Starline anti-theft systems:
- Starline alarm remotes, which have the number “6” in their name, are interchangeable with other similar devices. If the communicator for controlling the E60 system fails, it can be replaced with a key fob from models B64, D64 and vice versa.
- The key fob from the E90 can be replaced with a pager from the B94 and D94, as well as A91, A92, A93 and A94. Accordingly, you can buy an E90 communicator to work with these systems.
- Pagers for controlling Starline A2 and A4 versions are compatible with each other.
- In the Starline 24V, A4 and A2 alarm versions, spare communicators are completely interchangeable.
- Additional pagers are compatible with Starline B6 and B9 security system models.
- Line B alarms have one feature - all models are divided into older and newer classes. The latter are characterized by a blue color in design. Spare remote controls from older versions are completely interchangeable with key fobs from newer models.
- Starline A61 and B6 Dialog communicators are fully compatible. The same applies to the B9 Dialog and A91 models.
Flip key fob
Many owners don't like to carry a heavy key fob on their key ring. It is generally not recommended to do this, since it significantly reduces the security of the car: having stolen or taken away the keys, the thief immediately gets the opportunity not to look for the alarm in the cabin, but simply turn it off or switch it to service mode. But recently there has been a fashion for embedding key fobs into a car key - on the Internet you will find offers for the sale of flip keys for various alarm systems, including for StarLine A93.
From the point of view of car security, this is more stupid than wearing a key fob on a chain. You should resort to this solution only if you are fully using the alarm capabilities - two-stage validation must be configured (entering a secret code using the car’s standard keys).
To convert the alarm key fob into a flip key, you will also need to disassemble the body of the car's standard key - you will have to remove the standard immobilizer chip from it so that the car can be started normally with a new key. We also disassemble the alarm key fob as described above.
First we replace the glass from the alarm key fob into the new key fob if the purchased key has just a slot instead. We carefully separate the glass from the panel using a thin knife. After this we rearrange the discharge blade. Next, we insert the boards removed from the key fob into the case and check whether the microbuttons on the board match the rubber buttons in the key. We find a free space for the immobilizer chip - it is desirable that it be as close as possible to the very tip of the key and be oriented in the same way as in the standard one. To secure the chip we use a glue gun. All that remains is to close the cover of the key fob, insert the battery, and check the operation of the buttons.
Most common faults
Malfunctions in which it is necessary to repair the car alarm remote control Starline A91, A92, A93, A94, E90, D94:
- The battery is low. As a result of this, the anti-theft installation for Starline A91, A94, E90 and other versions will not respond to sending commands from the communicator. Sometimes the signal is transmitted, but with glitches. Also, the blinking light of the diode bulb on the pager body will deteriorate and the range of two-way communication will decrease. To solve the problem, you need to change the battery in the main or additional communicator, depending on the device.
- Screen damage. The problem is related to the physical impact on the communicator body. Sometimes even the case cannot protect the device from serious damage. If the screen breaks down, control of basic functions is possible if the damage is minor, but it is better to change the display. This procedure may take some time depending on the nature of the breakdown.
- Control keys are faulty. If you press too hard on the buttons when operating the alarm, over time they will begin to jam, causing damage to the internal components. In fact, the key itself can be working, but it will not respond to a click. To restore the device to working condition, it must be disassembled and the internal circuitry diagnosed. If the board breaks, it will have to be dismantled and reinstalled; the difficulty of performing this task lies in the need to use a soldering iron with a thin tip. If mistakes are made, other elements of the circuit may fail, as a result of which they will have to be dismantled and replaced.
- Damage to the device body. If the communicator is dropped frequently, scratches may form on its case, and serious falls may cause the pager to malfunction. Practice shows that Starline signaling communicators are characterized by low strength and cannot withstand heavy loads. If damaged, the case will have to be replaced, with the exception of minor damage, when part of the case can be soldered back. To avoid this problem, we recommend using a protective cover.
- Board hardware problem. Usually appears as a result of moisture entering the circuit. Exposure to water on the board can lead to damage to capacitors and other components. If after drying the problem cannot be solved, you will have to either repair the remote control board or change the device.
How to set up autostart by temperature, time, alarm clock from the key fob
Autostart from the vehicle's engine key fob can be done remotely based on temperature, time, and alarm clock. Before setting up autorun using any of the three options, you must meet the following requirements:
- the gearshift handle (gearbox) must be in the neutral position - the gears are disabled;
- the vehicle doors and hood should be closed;
- turn off the ignition;
- activate the car's handbrake.
Any model of the Starline security system is accompanied by detailed instructions that explain in detail how to use autostart. However, not everyone has the patience to study it from beginning to end. Therefore, we will answer which buttons to press to start the car engine remotely. After getting out of the car and closing the last door, we activate the alarm, and then carry out the following manipulations on the key fob to set the system to autostart from a distance:
- Press and hold button No. 1 for 3 seconds.
- Next, click on button No. 2.
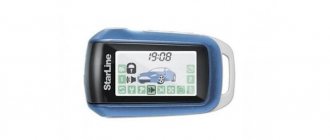
Buttons on the Starline key fob
Auto start on alarm clock
So, how to set up remote automatic start of a car engine using an alarm clock on the key fob. First you should check the current time on the alarm clock, and then follow the instructions:
- we activate the function, which is indicated on the key fob display with a graphic image of a bell;
- Having checked the current and set the required time, successively pressing buttons No. 3 and No. 1, move the cursor to the “dial” icon and activate auto-start on the alarm clock, which will be confirmed by a flash of dimensions;
- confirmation of activation of autostart by alarm on the key fob appears in the appearance of two icons on the display - a bell and a dial, coupled with a sound signal.
Autostart by alarm clock Starline A 93
You can deactivate the function by hovering the cursor over the dial image and then pressing the key fob button No. 2. Two flashes of dimensions and the absence of a bell with a dial on the key fob screen are a signal that the function is disabled.
Autorun by time (timer)
As part of the answer to the question of how to enable auto-start of the engine from the security system key fob at a specific time (timer), we offer you the following instructions:
- move the cursor to the “hourglass” icon by clicking successively on buttons No. 3 and No. 1;
- A flash of dimensions, a sound signal on the key fob and the appearance of an hourglass icon on its display indicate that the function is turned on and the vehicle engine begins to warm up for the programmed time.
Automatic start on time Starline A 93
You can deactivate the function by hovering the cursor over the hourglass icon again and pressing button No. 2. A double flash of dimensions, a sound signal and the disappearance of the graphic image on the LCD screen of the key fob indicate that the function is disabled.
Autostart based on temperature indicators
From the autostart unit - key fob, you can also configure the remote start of the vehicle engine based on temperature indicators outside the car. The security system monitors the readings of a temperature sensor installed on the car's engine, and after activation, starts warming up the engine for a programmed period of time.
Autostart based on temperature Starline A91, setting.
The option is enabled in the following order:
- point the cursor at the “thermometer” icon and briefly press button No. 1, after which the dimensions will flash, a sound signal on the key fob and the current temperature value will appear for 4 seconds;
- short presses on button No. 1 set the desired parameters (each press changes the temperature by 30 C);
- Holding down button No. 1 for a long time until a sound signal activates the autostart mode based on the temperature outside the vehicle (two short beeps and the appearance of the “thermometer” icon on the display indicate activation of the function).
The option is deactivated using a standard action - move the cursor over the “thermometer” icon and press button No. 2. A double flash of the dimensions, a sound signal and the disappearance of the graphic icon on the key fob display confirm that the function is disabled.
Features of operation
How to repair a gearbox
The Starline A93 alarm system does not cause any particular problems during operation, especially if it was installed in accordance with the manufacturer’s recommendations. Malfunctions in its operation may be due to:
- frequent voltage drops along the power buses (discharge of the battery in winter, poor contact with the body along the negative bus);
- moisture entering the interior in the area where the central unit is installed;
- damage to the engine temperature sensor;
- attempts of unauthorized access to the car (especially with the use of special means - grabbers, high-voltage shockers);
- water getting into the key fob.
In case of possible software failures, first of all it is necessary to disarm and arm the car several times. If the alarm fails again, you need to reset it to factory settings, then re-program the main functional parameters.
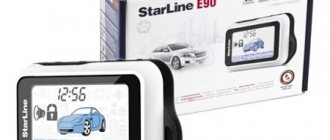
Connection diagram for Starline E90 alarm system with auto start
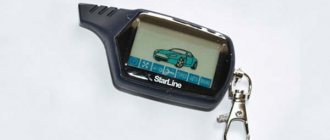
How to register a new key fob for the Starline A91 alarm
To install the Starline E90 alarm on a car you will need:
- set of wrenches with socket heads;
- drill with drills;
- soldering kit: blowtorch, rosin, tin, etc.;
- heat shrink tubes, insulating tape.
There are several main points that should be taken into account during installation, no matter whether the installation is on a VAZ or Nissan Terrano. Car alarms are installed exclusively on cars with an electrical circuit of 12 volts. It is advisable to place the main unit in a place protected from vibrations
The most preferable installation location is under the dashboard - this guarantees concealment from prying eyes, as well as a minimum length of connecting wires. The block is fixed using self-tapping screws or double-sided tape to eliminate the possibility of spontaneous movement
It is advisable to place the main unit in a place protected from vibrations. The most preferable installation location is under the dashboard - this guarantees concealment from prying eyes, as well as a minimum length of connecting wires. The block is fixed using self-tapping screws or double-sided tape to eliminate the possibility of spontaneous movement
Car alarms are installed exclusively on cars with an electrical circuit of 12 volts. It is advisable to place the main unit in a place protected from vibrations. The most preferable installation location is under the dashboard - this guarantees concealment from prying eyes, as well as a minimum length of connecting wires. The block is fixed using self-tapping screws or double-sided tape to eliminate the possibility of spontaneous movement.
A transceiver with a signal diode is mounted on the windshield of the car.
The engine temperature sensor must be mounted on its body using one of the M6 bolts. It is advisable to attach it closer to the crankcase cover rather than the cylinder head.
A siren is also mounted in the engine compartment. The main condition is to avoid moisture, and also place it away from large heat sources to prevent the horn from melting. Also, the siren connection wires should not be accessible from under the car so that an attacker cannot cut them.
The shock sensor is located near the center pillar. It is advisable to mount it so that you can access sensitivity settings if it triggers too often.
The Valet service key is installed in an accessible but hidden place. The inner sides of pockets for small items, the central tunnel between the seats, the plane under the decorative plugs of the front panel, etc. are suitable.
Also, to connect and configure automatic start on vehicles equipped with a manual transmission, you will need to program the neutral and connect the limit switches to the handbrake. If the car is equipped with an automatic transmission, then the owner must move the lever to the parking position, otherwise autostart will not occur.
First, all components are mounted, and then the system is connected according to the diagram below. Power is supplied through two main wires:
- black. The negative terminal that needs to be attached to the car body is ground;
- red. The positive wire, which is recommended to be connected to the battery or ignition switch;
If the car can be started using the Start button, then the connection is made in a slightly different way:
- the red contact is attached to the battery, but through a fuse designed for a current of no more than 30 amperes;
- The blue wire is connected to the brake pedal;
- the yellow-black cable connects to the start button;
- the yellow and green contacts remain unused.
- the red wire connects to the battery;
- yellow cable to the ignition system;
- green – to the ACC output;
- blue is redundant;
- the black and yellow contact is connected to the starter.
Repair process
- The first step is to disassemble the broken Starline alarm key fob. This must be done carefully, because you can inadvertently damage any important parts. Disassembly is quick and easy. All you need to do is unscrew a couple of bolts. One of them is located under the battery cover, and the second is closer to the mount that looks like a carabiner.
- Now you need to remove the board and antenna. This is necessary so that they do not interfere while repairs are being made. But this is already “taste and color”. They may not bother anyone.
- The Starline alarm display is connected to the backlight using ordinary glue. When dismantling, it is necessary to tear off the screen on the graphite cable. It is not necessary to take care of careful removal because... The screen is still damaged and worthless.
- Then you need to clean the contacts and place the new screen in place of the old one. There are two types of displays - on legs and on a flexible graphite cable. If the second option was ordered, then there will be no problems with installation. But if the screen is on legs, you will have to use a little skill and ingenuity to install it correctly.
You'll have to struggle a bit with the display on legs. Many “tutorials” advise making extensions with aluminum wire by soldering. But this is not a very easy way for the average person. Another guide advises using tin and copper wire wound around the soldering iron tip. In principle, an hour of work and the screen will fall into place. Unfortunately, there are no other methods, but you can try something of your own. So to speak - improvise.
- After the Starline alarm screen has taken its rightful place, you need to take care of connecting the glass and the body. You can perform this simple operation using any superglue. But you need to take into account that the glue is applied to the edge of the stencil ramie. This means that if it is very thick and easily and firmly sticks to everything it comes into contact with, then the screen will be covered in glue. And you will have to tear off the glass, wash the glue with alcohol and carry out the procedure again.
By the way, if the screen is on legs, then installation will be complicated by the fact that in the case itself there are pins that are intended for screens on a graphite cable. They will prevent the board from moving into its rightful place. They can be cut with a regular stationery knife.
- After this, you can assemble the starline alarm key fob to check its functionality. If everything is done correctly, it will work. And the replacement was a success.
By the way, you can see a protective film on the display. In principle, it is not particularly needed, so it can be removed and thrown away. This completes the repair of the starline a91 alarm key fob screen.
Step-by-step replacement instructions
Starline car alarm malfunctions when opening/closing doors
Let's say you need to register a new key fob in the main alarm unit. Then, you need to take with you all the keychains that will be used (maximum 4). The recording is done like this:
- They remove the car from security. While in the cabin, close all doors;
- Activate the service mode;
- Record key fobs one by one;
- Exit service mode.
This sequence looks approximately. Now we will clarify it.
Recording sequence
First of all, to record key fobs, you need to disarm the car. Then, while inside, close the doors and place the key in the ignition (it must remain in the LOCK position).
First turn the key to the left
Here is a sequence of actions that allows you to record under standard conditions:
- The Valet button installed in the cabin must be pressed and released 7 times (do not turn on the ignition yet);
- Start the engine. You should hear 7 beeps;
- Record the key fob by pressing the “1-2” buttons on it (for “Dialogue” the combination “2-3” is suitable). You need to press with one touch, both keys are pressed simultaneously. Hold the buttons for 3-4 seconds, then a beep will sound;
- Repeat step 3 for each key fob. There is no need to wait too long - if 5 seconds pass after the beep, the system will exit the required mode;
- Turn off the ignition. The “dimensions” will blink 5 times, which means the following: we have exited the service mode.
Now we need to clarify what exactly happens in step “3”.
From the Starline Dialog manual
The standard Starline instructions recommend pressing two keys and holding them until the beep sounds. However, there is a software option that provides something slightly different: the buttons are pressed, held for 3-4 seconds and released. And the beep sounds a second after that. If you hold it and don’t let go, you’ll never hear the beep. You can find out what exactly is suitable in your case (the first option or the second) experimentally. It’s okay if the key fob is not registered the first time - then the contents of the memory will remain the same.
In reality, this is not the case - if the write fails, the main block will remain in the same state. Otherwise, any mistake would lead to undesirable consequences. But as soon as at least one key fob is registered, the “old” codes will be erased. Moral: just in case, register the main keychain first.
LED behavior
You need to find where exactly in the cabin the indicator is located, which is connected to the main unit. This indicator at Starline is made in the form of an LED.
Signal diode (LED) Starline
Here is a breakdown of the indicator signals:
- Slow flashing – security mode is on;
- No indication – the car is disarmed, the doors are closed;
- Fast flashing – doors or hood are open;
- Flash 5 times, pause, 5 flashes again, etc. – the service mode is active (it is activated by the Valet button).
There is nothing more to add here. Follow the indicator carefully, and then the question “why the Valet button does not work” will not arise.
The most common mistakes operators make are: When trying to activate the service mode, you need to check whether all the doors and the hood are closed (by the LED indication or by the display of the main key fob). Usually, this is not done. Sometimes they also try to use equipment that is incompatible with the alarm system installed in the car. Well, we won’t talk about why only new batteries should be used here. This question needs no explanation.
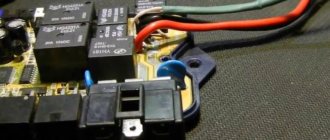
4Separate electronic boards
Why does the car alarm not see or respond to the Starline key fob and how to fix the problem?
Inside the StarLine E61 car alarm key fob there are two electronic boards. They are attached to the body with plastic latches in several places. By carefully prying them from below and pulling them towards you, they can be removed quite easily.
The upper electronic board is attached to the lower one like a sandwich through two connectors. The larger connector is located on the minus side of the battery; you need to start separating the small board from it. Alternately pull the board up a little by the larger connector, then by the smaller one. After several repetitions of this operation, the top board is easily separated.
Separation of the electronic boards of the StarLine E61 car alarm key fob
Methods for determining the need for replacement, filling volumes and expert advice
If an oil pressure sensor is installed on the engine of your car, this makes it much easier to determine the moment after which a scheduled lubricant change in the VAZ 2107 engine is required
To determine the exact torque, it is necessary to pay attention to the lubricant pressure in different operating ranges of the power unit. Usually, when the lubricant decomposes, the VAZ 2107 oil pressure indicator (installed on all cars produced before 1988) shows an increase in pressure in the system during startup and long-term operation of the power unit
This happens due to liquefaction and boiling of the lubricant in the crankcase of the power unit. If there is no oil pressure sensor on your car, then you will have to rely on the recommendations of the car manufacturer. AvtoVAZ engineers advise changing the lubricant in the engine every 6,000 km when driving short distances and every 10,000 km when driving constantly over long distances.
Many owners of classic cars are interested in the question of how much oil should be poured into the lubrication system of the power unit of their favorite car. According to the manufacturer, the volume of engine oil in the engine lubrication system is about 4 liters, or more precisely, 3750 milliliters, including lubricant in the filter. Expert advice.
- When changing oil, it is better to fill in the brand that was poured into the engine crankcase before.
- It is not recommended to fill old power units with synthetics, since it washes out deposits covering microcracks in the oil sump.
- It is better to immediately fill a new factory engine that has been run-in with synthetics. In a good engine, synthetics are welcome; they will prevent it from overheating and extend its service life.
Source