03/02/2022 1,848 Alarms
Author: Victor
If the Starline alarm does not respond to the key fob or does not work correctly, then most often this is due to the battery or poor signal reception due to the presence of interference in the area. In other cases, repair of the system or key fob will be required, before which you need to clarify the alarm model, since emergency unlocking actions will depend on its version.
[Hide]
General characteristics of Starline key fobs of different models
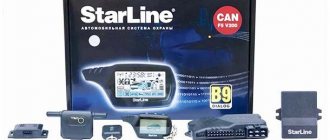
Description of the main characteristics of key fobs for Starline car alarms:
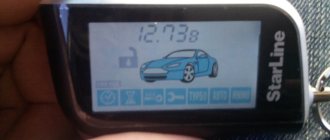
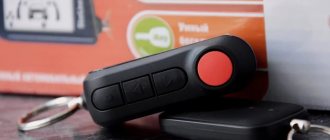
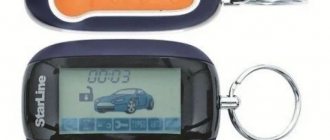
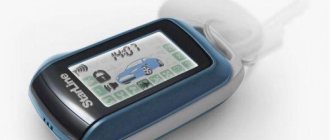
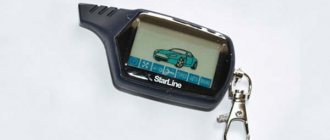
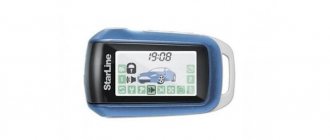
- The anti-theft complex includes two remote controls for controlling the system. Early Starline models used 2 one-way communicators, and later versions began to be equipped with feedback devices. As a result, one of the car key fobs is now equipped with a screen, and the second comes without a display. In the first case, thanks to the presence of the network, the user has the opportunity to monitor the condition of the vehicle.
- The operating range of the devices is determined by the model of the anti-theft system and a number of external factors. This refers to the architecture of the area and the density of its buildings, battery charge, weather conditions and electromagnetic interference. Noises that drown out the signal can come from factories, industrial plants and transformer substations. The average range of the main communicator with feedback varies around 100-200 meters, and the additional one - about 15-30 m.
- Coding technology can be interactive or dynamic; the first method is more reliable. This is due to the fact that data transfer between the transceiver and the key fob is carried out through the so-called dialogue. The remote control sends a signal in one form, the control unit decrypts it and sends back a message in a different format.
- Batteries of various types and standards can be used for power supply. This refers to devices of classes CR2032, CR2016, CR2025, AAA, etc.
- The communicator can be equipped with a built-in or external antenna module. This part can be hidden in the housing or connected to the main circuit via a cable.
- In order for the remote control to work with the control unit, it must be registered after installing the alarm. Without programming, the microprocessor will not be able to “see” the device, so executing commands will become impossible. You must register the key fob using the special “Valet” service button. The binding procedure differs depending on the model and is described in detail in the service manual.
- Newer models of communicators are equipped with a shock-resistant casing or a special rubberized protective coating.
Starline does not respond to commands from the phone
If there is a GSM module, the car alarm allows you to send remote commands from a smartphone: perform remote start, etc. If the Starline A93, A94 or B9 system does not respond to commands, then you need to send three SMS from the master phone to the number of the SIM card installed in the alarm system. Commands in SMS must contain codes 00550, 00990 and 00551.
Also, do not forget about topping up your alarm card account. Perhaps the complex does not execute commands due to a negative account balance. If funds run out too quickly, then you should take a suitable tariff with an emphasis on Internet traffic. As a rule, such cards come directly in the set, and using the standard tariff plan is too expensive. If you choose the right tariff, regularly replenish your account and make competent inquiries, problems will not arise.
Starline is a fairly common alarm system. At the same time, as the person who deals with them told me, her key fobs have one common problem: one or another button is pressed through
. It turned out that this can be fixed quickly and easily.
Inside it is simply soldered onto four legs and with sufficient force the soldering does not withstand and the button falls off. Diagnosis is extremely simple: the button does not work, the key fob turns into a rattle due to the button dangling inside. It happens very often in girls with long nails.
The case is not guaranteed. There are several ways out: buy a new key fob (I was told that it costs more than 2,000 rubles separately), give the key fob for official repair (they solder it, how much it costs is unknown, wait a month or more), give the key fob to a service center (any place where there is a specially trained person with a soldering iron), try to fix it yourself.
I decided that I would always have time to give it to a service center and that I should at least try to take it apart and see how it all works.
It’s worth noting that I literally don’t know how to solder, I have a healthy 40-watt Soviet soldering iron. Claims for poor quality/unaesthetic soldering will not be accepted. I'm just learning.
Need to:
- Small screwdriver (for glasses or similar size) - Superglue (one drop) - Toothpick - Soldering iron - Solder and rosin - Minimum soldering skill - 15-20 minutes of time
1. Open the battery compartment cover.
2. Take out the battery. There is a small screw under the battery. We unscrew it. I strongly advise you to put it somewhere where it won’t get lost or fly away.
3. Just in case, I checked under the sticker. There are no screws, so using a screwdriver or knife, boldly but carefully begin to open the key fob.
Starline equipment compatibility
Briefly about the compatibility and interchangeability of remote controls from different models:
- Key fobs from Starline systems, the name of which contains the number “6”, are considered interchangeable with pagers from identical models. For example, if the device from the B64 system breaks down, you can use the key fob from the E60, D64 versions and vice versa.
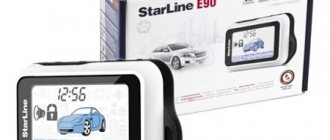
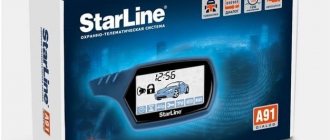
- The communicator for the E90 alarm system can be replaced with a remote control for the A93, A91, A92. Also for these models you can use devices from the A94 and D94 systems. To control security systems A91, A92 and others, you can use the E90 key fob.
- Alarm remotes A61 and B6 Dialog are completely interchangeable.
- Key fobs from Starline A2 and A4 systems are compatible.
- Communicators from B9 Dialog and A91 are completely interchangeable.
- In 24V, A4 and A2 alarms, additional devices are compatible with each other.
- The anti-theft systems included in the B line are different - all versions are divided into older and newer ones. The latter have the advantage of a blue tint in design over other colors. Additional devices from outdated versions are fully compatible with remote controls from new variations.
- The Starline B6 and B9 alarm systems have interchangeable additional communicators.
Problems with alarms of different Starline models
If the Starline A61 alarm or another model “does not see” the car and does not trigger from the key fob, there may be several typical malfunctions:
- The battery in the key fob is low or the contact elements in the rear compartment are oxidized. Failure of the power supply will result in the communicator becoming “invisible” to the control unit.
- Damage to the keys on the key fob. When pressed hard, the buttons become damaged over time, causing the response to commands to disappear not immediately, but gradually. If the alarm starts to turn on and open the doors every once in a while, the first thing to do is replace the control element. In fact, the contact itself, through which the button is connected to the board, often wears out, so it will have to be re-soldered.
- Hardware problems in the operation of the control unit or remote control. In practice, this reason is usually due to prolonged exposure to moisture on the working board installed inside the device.
- Wear of structural elements or wires. The alarm will close the doors every other time, sometimes it may not disarm the car at all. To determine the wear of the wires, just look at them. To test electrical circuits, you will need a tester.
- Presence of radio interference in the area. The main “symptom” of this reason is unstable operation of the alarm. When sending commands, the control unit may “respond” that the function was successfully completed, although there is no visible confirmation of this.
- The remote control is no longer “visible” to the control module due to desynchronization. In such cases, the system usually does not respond at all to commands from the key fob.
- Malfunction of the locking mechanisms installed in the doors. With this problem, difficulties arise only with working in the security system mode. One or more doors may fail. All other options, including service alarms, perform without failure.
- Reduced voltage in the vehicle's electrical network. The problem must be looked for in the battery or generator.
Video: Feedback fault
User Alexander Shkurevskikh in his video spoke about problems that may arise in the two-way communication of the Starline alarm system.
Emerging radio interference
Radio interference is also a common reason why the Starline security system does not respond to commands. If the car or its owner is in an area of radio interference, then the alarm may most likely not respond to the command. Interference usually occurs near certain enterprises, secret facilities, and also near airports. Also, a large concentration of cars with security systems in one place can create strong radio interference. Such situations often arise in the parking lots of large shopping centers. Reducing the distance between the signal receiver and the key fob as much as possible can help solve the problem. If you bring the key fob as close as possible, the alarm may respond to the command. If such actions do not help, then all that remains is to tow the car to an area where there is no interference. Then there should be no other problems with the operation of the alarm, and you can safely open your car and start the engine.
Why the alarm and diagnostics do not work
All problems in the functioning of the anti-theft system are divided into two classes - general malfunctions and problems with the key fobs. To eliminate the causes yourself, the user needs to check the correct location of all structural elements of the alarm and communicator.
General faults
When general problems occur, a car alarm usually does not fail immediately. At first there are interruptions, but in this mode security systems can operate for more than one month.
Alarm wear
To eliminate and repair the following actions are performed:
- A visual check of all wires running from the control unit to other alarm components is carried out. If it is possible to determine the cause without ringing, then the damaged wires are simply replaced with new ones. In the case where it was not possible to visually identify the failed electrical circuit, further testing is performed using a tester. When replacing conductors, it is recommended to wrap them with electrical tape to prevent their rapid wear in the future.
- At the next stage, diagnostics of contacts on the connectors of all structural elements is performed. This refers to an LED indicator, a control unit, and a transceiver with a built-in antenna. If there is oxidation on one of the connectors, then the contacts must be cleaned.
- The transceiver with the antenna module is checked separately. A malfunction in its operation may consist of rapid wear and tear as a result of improper installation. It is not allowed to place the transceiver at a distance of less than 5 cm from metal structures and electronic equipment.
Radio interference
When a vehicle enters a radio interference zone, sending commands from the remote control to the control unit becomes significantly more difficult. In practice, interference often occurs near enterprises, airports or sensitive facilities. However, their formation can also be caused by other vehicles equipped with many electronic devices or powerful anti-theft systems. Interference often occurs in large parking lots near hypermarkets and shopping centers.
To solve the problem, you need to try to send a command from the key fob, coming as close as possible to the antenna. If, when the device approaches, the alarm performs a function and sends a response to the communicator, this means that the cause is interference.
The key fob does not sync with the car
Designation of control elements on the remote control:
Correspondence of buttons on Starline key fobs
It is important to know
It is impossible to calculate the reason why the Starline remote control and the control unit are out of sync at home.
You can try to reset and reflash the communicator:
- When the ignition is turned off, the button to enter the service mode is pressed 7 times.
- The key is turned in the lock to the “ACC” position. The alarm should sound 7 beeps, this indicates that it is ready for programming. Please note that when linking new communicators, information about previously registered devices will be automatically deleted from the control unit’s memory. Therefore, the user must program all key fobs at one time.
- On the remote control, press buttons 1 and 2 or 2 and 3 simultaneously, depending on the model. The controls are held until the siren beeps once. When it appears, you can conclude that programming has been successful.
- Point 3 is repeated for each connected device. If several remote controls are programmed at once, the interval between settings will be no more than 5 seconds.
- After the binding is completed, the ignition is turned off. The vehicle's exterior lights should blink five times.
If these steps do not solve the problem, you need to change the firmware on the key fob board. This task can be completed if the alarm package includes a disk with the appropriate software.
Control unit problems
The following signs may indicate a malfunction of the control unit:
- Alarm options do not function properly. For example, the door locks are disabled automatically or the “Panic” mode is activated for no reason. In the latter case, external lights and a siren are spontaneously activated.
- The control unit executes commands sent from the communicator, but does so with a slight delay of a few seconds.
- The alarm mode is activated for no reason.
Good to know
It will not be possible to independently determine a software malfunction in the operation of the Starline alarm control unit. This requires special equipment, software and skills.
Diagnostics of the control unit without calculating software errors is performed as follows:
- All connectors with wires are disconnected from the device.
- The control unit is dismantled from its mounting location.
- The module housing is disassembled. The parts of the block are attached to each other using self-tapping screws. To unscrew them you need to use a Phillips head screwdriver.
- A visual check of the block is performed. If traces of moisture are visible on the board, then the circuit must be removed and dried. Any dirt can be removed with a dry brush or cloth.
Problems with door mechanisms
If the car doors close or do not open, the reasons are as follows:
- blown safety elements;
- damage to wires;
- mechanical malfunction of the central locking (CL).
To diagnose the operation of the mechanisms, you need to insert the key into the driver's door and lock the car. If the locking products are blocked, this indicates that the central locking system is working. In this case, further diagnostics will consist of checking all electrical circuit blocks from the control module going to the driver's door. In practice, the cause of the problem is usually poor contact on the connector.
Video: checking the central locking
The “VLAD/PRO REMONT” channel in its video showed the process of testing and determining the cause of door locks not working.
Insufficient voltage to operate the system
If the alarm does not respond to the Starline key fob and there is a suspicion of low voltage in the electrical network, a battery check is required:
- First, the battery integrity is diagnosed. If there are cracks in the battery case, electrolyte may leak out of the device through them. In this case, further diagnostics do not make sense; to correct the situation, you will have to replace the battery.
- The battery terminals are cleaned from traces of oxidation. You can use a wire brush or fine-grit sandpaper to complete the task. When cleaning, the main thing is not to overdo it, so as not to erase the working layer on the terminal.
- Voltage diagnostics are carried out using a multimeter. When the ignition is turned off, the tester outputs are connected to the battery terminals. The voltage level should ideally be in the range of 12.5 to 12.7 volts.
- Then the voltage is checked again, only now the engine needs to be started. After the engine starts, you do not need to press the gas pedal or turn on electrical equipment. The voltage level should be between 13.8 and 14.5 volts. In modern cars, due to the large number of electronics, the normal parameter may be 14.8 V, but this point should be clarified in the service manual for the car.
- You need to turn on the electrical equipment to simulate normal driving. To do this, the car's optics, heater, rear window heating system, and car radio are activated. The voltage is measured again. Under such conditions, the operating parameter should be about 13.7-14 volts. If the value is lower (up to 13 V), this indicates a generator malfunction.
Video: diagnosing the battery with a multimeter
The “Battery Man” channel in its video showed the process of checking a battery using a tester.
Key fob malfunctions
If the case or, for example, the display breaks down, the device still needs to be repaired, even if the alarm responds to the key fob. This is because small particles of glass or plastic can further damage your device.
Battery failure
The discharge of a battery can be determined by the following signs:
- the user has to press the keys harder when setting functions, the alarm does not respond to button presses or works erratically every other time;
- the LED on the communicator body began to glow dimmer;
- the display brightness has decreased;
- the corresponding indicator should be displayed on the key fob display and if it blinks, the battery must be replaced;
- The key fob emits a characteristic sound signal indicating that the battery is low.
Display damage
Screen damage can be determined visually in 99% of cases. Cracks and minor scratches will indicate a broken display. Signs of a malfunction also include the absence of an image on the device - the alarm executes commands, but data about this is not displayed on the screen. The display may darken.
Hull damage
Damage to the housing can also be determined visually. If your device shows serious cracks, they could have caused moisture to get inside your device. Case defects may be minor and not visually visible at first glance.
Broken buttons
Failure of keys can be determined by two signs:
- The user has to press the buttons several times to send a command. Sometimes the keys work immediately.
- The buttons get stuck. If the user "sinks" the control, the key does not return to its place.
Board hardware problem
Only diagnostics using specialized equipment will allow you to accurately calculate a board's hardware malfunction. To do this, you will need to contact a service center where they repair electronics. Other symptoms of a malfunction will be similar to those when the battery in the remote control is low.
Simple steps
Despite their primitiveness, in the vast majority of cases they are very effective. The first measure taken is to replace the battery. And no need to giggle: the battery is the most important thing in all alarm key fobs, and it should be taken seriously. If you can install a Chinese budget version into the TV remote control, then you shouldn’t put something unreliable in the key fob.
Moreover, where you buy batteries is also very important. The most reliable Energizer, bought from a tray in the cold, will last a maximum of a week, if it doesn’t die as soon as it warms up. A smart step would be to have spare batteries. And not in the glove compartment, but in your pocket, so that you can replace them if the key fob starts acting up.
The replacement was made, no improvements were noticed. What's next? Assess the surrounding conditions and remember the effect of the key fob freezing. It manifests itself in the following input data:
- you parked near a powerful radio station or high-voltage lines;
- your battery is dead for some reason;
- you pressed the button on the key fob several times far from the zone of its influence (for example, it was in your back pocket of your trousers);
- Not the most critical case:
you emergency unlock the alarm, drive away from the unfortunate place and check the operation of the key fob.
Emergency unlock
To emergency turn off the Starline A1, A2, A 4 or A8 alarm, follow the steps:
- Car door locks are opened with a key. This will trigger the siren.
- The key is inserted into the ignition switch and turned to the “ACC” position.
- The “Jack” service key is pressed three times. These actions must be completed within 20 seconds after turning on the ignition. For the Starline A8 alarm, the number of clicks should be 4 pcs. The service mode key itself is installed secretly, but usually it is located under the instrument cluster.
- The ignition in the car turns off.
The Starline A6 alarm system can only be unlocked using an individual code (factory value - 11):
- The driver's door is opened with the key and the ignition system is turned on.
- The service button is clicked for 20 seconds; the number of clicks must correspond to the first digit of the code. If it is 2, then the press should be double, etc.
- The ignition system is turned off. Then the key is immediately turned to the “ACC” position.
- The next digit of the password is entered in the same way.
- The ignition is turned off. If the code was entered correctly, the security mode should turn off.
In the case of the Starline A91 security system, emergency deactivation is performed as follows:
- The driver's door opens with the key. The alarm mode will turn on, accompanied by sound signals from the siren and blinking of external lighting equipment. If the number of flashes is 4, this indicates that the protective function was activated without the communicator.
- Within 20 s, the key to enter the emergency maintenance mode is “clicked” three times.
- The ignition system is deactivated. If the unlocking is successful, the security mode will be disabled. In the case when an individual code is used for unlocking, the disabling actions are performed similar to those with the Starline A6 alarm system. The only difference is that the password can be up to four characters long.
Video: emergency shutdown of the Starline A91 alarm
The Pandora Store channel in its video, using the A91 model as an example, showed the process of emergency unlocking of the anti-theft system.
General problems
Why else might the Starline A91, A93, A61 or any other alarm system not work on your car?
- Wiring is damaged. First of all, check the circuit in the area of the central lock and its actuators (limit switches). Pay special attention to the connection points of the plugs, contact pads, the area where the wires are connected and the central module.
- Radio interference. It is possible that your Starline A9 alarm does not work temporarily while the car is in the range of strong transmitting devices. They create powerful interference that interferes with normal data exchange between the key fob and the system module antenna. Which zones are considered “deaf” for radio signals by default? Airports, railway stations, sensitive facilities, large factories and production bases. Interference is also present in covered underground parking lots, areas with voluminous reinforced concrete structures, etc. For the Starline alarm to start working normally, evacuate the car to a “clean” place. Check to see if the key fob will work if you approach the car right next to it (then you won’t have to call a tow truck);
- The central locking mechanisms are broken. In this case, the alarm and key fob work normally, but the doors do not open. Check the wiring of the lock and the drives that are responsible for locking/unlocking, test the circuit with a multimeter, and make sure that the limit switches are functioning properly. If necessary, contact an auto electrician.
- The security system stopped working after you manipulated the battery. Let's consider what to do if the Starline alarm system malfunctions due to a nutrient element. First, put the unit on charge. At the same time, let specialists diagnose it for serviceability and ability to retain charge. Next, connect correctly. Be prepared for the need to re-program the key fobs (see the technical manual for the algorithm).
Now you know all the reasons why the Starline a91 alarm system may not work or work incorrectly. If independent diagnostics and repairs do not help, you will have to take the security kit to a service center.
Handle the alarm with care. Do not expose equipment components or wiring to excessive moisture. Every few years, clean the connectors, check the connectors, and clean dust and dirt from the internal compartments of the module. Periodically check the wiring and cables for breaks, breaks, or oxidation. Handle the key fob and tags with care. Long life of your alarm!
How to repair a key fob?
To troubleshoot the communicator you need to do the following:
- replacing the remote control battery;
- replacement of the case and display;
- restoration or installation of new buttons;
- removal of dirt and moisture.
What will you need?
To restore the functionality of the remote control you will need:
- Phillips head screwdriver;
- an awl or screwdriver with a thin tip;
- soldering iron with a thick tip;
- copper wire;
- adhesive sealant;
- wet wipe;
- alcohol;
- small brush.
Replacing the key fob battery
To replace the battery, follow these steps:
- The back cover of the key fob is removed; the fixation of this element depends on the model. The cover must either be pulled down, away from the antenna, or the latch must be disconnected. In the case of an additional remote control, the self-tapping screw is unscrewed using a Phillips head screwdriver.
- The battery is removed from the device. A new battery is being installed; when performing the task, you need to take into account the polarity.
- The back cover of the key fob is installed in place.
Replacing the body and display of the key fob
Algorithm of actions:
- The battery is removed from the communicator.
- Use a Phillips-head screwdriver to unscrew the screws that secure the components of the key fob. The cover and buttons are dismantled.
- If the cause of the malfunction is the screen, then this element is replaced immediately. A failed display can cause damage to the main circuit, in which case the board will have to be removed. To remove it you need to use an awl or other similar tool. The board is dismantled along with the antenna adapter; before removing it, you will need to disconnect the wire with the backlight diode.
- The graphite cable on the board is disconnected.
- Use a brush or dry cloth to clean the contact tracks on the device circuit. The new display is attached to the body of the communicator; this must be done in order to ensure that a suitable screen is used.
- At the next stage, wire needles are attached to the legs of the contact elements, and soldering is performed using a soldering iron. The car owner must secure these components as firmly as possible so that they do not become detached during use. When using a soldering iron with a thick tip, a thin copper wire should be connected to the tool in advance.
- The display is installed and mounted on the remote control body. At this stage you need to be as careful as possible so as not to damage the part. You will need adhesive to secure the display, but do not allow any liquid to get on the screen. Otherwise, clean as quickly as possible with a damp cloth.
- The circuit is installed back into the case. All components are fixed.
- The screws that secure the two parts of the case are tightened. The remote control is being checked.
Video: replacing the Starline key fob screen
The Roman TV channel, using the example of the Starline A91 communicator, showed the process of restoring the device’s functionality by replacing the display.
Repair or installation of new key fob buttons
You need to change the buttons on the remote control in the following order:
- The back cover of the remote control is dismantled and the battery is removed from the compartment. There should be a special sticker under the battery that hides the bolt connecting the two parts of the case. You need to unscrew it with a Phillips head screwdriver. If there are additional bolts, they also need to be unscrewed.
- The body parts are separated from each other. Diagnostics of the constituent elements is carried out. If the keys are damaged, they will not lock properly.
- The failed buttons are removed. The key fob is placed on a flat surface with the screen down for subsequent repairs. At this stage you need to be careful with the spring located to the left of the display. This component is used as an antenna, so it is not recommended to touch it at all.
- The remote control buttons are located on the end parts of the communicator. Under the control key there are two plastic legs without contact elements; they are used as guides. Using a toothpick and glue, the new key is fixed. At this stage, you must act carefully and do not fill the contact elements with liquid.
- After the glue has dried, new buttons are soldered. The keys are fixed at the corners of the board.
- The communicator circuit is mounted in the device body; you should make sure that the keys are placed correctly. For better fixation, two parts of the body can also be treated with glue. The screws are tightened with a Phillips screwdriver, and a working battery is installed in the pager.
- The remote control turns on and the device is checked.
Video: replacing the Starline remote control button
The Blue Box Ufa channel in its video showed in detail the procedure for restoring the functionality of the remote control by replacing the controls.
Removing dirt and moisture
To remove traces of moisture and dirt from the device, follow these steps:
- The key fob body is being cleaned and dust must be removed from it. This is done to prevent it from getting inside.
- The battery is removed from the device, then its seat needs to be cleaned. If there are traces of oxidation, the contact elements are cleaned and an alcohol solution is used to remove them. The liquid is applied to a cotton swab or napkin in advance.
- The communicator housing is disassembled. To unscrew the screws, use a Phillips screwdriver.
- The inside of the key fob is cleaned from traces of dirt. To complete the task, you will need a napkin or lint-free rag.
- The integrity of the board and its overall condition are checked. If there are traces of dirt on the diagram, it needs to be cleaned. At this stage, liquid should not be allowed to come into direct contact with the board.
- The communicator body is assembled in the reverse order. Then the key fob is turned on and its functionality is checked.
Starline alarm keychain disassembled
Setting the sensitivity of the shock sensor
Those who have often encountered the problem of the shock sensor constantly triggering have most likely already tried to adjust it. Yes, there are times when it is too sensitive and requires optimal reconfiguration. However, it happens when the settings are reset spontaneously. But there may be several most common reasons for this alarm behavior:
- close proximity of the sensor and module cables. You just need to install them as far apart as possible.
- Weak fastening. When the tilt sensor is placed on an insecure mounting such as wires or tape, the installation will not work properly.
- Fastening on plastic. If the device is attached to plastic, then any external influence will cause a malfunction, even a change in temperature.
Sensitivity may be increased due to moisture ingress. This is possible even if one of the locks gets wet. To get rid of such a malfunction, you need to find out exactly what the lock is causing.
Don't forget about the wear and tear of the system. In many cases, it is better to replace the sensor, and if that does not help, look for another cause.
The most annoying thing is if you received a defective sensor. In this case, only replacing it will help, and it is advisable to do this before the warranty expires. In the service, the owner is required not only to replace the broken part, but also to set up the entire system again completely free of charge.
What to do if the alarm system no longer sees the key fob after replacing the battery?
If after replacing the battery the system stops responding to the remote control, do the following:
- The battery functionality is checked. The malfunction may be due to incorrect installation of the power supply, in particular, mismatched polarity.
- The device is being diagnosed. A possible reason could be that the remote control itself is faulty.
- You also need to make sure that the appropriate battery is installed in the device. Perhaps the key fob needs to use batteries belonging to a different class.
How to disable the key fob?
The Starline manufacturer did not provide the ability to disable the communicator. Therefore, if the consumer needs to deactivate the remote control, this can only be done by removing the battery from the device.
Lack of wave transmission capability
Sometimes situations arise when certain conditions do not allow the signal to be transmitted from the key fob to the starline radio. This situation can also include a dead battery on the control panel, but this is far from the only reason for the inability to transmit waves.
If the car battery is almost dead, then there may not be enough voltage for the security system to receive a signal.
Also, sometimes the key fob can fail if you frequently press the command buttons outside the signal range. Repeated pressing of the function buttons may occur involuntarily when the key fob is in the owner's pocket. If the battery is dead, recharging is necessary to fix the problem, and the problem can be solved for a short time if you bring the key fob as close as possible to the receiver. If the key fob fails, then solving the problem will be much more difficult, since you will need to purchase and configure a new control panel. In some cases, specialists can simply fix the problem, but it is almost impossible to solve the problem yourself. This car can only be opened with a key.
Recommendations for preventing malfunctions
To prevent premature alarm failure, the following recommendations should be taken into account:
- Installation of the system must be carried out by qualified specialists. If you do the installation yourself, you must take into account the recommendations for placing the components of the anti-theft system.
- Key fobs should not be stored in places where they are exposed to severe moisture or high temperatures. This will lead to the formation of oxidation on the contacts, as well as failure of the circuit as a whole.
- Only working batteries should be used in key fobs, even if the device is simply stored and not used. When discharged, the battery may release acid, the effect of which negatively affects the functioning of the device as a whole. If liquid gets on the board, it may not be possible to repair the board.
- To prevent damage to the remote control as a result of a fall or other physical impact, it is recommended to use a protective case. It will not be able to protect against serious impacts, but it will prevent dust from getting inside the device.
- Do not store the alarm key fob in places where it is exposed to low temperatures. If the communicator is subsequently exposed to heat, the temperature difference will lead to the formation of condensation on the device board.
Video: replacing the key fob button
The “I MYSELF” channel in its video showed the process of replacing the controls on the Starline communicator.
Do you have any questions? Specialists and readers of the AUTODVIG website will help you ask a question
Was this article helpful?
Thank you for your opinion!
The article was useful. Please share the information with your friends.
Yes (100.00%)
No
X
Please write what is wrong and leave recommendations on the article
Cancel reply
Rate this article: ( 2 votes, average: 5.00 out of 5)
Discuss the article:

