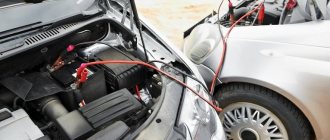
Winter is a challenge for any car owner. Moreover, many are annoyed not so much by the deterioration of the road situation (snow, ice), but by the difficulty of starting a cooled power plant. Of course, those whose cars “winter” in heated garages do not have this problem, but there are relatively few of them. Most car owners have their cars idle overnight in the open air or in a regular garage (at best).
And yet there are ways to alleviate the plight of car owners. One of the most optimal methods now is to install a heater on a VAZ or any other car.
Preheater
The problem of difficult starting of a power plant in winter is associated with several factors - the viscosity of the oil increases, the resistance in the battery increases, and it is no longer able to produce good starting currents. As a result, when trying to start, the starter “lazy” turns the crankshaft, and the rotation speed is clearly not enough to start the engine. And only after a couple of attempts, when the oil is mixed a little and the battery “warms up”, the engine can still be started, but this does not always happen.
Note that the chances of a successful start in cold weather are also affected by the technical condition of the power plant and the degree of its wear. Thus, the probability of owning a VAZ of the classic family (2101, 2106), produced 30-40 years ago, is significantly lower than a relatively new car. But installing a heater on a VAZ-2101 increases these chances, and significantly.
As noted, the difficulty of starting the power unit is largely due to the solidification of working fluids. But if you warm them up before starting, then the resistance that they create due to the increased viscosity will not exist, and it will be much easier for the starter to turn the crankshaft. It is precisely the preheating of the engine that is the task of the heater.
This device, in principle, is universal, so you can easily install a preheater on a VAZ, UAZ or any other make of car.
Some aspects and nuances
When using preheating, it is recommended to take into account the following points:
- a switch with a timer will ensure engine heating in the mode that the vehicle owner needs;
- the engine is started with the clutch depressed;
- I do not lay the 220V wire through high-voltage supports on the road;
- If the boiler power is higher than 1.0 kW, you should not leave it on overnight.
Compliance with these rules will protect you from fines from the fire inspection and unpleasant situations.
Types, features of work
There are several options for such equipment, but in essence such a device is a conventional electric heating element that provides heating of one of the fluids of the power unit.
There are several types of heaters. Some of them heat antifreeze, others heat oil. In the case of coolant, by acting on antifreeze, it is possible to heat the cylinder block, as well as the elements of the power system, which is important for ensuring normal mixture formation.
But such a device has disadvantages:
- it takes more time to warm up the engine, since the cooling system is just a shell of the cylinder block;
- the oil heats up slightly, since it is located below the cooling jacket in the sump, so heat will flow to it only after the cylinder block has been well warmed up;
But when using such a device, there is practically no need to warm up the engine after starting, since it is already heated, and warm air is immediately supplied from the stove to the cabin.
As for heaters that act on oil, such a device only heats the lubricant; the cylinder block and power system remain cold.
Since the volume of oil is small and it is all in one place, it takes little time to warm up. But due to the fact that only the lubricant heats up, after starting it will take time to warm up the motor itself.
In general, the effectiveness of using one or another device is approximately the same. When heating the antifreeze, we get a heated cylinder block and power system, which ensures good mixture formation (the result is excellent flammability of the mixture), but cold oil (the load on the battery and starter will remain high). If you heat the oil, then everything is exactly the opposite - the starter will turn easily, but the unit itself and the power system will remain cold.
Heaters also differ according to the power source used:
- From the network 220 V;
- From the on-board network 12 V (autonomous);
The first option is characterized by high power, and therefore the speed of heating of the working fluid. But to use it, the car must be close to the outlet.
As for autonomous devices, the heating element is powered by a battery, which means you can warm up the liquid anywhere, even in the field. But they are not very powerful, and during operation they drain the battery, and if it is already on the verge of exhausting its life or is simply discharged, then there will simply be no energy left for the starter after warming up.
Antifreeze heaters operating from a 220 V network have become widespread among car owners. In general, this is one of the most optimal options - the battery does not run out, the power of the heating element is high, and after using it, the driver also receives hot air from the stove.
Now manufacturers of automotive accessories and equipment offer different models of preheaters. All of them are almost identical in operating principle, but may differ in design - some consist only of a heating element, while others may additionally have a circulation pump.
What it is?
The pre-heater is a special device necessary to start the engine at low temperatures. The device is simple but effective. This allows you to quickly start the power unit even in severe frost, rather than sitting and warming it up at idle. They can be installed either on a KAMAZ or UAZ, or on some Ford Focus. The model doesn't matter.
Now many will say that this is nonsense and this cannot happen, since starting the engine in cold conditions requires mandatory pre-warming. This is how everyone did it before, and many continue to do so now. But there is another way out - installing a PPD.
What are the tasks of this unit? The point is not to heat the engine, but to warm up the coolant. That is, antifreeze or antifreeze, depending on the car.
The device is based on a tungsten spiral, which is located inside the block. It is placed under the engine and turned on until the car warms up and goes into normal operating mode. The advantage is that there is no need to burn fuel in vain.
It doesn’t matter whether you buy a PPD for a diesel engine or you have a gasoline engine, the heater will be equally useful in both cases. Although this is more relevant for a diesel engine, since starting such an engine at sub-zero temperatures is a big problem.
Kinds
I will say right away that PPDs are relatively inexpensive devices, the price of which starts from 3 thousand rubles. So buying them is not a problem, in principle. Which one you choose, decide for yourself. Installation at the service costs from several thousand rubles to 12-15 thousand. So think about doing the installation work yourself, or fork out for the services of specialists.
The following companies are considered current market leaders:
- Webasto (Webasto)
- Longfei
- Severs
- Binar
- Teplostar
- Nomak
- Atlant.
You can go to their official website and see the range.
In terms of finding installation specialists, there should be no problems, since many service stations in Moscow, Nizhny Novgorod, St. Petersburg and my favorite city of Yekaterinburg offer the corresponding services.
But I started something early about the installation. First you need to find out what types of PPD exist and how they differ.
- Electric PPD. Operates on 220V and is volatile. That is, an external power source is used for connection. Yes, I'm talking about a regular household outlet. They are inexpensive and simple to connect in design. It is this simple installation that makes them so popular.
- Autonomous. There is no need to connect to the mains here, so you don’t have to look for an outlet nearby. Autonomous type PPDs are distinguished by their increased practicality. 12V power from the fuel system or gasoline in the car's tank is sufficient. The disadvantage is the high cost. But you have to pay for comfort and convenience.
Yes, these are all fairly general words. We need to be more specific. Do you agree? Then we will consider both types of PPD separately.
Autonomous
They are installed on cars to be able to start a cold engine at any time and not have to look for sockets. The work is based on air recirculation.
In general, the general principle of operation is similar to energy-dependent models. The liquid composition of the engine, that is, coolant, is heated in the PPD unit. When the antifreeze heats up, it begins to move up the system and out of the block.
The radiator of a car is used for cooling. Then, due to the natural circulation process, the coolant again ends up in the heater. The liquid circulates in circles until the engine warms up completely.
Such heaters can be installed using two methods:
- connect the car to the electrical system;
- connect to the cooling system.
In addition to heating the power unit, autonomous devices can simultaneously warm up the interior. For installation, choose any free space available in the engine compartment.
Volatile (electric) PPD
Their device is as simple as possible. The main work falls on the shoulders of the block with the heating element. Here, unlike the previous type, it is the engine that heats up.
The PPD is equipped with a cable, which is connected to an outlet and powered from 220V. Such installations are often done by hand, although I do not recommend doing so.
Electric PPDs are equipped in different ways, and therefore may include the following components:
- fan;
- timer;
- thermostat;
- remote control;
- battery charging device.
The price largely depends on additional options. The fewer there are, the cheaper the device itself. Installation is carried out without any problems, so there is no need to contact specialists.
Alas, electric PPDs take up a lot of electricity. If you pay for it, then you should prepare for at least 10 kW per day. Some models consume even more.
Recommendations for installing electric PPD
Don't forget to make sure that everything is fine with your car's pump, the fuel system is working properly and there are no electrical problems. Otherwise, problems may arise with connecting the PPD.
Reviews clearly demonstrate that connecting the PPD, especially the electrical type, is very simple and accessible even for beginners.
The installation roughly looks like this:
- the coolant is drained from the system (at least 2 liters of coolant must be drained);
- the pipes going to the stove of your car are turned off;
- use only high quality hoses and connections;
- Put clamps on each connection for strong fixation;
- the heater is fixed with brackets (they are usually included in the kit);
- The PPD is connected to the stove through pipes;
- all previously unscrewed fasteners are returned to their place and firmly fixed;
- The coolant drained at the first stage is poured back in.
In some cases, engine heaters are mounted by inserting into a hose coming from the car's radiator. In this case, connectors larger than 6 centimeters cannot be used. Be sure to install the components vertically with this installation method.
Installation of autonomous PPD
If you decide to choose an autonomous type of preheater for your engine, then the action can be considered the right one. For some reason I trust them less. And the advantages of autonomous heaters are clearly greater than those of a volatile heater.
The installation looks like this:
- the heater is fixed in the engine compartment in a selected free area;
- it is better to fix everything with brackets and ensure the stability of the entire structure;
- the fuel intake included in the kit is installed (if it is not there, you will have to buy it separately);
- the fuel intake is mounted where the fuel hose connects to the filter, so you will need a high-quality tee;
- the electrical component is connected by ensuring the supply of energy to the device;
- the control system (turn the device on and off) is installed inside the cabin for your convenience;
- the heater is connected to the cooling system immediately before entering the power unit;
- after the manipulations have been carried out, the system will require an additional 1 liter of cooling liquid;
- make sure that all connections are made efficiently and nothing is leaking anywhere;
- carry out a test run of the system, where it is necessary to tighten and correct the connections.
The instructions are quite universal, but I advise you to rely strictly on the installation manual from the manufacturer. Each heater comes with a corresponding manual, so it will be the basis for the work.
Installation of equipment on a car
Installing a heater on a VAZ-2106 or any other model does not require any modifications to the power unit. Such equipment is external, and all that is needed is to correctly insert it into the power system.
The heater kit consists of:
- Block with heater;
- Fastening elements;
- Adapters, tees and clamps for insertion into the cooling system;
- Cable with plug.
Additionally, for installation you will also need sections of pipelines of the required length to make an insert.
There are several installation schemes for such a device, the simplest of which is shown below.
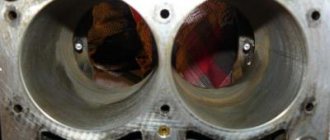
To ensure uniform heating, antifreeze must be supplied to the device from the lowest point of the engine, which is the drain plug of the cylinder block. But the exit of the already heated liquid is the opposite - to the top point.
To connect the equipment to the VAZ-2106 engine, you must:
- Install the fitting from the kit into the engine block and connect it with a pipeline to the input terminal on the heater block;
- Insert the tee from the kit into the upper pipeline of the cooling system coming from the radiator. Connect a pipeline leading to the output from the heater block to this tee;
- Attach the block with the heating element to the engine or subframe;
- Route the cable to ensure easy access to the plug.
When installing a heater, it is not even necessary to drain the antifreeze from the system. If you pre-assemble the heater (connect the pipelines to the block, tee and fitting) and quickly carry out installation work, then during operation 1-1.5 liters of coolant will leak out, which will then have to be replenished.
After installation, be sure to check all connections for leaks and, if necessary, fix them by tightening the clamps.
Installing the heater on a VAZ-2107 injector does not differ from that described above.
Installation methods
The method of installing the device can be very different, so you should carefully study the instructions before starting installation. For many models, when inserting, it is necessary to strictly observe the placement of the device relative to the engine. Otherwise, the circulation of liquid (especially in gravity models) may be disrupted and the device will not be able to fully perform its functions.
Let's look at the most common methods of installing pre-heaters on cars. Since the “Start” model is structurally and externally identical to the “Start M” versions (the difference is only in size and power), we will consider installation using the example of the latter (they are often preferred by car owners).
Installation of the Start M engine heater according to the instructions is carried out in a parallel circuit. The peculiarity of this scheme is that antifreeze is supplied for heating from the cylinder block.
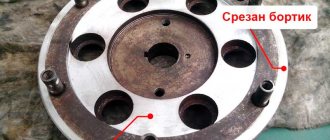
To do this, instead of a drain plug, a special adapter fitting is installed on the block. In some cases, a plug on the block can be used for supply (in some kits with a heater there is an identical plug, but with a hole for a fitting). The heated liquid is drained into the upper pipe leading from the radiator to the engine.
In this case, certain rules must be followed in order for the heater to function normally after installation:
- The instructions for installing the “Start M” heater stipulate that the device should be located at a lower level than the point of intake (below the drain plug or plug, instead of which the fitting is installed);
- The supply and discharge pipes must have a slight slope, and they are not allowed to have kinks or humps (as a result, circulation is disrupted);
- The position of the device relative to the engine is only horizontal (a tilt of no more than 15 degrees is allowed), while the outlet pipe must be directed upward;
Start Turbo heaters, since they have a pump in their design, do not require such harsh installation conditions, since liquid circulation is forced.
The installation method is selected depending on the purchased kit. Thus, the “Universal No. 1” set is intended for installation according to a sequential circuit.
This method implies that the device cuts into only one pipe - the supply or discharge of coolant to the heater radiator. That is, for installation it is enough to cut the required tube, install the heater into this cut and secure the connections with clamps. After this, you need to vertically attach the device using a bracket to the engine.
But the “Universal No. 2” set contains all the necessary elements for inserting into the system in both serial and parallel ways. As for the second method, some drain the heated antifreeze not into the upper radiator pipe, but into the pipe supplying the stove.
As for the “Start Classic” heater, its installation does not differ from the installation of the “Start M” model with only one difference - the device must be positioned vertically (with a slight tilt angle possible).
All other models - M1, M2, MP, since they are flow-through, they are installed only in a sequential manner and they cut into the pipes leading from the radiator.
Related articles:
- Description and installation of the Longfey heater
- Description and installation of the Alliance heater
- Homemade VAZ engine preheater
Security measures
Finally, a little about the safety rules when using such a preheater:
- Do not leave the equipment turned on for a long period of time. For normal warming up of the engine, 1-1.5 hours is enough;
- If an extension cord is used for connection, its wires must have a cross-section appropriate for the load;
- If the equipment is used on a car parked on the street, you need to mark or fence off the area through which the power cable runs.
For ease of use of the device, it should be connected to a power outlet through an adapter with a timer, on which you can set the time for turning the heater on and off.
Related articles:
Recommendations for choosing a boiler
To figure out which 220V boiler to choose from the entire variety of models on the market, it is important to consider the following factors:
- boiler from 220V with a specialized coating;
- a boiler without boiling points to prevent deposits from forming;
- a cheap boiler does not fit well with the aggressive antifreeze environment.
The boiler is manufactured with the following power gradations:
- 1.5 kW – for a 16kl engine;
- 1.0 kW – for an 8kL engine;
- 0.5 kW – for use when parked for regular engine heating.
A good example
The period for heating is selected individually, experimenting and choosing. Decisive factors:
- type of engine;
- boiler rated power;
- ambient air temperature.
Now boilers are made of square-shaped plastic.
On average, the boiler heats up for 40-60 minutes. In this case, it is important that the engine is hot, but the liquid does not boil.
You need to buy a boiler only from trusted commercial manufacturers of this type of product.
You can purchase the boiler on the manufacturer’s websites, in specialized retail outlets or at the car market.
Due to the wide range and many models, the device is selected for cars, trucks, and SUVs.
Video - installing an engine heater
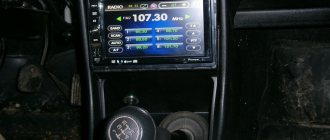
I came to the garage, warmed up the engine so as not to mess with the cold, and disassembled the car. Well, I took it apart and removed the air filter and battery. And I realized that on Solaris there is no drain plug or coolant in the block. I didn’t expect this, but how. I went online and found a hint that the manufacturer recommends installing the engine heater between the heater return (inlet to the engine heater) and the upper radiator hose. Well, since he recommends it, we’ll do it that way. The Operating Instructions and Installation Instructions are located on this page. The problem is to determine which of the return pipes.
I had to quickly put the car back together, but just quickly, without screwing anything in. I started it up, turned the heater on full blast, started checking the temperature of the pipes by touch, and began to doubt it. I decided not to guess, took a digital thermometer and measured it. I found out that the entrance is from below, the return is from above. The difference is only 3 degrees. I chose the installation location for the heater itself.
There was plenty of space for installation under the air filter. The place is good, in my opinion, the battery, gearbox, and air filter will heat up. Warm air always makes it easier to start. Since the coolant was strained, I decided not to spill the existing one. I cut off a half-barrel, placed it under the stove return hose, made a cut in the right place, the liquid ran out, but not much. I opened the cap where the coolant is poured, the liquid flowed out, the bottle was filled, closed the cap, the coolant stopped flowing, emptied the one and a half bottle and started again. In total, about two liters of coolant were drained. Not a drop was spilled.
I cut a 2.5 centimeter piece of hose on the stove pipe. I inserted the tee and clamped it with clamps (by the way, I changed the clamps and used my own stainless steel ones, the ones included in the kit are very weak).
I cut the upper hose from the radiator, use a sharp tool (there was no liquid there anymore), inserted a tee, and pressed it with clamps. I installed the heater itself and secured it to the screw to which the engine mass is attached. I didn’t cut the mounting plate, it doesn’t interfere, and there will be additional heat transfer. I connected everything with hoses, from the stove to the boiler inlet, the outlet to the radiator pipe. Everything, it seems, turned out not bad. I secured everything with plastic clamps, laid an electrical wire, also secured it with plastic clamps, and brought it out into the radiator grille. I had to modify it a little, cut off the protrusions on the sides of the Euro fork, everything fit perfectly.
Engine heating system START-M
| No. | Vehicle model | Power, kWt | Set price | ||
| "Start-M" for passenger and medium-duty domestic cars | |||||
| Bumper connector | +700 | 1 | Start-M without installation kit (boiler) | 1,0; 1,5; 2,0 | 1500 |
| 2 | VAZ 2101-2107, VAZ 2121-2123, VAZ 2129-2131 with carburetor engine | 1,0; 1,5 | 2100 | ||
| 3 | VAZ 2108-2110 with carburetor engine | 1,0; 1,5 | 2100 | ||
| 4 | VAZ 2108-2110, 2113-2115 with 8-cl. injection engine | 1,0; 1,5 | 2100 | ||
| 5 | VAZ 2108-2110 with 16-cl. injection engine | 1,0; 1,5 | 2100 | ||
| 6 | VAZ 2104-2107 with injection engine | 1,0; 1,5 | 2100 | ||
| 7 | VAZ 1117,1118,1119 Lada-Kalina, door. V 1.6, 8-valve | 1,0; 1,5 | 2100 | ||
| 8 | VAZ 1117,1118,1119 Lada-Kalina, door. V 1.4, 16-valve. | 1,0; 1,5 | 2100 | ||
| 9 | VAZ 1117,1118,1119 Lada-Kalina, gearbox with cable drive | 1,0; 1,5 | 2100 | ||
| 10 | VAZ 21701, 21713, 21721 Lada Priora | 1,0; 1,5 | 2100 | ||
| 11 | VAZ 21701, 21713, 21721 Lada-Priora, gearbox with cable drive | 1,0; 1,5 | 2100 | ||
| 12 | VAZ 2190 “LADA Granta” with 8-valve engine | 1,0; 1,5 | 2100 | ||
| 13 | VAZ 2190 “LADA Granta” with a 16-valve engine | 1,0; 1,5 | 2100 | ||
| 14 | VAZ 2190 “LADA Granta” with cable-driven gearbox or automatic transmission | 1,0; 1,5 | 2100 | ||
| 15 | VAZ “LADA Largus” with 8-valve engine | 1,0; 1,5 | 2100 | ||
| 16 | VAZ “LADA Largus” with a 16-valve engine | 1,0; 1,5 | 2100 | ||
| 17 | VAZ “LADA Vesta” | 1,0; 1,5 | 2100 | ||
| 18 | VAZ “LADA X-Ray” | 1,0; 1,5 | 2100 | ||
| 19 | VAZ 21230 Chevrolet Niva | 1,0; 1,5 | 2100 | ||
| 20 | VAZ 21214 Niva with injection engine | 1,0; 1,5 | 2100 | ||
| 21 | VAZ 21214 Niva with injection engine and ABS system | 1,0; 1,5 | 2100 | ||
| 22 | Moskvich 412 with UMZ 412 engine | 1,0; 1,5 | 2100 | ||
| 23 | UAZ with carburetor engine | 1,5; 2,0 | 2100 | ||
| 24 | UAZ-315195 “Hunter” with ZMZ-409 engine | 1,5; 2,0 | 2100 | ||
| 25 | UAZ-315195 “Hunter” with ZMZ-409 engine (Euro-3) | 1,5; 2,0 | 2100 | ||
| 26 | UAZ-315195 “Hunter” with ZMZ-514 engine, diesel | 1,5; 2,0 | 2100 | ||
| 27 | UAZ-3163 “Patriot” with ZMZ-409 engine (Euro-3) | 1,5; 2,0 | 2100 | ||
| 28 | UAZ "Farmer" with ZMZ-409 engine (Euro-3) | 1,5; 2,0 | 2100 | ||
| 29 | GAZ "Volga", engine. 560 (diesel) Styer | 1,5; 2,0 | 2100 | ||
| 30 | GAZ-31105 "Volga" with Chrysler 2.4L-DOHC engine | 1,5; 2,0 | 2100 | ||
| 31 | GAZ with carburetor engine ZMZ 402 (Volga) | 1,5; 2,0 | 2100 | ||
| 32 | GAZ with engine ZMZ 406 (Volga) | 1,5; 2,0 | 2100 | ||
| 33 | Gazelle with ZMZ-402 engine and its modifications | 1,5; 2,0 | 2100 | ||
| 34 | Gazelle Business with UMZ 4216 engine | 1,5; 2,0 | 2100 | ||
| 35 | GAZelle, Sable with engine ZMZ-40524 (EURO-3) | 1,5; 2,0 | 2100 | ||
| 36 | GAZelle, Sable with UMZ-4216 engine (EURO-3) | 1,5; 2,0 | 2100 | ||
| 37 | GAZelle, Sable with engine ZMZ-405,406 | 1,5; 2,0 | 2100 | ||
| 38 | GAZ-330202 "GAZelle", with Chrysler 2.4L-DOHC engine | 1,5; 2,0 | 2100 | ||
| 39 | GAZ-3302 “GAZelle”, with ISF2 “CUMMINS” engine (Euro-3) | 1,5; 2,0 | 2100 | ||
| 40 | GAZ-3302 “GAZelle”, with ISF2 “CUMMINS” engine (Euro-4) | 1,5; 2,0 | 2100 | ||
| 41 | "GAZelle NEXT with ISF2 "CUMMINS" engine | 1,5; 2,0 | 2100 | ||
| 42 | GAZ-53A, 3307 and its modifications with carburetor engines. ZMZ 53 | 2,0 | 2100 | ||
| 43 | GAZ-3309 with D245 diesel engine | 2,0 | 2100 | ||
| 44 | GAZ-331041 "Valdai" with D245.7E3 engine | 2,0 | 2100 | ||
| 45 | GAZ 3310 "Valdai" with Cummins engine | 2,0 | 2100 | ||
| 46 | PAZ-32053 with gasoline engine ZMZ 5234.10 | 2,0 | 2100 | ||
| 47 | ZIL-130 with carburetor engine | 2,0 | 2100 | ||
| 48 | ZIL-Bychok with diesel engine D245.12S | 2,0 | 2100 | ||
| 49 | Tractor MTZ-80, 82 with D245 engine | 2,0 | 2100 | ||
| "Start-M" for passenger and medium-duty foreign cars | |||||
| Bumper connector | +700 | ||||
| 50 | Start-M without installation kit (boiler) | 1,0; 1,5; 2,0 | 1500 | ||
| 51 | CHEVROLET Aveo, engine F14D3 | 1,5 | 2200 | ||
| 52 | CHEVROLET Aveo, F14D4 engine | 1,5 | 2200 | ||
| 53 | CHEVROLET Aveo, engine B12S1 | 1,5 | 2200 | ||
| 54 | CHEVROLET Cruze, F16D3 engine | 1,5 | 2200 | ||
| 55 | CHEVROLET Captiva, LE5 engine | 1,5 | 2200 | ||
| 56 | CHEVROLET Lacetti, F16D3 engine | 1,5 | 2200 | ||
| 57 | CHEVROLET Epica, engine X20D1 (V-2.0) | 1,5 | 2200 | ||
| 58 | CHEVROLET Lanos with 8-cl., 16-cl. engine | 1,5 | 2200 | ||
| 59 | Cherry Bonus, V= 1.5 l | 1,0;1,5 | 2200 | ||
| 60 | Cherry INDIS V=1.3 l. | 1,0;1,5 | 2200 | ||
| 61 | Cherry Tiggo, V= 1.6 l | 1,5 | 2200 | ||
| 62 | Cherry Tiggo FL 2013 (restyling) with SQRE4G16 engine | 1,5 | 2200 | ||
| 63 | CITROEN C4 with EP6 engine | 1,5 | 2200 | ||
| 64 | CITROEN Jumper | 1,5 | 2200 | ||
| 65 | DAEWOO Espero, engine C20LE (V-2.0) | 1,5 | 2200 | ||
| 66 | DAEWOO Gentra (V-1.5) | 1,5 | 2200 | ||
| 67 | DAEWOO Matiz with F8CV engine (0.8 l) | 1,0; 1,5 | 2200 | ||
| 68 | DAEWOO Nexia with 8-cl., 16-cl. engine | 1,5 | 2200 | ||
| 69 | FAW BESTURN B50 with 1.6 engine | 1,5 | 2200 | ||
| 70 | FIAT Albea with 178B2 (350A100) engine (1.4i) | 1,5 | 2200 | ||
| 71 | FIAT DOBLO with engine 178B2 (350A100) (1.4i) | 1,5 | 2200 | ||
| 72 | FIAT Doblo with V-1.2 liter diesel engine | 1,5 | 2200 | ||
| 73 | FIAT DUCATO, V-2.3 liter engine | 1,5 | 2200 | ||
| 74 | FORD C-Max, QQDA Duratec engine (V 1.8 l) | 1,5 | 2200 | ||
| 75 | FORD with QQDB engine | 1,5 | 2200 | ||
| 76 | FORD with QQDC engine | 1,5 | 2200 | ||
| 77 | FORD Focus 2, SHDA engine | 1,5 | 2200 | ||
| 78 | FORD Focus 2, SHDB engine (V 1.6 l) | 1,5 | 2200 | ||
| 79 | FORD Focus 3, (V 1.6 l) | 1,5 | 2200 | ||
| 80 | FORD Focus 3, (V 2.0 l) | 1,5 | 2200 | ||
| 81 | FORD Fiesta, (V 1.6 l) | 1,5 | 2200 | ||
| 82 | FORD Kuga, (V 1.6 l) (2014) | 1,5 | 2200 | ||
| 83 | FORD Mondeo 2012 with V-2.0 liter diesel engine | 1,5 | 2200 | ||
| 84 | FORD Transit with JXFA engine | 1,5 | 2200 | ||
| 85 | GREAT WALL, engine 491QE | 1,5 | 2200 | ||
| 86 | GREAT WALL Hover 5, G469S4N engine | 1,5 | 2200 | ||
| 87 | HINO 300 with diesel engine | 1,5; 2,0 | 2200 | ||
| 88 | HONDA Accord with F20B5 engine | 1,5 | 2200 | ||
| 89 | HONDA Accord 2008 with K24 engines | 1,5 | 2200 | ||
| 90 | HONDA CR-V with B20 engine | 1,5 | 2200 | ||
| 91 | HYUNDAI Accent engine G4EA | 1,5 | 2200 | ||
| 92 | HYUNDAI Accent G4EC engine, manual transmission | 1,5 | 2200 | ||
| 93 | HYUNDAI Elantra with D4EA engine | 1,5 | 2200 | ||
| 94 | HYUNDAI Elantra with G4FC engine | 1,5 | 2200 | ||
| 95 | HYUNDAI Galloper, with D4BF engine | 1,5 | 2200 | ||
| 96 | HYUNDAI Gets, G4EH engine, manual transmission | 1,5 | 2200 | ||
| 97 | HYUNDAI Gets, G4EA engine | 1,5 | 2200 | ||
| 98 | HYUNDAI HD65 with D4DD engine | 1,5 | 2200 | ||
| 99 | HYUNDAI HD72 with D4AL engine | 1,5 | 2200 | ||
| 100 | HYUNDAI Porter, D4BF engine | 1,5 | 2200 | ||
| 101 | HYUNDAI Santa Fe with 6GBA engine | 1,5 | 2200 | ||
| 102 | HYUNDAI Santa Fe with D4EA engine | 1,5 | 2200 | ||
| 103 | HYUNDAI Solaris with G4FC engine, (1.6 l) | 1,5 | 2200 | ||
| 104 | HYUNDAI Sonata with 6GBA engine | 1,5 | 2200 | ||
| 105 | HYUNDAI Grand Starex engine D4CB | 1,5 | 2200 | ||
| 106 | HYUNDAI Trajet with D4EA engine | 1,5 | 2200 | ||
| 107 | HYUNDAI Tucson with 6GBA engine | 1,5 | 2200 | ||
| 108 | HYUNDAI Tucson with D4EA engine | 1,5 | 2200 | ||
| 109 | HYUNDAI Tucson with G4GC engine | 1,5 | 2200 | ||
| 110 | HYUNDAI i30 with G4FC engine | 1,5 | 2200 | ||
| 111 | HYUNDAI with D4BH engine | 1,5 | 2200 | ||
| 112 | HYUNDAI with D4EA engine | 1,5 | 2200 | ||
| 113 | HYUNDAI with G4EA engine | 1,5 | 2200 | ||
| 114 | ISUZU with 4HF1 engine | 1,5 | 2200 | ||
| 115 | KIA Bongo 2 with J3 engine, with a U-shaped car frame | 1,5 | 2200 | ||
| 116 | KIA Bongo with J3 engine with hollow frame car | 1,5 | 2200 | ||
| 117 | KIA Bongo with J3 engine with drain plug on engine block | 1,5 | 2200 | ||
| 118 | KIA (Ceed, Cerato) with G4FC engine | 1,5 | 2200 | ||
| 119 | KIA Ceed with D4FB engine | 1,5 | 2200 | ||
| 120 | KIA Magentis with G4KE engine | 1,5 | 2200 | ||
| 121 | KIA Optima with G4KE engine | 1,5 | 2200 | ||
| 122 | KIA RIO with 4G engine | 1,5 | 2200 | ||
| 123 | KIA Soul with V-1.6 liter diesel engine, automatic transmission | 1,5 | 2200 | ||
| 124 | KIA Sorento with D4CB engine – diesel | 1,5 | 2200 | ||
| 125 | KIA Sorento, D4HB engine – diesel | 1,5 | 2200 | ||
| 126 | KIA Sorento with G4KE engine | 1,5 | 2200 | ||
| 127 | KIA Spectra, S6 engine | 1,5 | 2200 | ||
| 128 | KIA Sportage, G4KE engine | 1,5 | 2200 | ||
| 129 | KIA Picanto, G4LA engine | 1,5 | 2200 | ||
| 130 | MAZDA 3, Z6 engine | 1,5 | 2200 | ||
| 131 | MAZDA 3, ZL engine | 1,5 | 2200 | ||
| 132 | MAZDA with B3 engine | 1,5 | 2200 | ||
| 133 | MAZDA 626 with FP engine (DOHC 1.8 16V) | 1,5 | 2200 | ||
| 134 | MAZDA BT-50, WL engine (diesel) | 1,5 | 2200 | ||
| 135 | MAZDA Demio, B3 engine | 1,5 | 2200 | ||
| 136 | MAZDA Demio, ZJ engine | 1,5 | 2200 | ||
| 137 | MAZDA Familia, ZL engine | 1,5 | 2200 | ||
| 138 | MAZDA Premacy with FP engine (DOHC 1.8 16V) | 1,5 | 2200 | ||
| 139 | MERCEDES BENZ Sprinter, OM611 | 1,5 | 2200 | ||
| 140 | MERCEDES BENZ Viano, with OM646 engine | 1,5 | 2200 | ||
| 141 | MERCEDES BENZ Vito, with OM601 engine | 1,5 | 2200 | ||
| 142 | MITSUBISHI ASX with 4A91 engine | 1,5 | 2200 | ||
| 143 | MITSUBISHI ASX with 4B10 engine | 1,5 | 2200 | ||
| 144 | MITSUBISHI Fuso with 4M50 engine | 1,5; 2,0 | 2200 | ||
| 145 | MITSUBISHI Lancer, engine 4A91 | 1,5 | 2200 | ||
| 146 | MITSUBISHI Lancer, engine 4B10 | 1,5 | 2200 | ||
| 147 | MITSUBISHI Lancer, engine 4B11 | 1,5 | 2200 | ||
| 148 | MITSUBISHI Lancer, engine 4G13/15 | 1,5 | 2200 | ||
| 149 | MITSUBISHI Lancer, 4G18 engine | 1,5 | 2200 | ||
| 150 | MITSUBISHI with 4B10 engine | 1,5 | 2200 | ||
| 151 | MITSUBISHI with 4B11 engine; 4B12 | 1,5 | 2200 | ||
| 152 | MITSUBISHI with 4D56 engine (until 2008) | 1,5 | 2200 | ||
| 153 | MITSUBISHI with 4D56 engine (after 2008) | 1,5 | 2200 | ||
| 154 | MITSUBISHI with 4D56 (L200) engine | 1,5 | 2200 | ||
| 155 | MITSUBISHI with 4G63 engine | 1,5 | 2200 | ||
| 156 | MITSUBISHI with 4G93 engine | 1,5 | 2200 | ||
| 157 | NISSAN Almera, QG15 engine; QG18 | 1,5 | 2150 | ||
| 158 | NISSAN Almera 2013, K4M engine | 1,5 | 2200 | ||
| 159 | NISSAN Almera Classic, GA16 engine | 1,5 | 2200 | ||
| 160 | NISSAN Almera Classic, QG16 engine, automatic transmission | 1,5 | 2200 | ||
| 161 | NISSAN Avenir, QG15 engine; QG18 | 1,5 | 2200 | ||
| 162 | NISSAN Cefiro, VQ-20 engine | 1,5 | 2200 | ||
| 163 | NISSAN Juke with HR16 engine | 1,5 | 2200 | ||
| 164 | NISSAN NP300 with YD25 engine | 1,5 | 2200 | ||
| 165 | NISSAN Tiida with HR15 engine | 1,5 | 2200 | ||
| 166 | NISSAN (Note, Tiida) with HR16 engine | 1,5 | 2200 | ||
| 167 | NISSAN Pathfinder with YD25 engine | 1,5 | 2200 | ||
| 168 | NISSAN Patrol, RD28 engine | 1,5 | 2200 | ||
| 169 | NISSAN Patrol, ZD30 engine | 1,5 | 2200 | ||
| 170 | NISSAN Presage with YD25 engine | 1,5 | 2200 | ||
| 171 | NISSAN Primera, QG15 engine; QG18 | 1,5 | 2200 | ||
| 172 | NISSAN Qashqai MR20 | 1,5 | 2200 | ||
| 173 | NISSAN Qashqai 1.2 L (2014) | 1,5 | 2200 | ||
| 174 | NISSAN Sunny, QG 13-15 engine | 1,5 | 2200 | ||
| 175 | NISSAN Sunny with YD22 engine | 1,5 | 2200 | ||
| 176 | NISSAN Terrano with TD 27 engine | 1,5 | 2200 | ||
| 177 | NISSAN Terrano with ZD30 engine | 1,5 | 2200 | ||
| 178 | NISSAN Wingroad, QG15 engine; QG18 | 1,5 | 2200 | ||
| 179 | NISSAN X-Trail, M9R engine | 1,5 | 2200 | ||
| 180 | NISSAN X-Trail, QR25 engine | 1,5 | 2200 | ||
| 181 | NISSAN X-Trail, QR20, MR20 engine | 1,5 | 2200 | ||
| 182 | NISSAN with TD27 engine | 1,5 | 2200 | ||
| 183 | NISSAN with ZD30 engine | 1,5 | 2200 | ||
| 184 | NISSAN with QG15, QG18 engine | 1,5 | 2200 | ||
| 185 | OPEL Astra, with Z14XEP engine | 1,5 | 2200 | ||
| 186 | OPEL Astra, with Z16XEP engine | 1,5 | 2200 | ||
| 187 | OPEL Astra, with Z16XER engine | 1,5 | 2200 | ||
| 188 | PEUGEOT 206, V=1.2 l | 1,5 | 2200 | ||
| 189 | PEUGEOT 307, NFU engine, manual transmission | 1,5 | 2200 | ||
| 190 | PEUGEOT 308, EP6 engine | 1,5 | 2200 | ||
| 191 | PEUGEOT 408 with diesel engine, V-1.6 liters | 1,5 | 2200 | ||
| 192 | PEUGEOT Boxer, PSA4HU engine | 1,5 | 2200 | ||
| 193 | RAVON R2, B12D2 | 1,0 | 2200 | ||
| 194 | RENAULT Duster, F4R engine | 1,5 | 2200 | ||
| 195 | RENAULT Duster, F4R engine, automatic transmission | 1,5 | 2200 | ||
| 196 | RENAULT Duster with 1.6 K9K diesel engine | 1,5 | 2200 | ||
| 197 | RENAULT Logan | 1,5 | 2200 | ||
| 198 | RENAULT Master, M9T engine | 1,5 | 2200 | ||
| 199 | RENAULT Master with a diesel engine, volume 2.3, 2015. | 1,5 | 2200 | ||
| 200 | RENAULT Megane, K4MT engine | 1,5 | 2200 | ||
| 201 | RENAULT Symbol, engine K7JA700R | 1,5 | 2200 | ||
| 202 | SSANG YONG Action Sport, engine 664951 (diesel) | 1,5 | 2200 | ||
| 203 | SSANG YONG New Action, engine 671950 (D20DTF) | 1,5 | 2200 | ||
| 204 | SSANG YONG New Action with G20D engine (petrol) | 1,5 | 2200 | ||
| 205 | SSANG YONG Rexton with D27DT engine | 1,5 | 2200 | ||
| 206 | SUBARU, EJ engine(15,20,25) | 1,5 | 2200 | ||
| 207 | SUZUKI Grand Vitara with J24B engine | 1,5 | 2200 | ||
| 208 | SUZUKI Sx4 with M16A engine | 1,5 | 2200 | ||
| 209 | TOYOTA Avensis, 1AZ engine | 1,5 | 2200 | ||
| 210 | TOYOTA Avensis, 3S engine | 1,5 | 2200 | ||
| 211 | TOYOTA Avensis, engine 4A-FE | 1,5 | 2200 | ||
| 212 | TOYOTA Avensis, engine 7A-FE | 1,5 | 2200 | ||
| 213 | TOYOTA Caldina, 1ZZ engine | 1,5 | 2200 | ||
| 214 | TOYOTA Camry with 3S engines; 4S; 5S | 1,5 | 2200 | ||
| 215 | TOYOTA Corolla, 1NZ engine | 1,5 | 2200 | ||
| 216 | TOYOTA Corolla with 2C engine | 1,5 | 2200 | ||
| 217 | TOYOTA Corolla, engine 2E | 1,5 | 2200 | ||
| 218 | TOYOTA Corolla, 3ZZ engine | 1,5 | 2200 | ||
| 219 | TOYOTA Corolla, engine 4-5A | 1,5 | 2200 | ||
| 220 | TOYOTA Corona with 3S-FE engines; 4S-FE; | 1,5 | 2200 | ||
| 221 | TOYOTA Gaia with 3S engine | 1,5 | 2200 | ||
| 222 | TOYOTA Land Cruiser with 1HD engine | 1,5; 2,0 | 2200 | ||
| 223 | TOYOTA Land Cruiser with 1HD-FTE engine | 1,5; 2,0 | 2200 | ||
| 224 | TOYOTA Land Cruiser with 1HD-T engine | 1,5; 2,0 | 2200 | ||
| 225 | TOYOTA Land Cruiser with 1HZ engine | 1,5; 2,0 | 2200 | ||
| 226 | TOYOTA Land Cruiser with 3L engine | 1,5; 2,0 | 2200 | ||
| 227 | TOYOTA Land Cruiser Prado, 1KD engine | 1,5; 2,0 | 2200 | ||
| 228 | TOYOTA Land Cruiser Prado, engine 1KZ-TE (diesel), automatic transmission | 1,5; 2,0 | 2200 | ||
| 229 | TOYOTA Land Cruiser Prado, 2TR engine | 1,5; 2,0 | 2200 | ||
| 230 | TOYOTA Mark II, 1GFE engine | 1,5 | 2200 | ||
| 231 | TOYOTA Premio, 1NZ engine | 1,5 | 2200 | ||
| 232 | TOYOTA Probox, 1NZ engine | 1,5 | 2200 | ||
| 233 | TOYOTA 4RUNNER with 1GR engine | 1,5 | 2200 | ||
| 234 | TOYOTA RAV4, engine 1AZ | 1,5 | 2200 | ||
| 235 | TOYOTA Spacio with 1ZZ-FE engine | 1,5 | 2200 | ||
| 236 | TOYOTA Vitz, 1SZ engine | 1,5 | 2200 | ||
| 237 | TOYOTA Yaris with 1SZ-FE engine | 1,5 | 2200 | ||
| 238 | TOYOTA with ZR engine | 1,5 | 2200 | ||
| 239 | TOYOTA with 3L engine | 1,5 | 2200 | ||
| 240 | TOYOTA with 3S, 4S, 5S engines | 1,5 | 2200 | ||
| 241 | TOYOTA with engines 4A-FE, 5A-FE, 7A-FE | 1,0; 1,5 | 2200 | ||
| 242 | VOLKSWAGEN Golf with CBZB engine | 1,0; 1,5 | 2200 | ||
| 243 | VOLKSWAGEN Passat B7 with CDAB engine | 1,0; 1,5 | 2200 | ||
| 244 | VOLKSWAGEN Polo with CFNA engine | 1,0; 1,5 | 2200 | ||
| 245 | VOLKSWAGEN Transporter T5 with AXA engine | 1,0; 1,5 | 2200 | ||
| 246 | VOLVO S40 engine В5244S | 1,0; 1,5 | 2200 | ||
| 247 | ZAZ Chance A15SMS (1.5i) | 1,0; 1,5 | 2200 | ||
| 248 | ZAZ Chance MEMЗ 307 (1.3i) | 1,0; 1,5 | 2200 | ||
| 249 | Start-M “Universal” (KMU, Universal mounting kit) The kit is designed for installation on the engines of cars that are not in the price list. The kit includes a large number of different fittings, tees, and adapters so that it can be installed on absolutely any engine (foreign-made cars) | 1,0; 1,5; 2,0 | 2500 | ||
xn--80aylcfc.xn--p1ai
Types of engine preheaters
First, let's define what an engine preheater is. This is a special device that heats the liquid in the car’s cooling system (antifreeze) and makes it easier to start the engine at low temperatures.
There is no need for pre-heating if the car constantly sleeps in a warm garage, and also if the winter in the region is mild and the temperature rarely drops below -5 ° C.
Preheaters differ fundamentally in their design options and power sources, and are divided into two categories:
- Electric engine preheaters are devices that operate from an external source of electricity. They are simple, therefore have a low cost, and are usually connected to a regular household outlet with a voltage of 220V.
- Autonomous engine preheaters have a more complex design, and their price is noticeably higher than electric ones. They are powered either from the vehicle's fuel system or have their own fuel tank.
Main advantages and disadvantages
Advantages of heating elements:
- use in any climate zone;
- low cost;
- not a complex design;
- simple diagram;
- easy installation;
- saving fuel consumption;
- reliability;
- high degree of security;
- durability;
- the battery does not lose charge;
- recharging the battery;
- ease of maintenance;
- after warming up, the starter load decreases;
- wear of parts is reduced;
- additional features will allow you to preheat the interior and eliminate icing of the windows.
The only disadvantage of such boilers is their dependence on the electrical network.
DIY engine preheater
Is it possible to make an engine preheater with your own hands? The video below shows just one of these homemade products.
The fact that many do not want to spend money on installing electric engine heating and intend to do it themselves is not surprising. Russia has never complained about the lack of self-taught inventors, so there are many examples of such crafts.
Homemade heaters are made from various materials. Most often at home they try to warm up the engine with the following devices:
- based on a blowtorch;
- made of tungsten spiral;
- from wire and other improvised means.
All homemade engine heaters have two big drawbacks: they are a fire hazard (there are many cases where cars and garages caught fire due to such devices) and their low efficiency. So it’s better not to skimp on buying a high-quality preheater.
12V antifreeze heater
Nuances that must be taken into account when assembling the heater with your own hands:
- The heating device is powered from a 12-volt source, which is a battery (on trucks it is a 24V battery). During the cold season, the battery discharges quickly, so in winter you can use an additional transformer to power the unit.
- All contacts and conductors must be carefully insulated to eliminate the possibility of current leakage and short circuits.
- It is recommended to additionally wrap electrical circuits with electrical tape, this will increase their service life.
What will you need?
To complete the task you will need:
- two pipes made of thin metal - the diameter of the first should be 8 cm and the thickness - 1 mm, the diameter of the second is determined by the dimensions of the hoses of the car’s cooling system;
- two heating components (you need to make them yourself);
- set of wires;
- 10 amp safety device and switch to activate and deactivate heater;
- soldering iron with consumables or welding machine;
- scissors for cutting metal;
- steel sheet 1 mm thick;
- grinder for cutting pipes or other similar tool.
Algorithm of actions
Installing a homemade heater
After assembling the heating equipment, the following steps are performed:
- The device must be wrapped with electrical tape.
- The pump is installed in the cooling circuit of the vehicle in the direction of the flow of consumables.
- After this, you need to connect one cable to ground, and the second to the positive terminal of the battery. A 10 amp fuse device must be used to protect the power line. For simplified operation, you need to install a switch.
- To operate two heating devices, you will need a 12-volt battery with a parallel connection. It is possible to use a 24-volt battery, but in this case the connection must be in series.
The photo shows a heating system connection diagram
Installing an engine preheater
You can install the engine pre-heater yourself, since this process does not require any special knowledge or skills. Of course, a visit to a car service center is always preferable, because there the entire range of work will be performed by professionals who will save time and also provide a guarantee for the work.
If you don’t want to take money to the station or you can’t stay without a car for a while, you can install the engine heater yourself (usually installation instructions are included in the kit).
For video instructions on how to install a 220V electric heater with your own hands, see just below. The procedure for installing the heater is as follows:
- Draining antifreeze (it must be drained up to 2 liters);
- Disconnecting the heater pipes from the engine cooling system;
- Installation of the heater and its connection to the system;
- Assembly (you need to tighten the unscrewed nuts);
- Filling with antifreeze.
The whole process will take no more than 2-3 hours.
The advantages of installing an engine preheater are obvious:
- noticeable extension of engine life;
- saving fuel while warming up the engine;
- saving time;
- environmental protection.
By the way, if you do not yet have an engine heater installed, you can read simple tips on how to start your car in cold weather.
What is it intended for and how is it designed?
When the engine starts after a long stop, in the first seconds its parts come into contact with each other without lubrication. The viscosity of cold engine oil is higher than in the operating temperature range of the engine. Therefore, it takes some time for the lubricating fluid to penetrate through narrow oil lines to engine parts. Parts of the piston group especially suffer from cold starts. Thus, starting cold motors reduces their service life by up to 1.5 times. In order to avoid this, as well as to make it easier to start the engine in frosty weather, pre-start heaters are designed, powered by a 220 V network.
This device can heat up the engine in 30 minutes even in severe frost
Design and operation of the preheater
A modern heater is designed quite simply and is not much different from a boiler. The principle of its operation is to heat the coolant (antifreeze, antifreeze) to operating temperature, from 60 to 70 °C. When heated, the liquid begins to move through the pipes of the cooling system, heating the engine parts. To speed up heat transfer, many models are equipped with pumps that create pressure in the small circuit of the cooling system.
To create pressure due to temperature differences, heaters without a pump are connected to the cooling system at its lowest point. A device with a pump can be connected to the cooling system anywhere. When the temperature reaches the set value, the relay will simply turn off the heating element. If the temperature drops again, the relay will turn on the antifreeze heating again. Thus, you can connect the device in advance without fear of overheating the coolant.
In addition to heating the engine cooling jacket, heaters can parallel:
- charge batteries;
- pump warm air into the cabin;
- controlled remotely, turning on and off by command from the remote control.
This way you can connect heaters with or without pumps
The power of the heating elements ranges from 500 Watt to 4 kW. The range of additional features depends on the model and complete set of each device. There are also quite simple heaters on sale that are screwed into plugs or drain plugs of engine cooling systems.
Scope of application and variety of models
A simple device and low cost are the main advantages of 220 volt preheaters over other varieties. These devices can be independently installed on any car. You just need to decide on how to mount the device in the engine compartment and follow the manufacturer’s installation instructions. The only condition limiting the scope of application is the mandatory presence of an electrical outlet nearby.
There are models with a remote control on which you can set the heating temperature of the liquid and the heating time of the timer
Such heaters are best suited for private homeowners or car owners living on the lower floors of high-rise buildings. Those who have a nearby garage with electricity will also be happy. After all, an electric heater can be controlled remotely, from a distance of up to 1 kilometer (with direct visibility). If there are obstacles in the signal path, the distance will be significantly reduced.
Today, motorists can purchase preheaters of both Russian and foreign production. Chinese Longfei devices, as well as Norwegian DEFA ones, are popular among motorists. German Webasto heaters are not very convenient due to installation difficulties, and they are also expensive. Among Russian-made products, one can note the Severs and Start trademarks, produced with sets of mounting spare parts for domestic and foreign car models. Each model comes with its own set of mounting parts, along with installation instructions.
Depending on the engine size, you can choose models with power from 1 to 3 kW