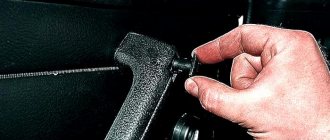
Unfortunately, the problem when the DVR suction cup does not hold the structure is not uncommon. As a rule, the device is placed on the windshield, because from here the camera gets the best view for shooting. The mounting device in the form of a suction cup, as planned by the manufacturers, should securely hold the gadget at the installation site. However, in reality everything is not so optimistic.
Due to a poor-quality fastening mechanism, the DVR breaks off the glass at the most unexpected moment. If the driver is driving at this time, a strong distraction is created, which is not safe. And the gadget itself may break or be damaged as a result of a fall. In a word, the situation is unimportant.
In this article we will tell you what to do if the DVR does not stick to the glass. Here are simple and effective ways to solve the problem.
DVR mount
The suction cup type bracket allows you to place the DVR in a place convenient for the driver.
The device should not obscure the view, but at the same time be positioned so that the person sitting behind the wheel can turn the video recording device on and off at any time and see what is displayed on the screen. The holders have different designs, as well as different areas of the fastening element itself for installation; fasteners can be purchased separately from the recording device itself. Suction cups can be rubber and silicone, with a lever or the simplest, with a side rotating mechanism, with two rubber/silicone fasteners, there are other types. The brackets included in the kit are designed taking into account the weight of the recorder, but do not always fulfill their purpose.
How to install a DVR yourself
Let's look at how to install a DVR yourself. Since some devices receive power from the cigarette lighter, they therefore have a power cord. After installation, there should be no wires hanging in the middle of the windshield. Therefore, install the recorder in the car so as not to obstruct the driver’s view or distract him from the road.
For this purpose, it is recommended to route the wires through the ceiling and side panels of the machine, moving it slightly away. Since the models and brands of cars are different, it is somewhat difficult to talk about the correctness of retracting the panel.
Another way to secure the cord is with plastic fasteners. They, unlike the first method, are not so hidden, but they also work well. The fasteners are installed directly on the glass or on a panel just under the ceiling and the wire is pulled through them.
Let's consider options for connecting a DVR. Owners run the wire through the glove compartment (which is more preferable), and some - from the driver's steering wheel. It is important to route the cord so that it does not get tangled with moving parts of the car and does not interfere with the driver while driving.
Almost all cars have a small protrusion (niche) at the top of the windshield and ceiling that can be easily moved away. The cable from the DVR is routed through it in one direction or another. To route the cable unnoticed from the side, you can lightly remove the side stand and carefully lay the wire under the panel.
If the wire goes into the glove compartment, then you need to install a tee in it to connect the wires. If the wire is pulled from the steering wheel, you will need to move the side panel of the fuse box and connect the wire. To do this, you will need a cigarette lighter with a wire, which can be purchased at any auto store, and a fuse with a soldered wire.
The fuse is connected to the positive wire. There is a diagram on the fuse box cover where you can see the symbol for the positive ACC fuse (10 A). You need to remove the standard fuse and connect the positive wire to it. After this, you can connect the cigarette lighter to it. If you connect directly, the DVR may burn out, since these devices operate on 5 V. The negative wire is attached to the bolt of the fuse box.
Recorder bracket repair
How and where to connect the DVR in a car correctly How to route and lay the wire from the DVR diagram
There are often cases when the suction cup itself becomes unusable: the plastic pin holding the “hat” breaks. This happens if you remove the DVR and pull it by the body without being careful.
One way to fix it is to smear the pin with superglue, but the connection will not hold for long, sooner or later the “cap” will fall off. The easiest option is to buy a new mount, but you can still try to restore the suction cup; repairs will cost much less than the purchase. Let's look at how you can repair a suction cup with a lever:
- disassemble the bracket - use a Phillips screwdriver to unscrew the screw and remove the cap;
- remove the pin;
- dismantle the spring and the rod with the broken base;
- Using a 3.5 mm drill, we drill a small hole in the body of the rod (in the place where the lower part of the suction cup was attached);
- we clean the area, take two wide washers, coat them with glue and place them on the sides of the rubber diaphragm;
- take a screw or self-tapping screw 10-12 mm long with a countersunk head, also apply glue to it, screw the fastener into the drilled hole;
- remove any remaining glue from the outside and let the structure dry;
- we assemble the bracket - put the spring in place, connect both parts of the device, fix the pin;
- if the suction cup has a large free movement, it will not press well against the glass, in this case we cut out an additional elastic band for it;
- We put the cap on top, assemble the holder completely, the work is finished, the mount can be used again.
Thus, you can restore almost any bracket for a DVR; the procedure takes little time, and there is no need to buy a new holder.
How to glue the suction cup? It doesn’t matter whether it’s new or an old one that you’re sorry to part with, the device must be properly and securely fastened. Nowadays, in almost any supermarket you can see a variety of different devices or simply decorative devices on suction cups
Before purchasing, few people think about how high quality the suction cup itself is and how long it will last. But when the installation processes begin, then we begin to indulge in reflection: will this structure withstand the “responsibilities” assigned to it?
In the interior, of course, such things look bright, positive and comfortable, and they are also quite practical in terms of fastening and dismantling. Mostly, small shelves for the kitchen or bathroom are equipped with suction cups: soap dishes, all kinds of holders for hair dryers, combs, toothbrushes, washcloths, hooks, towel rings and other things. As well as various devices that are attached to windows and glass in the form of thermometers, recorders or any other gadgets. The devices are often small in size and designed to hold light weight.
Rules for attaching the recorder holder
Harvest on the rubble; is it possible to reanimate broken trees?
Before using cunning methods and non-standard techniques, you first need to try to install the suction cup according to all the rules. We install the DVR by performing the following steps:
- With a clean napkin or rag moistened with alcohol or degreaser, we wipe the surface on which the device will be mounted, and we also degrease (clean) the base of the recorder bracket;
- we wait for some time, we need the treated surfaces to dry;
- press the holder tightly against the glass, if it has a lever, press and lower it, hold it for a minute or two, it is necessary for the suction cup to “grab” and secure in place;
- After installing the bracket, we check the reliability of the installation - we try to unfasten the holder by hand, but there is no need to pull very hard.
You need to check by looking from the back of the glass how the rubber circle is installed: if there are even microscopic air bubbles, then there is an almost one hundred percent guarantee that the suction cup will not hold on for a long time. If the bracket does not want to take the place allotted to it, we try various methods to help the suction cup fit tightly.
How is the DVR bracket held in place?
9 main rules for choosing a DVR
A “suction cup” type fastening element is held on the plane due to a pressure difference; when a silicone or rubber circle is flattened on the surface, a reduced pressure is formed inside it. But the bracket is fixed only when the material is absolutely sealed and no outside air gets inside the circle. If there is even a microscopic hole in the rubber band, there will be no suction effect, such a holder can be safely thrown away. The suction cup can only be secured if it is completely sealed, and you cannot press it and immediately release it, in which case it is guaranteed to fall off.
What to do to prevent it from falling off
There are only two tasks:
- Clear the atmosphere inside as much as possible.
- Don't let that negative pressure escape
This is why the side edges of the suction cup are made so wide! And they try to make the material as elastic as possible so that it adheres well to the glass.
Many people wet the surface with water (or even saliva), this is of course correct, but in winter it can freeze, but in summer it simply evaporates. Therefore, you need a composition that will not evaporate, freeze or harden. Motor oil is ideal, you need a little on your finger, wipe the surface of the suction cup and attach it to the windshield. WILL HOLD ON for a very long time!
The second “jamb” of modern gadgets is the “lever” in the mount, which creates a lot of pressure. Often it makes almost a full turn (180 degrees), but it starts working only at the very pressure, only 25 - 35 degrees, that is, the remaining angle works idle. We need to reduce this idle speed, which is done - a circle is cut out of a regular car camera, along the rim of the suction cup (like a gasket), then all the insides are cut out inside and it is inserted between the suction cup and the body.
Once you start pressing the suction cup with the lever, this “spacer” will reduce the idle speed and increase the pressure inside. IT WILL HOLD SEVERAL TIMES BETTER, tested many times.
Here's a short summary:
- Checking the rubber or silicone surface for damage
- Degreasing glass
- Lubricate the surface of the suction cup (motor oils are ideal because they do not freeze in winter and do not evaporate in summer)
- You can make a spacer (ideally from a wheel tire) between the plastic and rubber (silicone) components, thus increasing the pressure
Now we are watching a short video version.
Source
Have you ever gotten into your car in the morning and found car glass holders lying on the floor, seat or dashboard? Have there ever been situations when the suction cup for the DVR fell off right on the road, on the next bump? If yes, then we will tell you how to avoid such surprises.
Why doesn't the suction cup hold?
The most common reason is cold. In winter, the windshield freezes, the rubber suction cup loses its elasticity and falls off. In such cases, drivers usually warm up the car, place the suction cup under the airflow and attach it back. This method, despite its prevalence, rarely leads to long-term results.
But sometimes the suction cup doesn't hold up well in the heat. If in the summer the car is often left in direct sunlight, this leads to numerous sad consequences, one of which is deformation of the holder mounts.
And sometimes the suction cup holder cannot be installed from the very beginning; it simply does not stick to the glass. There are two main reasons: either the glass is dirty or there is a layer of dust on the suction cup, or you got a defective holder.
What should I do to make the suction cups stick?
Act according to the situation.
There are several working methods, tested by many drivers, to restore the elasticity of a frozen suction cup.
- Warm up the car. Wipe the windshield with alcohol and wipe dry. Warm the suction cup, clean it of dirt and apply it to the glass. To be on the safe side (and if you have the means at hand), before putting the holder back in place, treat the suction cup with clear plumber's sealant or silicone grease.
- Budget popular option. Boil the mount in a soda solution for about 20 minutes. To make a solution of suitable consistency, take a teaspoon of baking soda per glass of water.
- A completely budget and desperate option for the most extreme case. The suction cup can be attached to glass or a dashboard using double-sided tape. This option is suitable only if you have nothing on hand except tape, and you need to secure the holder.
Most often, the suction cup can be easily returned to its place by simply warming it up and degreasing the area on the glass. But if the mount is deformed or continues to fall off despite all your efforts, don’t worry and just buy a new suction cup holder. An excellent choice would be the Partner car holder for tablets.
Methods to help securely attach the bracket
There are methods that help to secure the suction cup more securely, here are some of them (as car enthusiasts advise):
- warm up the fastening element by bringing it close to the heater fan, while the car interior must be warmed up;
- use double-sided tape;
- coat the contact surface of the bracket with silicone;
- cut a rubber gasket along the diameter of the circle and place it between the glass and the holder;
- To seal, add a little glycerin to the contact surface; you can also use laundry soap and garlic juice.
Not all of the listed methods work 100%, and there are side effects. The adhesive tape holds up well, but in the sun it heats up and loses its properties. An additional rubber gasket helps in many cases, but you just need to take into account that the DVR becomes a little heavier, the load on the bracket increases (it can break), and adding rubber is pointless on suction cups without a lever. Garlic juice always helps, but not everyone likes the smell it gives off. A solution of laundry soap gives a good effect, you just need to take one thing into account - until the soap has dried, you can move the suction cup on the glass, then everything will set tightly. Silicone should be spread in a not too thin layer, evenly, its disadvantage is that it sets well only after a day; if you drive the car right away, the fasteners may fall off. Another drawback is that the silicone-lubricated holder moves across the surface.
Traditional methods: working and not
We’ll also tell you what drivers manage to do when their DVR suction cup doesn’t work. We will talk about folk methods, some of which, by the way, are very effective!
- Heat the gum slightly by bringing it to the stove (a little bit). At the same time, the interior should also be warm so that there is no sharp difference between the temperatures of the glass and the suction cup;
- Glue the suction cup with double-sided tape. At first it holds the recorder, but over time, under the influence of sunlight, it loses its properties;
- Lubricate the elastic band from the inside with transparent silicone. Not a bad way, it actually holds the DVR, but as a result, the suction cup will constantly “travel” across the glass;
- Place a rubber gasket between the window and the suction cup. This design, indeed, holds better, but it is heavier, which means that the risk that the DVR will one day fall increases;
- The contact area on the glass is rubbed with glycerin, garlic juice, and laundry soap. The method with glycerin is questionable, it doesn’t hold up well. Garlic does a better job, but its aroma will not be overwhelmed by any car fragrance. After drying, the laundry soap firmly sticks the DVR to the surface and holds perfectly. But if you want to move the device slightly, you will have to tinker a lot;
- Moisten the gum with saliva or water. The liquid really provides a reliable “adhesion”, preventing air from penetrating inside. However, sooner or later the moisture will evaporate.
- Treat the suction cup on the reverse side with motor oil. This method holds up well, but the composition itself can have a negative impact on the material from which the elastic is made;
- Some “masters,” when the suction cup of the DVR does not hold, put it on super glue, which is strictly not recommended. Firstly, sooner or later the device will fall off anyway. And secondly, think about how much effort you will have to put into cleaning your windshield from traces of Chinese glue?
Mounting methods
Let's move on directly to the issue of installation. There are several ways to stick objects with suction cups to tiles. Of course, they will hold up well and perform their functions only if the above conditions are met. The most popular fastening approaches are:
- using alcohol for degreasing;
- the use of petroleum jelly or other similar products;
- PVC film backing on a self-adhesive basis;
- strengthening the suction cup with silicone sealant.
Methods for strengthening the attachment of suction cups to the surface
The first method is suitable for objects that are small in size and weight. For example, this can be used to secure a plastic soap dish. The essence of the method is to completely clean and degrease the surface of the tile. In other words, you need to thoroughly clean it of any contaminants: dust, dirt, limescale, rust, grease, soap, etc. Then treat the suction cup itself. Alcohol is best for degreasing. After such manipulations, just press the suction cup tightly against the tile, and it will remain in the place you want. If you need to move the product, wet the tile next to the suction cup. It will glide easily on such a surface, but you won’t have to peel it off.
The second option is to use Vaseline. Using this product you can improve the quality of surface adhesion. This method is even suitable for securing objects in aquariums with live fish, since Vaseline is a safe product.
For heavier items, the third method is suitable. To bring it to life you will need a small piece of PVC film. Some accessories include such self-adhesive. Otherwise, you can make it yourself by cutting out a circle of the required diameter. First, the self-adhesive is attached to the tile. Then you need to hit the suction cup exactly along the contours of the film. Auto electrics and car diagnostics in Minsk AvtoTerapevt.bel Diagnostics and repair of auto electrics for passenger and commercial vehicles. Chip tuning, eco-tuning, removal of EGR, DPF, FAP
If the object on the suction cups will be subjected to significant loads, you need to look for a more effective method. The best option is to use silicone sealant. It provides a strong connection between the two surfaces, is absolutely invisible against the background of the tiles, and moreover, if necessary, it can be cleaned off without damaging the finish. To glue the suction cup with sealant, you need to coat it on the back side and press it against the wall. Leave the item to dry for a day.
Excess protruding silicone can be easily removed with a rag or blade. This mount will hold a heavy robe, shower head and even a shelf.
Thanks to the methods described, you will not have problems installing accessories on suction cups. The main thing is to choose a quality product and properly prepare the surface.
What is the problem
Fastening household items using suction cups is very convenient and fast, since no additional devices such as a drill or glue are required. Removing the annoying accessory will also be quite simple. Typically, towels in the kitchen and bathroom, soap dishes, hooks for washcloths, small shelves, etc. are placed in this way. Such items weigh a little, but vacuum Velcro does not need to withstand weight.
Why is it not always possible to attach the suction cup to the tile for a long time ? Almost always the problem is unevenness of the surface. Lumps, cracks and other defects on the tiles weaken the vacuum structure. Uniformity and smoothness of the tiles is the main condition for a strong connection. Try to choose the most suitable areas. The best option is glossy tiles.
Advice Do not try to glue the suction cup to a textured surface, for example, a tile with a pattern. Matte surfaces are also not the best solution: small pores weaken the suction cup.
Under pressure from heavy objects, the hooks on the suction cups quickly fall off. Correlate the size of the item and its purpose. For example, a large terry towel will be an excessive load for Velcro with a diameter of 1-2 cm.
The shape of the suction cup must also be correct - even and round. The microclimate in the bathroom or kitchen also plays an important role - constantly high humidity. This problem is difficult to fix, but try fixing plumbing leaks and ventilating the room more often.
So, what will determine the strength of the vacuum suction cup?:
- From the integrity of the material and the presence of defects.
- The relationship between the size of an object and its purpose.
- On the quality of the surface material.
How does the suction cup work?
Actually, there is nothing magical here, remember the school physics course. If we describe the essence of the phenomenon in a few words, it turns out that almost zero pressure is created under the suction cup, since we pressed the surface to the windshield and pulled it towards ourselves. But we have atmospheric pressure, which always puts pressure on us and on the objects around us, and since it is quite high, it presses on the surface of the suction cup on the other side, pressing it to the surface (it seems to try to fill the internal vacuum under the suction cup).
Thus, if the suction cup is working properly, it will stick very firmly to the windshield. But why does it fall off?
Laundry soap
If the “suction cup” falls off on the way, and there are no special products at hand, then you can use regular soap. You need to moisten it a little with water, rub the rubber generously and wait until it dries. When the soap acquires viscosity, you can attach the membrane to the glass and tighten the console clamp. The soap will set and prevent air penetration, like a thick sealant.
Factors influencing the strength of attachment of the suction cup to the surface
There are several factors that can affect the quality of the suction cup attachment.
The reliability and strength of the connection between the suction cup and the tile depends on three factors:
From the material from which the surface is made and its condition and quality. The base must be absolutely smooth and clean, free from chips and potholes, and it is better if the tile has a glossy front side. On matte ceramics, the adhesion of the suction cup to the surface drops significantly, and on embossed tiles it is unlikely to be able to stick anything. From the total weight of the device with a suction cup and the weight of the object located on it. The quality of the device’s material and the presence of flaws on it
When purchasing a fastener with a suction cup, you need to pay close attention to the inner working side of the device so that there are no bumps or growths on it that will not allow the device to be securely glued to the tiled surface.
Disadvantages of a DVR built into the mirror
- Impossibility of self-installation (only service center employees can do this efficiently and correctly).
- Significant financial expenses for a device of this type and its installation.
- Lack of mobility (if you change your car, you will need to reinstall the DVR).
This method of mounting the DVR is the highest quality, discreet and aesthetically comfortable, since the wires are disguised and it seems that there is no foreign device in the car interior. But it is worth noting the high cost of the DVR and the process of installing it in the mirror. This type of fastener is suitable for those car owners who are willing to pay a lot of money for the quality of shooting and the safety of the fastening.
When choosing a mount, do not forget to pay attention to the features of your device: dimensions, shooting quality, viewing angles, quality of material, mobility, because based on these parameters and your needs, you can understand which type of recorder mount suits you best
And remember, it’s the little things that matter, so it’s better to attach a high-quality recorder now than to buy another one later
Surface quality and suction cup
First of all, you need to make sure that the product you buy with a suction cup will not be unsuitable for fastening. High-quality material must have an absolutely smooth inner surface. It is this factor that determines the choice. Be sure to run your fingers over it. If you feel a depression or bump, it is better to refuse such a product.
Please also note that the shape of the suction cup must be correct. Another important aspect is the assessment of the tile surface
It must be perfectly flat, since it will not be possible to glue the suction cup onto a textured tile. Smooth gloss is best suited for this purpose. Pores on the matte surface can weaken the bond. And raised protrusions, various surface defects, particles of glue or putty are not at all capable of holding a suction cup
Another important aspect is the assessment of the tile surface. It must be perfectly flat, since it will not be possible to glue the suction cup onto a textured tile. Smooth gloss is best suited for this purpose. Pores on the matte surface can weaken the bond. And raised protrusions, various surface defects, particles of glue or putty are not at all capable of holding the suction cup.
In order for the suction cup to adhere well to the tile, you need to make sure that the product is of high quality, and that the tile is even, and preferably glossy
It will not be possible to securely attach the suction cup to a chip or crack. Unfortunately, it will not be possible to disguise these flaws in this way. The only way out is to fix the object hanging down a few centimeters above this flaw.
Questionable ways to attach the holder
There is a lot of advice that motorists give, but how useful they all are is a big question. Drivers also advise:
- lubricate the contact surface with engine oil;
- use brake fluid as a fixing agent;
- moisten the contact with saliva;
- attach the bracket with superglue;
- attach the suction cup to the sealant;
- To improve contact, use Pepsi-Cola.
Motor oil is a good way to create reliable contact, but we must not forget that the quality of the rubber seal of the suction cup, especially from Chinese manufacturers, varies; the rubber can swell and “float”. Brake fluid and saliva are water-based, and when the moisture dries, the contact reliability deteriorates. Automotive colored sealant does not look aesthetically pleasing; it is possible that traces will remain after its application, but transparent silicone sealant will come in handy. Some people attach the suction cup with superglue, but this seems like a perversion - it is not a fact that the mount will not fall off, but scraping off the remaining glue from the glass will not be easy.
What can help?
There are several available tools that will help secure the device efficiently.
But no matter what product is used, first of all it is necessary to thoroughly degrease the surface to which it will be attached.
As a treatment agent, you can use nail polish remover, alcohol, glass spray or soap solution.
Silicone sealant
In order to properly secure the suction cup, you can use transparent silicone sealant. To do this, sealant is applied to the concave part of the device, after which it is pressed tightly against the glass.
But before using the Velcro for its intended purpose, it is recommended to wait 24 hours for the sealant to dry completely.
How to wash the inside of the windshield to perfect condition When preparing the car for a trip, some drivers do not pay attention to the condition of the glass on the inside of the car, but...
Garlic juice
You can also securely attach the suction cup using garlic juice. When it gets into microcracks, it clogs them and thereby prevents air from getting under the device.
Simply rub the surface of the Velcro with garlic juice and attach it to the glass, pressing it down for a few minutes until it dries.
Oil
Machine oil or any vegetable oil applied to the surface of the Velcro helps to secure it for quite a long time, acting in a similar way to garlic juice.
In this case, oil is easily removed from the surface of the glass using a regular soap solution or organic solvent.
Car camera
As you know, a new suction cup always holds better than the old one due to its rigidity.
But there is a way to return the device to its previous strength using a regular car inner tube or any other rubber:
- To do this, you need to cut a ring from the chamber, the diameter of which will coincide with the size of the suction cup.
- Place it between the plastic and the sticky surface.
- An updated item can be treated with oil or garlic, then it will definitely last a long time.
Under what conditions is it difficult to install the holder?
The most common reason for weak fastening of the DVR bracket is low temperature, usually the suction cup falls off in the cold. This happens because rubber or silicone hardens at low temperatures and loses its elasticity. Also, the rubber band does not hold up in the heat; if you left the car for a while in the sun, you should not be surprised that upon your return you will find a fallen recorder.
It will be difficult to install the holder on glass covered with dust; the rubber circle itself should not be dirty either. The suction cup holds very poorly on uneven glass, for example, if it is silk-screened. Here it is no longer possible to level the surface; you need to figure out how to ensure tight contact. Another thing to consider is that there are a lot of Chinese products on the Russian market, and the fastener may initially be defective.
But if you can’t immediately secure the bracket well in the car, there is no need to despair; there are many different tricks and folk methods that you can use to securely install a portable device on the windshield.
How to lubricate the suction cup on the windshield
Logically speaking, motor oil wins because... only it is not afraid of temperature changes. Alcohol-containing liquid or soapy/sweet liquid may evaporate in the summer and freeze in the winter and the suction cup will fall off.
Motor oil does not evaporate in summer, and in winter it does not freeze like water, due to its composition. Although, it’s up to you to decide how to lubricate the suction cup.
DVRs are increasingly used in cars: the device allows you to record an accident, and then present the resulting material as evidence. Usually the device is placed on the windshield or dashboard; a suction cup mount is included. But the fastening element does not always ensure reliable installation of the device that records events; it’s a shame if the gadget flies off while moving, sometimes it breaks and fails. In this article we will look at what solutions there are to this problem, the reasons why the holder is so unreliable and weak.
Decoding the symbols on the buttons and connectors of the radio
Types of suckers
As I already wrote, there are usually two or three of them in the mount to better hold the gadget.
And there are single, but massive ones. They are made mainly from two materials - rubber and silicone. Rubber suction cups are dark (often black) in color, but silicone ones are often transparent.
There is a lot of debate about which of them is better. However, in my experience, the regular rubber options held up better. Silicone hardens much more in cold weather, which makes the suction cup less elastic.
Although to be fair, it’s really difficult to choose between these two options! Because there is high-quality silicone, and there is low-quality rubber.
Why don’t suction cups stick to tiles, shelves, hooks, soap dishes, what to do, how to secure them
Smooth gloss is best suited for this purpose. Pores on the matte surface can weaken the bond. And raised protrusions, various surface defects, particles of glue or putty are not at all capable of holding the suction cup.
In order for the suction cup to adhere well to the tile, you need to make sure that the product is of high quality, and that the tile is even, and preferably glossy
It will not be possible to securely attach the suction cup to a chip or crack. Unfortunately, it will not be possible to disguise these flaws in this way. The only way out is to fix the object hanging down a few centimeters above this flaw.

