For a number of reasons, it becomes necessary to remove the interior mirror: windshield replacement, mirror repair, installation of additional equipment, windshield tinting, etc. That being said, it is important to know how to remove the mirror from the windshield and reattach the rear view mirror when reinstalling it.
To dismantle and install the rear view mirror you will need:
- remove clamps and clamps;
- heat the adhesive base or use a string;
- prepare the surface, use the appropriate type of adhesive for installation.
At first glance, the procedure is not complicated. However, there are a number of nuances that you need to pay attention to in order not to damage the glass and/or mirror during removal and to obtain reliable fixation during installation. Read more in our article.
How to glue a rear view mirror to a windshield
Many drivers make a big mistake when they are inattentive when choosing an adhesive for connecting a metal fastening element to glass. The most common erroneous option is to connect the rear view mirror to the windshield using ordinary Moment construction adhesive. In second place in popularity among incorrectly chosen products is double-sided tape.
It is important to understand that the adhesive material with which the rear view mirror clings to the windshield must:
Withstand the weight of the mirror, which consists of a metal mount, plastic parts and glass;
- Maintain its properties at increased vibration. Moment glue is not able to work in conditions of constant vibration, and on the next bump the interior mirror will fall off if you use it for fastening;
- Do not lose stickiness due to temperature changes. The windshield of a car is subject to serious temperature changes, which are partially transferred to the adhesive. Sun rays in summer and snow settling on the glass in winter should not affect the adhesive properties of the chosen product.
The properties listed above are inherent in epoxy resin, with which you can securely mount the rear view mirror to the windshield. But the problem with its use is that for high-quality fastening it is necessary to press the interior mirror to the glass for 10-12 hours, fixing it securely. Since this is quite difficult to do, it is better to use special means for gluing the rear view mirror to the windshield.
In automotive chemical stores you can find many different products designed to fix rear view mirrors to the windshield. Here is a list of the most popular and high-quality adhesive options:
Permatex 81840 or Permatex 81844. An inexpensive means for gluing a rear view mirror to the windshield. Among its advantages, one can note the presence in the kit of a special napkin for degreasing the surface.
Most often, the price of glue for interior glass depends on the configuration and volume of the substance.
When is it necessary to remove an interior mirror?
You may need to remove the mirror from the windshield of your car for a number of reasons. As a rule, the windshield mirror is removed:
- when replacing a windshield;
- for repairing electronics built into the mirror;
- to solve problems with mirror mounting (extraneous sounds, vibrations);
- as part of car windshield tinting;
- when replacing the rear view mirror itself;
- for the purpose of installing additional equipment in the area of the rear view mirror, etc.
In this case, the main task is the safety of the mirror and windshield when performing certain work. To perform all the work correctly, you need to know how to remove the rear view mirror.
How to glue an interior mirror to the windshield
Using the correct adhesive does not guarantee that the rear view mirror will remain securely attached to the windshield for a long time. In order for the salon mirror to hang for years in its proper place, it is necessary to glue it correctly:
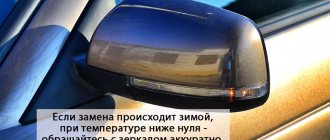
- Drive your car into a garage or other warm room if it's cold outside. The glue will show its properties better if the ambient temperature is about +20 degrees Celsius;
- Next, you need to decide where the mirror will be glued to the windshield. It is optimal for it to be in the middle, but in each situation it should be based on individual preferences and the design of the rear seats;
- After this, you need to clean the bonded surfaces from any glue residue. Dried glue can be removed from glass using a knife or razor. To clean a metal fastener, it is better to preheat it with a hairdryer, and then scrape off the remaining glue with a knife;
Important: Be sure to read the instructions on the adhesive for its use.
It is worth noting that the glass should be hung on the mount no earlier than 24 hours after gluing it. It is advisable to securely fix the mount on the glass while the adhesive dries completely. For example, you can use tape, plasticine or a magnet on the back of the glass to avoid the slightest movement of the surfaces being glued.
The circumstances in which you will need to remove your rear view mirrors can vary. For example, repairing or replacing cracked glass, purchasing new modified models, and even regular window tinting. In addition, you can install a heater in your car, as well as a monitor and a rear view camera. Removing a damaged mirror, disassembling it and gluing a new one with your own hands is not so difficult, as is installing devices more convenient than a regular reflector. To do this, arm yourself with your machine's operating manual and our instructions.
How to remove a mirror element on a Priora
Priora Lada (2013+). Disassembling the outside rear view mirror
We disassemble the outside rear view mirror to replace the heated reflective element, gear motor unit or side turn signal. The work is shown on the left mirror; we disassemble the right mirror in the same way. At low ambient temperatures, in order not to split the reflective element, we recommend removing the mirror and gradually warming it up with a household hairdryer or warming it up indoors.
To replace the heated reflective element, turn the reflective element all the way down.
Pulling the reflective element towards you, press the upper latches of the element with your finger. . remove the element from the mirror body (arrows indicate the upper clamps of the element).
Disconnect the wire block from the pointer block. _
. and remove the turn signal.
The indicator is equipped with LEDs; if they fail, the turn indicator assembly must be replaced. Install the side turn signal in the reverse order.
I think many will find my photo report of how the mirror is disassembled useful. It all started with the sound of a clatter coming from these mirrors when the music was turned on - the door was taped with noise. And this rattle got to me. It turns out that without knowing, you can easily break the mirrors during disassembly.
1. Using the handles, tilt the lower part of the mirror away from you until it stops. A gap appears at the top. You need to insert a screwdriver into it, see photo
2. There are latches inside that fasten the mirror to the electric drive.
Having reached the mounting spring, I decided to tighten the nut tighter - the breakpoint probably appeared from its loosening.
And just in case, I laid a noise between the connection of the mirror and the mounting base.
Then I reassembled everything and installed it back. THE RATTLE DISAPPEARED.
There is an idea to add repeaters to these paws like the deluxes. I’ll post a separate report on how to do it.
For those who find it useful, click (like)
Issue price: 0 ₽ Mileage: 25,000 km
How to remove a rear view mirror
Mirrors of this type are designed to study the situation on the road behind the car. They can be divided into two categories:
- salon - installed inside the car;
- side - located on both sides on the front door pillars.
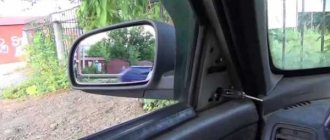
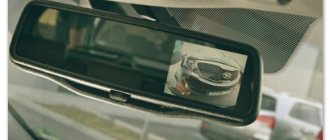
The interior mirror is located inside the car
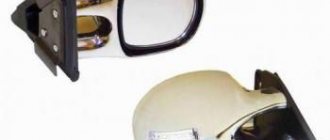
side mirrors are located on both sides of the car
It seems that it could be easier than dismantling the mirror? In fact, this is not so easy to do, and the principle of dismantling can vary significantly between different brands and models. We will tell you about the most universal methods of removing, disassembling and installing internal and external ones. However, if any of the methods described here do not work for you, check your machine's owner's manual. Today, many automobile companies make all such processes much easier: perhaps, instead of unscrewing bolts and bending terminals, you only need to press a small button or pedal.
Required Tools
In order to remove the mirror, you do not need any specific or hard-to-reach tools. As a rule, everything you need can be found in any motorist’s garage.
- a set of screwdrivers (most likely, only figured and flat ones will be useful);
- wrench depending on the size of the bolts;
- household hair dryer for removing the mirror element.
Add to this set skillful hands and the desire to do everything efficiently, and you can get down to business.
Mirror removal process
Salon
Interior mirrors can be installed in a variety of ways depending on the make, model, and year of your vehicle. There are two methods that are used most often.
- Installation into the car ceiling using bolts or self-tapping screws.
- On the windshield using glue or suction cups.
Thus, on many domestic cars the assistant device is installed using ordinary bolts, which greatly simplifies the dismantling process. To do this, you just need to unscrew the bolts after removing the plug.
in order to remove such a mirror, you just need to unscrew the bolts
The situation can become more complicated if the mirror is mounted on a bracket glued to the glass. First of all, check whether it is possible to separate the bracket itself and the platform glued to the glass. On most cars, they are separated by moving the clamps or turning in a certain direction.
If this is not possible, you will have to resort to a radical method and remove the bracket along with the windshield. The fact is that the glue holds the elements very firmly, so when you try to separate the mirror, you may accidentally damage the glass.
Before you begin this process, take a look at your vehicle's manual: it should detail the process of removing certain components. Remember that buying a new windshield will cost you a lot.
You most likely will not be able to separate the bracket platform from the mirror on your own, so it is better not to risk it and contact a special salon. Especially if you are dismantling it for future tinting. However, if you decide to do it yourself, be prepared that a trace of glue will remain on the glass.
Tips on how to easily and safely remove a mirror from a cabinet door
Of course, if you adhere to the rules and instructions described above, then the whole process will go through without any difficulties. However, you should also consider tips that will certainly make this work easier.
- When cutting drywall, it is advisable to make the edges even. This will make your future work much easier when you restore the surface or make repairs.
- When you cut through the glue, you should hold the mirror. You can even call another person to help you perform this function.
- To eliminate residues that are located at the site of the removed product, it is recommended to use a solvent. He will do an excellent job with this task. It is better to use this method in cases where further interaction with the element is planned.
- Remember that during the dismantling process all actions must be smooth and proceed carefully. Sudden movement is prohibited.
- When using the ruler, it is not recommended to raise it high, otherwise the mirror may break.
Now removing the mirror from the cabinet door will not be difficult for you.
Disassembling the rear view mirror
Salon
In order to disassemble the internal, you will need special picks and push-ups. The case is divided according to the same principle as a mobile phone or control panel to replace the battery.
- Find the junction of the body and the mirror part.
- Insert the wringer into this area and press firmly. A gap should form on the housing.
- Carefully walk the pick along the entire gap and divide the body into two parts.
- Remove the mirror. All the elements you need will be located under it.
Disassembly process on video
Lateral
Once you have separated the side mirror housing from the car body, it should be disassembled. First of all, you need to remove the mirror element. This process may not be the same for different brands, however, the following procedure is most often used.
- Use a regular household hairdryer to thoroughly heat the junction of the reflective element with the body. The temperature of the air flow should not be too high, so a technical hair dryer will not work here.
- Using a flat-blade screwdriver or a small spatula, pry the mirror away from the housing. On some models, at this stage you need to bend the terminals. To avoid damaging the glass, you can wrap a screwdriver or spatula with electrical tape or a soft cloth.
- In some designs, to separate it, you need to lightly press it in the center and, as it were, push it to the side. After this, the reflective element can be removed with careful movements.
- Then remove the center screw from the plastic frame (if equipped).
- All side mirror mechanisms are located under the frame. Using a screwdriver, you can unscrew any of them and put them in place. You can independently divide the structure into all its component parts, including adjustment and folding motors.
Video: process of disassembling the side mirror
The mirror is assembled in the same way, but in reverse order.
Other Possible Causes of a Power Side View Mirror Not Working
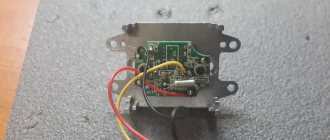
It may well be that the motor itself with the worm gear, which controls the folding of the mirror (similar to those installed in Chinese children's toys), or the board responsible for changing the power supply when the load increases at the end of the stroke, has failed.
The mirror may buzz, but not fold, if the gear on the shaft with the worm is worn out. You can do this type of electric side mirror repair yourself.
The left and right mechanisms for folding and adjusting the mirrors are exactly the same. They differ only in setup and connection. After the mirror is assembled, but the color cover has not yet been installed, you need to check the correct control of the mirror: if, when adjusting the vertical position, the mirror is adjusted horizontally, you need square plugs.
This is what the control body of the folding mechanism of the left (top) and right (bottom) mirrors looks like. Saz can see the difference in the settings: the right mirror is assembled in the “disassembled” position, and the left one is “assembled”.
Before the mirror is removed from the car, it must be set to the “disassembled” position in order to be assembled in the same disassembled position (otherwise, it must be assembled in the “assembled” position).
Dismantling the folding left mirror mechanism.
Now it can be applied to the corresponding part of the body, with which the mirror is attached to the body pillar.
Having turned the mechanism to the “disassembled” position, we assemble it in the reverse order. It is impossible to make a mistake with the rotation angle, since the mechanism rotates at a certain angle. It just needs to be turned from one extreme position to the other.
How to secure and how to glue a new one
If you have successfully dismantled the mirror yourself, then returning it back will not be difficult. As a rule, all actions are performed in reverse order.
But you should pay special attention to the selection of glue, since not everyone is suitable for this process.
it is necessary to choose the right adhesive for attaching the mirror to the windshield
Glue selection
There are three types of compositions for gluing mirrors:
- chemically cured;
- light-curing;
- compositions based on epoxy resin.
A composition with resins will work well only if it is allowed to dry properly. This usually takes from 10 hours to a day. In this case, the part must be pressed tightly at all times. This approach is not very convenient, so such products are not used in everyday life.
Light-curing mixtures operate when exposed to special ultraviolet lamps. This is one of the most common methods in production. However, if you are not the happy owner of a lamp, you should not purchase such a composition. Sunlight, especially diffused light, is not able to have a sufficient effect.
For these reasons, chemically cured compounds are the most popular. A special hardener starts the polymerization process. As a rule, they consist of the glue itself and an aerosol activator, although one-component compositions are also found.
Please note that some materials cannot be used to glue the mirror.
- household superglue;
- double-sided adhesive tape.
The adhesive component of both materials has such a composition that when used on glass or metal, it will not be able to harden completely. High air temperature inside the cabin or heating of the glass from sunlight will soften it and the mirror will fall off. You can use household adhesives only if the mirror fell completely unexpectedly, and now you need to urgently get to a car service center.
I tried it with superglue three times. I confirm: it doesn’t last more than a week.
Max
https://homo-habilis.ru/v-garazhe/223-chem-prikleit-zerkalo-zadnego-vida-v-avtomobile
How to stick to windshield
Having selected the appropriate glue, you can begin returning the rear view mirror to its rightful place. Choose a warm day for this or install a heater in the garage: the air temperature should be between 20 and 25 ° C.
process of applying glue to the holder platform
- Clean the holder platform of any old adhesive residue.
- Lightly sand the surface of the holder to improve the adhesion effect.
- In the same way, sand the area of the windshield where it is glued.
- Degrease the holder and glass area.
- Apply a thin layer of glue to the holder.
- Spray a special activator onto the place where the part is attached.
- Place the adhesive side of the part onto the glass. Try to follow the trail left from the previous time.
- Press the mirror firmly against the glass and hold for the time indicated on the package.
- After making sure that the part is firmly in place, clean the mirror from any remaining activator and glue around the holder.
- Reinstall the windshield (if you removed it) according to the owner's manual.
Ready! If you followed all the instructions carefully, the mirror looks like it was installed at the factory or at least in a car repair shop.
Be extremely careful and attentive! A crookedly glued mirror cannot be moved, so you will have to start the whole process all over again.
How to install on bracket
If during dismantling you did not separate the bracket platform from the glass, it will be even easier to assemble it. To do this, find a fixing element: it may be a screw or a latch. After this, connect the bracket leg to the platform.
There are also special brackets that are not glued to the glass, but are installed on the ceiling or other elements of the car, for example, on sun visors.
How to dismantle a mirror
They disassemble the mirror without removing it from the car: the two latches (red) need to be moved aside with a little force, then the guides (marked yellow) must be moved apart using a flat-head screwdriver. Such actions are carried out on four sides until the mirror “hangs” on the heating wires.
That's the problem.
Now you need to remove the decorative trim and unscrew the three screws. After this, very carefully, shaking slightly so that the latch does not break, the mirror is removed.
The connector is disconnected.
You can start troubleshooting.
To remove the drive from the housing, just unscrew three screws.
Next comes the turn of the boot and the back cover, which need to be removed. Unfasten the connector.
We also remove the white part, relative to which the element holding the mirror rotates.
Now, in order to extend as much as possible, we move the drive to the side (shown by the arrow), connecting it to the connector on the door and again to the body.
One reason could be that part of the groove has broken off.
To eliminate such a breakdown, it is enough to use a dropper tube that has become “stiff” from petroleum products (gasoline).
We put the tube, with glue pre-applied on it, onto the broken groove and cut it in place. For a more reliable connection with the ball joint, blow on the tube with a hairdryer - under the influence of hot air, its upper part will narrow.
This is what it looks like.
Now all that remains is to reassemble everything carefully in reverse order. The drive is working.
Installation of mirrors with additional functions
Modern devices not only reflect, but also have a number of additional functions. You can equip them with heating, or even install a camera with a monitor.
Heated
The heating function is very convenient for external side mirrors, since thanks to it they will not fog up in high humidity and will not become covered with a crust of ice in frosty weather.
The heating element in the mirrors will help prevent fogging and icing
How to disassemble a side mirror
First you need to decide on the make of the car and its design of the mirror. Then inspect the visible damage and read the repair instructions. In approximately half of the cases, side mirror malfunctions consist of a broken housing and broken glass. Although different cars will require a different approach to replacing a mirror, one thing is similar for them. If the mirror is cracked, you need to pull out the burdock with the mirror from the holding hinged bracket, which ensures mobility, and then replace it with a new one. The main thing during installation is not to overdo it! The mirror is very fragile, so it is better to perform the procedure at positive temperatures; in winter in a heated garage or in a service station.
Possible malfunctions and their elimination
After independently dismantling, disassembling and installing a modified mirror, some problems may arise. Very often, incorrectly glued mirrors fall off at the most unexpected moment, which can lead to an accident.
What to do if the mirror comes off
The interior mirror may fall off due to physical impact or on its own. The main reason that the structure with the bracket does not stay in place is the wrong glue. If you chose epoxy, the platform holder was probably not locked in one position long enough. The same problem could occur if you used a light-curing product without special UV lamps. Household glue will also not give a good result: temperature changes and active vibrations of the car can lead to the mirror coming off while driving.
To fix this, the structure must be returned to its place and glue with a chemical hardener must be used.
Sometimes the platform with the bracket may fall off along with a piece of glass. This means that microcracks have already formed in it, which can spread throughout the rest of the glass. In this case, contact a car service: specialists will be able to carry out diagnostics and tell you how necessary it is to replace the windshield.
Nowadays you can find brackets with special suction cups on sale. They don't hold as tightly as the adhesive ones, but you can remove them and put them back in place repeatedly without fear of damaging your windshield.
What to do if it's cracked
A cracked mirror can cause a lot of inconvenience to a car owner. A serious crack can distort the image, and therefore make it difficult to assess the real distance to the object behind. This problem can occur in both the interior and side mirrors. Most often this happens during improper dismantling or installation. Although the reasons may be different: for example, a sharp pebble flying out from under the wheels, careless owners of neighboring cars, and even ordinary hooligans.
Be that as it may, the reflective element should be replaced. To do this, carefully remove the mirror from the housing and install a new one. Carefully follow the instructions for disassembling and reassembling the part. If you are not sure of your actions or are afraid of damaging the element again, contact a specialized workshop. The mirror replacement service does not cost very much, but it will help save you nerves and money on unsuccessful attempts.
Types and causes of mirror breakdown
One of the main reasons for replacing this item is cracking due to damage. This mainly applies to external road monitoring objects, since they often become a hindrance for other road users while driving. Most often, the way to get rid of external and internal damage to side mirrors is to use a certain decorative coating. However, this method is controversial. Especially if there are strong impacts during movement. The second reason for replacing exterior mirrors is damage to the cables. To install new ones, you need to disassemble the entire structure.
Interior mirrors can also break. Basically, the cause of the breakdown is the constant adjustment of the element to the desired angle. At the same time, when making the next adjustment of the mirror, the driver may not notice a violation of its operation.
In fact, it is necessary to begin repairing a mirror at the slightest deviation from the previously configured position of the element. If a slight deviation is noticeable, it means that the legs used for fastening have shifted. The latter often come off completely, but the driver is able to see this only during an external inspection of the windshield of the “iron horse”.
Why does a mirror fall off and how to avoid it?
If after repair the rear or side view mirror almost immediately comes off, then you need to look for the reason. It could be:
- poor-quality adhesive composition;
- gluing surfaces that are too cold;
- non-compliance with work stages (neglecting degreasing, increasing adhesion or poor removal of dried glue);
- quick start of operation (polymerization period is not met).
If the car mirror falls off, you will have to re-glue it. When installing a fallen accessory, you need to take into account the mistakes made and work, following the step-by-step repair algorithm.
Disassembly and installation of side mirrors
The side rearview mirror is usually disassembled for repair if it is damaged. Although sometimes the driver wants to install or replace the heating, make tuning, for example, modern LED lighting and the like. Here, too, you can’t do without assembly and disassembly.
How to disassemble a rear view mirror? It can be understood quite simply. For this you will only need screwdrivers.
The first step is to remove the plug inside the cabin. To do this, you just need to pry it off with something flat, since it is held on by 1-2 clips, depending on the make and model of the car.
After this, unscrew the screws with a screwdriver and disconnect the heating and adjustment wires. Then we take the new structure and install it back in the same sequence. First, all the wires are connected, then the screws are screwed in, and the plug is put in place.
How to replace a side mirror
We remove the glass holder from the hinge of the protective casing, and then, using a thin chisel or flat screwdriver, we pick out the remains of the previous, original mirror. If necessary, the surface is smoothed with sandpaper and degreased with alcohol or acetone. Now the new mirror needs to be glued in. The best glue option is Poxipol, and it’s silver, as it holds much better than transparent glue. Carefully apply glue to the burdock fastening mold, starting from the center and finishing about one centimeter from the edge - to prevent the possibility of the glue creeping out and leaking. We wait a while for the glue to polymerize. The final stage is to carefully insert the burdock with the mirror into the hinge mount.
How to disassemble a car's side mirror
Communities Car cosmetics detailing, tests, tips Blog Glue for gluing the rear view mirror to the windshield.
Disassembling the side mirror involves removing the mirror element itself, which is located in a plastic case. This is necessary if the mirror element is broken, you need to repaint the plastic element or perform some other manipulations with these parts separately from each other.
The mirror element is secured in the mirror body using several plastic latches, which are located on its reverse side. Most often there are about 8 such latches, 2-3 on each side. We recommend proceeding as follows to remove the mirror from the housing without damaging any of the elements:
Since the latches are plastic, it makes sense to warm them up a little so that they are more flexible to deformation. To do this, you can use a regular household hair dryer.
Direct it onto the glass for 3-4 minutes, preferably distributing the heat evenly along all edges of the mirror. Important: Do not use a hair dryer for this work, since its temperature may exceed the melting point of plastic, as a result of which the mounts and side mirror housings are deformed and damaged; When the latches have become softer, you can proceed directly to the process of removing the mirror. To do this, we recommend taking plastic spatulas (which are often used in mobile equipment repair services)
If you don’t have such a spatula, you can use a regular flat-head screwdriver, but before doing this, it is advisable to wrap the metal part with electrical tape so as not to accidentally scratch the mirror and body. Also get a small piece of soft fabric; After this, place a soft piece of cloth on the plastic part of the body in the place where you will insert the spatulas or screwdrivers. After this, insert the tool, thereby moving the mirror; Next, carefully pull the improvised lever from a screwdriver or spatula to remove the mirror element from the plastic mount or mounts; Having freed one side from the fastenings, do similar actions with the others; After this, carefully remove the mirror, but note that it may still be attached to something, for example, glue, or there may be wires going to it. Disconnect everything unnecessary and remove the mirror element, at which point the process of disassembling the side mirror can be considered complete.
Depending on the car model and the mirror used, the space under the mirror element may be empty or filled with various components. Their dismantling, if necessary, should not cause difficulties.
(419 votes, average: 4.54 out of 5)
Tuning and installation of structures with pre-installed electronics
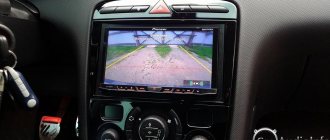
The installation methods described above are only applicable when replacing structures with similar ones. But for those who decided to slightly improve their car and, instead of the usual one, install a rear-view mirror with a camera, a video recorder, or additionally with a parking sensor monitor, it will not be possible to make do with improvised methods and replace the structure of the house. The same applies to installing heating on the side mirrors and additional lighting. Here you will need the help of a specialist, because you will have to deal with the wiring. Since this electrical device was not in the car before, the wiring will need to be correctly installed, secured, and then the operation of the device itself will need to be adjusted.
From the moment I bought the car, I almost had a problem with the rear view mirror. At first it appeared extremely rarely, and then it completely deteriorated. Perhaps the problem is familiar to some, but I don’t think I’ve seen anyone write about it. Over time, the mirror mount on the hinge becomes loose and it does not lock. For me it turned into the “I can’t hold on at all and look blankly down” stage. It needs to be corrected for the sake of appearance.
A long time ago I called the showdown. To which the answer was “Oh, yes! Standard problem, easier to replace." Well, I didn’t bother picking at anything, and then you know, I didn’t have time. So I recently came across a mirror and bought it. Moreover, his problem was just beginning, but compared to mine it was completely problem-free. Well, I installed it, and for the 5th day nothing has moved. I examined the mirror and it was clear that the hinge itself was coated with varnish, i.e. They also tried to repair it, but didn’t take it apart (I once poured instant glue into mine: it just doesn’t dry out and in the winter it worked just fine, but in the summer the glue apparently melted =)).
And so I took apart my mirror. And before I could figure it out, I came across a loose fastening of the platform, which was tightening the hinge. I tightened it right away and lo and behold! The fastening became absolutely unshakable!
In the photo, the black rectangle is the same mount that presses the ball. On two bolts that weaken over time. That's all about them actually.
But the mirror itself is essentially non-separable. The frame is soldered with dots. You might be able to see it in the photo. But in general, if you are careful, you can remove it. I removed it with a metal spatula. You can really shred everything with a screwdriver.
All that remains is to somehow glue the frame and return it to its place. I’m thinking about what to plant, because someday I’ll have to open it again. Apparently there is no way to do this without sealant =)