Author: Evgeny Zhivoglyadov. Publication date: December 18, 2022. Category: Automotive equipment.
In order for a gasoline engine to work, the fuel must ignite in its cylinders. It is truth. Therefore, the ignition system (at first, naturally, contact) appeared simultaneously with the car. But progress does not stand still. He, of course, also affected the ignition system: the traditional method of generating a spark was replaced by a more efficient and reliable one, namely, non-contact. This will be discussed in this article.
The main differences between traditional and contactless ignition systems
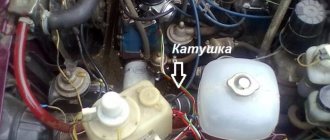
When a gasoline engine is running, sparking (that is, the supply of high voltage to the spark plug) occurs at the moment when the low-voltage power circuit of the ignition coil is opened. In a traditional system, such a “switch” is the contacts of a mechanical breaker, which periodically open when they come into contact with the cams of the rotating rotor of the distributor.
It was this unit that was replaced during the transition to a contactless system. The control signal in it is generated by a special sensor (inductive, optical or Hall sensor) installed under the distributor cover. An electrical impulse is sent to a semiconductor switch, which controls the primary winding of the ignition coil.
On a note! It is still impossible to fully call the ignition system of most modern cars (mid-price category) contactless. The fact is that the contacts installed in the distributor cap still participate in the sparking process, because it is through them and the slider that high voltage is supplied to the spark plugs.
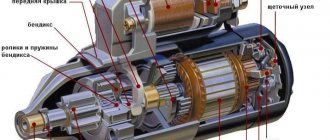
Structure and functions of BSZ
Based on the figure, the operating principle of the system is briefly explained:
Drawing. Components of a transistor ignition system
- Accumulator battery
- Ignition and starter switch
- Ignition coil
- Switch
- Ignition sensor
- Sensor-distributor
- Spark plug
When the ignition (2) is turned on, supply voltage is supplied to the primary winding of the ignition coil (3). Current flows through the primary winding; as soon as the commutator (4) receives a signal from the ignition sensor (5), the current in the primary winding is interrupted. Terminal 1 of the ignition coil is connected to ground via a switch. A high voltage of more than 20 kV is induced in the secondary winding.
The secondary voltage of the ignition system is transmitted through terminal 4 of the ignition coil to the distributor sensor to the corresponding cylinder and spark plug.
The control unit determines the crankshaft rotation speed (sensor signals) and, based on it, controls the accumulation time of the current of the primary winding of the ignition coil (the duration of the open state of the output transistor or thyristor of the ignition system) and its magnitude. In accordance with the speed and voltage of the battery, shortly before the appearance of the ignition spark, the set value of the primary current is set, that is, as the speed increases, the duration of the current flow increases in the same way as when the battery voltage decreases.
When the ignition is turned on and the engine is not running (no sensor signal), after a while (usually after one second), the current in the primary winding of the ignition coil is turned off. As soon as the control unit receives a sensor signal (for example, during startup), it returns to operating status.
To adapt the ignition timing to different load conditions, adjustment is carried out in the same way as in contact ignition systems, mechanically through a membrane mechanism of a vacuum regulator, as well as a centrifugal regulator. As a result, the sensor signal (and with it the ignition timing) changes depending on the engine speed and load.
Drawing. Interaction diagram of vacuum and centrifugal adjustment when controlling the ignition using an inductive sensor
- Centrifugal regulator
- Vacuum ignition timing regulator with membrane mechanism
- Ignition distributor shaft 4 - Hollow shaft
- Ignition distributor inductive sensor stator
- Control pulse sensor rotor
- Ignition distributor rotor
Inductive signal formation in a contactless transistor ignition system by storing energy in inductance
As a result of rotation of the rotor of the control pulse sensor, the magnetic field changes and an alternating voltage shown in Figure a, b is created in the induction winding (stator). In this case, the voltage increases as the rotor teeth approach the stator teeth. The positive half-cycle of the voltage reaches its maximum value when the distance between the stator and rotor teeth is minimal. As the distance increases, the magnetic flux sharply changes its direction and the voltage becomes negative.
Drawing. Control pulse sensor based on the induction principle a) Process diagram
- Permanent magnet
- Core induction winding
- Variable air gap
- Control pulse sensor rotor
b) time characteristic of alternating voltage induced by the control pulse sensor tz = ignition timing
At this point in time (tz), as a result of interruption of the primary current by the commutator, the ignition process is initiated.
We recommend: How to check the vacuum brake booster?
The number of rotor and stator teeth in most cases corresponds to the number of cylinders. In this case, the rotor rotates at a reduced crankshaft speed. Peak voltage (± U) at low speed is approx. 0.5 V, at high - approx. up to 100 V.
The ignition timing can only be monitored when the engine is running, since without rotation of the rotor the magnetic field does not change and, as a result, no signal is created.
Advantages and disadvantages of a contactless ignition system
Despite the fact that the contactless ignition system (BSI) is more expensive (this is perhaps its only drawback) compared to the traditional one, it is now used in all modern cars. Better sparking in BSZ is due to the fact that due to the use of a semiconductor switch, energy losses on the primary winding of the coil are reduced, and this, in turn, leads to an increase in voltage on the secondary. As a result, more complete combustion of the fuel-air mixture occurs in the engine cylinders. Hence all the ensuing advantages of a contactless ignition system:
- increase in engine power;
- fuel economy;
- improving the dynamic characteristics of the car;
- reduction of exhaust gas toxicity;
- confident engine starting in conditions of high humidity and high negative temperatures;
- stable engine operation at various speeds (up to maximum);
- increasing the service life of spark plugs.
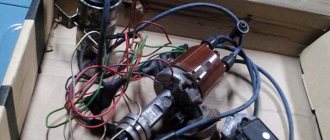
What does the BSZ consist of?
Contactless ignition includes a small number of parts, thereby reducing the likelihood of failure of each of them. The system consists of:
- Power supply. In all cars it is the battery.
- Ignition and starter switch. The part is necessary for the correct distribution of operating time of the device.
- Ignition coil. Converts low-voltage current from the battery into high-voltage, which ensures stable operation of the car.
- Transistor switch. Responsible for interrupting the flow of electrical current to the coil.
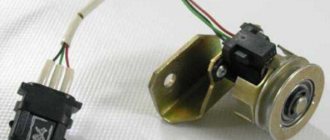
- Ignition sensor. Detects changes in the magnetic field.
- Distribution sensor. The sensor is combined with a pulse sensor, which comes in several types. The pulse sensor is most often represented by a Hall sensor, but there are also two more varieties - inductive and optical.
- Candles.
We recommend: How does an ignition coil work in a car?
Methods for converting a contact ignition system into a contactless one
Naturally, a huge number of cars (both imported and domestic) equipped with a standard ignition system travel along the roads of our vast Motherland. Increasing the efficiency and reliability of its operation is the dream of any vehicle owner. Nowadays, doing it yourself is quite easy. There are two main ways (we do not consider the option of a completely homemade device) to modernize the ignition system:
- Purchase and installation of a complete set of contactless ignition. Although this tuning option is quite expensive, experts consider it the most “correct” from a technical point of view. Only by completely replacing the standard ignition system can you get a new one that has all the advantages of contactless sparking.
- Modification of the “native” distributor by installing a special module, which is a small-sized “3 in 1” device (sensor, signal amplifier and switching transistor). This modernization option is less expensive and allows you to slightly improve the technical characteristics of the traditional ignition system by eliminating the “problematic” mechanical breaker from the circuit.
On a note! Manufacturers of automobile parts offer users kits that allow them to modify ignition systems for various vehicle models, in accordance with the options described above.
Instructions for setting the ignition
If you strictly followed the instructions, connected all the wires according to the diagram and did not misalign the marks, then the motor will start without problems. To adjust the ignition, you need to ensure stable engine operation, so first warm it up for a few minutes, without letting it stall by pressing the gas pedal.
Advice. If the engine does not start successfully, and when you turn on the starter there is not even a popping sound, then you probably made a mistake with the wiring. Check everything again according to the diagram included with the factory set of electronic ignition parts.
Adjustments can be made on a warm engine using two methods:
- without the use of special devices - “by ear”;
- fine adjustment using a strobe light.
A strobe is a device with a light bulb that flashes simultaneously with the transmission of a pulse by the Hall sensor. When the switched on strobe is brought to the crankshaft flywheel with the engine running, the position of the notch becomes visible. Hence the possibility of precise adjustment.
This is what a strobe looks like for fine-tuning the ignition
To set up, connect the strobe power supply to the battery, and the thick wire to the high-voltage wire of the spark plug of the 1st cylinder. Loosen the distributor fastening nut and bring the flashing lamp to the pulley. Slowly turn the distributor body until the notch on the pulley aligns with the short notch, then tighten the nut.
Tuning in the traditional way “by ear” is done like this:
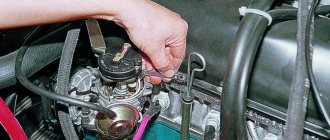
- Start the engine and loosen the nut holding the ignition distributor.
- Rotate the distributor smoothly and slowly within 15°. Find the position at which the motor operates most stably.
- Tighten the fastening nut.
When adjusting, turn the distributor by the membrane body
Advice. When you turn the ignition distributor by hand, try not to touch the high voltage wires so that you do not get an electric shock. The best option is to grab the body of the membrane mechanism, where the tube from the carburetor is attached.
It is quite natural that after installing a contactless ignition system, the engine idle speed will increase to 1100-1200 rpm due to the increased spark power. Set the rate to 850-900 rpm by tightening the idle screw on the carburetor and using the tachometer as a guide. On VAZ 2105-2107 carburetors of the “Ozone” type, this screw is located in the lower section of the unit on the right side and is large in size. The VAZ 2108 carburetors of the Solex type (these were also installed on the “seven”) have a long plastic handle protruding from the right (in the direction of travel). The second screw, which regulates the composition of the air-fuel mixture, cannot be turned.
The arrow shows the idle speed adjustment screw.
Advice. If, when you sharply press the accelerator, a loud knock is heard from the engine, then you have set the ignition timing too high and the mixture flares up earlier than necessary. Loosen the distributor nut and turn the housing a couple of degrees clockwise.
A budget option for switching to a contactless system
The contacts of the mechanical breaker “burn out” and wear out, so they have to be periodically cleaned and the gap adjusted. Installing the Sonar IR module (costing 700÷900 rubles) in the distributor allows owners of classic VAZs (2101-2107) to be spared from this routine work.
The device consists of:
- optical sensor (infrared radiation source and photodetector);
- electrical signal amplifier;
- switching transistor.
Important! All of the above is mounted in a miniature waterproof housing, which makes it quite easy to install it in place of a standard contact breaker.
The operating principle of the module is as follows:
- When the distributor rotor rotates, its cams periodically block the light flux of the optical sensor.
- Electrical impulses from the photodetector are amplified by a built-in microcircuit and supplied to a control transistor, which opens/closes the circuit of the primary winding of the coil.
On a note! LED indicators (red and green) inform about the state of the electronic switching key (closed/open).
How to install and configure Sonar IR is described in detail in the video below:
Types of sanitary protection
The ignition system serves to ignite the air-fuel mixture located in the engine cylinders at the required moment.
The applied protection systems can be divided into three main types:
- Contact;
- Contactless;
- Contact transistor.
The first and third types are not of particular interest to us, since the VAZ 2109 uses a contactless or contactless transistor system.
https://youtube.com/watch?v=Ud-nuLSxwvk
The use of such schemes began in the mid-80s of the last century. Over time, engineers have been able to improve efficiency, performance and reliability.
BSZ began to use non-contact sensors instead of a breaker, which make it possible to instantly determine the speed of rotation of the crankshaft and the angle of its position.
Operating principle
The operating principle of the ignition system installed on the VAZ 2109 is as follows:
- The crankshaft position sensor performs its main tasks, sending a signal to the controllers;
- The controller processes the received information and calculates the sequence of switching on the ignition coils;
- The coil creates two sparks - igniting and idle.
The dry spark method involves creating sparks simultaneously in two spark plugs. One is igniting, and the second is idle, because it beats in time with the release of exhaust gases on the other spark plug. Thus, the cylinders where sparks are generated simultaneously create pairs - cylinders 1 and 4 and cylinders 2 and 3.
Coil
Main advantages
The ignition system used for nines has good reliability indicators, although it produces energy up to 50 kJ, and the breakdown voltage can sometimes reach 30 kV or more. BSZ is valued for its high efficiency.
There are several main advantages that characterize contactless ignition systems.
| Advantages | Peculiarities |
| SZ works with a Hall sensor | Because of this, the spark energy parameters are not affected by the voltage in the electrical network or the frequency of the engine. This is due to the fact that the time period of energy concentration in the ignition coil is always constant. This ensures high efficiency of the circuit |
| There is no mechanical interaction between contacts | This ensures there is no contamination or burning of contacts, so there is no need to clean them |
| No need to adjust the position of the contacts | This can be explained simply - they are not in the SZ VAZ 2109 |
| Minimal mechanical interactions between parts | This factor contributes to the absence of rotor vibrations, resonance, and uneven spark distribution across the spark plugs |
| The energy in the candles is constantly increased | It can reach 50 J, which allows you to avoid failures when igniting the air-fuel mixture in the cylinders. This is especially noticeable when accelerating a car. |
| Cost-effective and environmentally friendly | The use of the new SZ made it possible to improve fuel economy by approximately 5 percent, as well as reduce CO emissions by 20 percent |
| Stable cold engine start | Even if the battery is discharged to 6V, you can still start the engine without problems. This makes BSZ significantly different from other ignition systems that cannot boast of such stability. |
Scheme
Contactless sensor-breaker for foreign cars
Owners of foreign cars can purchase a simple device from UltraSpark, Pertronix or AccuSpark, which allows them to quickly “convert” a standard ignition system into a contactless one. The delivery package for this device includes:
- Induction sensor-interrupter.
- A plastic trigger ring with neodymium magnets pressed into it (according to the number of engine cylinders).
- Installation instructions and connection diagram.
According to manufacturers, installation of a non-contact sensor-interrupter (BSD) takes no more than 30 minutes:
- Remove the distributor cover and slider.
- We dismantle the contact group of the mechanical breaker and the spark-extinguishing capacitor.
- We install the BDP and bring its wires out through the hole in the housing.
- We put a trigger ring on the rotor axis.
- We return the slider and distributor cover to their place.
- We connect the wires from the installed sensor to the ignition coil in accordance with the diagram.
Important! Knowing the distributor model, you can select a contactless breaker module for almost any brand of foreign-made vehicle.
The undoubted advantages of the BDP are:
- Low cost.
- Easy to install.
- Possibility of use with stock distributors and high-voltage coils of a specific car brand.
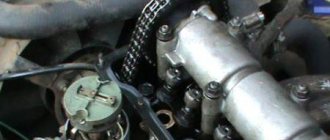
Replacing contactless electronic ignition on a VAZ 2101-2107
- Using a 38 wrench, unscrew the ratchet nut until the marks on the crankshaft pulley and the engine cover match, that is, you need to set the engine to the “TDC” mark.
- It is imperative to remember the location of the distributor and the slider itself; the new distributor must be placed in the same position.
- It is necessary to remember the wires that are attached to the coil marked B+. After which it can be unscrewed and removed.
- Afterwards we will need a 13 key, use it to unscrew the distributor lock nut, and then remove it. You need to be careful not to lose the gasket.
- Afterwards you need to secure the switch and attach the black wire to ground.
- We install and attach the coil to the body. Standard wires are connected to the corresponding terminals.
- Wires from the switch, which show the “+” mark, to the corresponding terminal, the second wire, respectively, to the terminal with the “-” sign.
- After installing the distributor, the lock nut is not fully tightened.
- The wires from the switch must be connected to the distributor.
- After that, the position of the distributor and the slider is checked, the cover is put on and the wires are connected in the sequence 1-3-4-2.
Also, when installing BSZ, beginners in this business can make basic mistakes, such as, for example: connecting a coil with wires mixed up. Therefore, check everything before starting. - After everything is secured, you can start the engine and begin adjusting the ignition, you can adjust it “by ear.” But of course it is better to use a strobe light.
If after installing the electronic ignition the car does not start, you need to check the correct supply of high voltage wires to the cylinders and install the distributor drive.
You might be interested in reading:
- How to remove the rear drum on a VAZ 2107 with your own hands Brake drum While the car is driving, the brake drums attached to the rear wheels rotate with them. These are massive metal parts...
- How to do sound insulation on a VAZ 2107 with your own hands For those who do not spend much time in the car, there may be no need to spend money on retrofitting. If in the salon...
- Reasons why the tachometer on the VAZ 2107 does not work. The tachometer on the carburetor engine of the VAZ 2107. On the carburetor seven, three wires come out of the tachometer. Two wires are plus and minus...
Complete non-contact ignition system
Naturally, you won’t be able to get all the benefits of the BSZ by installing only a sensor-interrupter. This module only improves the reliability of sparking (without skipping) and relieves owners from the need to constantly monitor the condition of the mechanical contact group. In order to equip your car with a full-fledged BSZ, you need to purchase a kit consisting of:
- distributor, with installed Hall sensor;
- semiconductor switch;
- high voltage coil;
- connecting wires with installed blocks.
Such a set for classic VAZ cars from SOATE (Russia, Stary Oskol) currently costs about 2,500 rubles. The video below describes in detail the process of installing it yourself:
Instructions for installing a homemade BSZ
If you have decided which ignition is better, then let’s move on to the issue of installing a better option on your car. Installation of contactless ignition begins with the installation of a block equipped with a steel plate with mounting holes, which is necessary for cooling. Let's look at the procedure using the example of a classic VAZ 2107 car. There should be holes on the left side member to which the switch is screwed using two self-tapping screws. If there is no hole, then find a place next to the coil and drill holes there (the author of the video is the Sdelaj Sam channel! Pljus interesnoe!).
When installing a homemade electronic ignition, the switch cannot be mounted next to the washer reservoir. After all, if it leaks, then all the electronics will be “covered.” Before dismantling high-voltage wires, remember their location.
Installation of BSZ is carried out in the following order:
- First, you need to remove the cover from the new distributor and install the gasket. The distributor is mounted on the block so that its moving contact is located opposite the mark on the valve cover of the power unit. The so-called distributor skirt should be slightly pressed using a fastening nut, this will prevent possible rotation of the distributor.
- Next, you need to install the coil at the installation site. After this, you should connect the wires from the lock relay, switch, and tachometer to its terminals. The wire that comes from pin 1 on the block must be connected to terminal K directly on the coil. As for the wire from pin number 4, it is connected to terminal B.
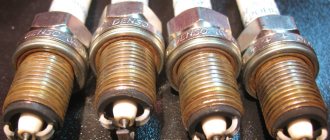
- After performing these steps, you need to set the gap on the electrodes of the spark plugs to about 0.8-0.9 mm, and then the spark plugs themselves can be screwed into the seats. Place the cover on the distribution unit and connect all the necessary wires in the appropriate order. Then all you have to do is connect the vacuum line. Having done this, you can begin adjusting the unit.
1. Disconnect the wires from the distributor.
2. Remove the distributor.
3. Install the switch.
Ignition system without distributor
The most “advanced” and truly contactless is the electronic ignition system, which does not have a mechanical distributor, since its functions are performed by the on-board computer. It “determines” the moment of spark formation in the corresponding cylinder based on signals received from the camshaft and crankshaft position sensors. Instead of one high-voltage coil, the system uses several (one for each engine cylinder). This allows you to create a more powerful spark, since the computer, depending on the engine speed, clearly “determines” the time required to accumulate energy.
On a note! Even more innovative is the ignition system, in which the coils are mounted directly into caps placed on the spark plugs. This allows you to get rid of high-voltage wires, which in turn reduces electricity losses, and also increases the reliability and efficiency of the sparking process.
Design and operating principle of BSZ
So which ignition is better? Before we talk about installing and adjusting electronic ignition with our own hands, let's look at the operating principle of the BSZ and its design. So, the contactless ignition system is a rather complex device in design, which consists of many parts.
Among the main components it is worth highlighting:
- coil;
- vacuum and centrifugal voltage regulators;
- switching device;
- signal controller;
- high voltage wires;
- candles;
- accumulator battery.
These are the main elements that include the contactless ignition kit. As for the principle of operation, it is quite simple. When the driver turns the key in the lock, voltage begins to flow to the mounting block and here it is distributed between the starter, coil and other consumers of the car's current. The crankshaft begins to move, causing the signal controller to begin transmitting pulses to the switching node. The purpose of the latter is to stop the supply of voltage to the coil windings, due to which a higher voltage current is generated in the secondary turns.
BSZ diagram with designation of elements
This current makes it possible to generate a strong spark at the candles, which is subsequently used to ignite the combustible mixture. Current flows to the spark plugs in a certain order, in accordance with the position of the crankshaft. This process is carried out under the control of regulators, which can determine not only the frequency with which the shaft moves, but also the degree of load on the power unit. If the non-contact ignition system is adjusted properly, a high-power spark plug will form on the spark plugs, which will ensure normal ignition and combustion of the combustible mixture.
Adjustment with strobe light
Adjustment with strobe light
produced this way. We hook the strobe light to the car's network. You need to remove and plug the vacuum corrector hose from the distributor. Now the engine needs to be started and warmed up to a temperature at which it will stable idle speed. Then you need to loosen the bolt that secures the distributor body. The strobe light must be directed at the pulley, which is located on the crankshaft.
Now we begin to turn the distributor until the mark on the pulley aligns with the marks on the timing cover. In this position, the distributor body is fixed.