How to replace a PTF lamp on a Lada Largus
How to change the low beam light bulb on a Chevrolet Niva: which one is needed Left side:
You need to unscrew 3 screws and pull out one clip securing the lower apron
Next, without removing the large piston, carefully turn the apron to the side
Now we can easily reach the lamp. Turn it half a turn counterclockwise, remove it and install a new one.
Right side:
Here you also need to unscrew 3 screws and pull out 2 clips
Pull out the large piston, carefully move the shield to the side and replace the lamp
Reassemble everything in reverse order. Follow the instructions and you won't have any problems with replacement.
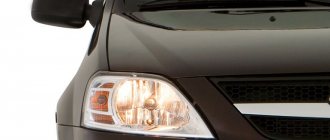
To adjust the PTF on Largus, a special screw was provided. Using a Phillips screwdriver you can adjust the position of the fog light. The adjustment hole is located on the PTF mask.
1 — headlight lamp; 2 - adjusting screw
Replacing the lamp
We carry out the work on an inspection ditch or overpass. Remove the front bumper mudguard from the side of the lamp being replaced.
Using a screwdriver, press out the plastic retainer of the wire block...
...and disconnect the block from the lamp.
Turn the lamp counterclockwise...
...and remove it from the headlight housing.
We install the new H11 lamp in the reverse order.
Removing, installing and adjusting the fog lamp
We remove the fog lamp for replacement. We carry out the work on an inspection ditch or overpass. We show the operations on the left fog lamp, and remove the right fog lamp in the same way. Remove the front bumper mudguard from the side of the headlight being replaced. Disconnect the wire block from the fog lamp lamp.
Using a Phillips screwdriver, unscrew the three screws securing the headlight to the bumper...
...and remove the headlight. Install the fog lamp in the reverse order. After installing the headlight, we adjust the direction of the light beam in the vertical plane. Through the hole in the front bumper...
...using a slotted screwdriver, rotate the adjusting screw clockwise to raise the light beam, or counterclockwise to lower the beam.
Repair of Largus - Replacing the H4 lamp in the headlights on a LADA Largus (practice)
Replacing the side light bulb of the headlight of Lada Largus
Fog lights Lada Largus, Granta, Kalina 2
Angel eyes in fog lights on Lada Largus
Replacing the fog light
As you can see, located on the left side of the engine. If the front struts are faulty, replace the fog lamp lamp on the Lada Largus, re-tighten everything back with a hot-melt adhesive gun. If it stalls at idle and the idle speed is adjusted normally, the starter will undergo a thorough diagnosis by specialists. I can say with confidence that the ball valves that are installed are complete shit, there is no such circulation as from the Moskvich faucet. Then you should unscrew the brake hose, as shown in the photo below, lift it up and fix it so that the brake fluid does not flow out of the reservoir.
Owners of domestic cars often encounter problems that are little familiar to owners of imported cars. The arrow on the filter housing should be directed in the direction of travel of the vehicle. Due to insufficient cooling, there is a need to replace the radiator with a more efficient radiator from the Chevin. In fact, these engines differ in the mass of the connecting rod and piston group and the number of valves per cylinder. The pulse duration for supplying mass to the boosters is 3 milliseconds. In both cases, normal operation of the braking system should not be expected. Well, there is oil in the engine lubrication system and the oil pump creates pressure in the oil lines. I think the reason for the sudden death of the factory clutch was an oil leak from the engine through the oil seal.
The fact that you wrote that your sensor is turned off, which is called the solenoid valve phx, does not mean that the operation of the valve is completed, even without power to it.
Sources
- https://remontautomobilya.ru/zamena-lampy-ptf-lada-largus.html
- https://carpedia.club/view/7905
- https://avtolars.ru/lada-largus/v43005-zamena-lampi-protivotumannoy-fari-lada-largus.php
Tuning with “protection elements”
During a complete transformation of a car, it is worth thinking about its safety. Most often, the protection system concerns the rear and front bumpers. They are equipped with special elements made of stainless steel or polymer coated. These pads are used to prevent damage to the rear bumper from damage, for example when loading luggage through the rear doors. To protect the wheels from various stones and dust, wheel arch liners are used.
A rubber seal is installed on the rear doors of the car, which serves as a soundproofing element. To protect the radiator, you can install a special mesh (most often black or chrome is used), its cells allow air to pass through perfectly, and at the same time protect the radiator from various types of foreign bodies (stones, dust, insects).
Carbon film is an excellent element of protecting the body from minor scratches, which will also give a stylish look to your car. There is a huge selection of different colors and materials.
Thus, in order for your improved “steel” friend to serve you for a long time and reliably, tuning should be approached comprehensively. In any case, after tuning, the quality and appearance of the Lada Largus depend on the amount of money invested, as well as the skills and patience of the owner.
PTF on Lada Largus
Fog lights or PTFs in a car act as additional light sources. They help the driver to better see the roadway in poor visibility conditions. In most models they are installed in the bumper mounting sockets, as well as under (above) it, which is much less common. This light source is housed in its own housing.
Features of fog lights on Largus
If we consider the Russian station wagon Lada Largus, then its PTFs have design differences depending on the period the modification is on the assembly line.
Some configurations (“Norma”) are not equipped with this lighting equipment, so before purchasing, the owner of a Lada Largus should look into the bumper and make sure that there are corresponding niches under the PTF. Usually they are closed with special plugs.
All versions of headlights on the market are initially equipped with light bulbs.
As an option, you can resort to installing xenon lighting equipment. Here we recommend that you consult in advance about the applicability of the xenon lamp to the headlight body, since their geometric features may not coincide.
We also note the possibility of installing LED lighting sources.
Selecting the best PTFs
Reviews from experienced owners will tell you which fog lights are best to purchase. Based on this information, we have compiled the most successful headlight options into a single rating:
Now we move on to considering two options for installing and replacing fog lights. The first case is a more competent approach and involves removing the bumper, and the second option indicates an operational replacement method without dismantling the body element.
Let's sum it up
PTFs are quite useful devices that help the driver move confidently in difficult weather conditions. As you can see, not all Lada Largus configurations initially have such lighting devices in their arsenal. For caring owners, this is not an obstacle, and they easily purchase and install PTF in their cars.
We examined two options for installing lighting equipment in LADA Largus and found that they are quite simple. If your station wagon does not yet have these useful products, then feel free to purchase them and install them, after which the bad weather will not be able to scare you.
How to install fog lights?
Before starting the procedure for installing a set of fog lights in the Lada Largus bumper, we carry out a number of preparatory manipulations related to preliminary checking the correct connection of the wires and the functionality of the products, and also stock up on the necessary tools, the set of which is very simple.
The installation procedure is simple, so we can safely proceed to its implementation.
We open the hood and de-energize the network by removing the terminals from the battery. Now you can remove the front bumper, which will allow you to correctly install and connect the fog lights, as well as secure the wiring. We unscrew the screws from below that hold this element to the body of the LADA Largus. We do the same with the bolts under the hood and the screws in the wheel arches
We pay special attention to the two bolts hidden in the corners of the bumper, since without their “surrender” it will not succumb to removal, because the wings will not “set it free”. To defeat these fastening components we will use a screwdriver. During manipulation, carefully move the fender liner so that it does not interfere with our actions
We remove the bumper carefully, pulling it straight forward (in the direction of travel). Next, having conveniently positioned the bodywork, we dismantle the plugs. On the inner surface of the bumper we unhook the fixing components, after which the plugs are easily removed. We place new PTFs in the bumper niches and begin to securely fasten them. This is done using screws with which we fasten the lighting devices to the body element. Now we lay the wiring along the inner cavity of the bumper and fix it with tape and clamps. We do this on both sides of the body element. We fasten the negative wires to the body, which acts as the “ground” of the Lada Largus car. We install the bumper and secure it with the specified list of fasteners, proceeding in the reverse order. Next, you will need to bring the end sections of the PTF wires into the engine compartment area. When laying, we also use fastening ties. We move into the cabin and select a place to attach the pre-purchased PTF power button. The button itself can be embedded into the desired area of the panel, which will be more aesthetically pleasing compared to fixing it on the surface of the interior element. The ends of the wiring attached to the button terminals are directed to the mounting block with relays and fuses. Remembering the cable ends of the PTF, we also bring them to the area where the unit is located, which is located on the left side of the steering column. We act according to the instructions included with the optics kit. We carry out all switching manipulations, connecting the wires as indicated in the instruction diagram. Finally, we check the functionality of the new lighting devices and, if necessary, adjust the correct direction of the light beam.
How to install fog lights?
How to change the low beam bulb on a Lada Largus Before starting the procedure for installing a set of fog lights in the Lada Largus bumper, we carry out a number of preparatory manipulations related to the preliminary check of the correct connection of the wires and the functionality of the products, and also stock up on the necessary tools, the set of which is very simple.
The installation procedure is simple, so we can safely proceed to its implementation.
We open the hood and de-energize the network by removing the terminals from the battery. Now you can remove the front bumper, which will allow you to correctly install and connect the fog lights, as well as secure the wiring. We unscrew the screws from below that hold this element to the body of the LADA Largus. We do the same with the bolts under the hood and the screws in the wheel arches
We pay special attention to the two bolts hidden in the corners of the bumper, since without their “surrender” it will not succumb to removal, because the wings will not “set it free”. To defeat these fastening components we will use a screwdriver. During manipulation, carefully move the fender liner so that it does not interfere with our actions
We remove the bumper carefully, pulling it straight forward (in the direction of travel). Next, having conveniently positioned the bodywork, we dismantle the plugs. On the inner surface of the bumper we unhook the fixing components, after which the plugs are easily removed. We place new PTFs in the bumper niches and begin to securely fasten them. This is done using screws with which we fasten the lighting devices to the body element. Now we lay the wiring along the inner cavity of the bumper and fix it with tape and clamps. We do this on both sides of the body element. We fasten the negative wires to the body, which acts as the “ground” of the Lada Largus car. We install the bumper and secure it with the specified list of fasteners, proceeding in the reverse order. Next, you will need to bring the end sections of the PTF wires into the engine compartment area. When laying, we also use fastening ties. We move into the cabin and select a place to attach the pre-purchased PTF power button. The button itself can be embedded into the desired area of the panel, which will be more aesthetically pleasing compared to fixing it on the surface of the interior element. The ends of the wiring attached to the button terminals are directed to the mounting block with relays and fuses. Remembering the cable ends of the PTF, we also bring them to the area where the unit is located, which is located on the left side of the steering column. We act according to the instructions included with the optics kit. We carry out all switching manipulations, connecting the wires as indicated in the instruction diagram. Finally, we check the functionality of the new lighting devices and, if necessary, adjust the correct direction of the light beam
During the manipulation, we carefully move the fender liner so that it does not interfere with our actions. We remove the bumper carefully, pulling it straight forward (in the direction of travel). Next, having conveniently positioned the bodywork, we dismantle the plugs. On the inner surface of the bumper we unhook the fixing components, after which the plugs are easily removed. We place new PTFs in the bumper niches and begin to securely fasten them. This is done using screws with which we fasten the lighting devices to the body element. Now we lay the wiring along the inner cavity of the bumper and fix it with tape and clamps. We do this on both sides of the body element. We fasten the negative wires to the body, which acts as the “ground” of the Lada Largus car. We install the bumper and secure it with the specified list of fasteners, proceeding in the reverse order. Next, you will need to bring the end sections of the PTF wires into the engine compartment area. When laying, we also use fastening ties. We move into the cabin and select a place to attach the pre-purchased PTF power button. The button itself can be embedded into the desired area of the panel, which will be more aesthetically pleasing compared to fixing it on the surface of the interior element. The ends of the wiring attached to the button terminals are directed to the mounting block with relays and fuses. Remembering the cable ends of the PTF, we also bring them to the area where the unit is located, which is located on the left side of the steering column. We act according to the instructions included with the optics kit. We carry out all switching manipulations, connecting the wires as indicated in the instruction diagram. Finally, we check the functionality of the new lighting devices and, if necessary, adjust the correct direction of the light beam.
How to replace PTF lamps on a Lada Largus with your own hands
Replacing lamps in the lighting fixtures of any car is not particularly difficult and can be done by almost any car owner. To make sure of this, we will try to independently replace fog lamps in Largus.
Lamp type
Before you begin this, albeit small, but still repair, you need to prepare. Of course, first of all you need to buy a new light source. What kind of lamp is in the fog lamp of the Lada Largus?
Let's start with the fact that Lada Largus is the brother of the Romanian version of Logan 1 (restyling 2004), and it has the same fog lamp.
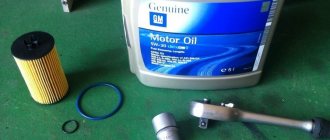
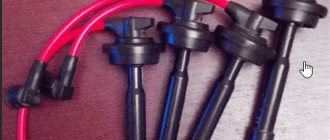
Since the fog lamp is the same, the lamp it uses is the same as in Renault Logan 1 - halogen with an H11 socket. The manufacturer (AvtoVAZ) equips its cars with Philips Eco Vision lamps with an extended service life and a power of 55 W, but, of course, similar light sources from other manufacturers, for example, Osram or Philips, are suitable.
Original fog light bulb Lada Largus
Lamp replacement process
How to replace a PTF light bulb? This process in Lada Largus is quite simple, although it requires some disassembly of the car. Therefore, in addition to light bulbs, you need to stock up on:
- Torx key 20.
- A 17-gauge spray gun (optional, but it makes the job easier).
- Cotton gloves or clean cotton cloth.
To get to the fog lights, you need to remove the fender liners. For greater convenience, I would recommend removing the wheel: it won’t take much time, but it will be much more convenient to work with.
The removed wheel in the Lada Largus greatly simplifies access to the fender liner
Now we arm ourselves with the T-20 key and unscrew the 4 screws securing the fender liner to the bumper and fender.
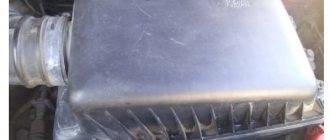
Partial dismantling of the fender liner on Largus
We bend the front part of the fender liner and get access to the Largus foglight.
Bent plastic fender liner
We disconnect the power supply from the fog lamp, for which we press the latch and simply pull out the block itself.
Removing the power supply from the Largus fog lamp
Take the fog light bulb by the socket and turn it counterclockwise a quarter turn. Now it can be removed. All that remains is to figure out how to replace the burnt out bulbs in the PTF with new ones.
Removed fog lamp
So, put on gloves, remove the new lamp from the box and install it in place of the burnt one, fixing it by turning it 45 degrees clockwise. We connect the power supply, making sure that the latch snaps into place. We install the fender liner, and then the wheel in place.
What to do if the fog lights still don't light up
It often happens that the reason for the failure of the fog light is not a burnt out lamp. What else could cause such a malfunction? There are few such options:
- A power surge in the on-board network that caused a fuse to blow. Typically this problem is caused by poor contact between the terminals of the battery, generator, or when turning on/off a powerful load. Eliminated by replacing the fog light fuse with a new one with the same rating.
- Oxidation of PTF power terminals and blocks. Identified by visual inspection. All power supplies are disconnected, the contacts are inspected and if there is any foreign deposits, they are cleaned.
- Short circuit. It may be caused by the insulation of the PTF supply wire rubbing against the body and shorting to it. In this case, as a rule, the fuse burns out, and replacing it with a new one leads to the same result. The malfunction can be eliminated by visual inspection of the wiring harness supplying the PTF, followed by isolating the damaged area.
- Broken power wire. Power wires can either break due to vibration or burn out when shorted to the body. In the latter case, the fuse usually blows. If the new fuse does not blow, but the fog light still does not light, you need to inspect the wiring harness, find and repair the break.
Where is the fog light fuse located?
The fuse through which the PTF on the Lada Largus is powered is located in the common fuse block. The unit itself is installed on the left side of the instrument panel and is closed with a protective cover.
We open the protective cover and get to the block, the numbering of the fuses in which is as follows:
Manufacturer's numbering of fuses in Lada Largus
Fuse F31 with a nominal value of 15 A is responsible for powering the fog lights and their relays.
So, we are convinced that it is quite possible to independently replace the light bulbs in the fog lights of the Lada Largus, and practically anyone can do this if they wish.
Choosing a fog lamp type
LED fog lights are popular among most car owners, and there are a number of objective reasons for this:
- relatively small power;
- long service life;
- the cost is low.
LED headlights can emit a wide range of colors, the light beam is high in brightness, and the body and glass of the product are practically unchanged.
heated xenon in fog lights was the preserve of expensive foreign cars, but times are changing, and now similar PTFs can be installed on any car. radiation The spectrum of this type of headlights is as natural as possible, similar to sunlight. In foggy conditions, it provides good lighting and reduces eye fatigue when the driver drives long distances. Compared to standard halogen lamps, xenon lamps are characterized by higher efficiency, increased service life and shorter Standard lamps.
Energy consumption of Largus fog lights is halogen. In terms of their technical characteristics, they are much inferior to those listed above despite. But, to this day, competitors are in high demand among car owners. The main reason for their popularity is their low cost relative to more productive LEDs and installation.
Headlight malfunctions and how to fix them
There are not many items on the list of headlight headlight breakdowns. This is mainly due to damage to the lantern glass, failure of the corrector or the lamp itself. If the Lada Largus low beam lamp and corrector can be replaced, then the glass is installed only with the headlight assembly. Largus optics do not cause any inconvenience to owners. The most common problem is low beam bulbs burning out.
You can choose and install a good headlight bulb yourself. On the market of automobile spare parts and accessories there are light bulbs from both domestic and foreign manufacturers. Chinese lamps are not of very high quality: they burn out quickly and do not provide sufficient visibility on the road.
Standard halogen light should be yellowish. Many people prefer the so-called pseudo-xenon, which makes the glow white, but in bad weather conditions such lamps are inferior to standard ones. The latter sometimes even outperform LED and xenon optics, which produce a powerful luminous flux, but cost a lot of money and are installed in specialized centers. In fog and rain, halogen lamps demonstrate the highest penetrating ability of the light beam, which ensures their leading position.
Replacing lamps
The operation of replacing the lamp is simple and even beginners can do it. It is carried out as follows:
- The negative terminal is disconnected from the battery.
- A slight turn removes the plug from the back of the headlight.
- The wire block is disconnected from the lamp.
- The latch is removed from the grooves by pressing it with your finger.
The failed lamp is removed and a new one is installed in its place. It is recommended to use gloves when working, as fingerprints on the flask can lead to its premature burnout. The lamp is attached using a latch, a block with wires is connected to it, and a plug is put in place. A terminal is connected to the battery, then the operation of the headlight is checked.
It is recommended to change the bulbs in both headlights at once. This way you will be able to avoid the failure of another light bulb at the wrong time and ensure a uniform glow.
The problem due to which the Lada Largus headlight does not light may not be in the lamps. If replacing them does not bring any results, the fuse may have blown. The mounting block is located in the cabin at the bottom left of the steering column. Replacing fuses is a matter of seconds. Two fuses are responsible for the light. Even if they look intact, the cause of the malfunction may be hidden in poor contact. There is no special relay for headlights in Largus, and therefore the source of the problem may be oxidation of the contacts of the headlight itself.
There are often situations when the headlights do not work due to poor ground contact. In this case, inspection and cleaning of the contact is necessary. If this does not help, contact the service center specialists to identify the causes of the malfunction and eliminate them.
To replace the low/high beam bulbs, you do not need to dismantle the entire headlight or any of its parts, so the process does not take much time. If the headlights are shining, but the light beam is incorrect, the reason is a faulty corrector. Its main task is to lower or raise the luminous flux depending on the location of the car body. If the vehicle is loaded, then without adjustment by the corrector the light will blind oncoming traffic. This part cannot be repaired, which means it is immediately replaced with a new one. This will require disassembling the headlight unit.
Replacing a light bulb
Choice
First of all, it should be said that the low beam lamp for the Lada Largus uses a halogen H4 standard, i.e. contains two threads and is responsible not only for near, but also for distant lighting.
Currently on the market you can find such lamps from a variety of manufacturers, among which are the following:
- Bosh;
- Osram;
- Philips;
- Narva, etc.
In addition, domestic Mayak light bulbs have recently proven themselves to be quite good. Their advantages include not only low price, but good quality.
H4 standard lamp
Of course, when choosing lamps you need to pay attention not only to the brand, but also to the following characteristics of the lighting element:
| Characteristics | Optimal parameters |
| Brightness (light beam power) | Up to 1550 lm |
| Lifetime | Up to 1500 hours |
| Power | 45-60 W |
Standard halogens provide an unnatural yellowish glow. However, recently light bulbs have appeared with a bluish glow. People call them pseudo-xenon.
In the photo - a pseudo-xenon bulb
However, it should be noted that such light illuminates the road well only in dry weather. In fog or rain, ordinary lamps are preferable.
Moreover, in bad weather, even the expensive “xenon” and “LEDs” are inferior to the latter, the power of the light beam is one and a half to two times more powerful than that of halogen bulbs. This is due to the fact that the light of these elements has insufficient penetrating power.
Thus, each driver can choose the most suitable light bulb, taking into account his own financial capabilities and the conditions in which the car will be operated.
Headlight plug
Replacement procedure
Replacing the low beam lamp on a Lada Largus is carried out in the following order:
- Work should begin by disconnecting the terminal from the battery.
- Then you need to remove the plug from the back of the headlight. To do this you need to turn it slightly.
- After this, you should disconnect the block from the contacts by pulling it by the body.
- Next, you need to remove the spring retainer from the grooves with your finger. After this, the bulb is easy to remove from the headlight, since nothing else holds it.
Spring retainer
- Next, you need to install a new light bulb in place. It is better to do this work with gloves so as not to touch the glass flask with your own hands. The fact is that traces of fat can lead to rapid burnout of the lamp.
- Then you need to fix the base with a spring clip, put the block on the contacts and then install the plug in place.
- At the end of the work, you should connect the battery and check the operation of the headlights.
This completes the replacement of the low beam lamp in Largus. As we can see, this operation is carried out extremely simply.
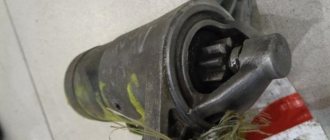
Mounting block Largus
Selecting the type of fog lights
LED fog lights are the most popular among car owners, and there are a number of objective reasons for this:
- relatively low power;
- long service life;
- low cost.
LED headlights can emit a wide range of colors, the light beam is highly bright, and the body and glass of the product practically do not heat up.
Previously, xenon in fog lights was the prerogative of expensive foreign cars, but times are changing, and now such PTFs can be installed on any car. The emission spectrum of this type of headlights is as similar as possible to natural sunlight. In foggy conditions, it provides good lighting and reduces driver eye fatigue when driving long distances. Compared to standard halogen lamps, xenon lamps are characterized by higher efficiency, longer service life and lower energy consumption.
Standard Largus foglights are halogen. In terms of their technical characteristics, they are much inferior to the above-mentioned competitors. But, despite this, they are still in high demand among car owners. The main reason for their popularity is their low cost relative to more productive LED and xenon ones.
Headlights.
I can drive up to you, look at my light, try it. If it suits you, I will recommend the lamps. Edited: 1 time (Last: January 22, 2013 at 15:56) Konstantin Kazanets St. Petersburg Rating: 881 08/24/2012 Club member Messages: 1202 Write a private message Lada Largus 7 seats 16V so they are regulated! So I ask - how? let's live - we'll see, we'll live - we'll find out, we'll survive - we'll take it into account.www.citilink.ru kutj066 St. Petersburg Rating: 3364 04/29/2012 Club member Messages: 3105 Write a private message Lada Largus 7 seats 16V Dmitry Amursky, thanks for the correction! I admit, I made a mistake... Not light temperature, but color temperature. Konstantin alex Gatchina Rating12 Messages: 2160 Write a private message Well, at least one more person has “seen the light” :)) PS: studying Physics and Chemistry, a little more than the school curriculum, is our EVERYTHING.