External use
Do not rush to remove the left headlight when replacing lamps. The interfering neck of the washer fluid reservoir is simply pulled out upward. Do not rush to remove the left headlight when replacing lamps. The interfering neck of the washer fluid reservoir is simply pulled up.
When replacing lamps, the headlights do not need to be removed. Access to the right one is good, and “on the way” to the left one we remove the washer reservoir tube. Regardless of the body type, the rear lights have to be removed, even to check the connectors. The hole in the body is made only for wiring. The lights are secured with two self-tapping screws and a pair of guide pins. Don't touch them in the cold.
The greatest difficulties are with replacing the front fog lamps. Access is only from below. The greatest difficulties are with replacing the front fog lamps. Access only from below.
We change the front fog lamps from below. We remove the standard crankcase protection and partially unscrew and bend the fender liners under the bumper.
Technological holes are for wiring only. I'm glad that the lights themselves can be removed from the outside. The technological holes are only for wiring. I'm glad that the lights themselves can be removed from the outside.
License plate lamps are changed from outside.
First, the housing is pushed to the right and then freely removed from the left side in the case of left-hand illumination, and vice versa. In the trunk there is a stowage or full-size spare wheel, depending on the configuration.
In both cases, the tool is assembled in a tray lying on the wheel, which is convenient.
The lamps in the license plate illumination can be changed from outside. All you need is a flat-head screwdriver. The lamps in the license plate illumination can be changed from the outside. All you need is a flathead screwdriver.
I'm glad that the wheels here are on studs: there are difficulties with bolts on some cars. And changing the stud is cheaper than repairing or changing the hub.
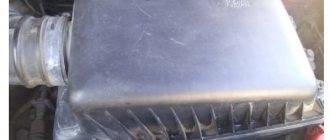
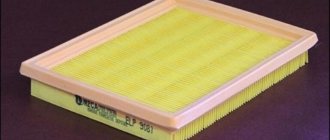
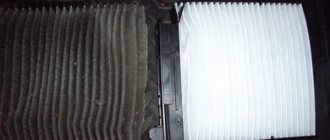
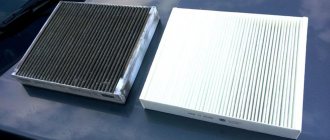
The cabin filter is hidden behind the glove compartment:
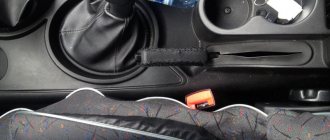
It is closed by a lid (yellow arrow) with two antennae (orange arrow) on the sides. It is closed by a lid (yellow arrow) with two antennae (orange arrow) on the sides. To change the front brush, you need to squeeze the two antennae of the fastener. Next, turn it all the way and remove it from the hook of the leash. To change the front brush, you need to squeeze the two antennae of the fastening.
Next, turn it all the way and remove it from the leash hook.
The main fuse box is located under the hood and contains spare fuses. On the back of the cover there are English designations for all fuses and relays, which makes life much easier if electrical diagrams are not at hand.
There are similar instructions in the cabin unit, hidden in the front panel to the left of the steering wheel, below.
In the guides of the front pads on the bracket there are anti-creaking springs, which come complete with the new pads. In the guides of the front pads on the bracket there are anti-creaking springs, which come complete with the new pads. On the rear drums on the inside there is a technological hole (yellow arrow) for checking pad wear (orange arrow).
If necessary, the drums can be removed without problems. On the inside of the rear drums there is a technological hole (yellow arrow) for checking pad wear (orange arrow). If necessary, the drums can be removed without problems. To adjust the handbrake, remove the cup holder by prying it off with a screwdriver. To adjust the handbrake, remove the cup holder by prying it off with a screwdriver.
Work algorithm
Before you begin, you should prepare the necessary tools and materials for changing the oil. Among the basic tools, the motorist should have a key with a head at hand. First you should buy the necessary lubricant, a filter, stock up on dry rags and a container into which the waste will drain.
The vehicle should be installed on a pit or overpass. Before unscrewing the drain plug, it is important to place an unnecessary 5-liter tank. The waste should be drained carefully so that the heated substance does not scald the skin of your hands. Do not rush and quickly remove the oil tank; you need to wait until all the contents leave the tank. In the free time, you can start changing the filter, lubricating it with a small amount of lubricant before installation.
As soon as everything is done and a portion of new oil appears in the Chevrolet Aveo, you need to make sure that there are no leaks. Most often they appear near the drain plug, as well as the oil filter.
Possible breakdowns and their causes
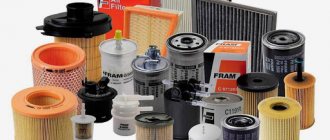
Types of oil filter box breakdowns that you can fix yourself, without contacting technical assistance. service:
- The box with the cleaning element burst due to strong pressure or gravel. Corrective measures: replace the box together with the filter element. Further movement of the vehicle without appropriate replacement is contraindicated.
- Oil smudges on the engine wall, crankcase or vehicle protection. Corrective measures: check the tightness of the drain bolt and the sealing rubber of the cleaning element. If possible, apply sealing adhesive to the leak area before replacing the part or making additional repairs.
When the oil level drops, the likelihood of failure or contamination of the cleaning element increases significantly. Corrugated paper must not be washed with water or gasoline. However, if the bypass valve is working, the driver has 30-40 km to get to the nearest repair shop or store.
The main condition for stable engine operation is timely replacement of the filter box with a new cleaning element. The recommended period is up to 10-12 thousand km since the last replacement. It is recommended to remove the filter box simultaneously with adding new oil.
T300
It is necessary to prepare in advance all the necessary spare parts and oil, as well as tools - a T45 sprocket and a 24-inch socket. You cannot pour the used fluid on the ground - you must prepare a suitable container in advance. It is also important to remember that it is advisable to carry out work on a warm engine - the oil will drain better. It is important to be safe and not get burned by hot liquid when draining.
Work order:
- Place the car on the overpass (you can drive it into a pit).
- Place a container for waste fluid under the drain neck.
- Remove the drain plug with an asterisk T 45.
- Wait until all the liquid has drained from the device (it is better to do this 15-20 minutes after the trip). The whole procedure takes about 20 minutes.
- Replace the oil filter - it is installed in the upper part to the right of the engine. To replace, you need to unscrew the cap with a 24mm head (it turns counterclockwise). Next, you need to remove the filter housing and install a new element into it.
- Install the purchased o-rings on the filter element and on the drain plug.
- Replace the O-ring and close the drain plug.
- Inject oil into the system through the filler neck.
The tightening torque of the oil filter cap is 11 Nm, the tightening torque of the power unit plug is 14 Nm.
During the procedure, experts advise removing contaminants from the system. To do this, after installing the new filter, but before installing the plug, add about 250 g of oil to the engine, and then run it through the device. When the color of the liquid becomes light, the device can be considered cleaned.
Changing the engine oil on a Chevrolet Aveo T300 on your own is not at all difficult. It is enough to prepare all the necessary materials in advance and follow the instructions given.
Changing the oil in an Aveo automatic transmission using the “spill” method
Let us also add that some car owners go even further, trying to complete a partial replacement more fully. To do this, you need to remove the automatic transmission cooling hose, which comes out of the top of the radiator. This procedure allows you to flush the automatic transmission fluid cooling circuit in the radiator.
The return hose is removed. If you disconnect the lower hose, some of the waste will remain in the radiator. A 10-12 mm adapter is inserted into the rubber hose, and a tube about 1.5 meters long is connected to the other end of the adapter. The tube is lowered into a container of about 5 liters. The container is placed so that it is also possible to control the level of the drained liquid.
Now, having placed the drain container so that it can be seen, you need to start the car engine, switching the automatic transmission to modes, starting with “P” and ending with low “1”. In this case, the selector is delayed in each mode for 3 seconds. Switching is necessary so that the channels and plungers in the valve body are actively engaged, allowing more fluid to be drained.
At the same time, you need to control the draining process so that more than 75% of the filled volume does not drain. Otherwise, the oil pump may “grab” air. After this, the engine must be turned off, then oil is added to the machine.
After topping up, flushing should be repeated. The main task is that the color of the ATF in the drain tube should be the same as that of fresh fluid. Taking into account the complexity of the work, it is better to flush the automatic transmission and automatic transmission radiator with an assistant, which will avoid a critical decrease in the level and achieve more accurate control.
Also, with such a flush, much more ATP fluid is needed than in the case of a partial replacement, even with removal of the pan. Typically, about 10 liters of oil may be required to flush and fill the automatic transmission. If the box is heavily contaminated from the inside, 12 liters or more may be consumed before clean oil begins to flow.
How to replace the oil filter on a Chevrolet Aveo T300 with your own hands?
The new oil filter element in the car engine not only reduces the friction of the cylinder block, but also removes carbon deposits, small metal particles and dust. All this debris flows through the engine oil into the car's filter box. During the entire operation of the motor, a critical content of waste accumulates in the corrugated paper element, and it must be removed. Replacing the filter box must take place simultaneously with draining the used motor lubricant. How to promptly carry out the procedure for changing a car's consumable parts and extend the period of uninterrupted operation of the engine is described in detail in this article.
How does an oil filter work?
The main function of the cleaning device is to stop microparticles from entering the engine and constantly filter the car’s engine oil. Unrefined oil damages the walls of the cylinder block, greatly accelerating engine wear.
The new filter cleaning box consists of the following components:
- A bypass valve is a device in a car that allows unrefined oil to flow into the engine compartment. This situation occurs when the engine oil is not warmed up, is too viscous and cannot pass through the corrugated paper of the box. To ensure that the engine pistons are not left without oil, the filter box may leak a certain amount of lubricant. The bypass valve also operates when the corrugated paper is densely contaminated and does not allow the vehicle's engine oil to pass through;
- The corrugated paper of the filter element box is a new element that has a density to retain abrasive substances, slag, carbon deposits and other small particles;
- Check valve. When the car engine is stopped, engine oil under pressure exits the filter box back into the engine circuit. At startup, the filter is empty and the cylinder block will not receive the new required lubrication. To prevent this from happening, the check valve of the box keeps a certain amount of oil in the filter element when the engine is stopped.