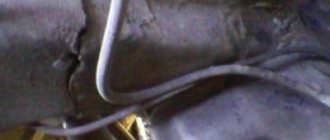
Slip rings
Replacing the slip rings of the VAZ 2110 generator is necessary if there are various types of defects on their surface. Because of them, the rings cannot efficiently perform their most important function - tightly connecting the parts to each other so that contact occurs between them. Very often, individual parts of the generator break. If you change it completely, you will have to spend a considerable amount of money. Therefore, you can repair it by replacing broken parts. On a VAZ 2110, replacing the slip rings of the generator is a simple procedure and you can handle it yourself.
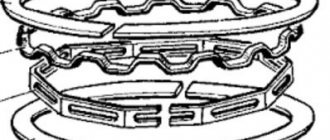
Slip ring block
ATTENTION! A completely simple way to reduce fuel consumption has been found! Don't believe me? An auto mechanic with 15 years of experience also didn’t believe it until he tried it. And now he saves 35,000 rubles a year on gasoline! Read more"
Disassembling the generator is the first thing to do. In order to see the rings, it is enough to remove the back cover of the gene from the side of the diode bridge. However, to replace it you will need to disassemble the entire device.
A block of rings is like this.
The rings, as you can see, come assembled. Factory rings have a decent thickness - 1-2 mm. Purchased analogues may be thinner. Blocks of rings “run” on generators, depending on operating conditions, for approximately 300 thousand vehicle kilometers. If the generating device did not fall into the area of primary concern of the car owner, and “lived out its life,” so to speak, in oil, the service life of the slip rings will decrease significantly.
The block is inexpensive. If you replace it along with the bearings and the tablet, you get an almost brand new generator.
Disassembling the generating device
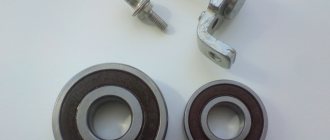
It is noteworthy that generators come in two types: old and new. The differences between them are in the diameter of the shaft. A 15 mm shaft is installed on old generators, 17 mm on new ones. This means that different bearings should be selected for replacement. The 302nd is suitable for a 15mm shaft, and the 303rd for a 17mm shaft. As for the rear bearing, it goes with all generators and is marked as 202.
So, disassembling the generator begins:
- First, remove the plastic cover;
- then the diode bridge is dismantled;
- remove the tablet (regulator with brushes);
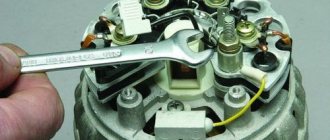
- To unscrew the pulley nut, you will have to clamp the generator in a vice, and then use a 24mm socket.
Advice. The gene must be clamped in a vice very carefully so as not to damage its parts. To avoid damage, the pulley is clamped using rubber gaskets.
- the relative position of the covers of the generating device is marked;
- then the tightening screws are unscrewed.
Note. The fastening screws are tightened very tightly. They are made of soft metal, so the usual methods of turning out oxidized bolts will not work. Here you will need an impact screwdriver or a shaped one, but with a large tip. Fasteners must be pre-treated with WD-40 or brake fluid and wait a little.
It is also recommended to treat the joints of the covers with the device body with WD-40.
- take a mounting spatula or an ordinary, but flat screwdriver, and halve the gene.
Dismantling
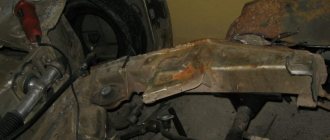
To disassemble, remove and repair or replace the generator, you will need to do the following.
- Drive onto an inspection hole or overpass to have access to the bottom and engine compartment.
- Remove the battery, otherwise it will not allow you to get to the nut that holds the generator you are looking for.
- Next, the same nut and adjustment bar are removed. Here you will need a 17 mm wrench. Use an extension cord. This will make the task easier; you will have to apply less force to unscrew the fastener.
- In the engine compartment, remove the shield that performs dirt protection functions.
- Now the drive belt is removed and the wires are disconnected.
- Be sure to remove the protective cap and use a 10mm wrench to unscrew the nut that holds the tip and positive cable of your battery.
- There is another nut on the fixing bracket, which will also have to be unscrewed.
- That's it, you can remove the generator. Just remember to pull out the long bolt first.
- When removing, keep an eye on the buffer sleeve. It won't be good if you lose it.
Dismantling work
This completes the procedure for removing the generator. You can proceed with partial repairs or complete replacement of the unit.
Belt
Often, the solution to a poorly functioning alternator is simply adjusting the belt.
Belt
- For the device to work effectively, it is necessary to ensure normal deflection of the belt;
- The deflection size should be 6-10 millimeters with a force of 98 N or 10 kgf;
- To adjust or replace the belt, you need to move the generator slightly to the side, towards the cylinder block;
- By rotating the adjusting bolt, you can adjust the belt tension.
If this measure does not help, you will have to pay attention to the voltage regulator and brushes.
Brushes and regulator
It is not recommended to repair the generator brushes, as well as the voltage regulator if they are worn out.
Experienced specialists advise purchasing a complete unit that includes both elements. Replacement is completed in a matter of minutes.
Brushes
Replacing rings
Such partial disassembly of the generating device is sufficient to replace the slip rings and the bearing on the shaft (armature bearing).
Attention. Even if the armature bearing is new, it is recommended to replace it after pressing.
Method for replacing ring block 1
- the anchor is clamped in a vice;
- the bearing is pressed out;
- then use a knife to remove the plastic contact protection, which is located directly under the bearing;
- after this, you need to open the bracket of the contact block and tear out the soldered wires so that you can remove the old slip rings (again, you can use a knife).
Attention. If it is not possible to open the bracket due to oxidation, etc., then you can use the old-fashioned method - press out the block with the contacts using a chisel and any long tool, directing the force of the lever upward.
- a new block with rings is put on the shaft (a spacer and light blows from above on the block with a hammer - the main thing is that the tails of the block accurately hit the seats);
- the wires are tucked into the proper places and sealed.
Note. During the soldering process, it is recommended not to use soldering acid (if used incorrectly, liquid can easily get inside the winding). After this, crimp the soldered contacts with pliers.
Next comes the assembly process:
- put the contact protection back on (it should fit tightly);
- then a new bearing is installed.
Method for replacing ring block 2
The old block with rings can be removed in another way (a more barbaric method, but effective).
In general, the wire strands that are soldered to the sides of the installed slip ring block should be thoroughly cleaned with a sharp object (knife, screwdriver, etc.) before removal. They are cleaned for the only reason - to make it easier to unsolder.
Then take a side cutter tool (you can use pliers) and use it to bite the eye where the vein is inserted. Move the eyelet up and down until the wire comes off. The same is done with the other ear.
Now you need to put the rings on the anvil (place only the part of the block that has the rings). Take a sharp chisel and a hammer, cut out the rings (not all the way) and pull them out with a side cutter.
With this method of dismantling the ring block, the plastic protection also breaks off. In the future, you can install new protection or leave the contacts without it (this is also done, but not recommended).
The protection is carefully broken off in the area adjacent to the contacts. As a result, the armature shaft should be completely freed from the remnants of the old block of rings; on the sides below, the ends of both wires should be visible, onto which the tails of the new block will be soldered.
Note. By the way, the anchor does not have any polarity, so you don’t have to “bother” with the correct position of the tails of the ring block.
The block, as in the case described above, is stuffed from above through a spacer.
Attention. The contacts (both wires on the side) rise upward so that when the contact block is lowered, they remain on top, and the tails of the block go to their original places. You can guide the wires with a screwdriver more often, thereby eliminating the clamping of the wire tails. The slip ring block should fit tightly into place.
Next, the wires are smoothed to the metal pads of the block to which they must be soldered.
Attention. There should be no empty spaces left on the site during the sealing process. The entire space must be completely treated with tin and rosin.
If you look at the factory solder of some “generator” models, you will see that the wire in this case is twisted into a ring, and the solder itself is carefully and completely filled inside.
After the generator is assembled, it should be checked. After starting the car, we look at the voltage - it happens that it shows a value below normal. This means that you need to put on the excitation wire and start the engine again. More than 14 is the ideal voltage parameter.
- The shaft should be thoroughly cleaned of any remaining epoxy, and before installing a new block with rings, the shaft should be coated with poxypol;
- It is also recommended to cold weld the junction of the protective cover with the anchor;
- When installing a bearing, it is advisable to strike the inner race with a suitable mandrel, or even better, heat the bearing with a special heating pad and place it manually (with gloves on);
- All possible contacts that occur during work should not be forgotten to be cleaned.
Generators: how they work and how they are repaired
The respectful “Gennady” or the familiar “Gena” are written with a small letter for a reason! This is not the name of a car mechanic, but a humorous slang nickname for an electric generator - one of the most important components of a car, which has practically not changed its design over several decades. Let's take a closer look at Gennady, studying its strengths and weaknesses and understanding on what fronts we can expect surprises regarding the electrical part of the car.
"Child of Light"
And the car generator in the modern sense is generated by mankind’s love for electric light. Cars from the dawn of motoring had only a simple unit called a “magneto” - a miniature generator combined with an ignition breaker, integrated into the engine housing and producing exclusively high-voltage impulses for the operation of spark plugs. Neither a lamp nor any other consumer of electricity could be connected to the magneto, so cars of the 19th century illuminated the road with carbide lamps in which acetylene burned - there was no need to expect help from the internal combustion engine.
However, it soon became obvious that the car engine must generate more electricity: not only for its own operation, but also for the operation of external consumers - headlights, horn, front panel meters, battery charging and the like. Therefore, next to the high-voltage “spark” winding of the magneto, an additional winding appeared - a low-voltage one, providing on-board voltage. MAGneto + DYNAMO machine = Magdino. This is how the first generators came to be called.
But since magneto and magdino are traditionally built directly into the engine, their power is limited by their small dimensions. And as soon as it became clear that an increase in generator power was inevitable, the “gene” became external - it moved to a bracket on the cylinder block and began to receive rotation from an external transmission - a belt, and sometimes a chain or gear.
The first generators produced direct current, but after the development of the semiconductor industry in the mid-twentieth century and the advent of powerful rectifier diodes, generators began to produce alternating current, which was then rectified to constant current by diode bridges. Changing the type of current made it possible to stepwise reduce the size and weight of generators several times and increase their power.
Actually, a modern generator is almost identical to what was on machines developed 10, 20, 30, or more years ago. Engines and gearboxes become more complex year after year, but perhaps the main external electrical unit remains virtually unchanged. Its design is not ideal, but it represents a golden balance of properties and cost. However, additional components and improvements appear - for example, instead of a simple pulley for a belt, an overrunning clutch can be installed on the generator, as in a starter bendix, or the number of coils in the stator winding increases and the diode bridge becomes more complicated, but most generators still make do with the classic design.
How does the generator work?
The two halves of the body, cast from aluminum, form a “barrel” and are bolted together. Inside the “barrel” there is a ring winding - a stator coil, from which we remove alternating voltage. A diode bridge is connected externally to this winding, covered with a plastic protective half-cover and converting the alternating voltage into a constant one. An axis passes through the generator housing - a shaft rotating on two bearings and driven by a pulley by a belt from the engine crankshaft.
A rotor with a coil inside – an electromagnet – is installed on the generator shaft and rotates with it. Through a pair of sliding contacts and carbon brushes, a voltage regulator supplies control current to it, ensuring that the generator produces 14 volts at the output - without a regulator, the voltage value will depend on the speed and can reach several tens of volts, dangerous for 12-volt automotive electrical equipment.
Generator faults
The generator on most machines is quite simple in design, and thanks to this, the number of types of its malfunctions is small, and diagnosis is simple. “Floating” problems that are difficult to catch and localize almost never happen there.
The weakest components of the generator are not mechanical, but electronic: this is a diode bridge, consisting of six powerful diodes, combined into three groups on an aluminum radiator plate, and a voltage regulator. They fail due to overload (due to systematic operation with overload from abnormal current consumers, if you light someone else’s car without turning off your engine, or due to a short circuit in the battery banks), due to the appearance of microcracks from constant shifting engine compartment temperature within a wide range and penetration of moisture into cracks, and sometimes for no apparent reason at all - this happens with electronics... In addition, the graphite brushes in the voltage regulator wear down over time. In this case, both the diode bridge and the voltage regulator assembly with brushes can be replaced with new ones.
In second place for failure are bearings. There are two of them in the generator - the more powerful and massive front one, and the rear one - smaller in size. The front one most often suffers, since it bears both the load from the tightly stretched belt and the penetration of dust and moisture from the outside. The bearings manifest themselves with a hum and squeal, which disappears if you start the engine with the alternator belt removed. They can also be replaced with new ones.
In third place are more unpleasant malfunctions, although, fortunately, more rare. Two copper rings on the shaft can be ground down to the ground - contacts for powering the rotor winding, along which the graphite brushes of the voltage regulator slide. These rings are quite durable, since the brush springs are weak, but after using several sets of brushes, the rings can become unusable over the years. They are not always found as spare parts, and you may not find them for a specific generator model... If you manage to buy them, then they are removed from the shaft in one block (filled in plastic), and new ones are installed in one block.
Even from old age, the insulation of the stator winding wires can deteriorate and a short circuit between the turns can occur. As a rule, it is not profitable to repair this, although in principle rewinding is possible. Malfunctions such as housing destruction are probably not worth considering, although they certainly do happen, and, oddly enough, some domestic generator manufacturers supply halves of the “barrel” for retail sale.
Generator repair
Now let's look at generator repair using a live example. A VAZ-2115 car arrived for service with the problem of the battery not charging. The electrician, to his credit, did not condemn without looking (as is often done) the diode bridge and the regulator en masse, but first checked the wiring to the generator, then (without removing the generator from the car) removed the voltage regulator from it and checked it using an external a voltage source of 15-16 volts and a load lamp, simulating normal operation - the regulator turned out to be working. The regulator brushes, slip rings on the shaft and the rotor winding were also intact. After that, the master shone a flashlight on the diode bridge, saw a charred diode, concluded that the bridge was faulty... and suggested a complete replacement of the generator!
Why? It’s simple: our generator, produced by the Rzhev Automotive and Tractor Electrical Equipment Plant ELTRA, model 5102.3771, is equipped with an 80-amp diode bridge MP13-80-3-2, which costs in the store... 909 rubles, and it doesn’t change like, say, the old one - the good “nine”, where this was done with a screwdriver and without removing the generator from the car. In our case, the bridge is changed using a powerful soldering iron, and for this, the generator, in an amicable way, should lie on a workbench. This is a fair amount of fuss, which also requires a certain amount of accuracy. The master did not want to deal with this for less than 2,000 rubles, and hinted to the owner that the cost of spare parts and repairs of almost 3,000 rubles for a 2006 generator looked pale compared to the price of a new assembled generator of 4,450 rubles. In other words, you can fix it for 3,000, or you can get a new “gene” under warranty for an additional 1,500 rubles on top of the repair price, with new bearings, windings, guaranteed to be free from fatigue cracks in the varnish, and so on. The owner agreed with these arguments, and the generator was replaced with a new one.
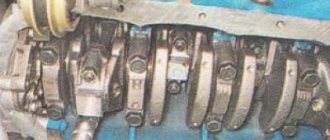
Repair of the VAZ 2110 generator armature.
In the photo we have a new anchor and there are no complaints about it, but at the moment we will talk about possible malfunctions with it.
An excitation coil is installed inside the armature. Replacing the brushes of the VAZ 2107 generator, do it yourself. Replacing the slip rings and bearings of the VAZ 2110, 2111, 2112 generator. It's time to sort it out. The coil has two terminals that are connected to slip rings. We need electricity to pass from the first contact ring through the coil to the other and not penetrate the housing.
To check, we will need a special multimeter device. If you are an experienced radio mechanic, you can easily check the resistance of the excitation coil. Resistance should be in the range from 1.8 Ohm to 8 Ohm. Checking and replacing brushes on the generator and VAZ 2107. Service without removing the generator. principle of replacing valve stem seals replacing valve stem seals VAZ 2110 16kl. But when the device readings differ from the norm, it means a replacement
anchors or its repair.
But, since many drivers have not even held such a device in their hands, you can check it using the sound mode. For this you need the device itself. We set it to beep mode.
Reddish arrows indicate the position of the mode switch and where to connect the two wires with probes (by color).
When the probes are closed together, a sound signal occurs. Next we check the excitation coil for a break. By connecting the probes to the contact rings of the generator armature, a sound signal should occur, this means that there is no break in the contact. Now let's check the coil for shorted turns.
Set the mode switch to this position and freeze it.
If the device readings show less than 1.8, it means that there are short-circuited turns in the coil and such an armature requires replacement.
Next, we need to check whether the coil is shorted to the housing. We set the mode switch to the sound signal position and connect the probes, one to the armature contact ring, and the other to the body.
If the beep
is located, which means that the insulation of the excitation coil with the generator armature housing is broken. The upcoming introduction of an anchor is not permissible, either we buy a new one or repair the old one. Do-it-yourself replacement of VAZ 2110 thresholds video. If there is no sound signal and the slightest resistance (the resistance is shown on the display of the device), it means that it is working.
We have sorted out the excitation coil and move on to the contact rings of the generator armature.
The generator must always be in good working order
Replacing the Lada Kalina sedan pump (VAZ Kalina) Any modern car is equipped with electrical equipment that is absolutely necessary for the vehicle:
- without a starter it is impossible to start the engine;
- a car cannot be driven without lighting at night;
- The heater motor creates heat in the cabin;
- The wiper motor clears the windshield of rain and snow;
- FM radio makes it possible for the driver not to get bored on the road.
But all these devices cannot work without electricity, so the car must have a power source.
The current from which all consumers in the car are powered is produced by the generator, and the performance of the entire electrical circuit of the vehicle depends on its condition.
Therefore, the generator must always be in good working order, and if any breakdowns occur with it, they must be eliminated in a short time.
Sources
- https://artel55.ru/obzory-i-testy/zamena-kolec-generatora.html
- https://SdelaySam-SvoimiRukami.ru/6090-kak-pomenjat-tokosemnye-kolca-na-rotore-generatora.html
[collapse]
Replacing the slip rings of the VAZ 2110 generator armature.
Having twirled the anchor in our hands and looked at the worn contact rings, we proceed to replacing them.
This work can be done without the help of others at home, there are virtually no difficulties.
To dismantle the old rings, it is necessary to release the contacts that go to the excitation coil. The contacts may be pressed and need to be released, but they may also be soldered, then you will not be able to do without a soldering iron.
Having freed the contact wires, we lightly clamp the armature in a vice and, turning it with our hands, rip off the old contact rings by the armature in different directions.
We pick out the remains with a screwdriver. VAZ 2107 | checking and replacing generator and regulator brushes. We need to completely remove all parts of the old slip ring
.
What causes rings to wear off?
Alternator rings for VAZ 2110
The following generator parts can cause slip ring failure.
Stator
- On its inside there should be no traces from the rotor that would appear during its operation. Otherwise you will have to change it.
Note: You also need to check the bearings, as this problem often appears when they are broken. Sometimes even the generator cover can also get broken. This problem urgently needs to be fixed by replacing the damaged part with a new one.
Of course, if you are sure that the stator is completely intact, then you should not carry out such manipulation. But if there is even the slightest suspicion that it is malfunctioning, then it is better to check it. A faulty stator can lead to rotor failure again.
Bearing
- See if the generator bearing located on the rotor rotates correctly. It should rotate freely on the slip ring side without jamming.
- If it dangles too much or, on the contrary, is very tightly clamped, then it needs to be compressed.
Lid
- The generator cover on the slip ring side may have damage, cracks or other defects.
- In this case, it needs to be replaced, otherwise it will have a bad effect on the contact rings, leading to their abrasion.
How to replace slip rings on an old-style generator rotor.
Generator repair
engine ZMZ-409 UAZ Bukhanka 2009 mileage 140 thousand km, for only 220 rubles (bearing 50 rubles and cont.
We fill new contact rings carefully so that they do not become distorted, otherwise during operation of the generator the brushes will fall apart or they will wear out quickly. It is better to stuff through a wooden container.
Having installed new rings, we secure the wires going to the excitation coil. It’s better, of course, to solder them, it will be more reliable.
Don't forget to install a new protective washer.
Repair and replacement of the stator of the VAZ 2110 generator.
The generator stator has three windings. These windings are connected together on one side and to a diode bridge on the other. They are wound on a plate-type metal core.
First of all, we visually inspect the stator windings for damage. Damage can be different, for example, chipped insulation, burnt windings, visible breakage of windings. If such causes are identified, it is advisable to replace the stator.
But if everything seems to be in order, we proceed to check it with a multimeter.
You need to set the device mode switch to a sound signal and connect the probes to the windings one by one and take measurements.
Since the ends of the windings are connected to one point, all three outer wires must ring each other. Above in the photo, I indicated the alternate connection of the device in different colors.
If, when checking one of the windings, no sound signal is heard, it means there is a break somewhere and the stator needs to be replaced. You can, of course, rewind the winding, but more experience is needed here, so it is better to replace the entire stator.
In the same way, we check whether the windings are shorting to the stator housing. Replacing valve stem seals for VAZ 2110 | car enthusiasts. To do this, we connect one probe to each winding terminal in turn, and the other probe to the stator housing.
We can finish this with the stator and move on.
Replacing the rotor with rings
Replacement on the VAZ 2110 generator
Sometimes it is not possible to replace the rings separately. The rotor also has to be replaced. This situation occurs when the rings reliably “stick” to the rotor. But you can try to restore the rings by placing them in a sulfuric acid solution. They cannot be kept in solution for a long time, as whole particles may disintegrate. To replace the rotor and rings, you must:
- Place markings on the covers of the generator (to make it easier to assemble them later, otherwise you can confuse their location).
- Remove the plastic casing. This is easier to do after the three latches securing it are bent away.
Note: you need to bend them very carefully, as they are quite delicate. Moving too quickly can cause them to break.
- Remove the two screws that secure the electronic voltage regulator.
- After this, you will have access to the generator relay. It must be removed, otherwise it will interfere with the work process.
- Remove all fastenings of the unit and condenser.
- Then unhook the three winding tips coming from the stator.
- Remove the block and capacitor. If you need to replace the capacitor, you need to unscrew the nut that secures it. Then remove the washer along with the bushing. Now it’s the turn of the wires that attach the capacitor to the contact bolt. After this, you can remove and replace the capacitor itself.
- Unscrew the generator coupling bolts. There are four of them in total. There are usually flat washers and spring washers underneath the screw heads. They are very small, but perform an important function. You can’t lose them, otherwise you’ll have to buy new ones, but finding them on sale is not easy.
- Remove the generator cover from the side where the slip rings are located. In this case, you can help slightly with a screwdriver, as if pulling the lid towards you.
VAZ 2110 in the generator slip rings
- Remove the nut securing the generator pulley. Remove the washer and pulley.
Note: the rotor must be stationary. To prevent it from spinning, it should be clamped as much as possible, and a small piece of plywood should be placed under it.
- Disconnect the thrust washer.
- Remove the generator rotor.
- It has a spacer ring that needs to be removed.
- At this stage, you need to carefully inspect the slip rings. It is possible that they will also have to be replaced. If they are worn out or there are scratches on their surface, then replacement cannot be avoided (by the way, it is not necessary to install new rings - they can be thoroughly sanded).
- A multimeter should measure the resistance of the rotor winding.
Note: if this tool shows that there is a break in the rotor winding, then it urgently needs to be changed. You can also try to rewind it, eliminating the break. But this process is quite complicated.
- You should also check if there is a short circuit between the winding and the rotor housing. To do this, you need to use a 220 V lamp. One of its wires must be connected to the body, and the other must be connected in turn to each of the slip rings. Moreover, if there are no short circuits, the lamp will not light.
- Insert the new rotor into place.
- Assemble everything in the opposite order.
Replacement and repair of the diode bridge of the VAZ 2110 generator.
The diode bridge consists of two aluminum plates, a plastic spacer and nine diodes, which are soldered into a so-called bridge. These diodes rectify alternating voltage into direct voltage and the failure of one or more diodes (even a minor one) entails a drop in voltage and power in the on-board network.
You may not even notice the failure of the diode bridge, because, as a rule, all the diodes do not burn out at once, but maybe only one at a time. Now I will tell you in detail how to properly check the diode bridge for serviceability.
If one of the diodes is leaking, the battery will run out due to lack of power. If the diode breaks, you need to constantly rev up the gas so that charging occurs, in general, keep the engine at high speeds. All this indicates that something is wrong with the generator. I described in detail how to correctly determine a malfunction in the generator in the article “Checking the VAZ generator”, do not be lazy and read it, there is a lot of useful information for you.
Vehicle voltage
For normal operation of all consumers in the car, the generator must maintain a certain voltage; for the Lada Kalina on-board network, with a working generator, it must be in the range from 13 to 14.8 volts.
Within specified limits, the voltage is provided by a relay regulator, and with any deviation from the specified norm, various problems arise:
- At high voltage, the electrolyte in the battery banks boils, and the battery quickly fails;
- If there is insufficient charging, there is not enough current for consumers, as a result the battery quickly discharges.
The voltage generated by the current source is measured in the following way:
- On a digital multimeter (voltmeter), set the limit to 20 volts;
- We connect the probes of the measuring device to the battery and start the internal combustion engine, the voltmeter should show a voltage of about 14 volts;
- Without turning off the engine, we turn on the load - headlights (high beam), heater motor at maximum speed, windshield wipers, radio, etc. If the generator is in good condition, when the engine is idling, the voltage should not fall below 13.2V, optimal The voltage is considered to be 13.7-13.9 V.
Correct check of the diode bridge of the VAZ 2110 generator.
To check, we will need our multimeter, which we have already used before.
Set the wires of the probes red to red, and black to black, so that each corresponds to its own value. Replacing the slip rings of the VAZ 2110 generator. Below in the photo, I have indicated with arrows which values go to which wires. Red is a plus and black is a minus. We also set the mode switch to 200 kOhm.
The device should show one. We attach the red probe to the positive bolt of the diode bridge and the negative probe, and check the diodes one by one for leakage.
In the photo above, I indicated where we attach the positive and negative probes.
The readings on the device should be one (infinity). If at least some numbers fluctuate on some diode, it means there is a leak and such a diode needs to be replaced.
Next, we do everything the other way around, connect the negative probe to the positive, and use the positive probe to check the diodes.
In this case, the device indicators should be in the range from 400 Ohms to 700 Ohms. Basically, the indicators are somewhere in the range of 500 Ohms. Here, one serious factor needs to be taken into account. Replacing valeo generator brushes, without removal. Replacement and repair of a VAZ 2107 generator. All diodes should show the same value, if 500 Ohms, then for all, only a small deviation is allowed, about 10-15 Ohms. If these indicators deviate from at least one diode, either the diode or the entire bridge needs to be replaced.
Now we turn over the diode bridge and perform this operation again (check the second arm of the diodes).
The device indicators in this case should be one. By changing the polarity of the probes, the indicators should be the same as on the diodes on the other side within 500 Ohms.
You must remember one thing, all indicators must be the same, and if there are large deviations, then the diode bridge is scrap.
Small diodes are checked this way.
Here, in the first case, the device should show one, and by reversing the polarity of the probes, the resistance is the same on all diodes.
What else I want to add, when installing the diode bridge on the generator, remove the cylindrical bushing on the positive bolt and clean it until shiny with a file.
In this way we will improve contact and get rid of electricity losses.
Well, I think everything is clear here now, I explained it as best I could.
Replacing the VAZ 2110 generator regulator relay.
generator regulator relay is a component that cannot be repaired; it just needs to be replaced with a new one. I described how to check it correctly in the article at the link above, “Checking the VAZ generator.”
There are many different types of regulator relays that are installed on VAZ car generators, and no matter what I describe here (because the article is already long), I decided to write a separate article “review of the VAZ regulator relay”, if you wish, read it.
To replace the regulator, you need to unscrew two bolts and remove the contact wire. Before installing a new relay, make sure that the brushes move freely and do not jam. Replacing slip rings and bearings possible malfunctions of the VAZ 2110 generator. There is nothing difficult in the installation, I think you can handle it.
Steel rings and their advantages
Replacing slip rings on a VAZ 2110 generator
There is no point in installing copper rings, as they wear out very quickly. Therefore, it is better to opt for steel rings, which have a number of advantages:
- They hardly wear out, so the brushes remain in almost perfect condition for a long time.
- They are easy to install.
Note: by the way, for more reliable fixation, they are first lubricated with a flux solution, and then washed with soda.