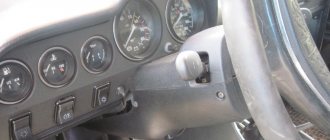
Comments: one Published: 08/12/2016
Rating:
Tags:VAZ 2110/2111/2112 Body exhaust Replacement of spar
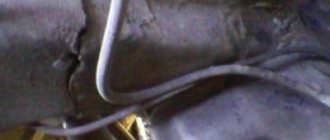
Every car owner knows what a spar is - it is a longitudinal beam on a frame on which the body rests, springs and a number of parts are attached. It often breaks at the point where it comes into contact with the stabilizer, which makes the steering wheel stable, even despite the presence of amplifiers. Cracks appear there, which can be noticed when checking the chassis. And the deformation of the body geometry is associated with the active operation of the car in Russian conditions. If the owner of the car has not yet changed the VAZ 2110 spar, but is faced with its breakdown, the part is replaced with his own hands.
Please note that in a neglected state, the spar (VAZ 2110) is not repaired, but replaced.
The main thing is to pay attention to the breakdown in time and eliminate it by welding in the internal part of the product.
Despite the amplifiers available in these places, the spars fail and require either repair or replacement
The key causes of failure are:
- poor quality of road surface;
- driving over potholes at high speeds;
- weak fastenings. If the rigidity in the steering mechanism decreases, cracks appear near the bolts. Then there is play on the body, and then the wheels get toe defects.
Another problem: how to pull out the spar with your own hands? The procedure is required when it is bent to the side during an accident and involves a bench hood.
Body geometry of the VAZ 2114 and its meaning
Violations of the body geometry have certain consequences, which are reflected in the general condition of the car in the following ways:
- Deterioration in controllability and vibration when accelerating (manifests itself at 80 km/h and above).
- Increased tire wear.
- Noise from suspension elements.
- Increased fuel consumption, etc.
The VAZ 2114 has a hatchback body type, for which, however, as for other types (station wagon, sedan, etc.), violation of the geometry affects various parameters.
The symmetry of the wheels is broken, as can be judged by:
- reducing vehicle stability on the highway;
- uneven tire wear.
The diagonals of the body are broken, which is noticeable in the frames of the front/rear windows and in the doorways of the car.
Specific folds may form on the bottom or frame.
Diagnostics and repair
The damaged element is subjected to a drawing process on an appropriate measuring stand. The quality of work is checked at control points, according to the recommendations of the manufacturer. It is interesting that the necessary data, diagrams, devices, as well as qualified and specialists are not available in every branded service. Of course, restoring a car with your own hands in a garage is generally a futile endeavor. At best, it will only be possible to return the superficial, original appearance, but not to return the previous factory geometry.
Before undertaking repairs to the spar, it is recommended to first perform a wheel alignment. This simple procedure, which should definitely be carried out when purchasing a car, will show whether restoration work is necessary and how labor-intensive it will be. In most cases, deviations from symmetry, the visible absence of smooth lines along the body, unstable gaps in the doors, hood, and trunk indirectly indicate, at a minimum, that the car was disassembled and, probably, repaired.
The spar is drawn out on a robotic slipway. A bracket is welded to the defective unit, using which the hood is pulled using a hook, chains, and a winch. In a garage workshop, instead of a lifting mechanism, you can get by with a cable and a fixed support, for example, wood. The tinsmith sits behind the wheel and, by smoothly slipping, tries to pull out the part. If the damage is critical, only replacing the spar will help. It is worth considering that with a new part, probably, due to existing damage, you will have to change the subframe, suspension elements, engine mounts, etc.
What happens to the side members after an impact?
With a minor impact, the bumper reinforcement and front panel are deformed. The MFC LFA body shop specialists recommend replacing both damaged elements. After all, there is often, although minimal, displacement of the side members, both in the horizontal and vertical planes, and repair is impractical. And the stronger the impact, the greater the likelihood of wrinkles forming on the side members. In rare cases, the metal on them even breaks. Even a minimally misaligned side member can seriously affect the vehicle's handling and safety.
Restoration of spars
The front quarter of the Honda Fit spar, in the event of a minor impact, the craftsmen measure all the necessary distances between the power elements of the body using special equipment at control points.
Thanks to its huge database, MFC LFA has dimensions for repairing side members for almost all car models. If a deviation of at least a millimeter is determined, the car is installed on a slipway. It allows you to return the displaced power elements of the body to the places provided by the factory.
If folds form, the car is placed on a slipway for several days to return the required plane to the surface of the side members. Thanks to micron-stretching technologies for metal, the side member will not lose its rigidity.
After the work described above, sometimes tears occur at the folds. They need to be strengthened by welding.
If the spar is deformed by 25% or more, its partial or complete replacement is necessary. The front parts of the elements are sold at disassembly sites. The damaged piece is cut off and a new one is welded in its place. Replacement of the rear side members is carried out according to the same scheme. In case of the most severe damage, it is recommended to replace the spar along with a quarter of the body.
Equipment and tools
Replacing rear side members on a VAZ 2110
Repair work to replace the spar must be carried out in an equipped and spacious garage. It is necessary to prepare equipment and tools:
- welding machine or gas welding;
- rear side members complete with rear suspension;
- two jacks, hydraulic racks;
- drill;
- Bulgarian;
- chisel;
- plumber's hammer;
- disc on a grinder for stripping metal where the old part was cut.
Before starting repairs, you must remove the battery and drain all remaining gasoline from the gas tank. If possible, cover the gas tank with fireproof material. To prevent spontaneous combustion from remaining gasoline vapors in the gas tank. Since the repair will be carried out using a power tool that produces a spark.
How to pull out the spar yourself
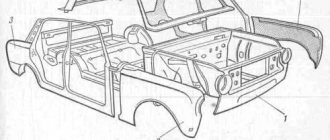
The main part of the body of each car can be called side members; this is a rectangular pipe, or, as they say in another way, a longitudinal beam of the body. The spar passes through the entire body, and the entire load, shock absorption and impact in an accident falls on it. The standard car design has left and right side members, and they themselves are divided into front, rear and middle. As a rule, the front side members are slightly higher than the rear ones; this design is made in order to place the car's engine in front. A variety of materials are used for them, it can be:
- titanium alloy;
- Aluminium alloy;
- composite layers.
Spar
Causes of damage
As we have already found out, the spar absorbs the bulk of the shock absorption when driving; manufacturers specially develop special designs for this part so that it absorbs all the kinetic energy and takes on the entire impact force in an accident. But even if the car has never been in an accident, the spar may crack over time from driving on our roads.
If you notice that the car is starting to pull sideways, or the doors are not closing well, the rubber is rubbing against the body - these are the first signs that the spar is cracked or misaligned. But don’t panic, how to pull out the spar is described in this article, and you can solve this problem yourself or turn to the services of a car repair shop. In today's article we will look at the method of drawing out a spar with our own hands using the example of a VAZ car.
To damage or bend the spar, it is not necessary to make a head-on collision at “crazy speed”; this can also happen in a light collision, as a result of which the entire car body changes its geometry.
Required materials and tools
I would like to warn you right away that the further possibility of using the car depends on a high-quality hood, so this problem should be taken seriously.
We will need the following tools to pull out the car body:
- powerful electric grinder (impeller);
- welding machine;
- gas stove);
- grinding machine with a full set of discs;
- a stationary stand with the necessary template and chain grips (they are easier to work with);
- metal spatula and automotive primer;
- sealant tape;
- straightening hammer for metal;
- You will also have to find a table for the make of your car with data about the factory body geometry.
When the entire list has been collected, you can begin to work.
Sequencing
Before starting work with a VAZ car, you need to remove all the parts that stand in the way of the spar. It is also necessary to disconnect wires and electrical devices in vehicles. After all these manipulations, you will see the spar itself and now you can easily reach it
Next, let’s begin the extraction process itself, fix the car and cut off the heavily damaged parts of the part with a grinder - this must be done carefully using a protective mask and gloves. We attach the chains to the spar, and make a smooth tension, at the same time giving it its original appearance
After you have cut off the “unnecessary” parts and made a hood, check whether the car door can be closed correctly. If the door closes as it should, then you are on the right track, otherwise you will have to manipulate the tension several more times. Further in the work, using the table of technical characteristics of the VAZ car, we restore the geometry of the points of the body spar. To make it easier to set dots in such conditions, you can use colored tape to mark those same dots. It is necessary to pull out the spar so that the adhesive tape marks coincide with the marks indicated in the technical specifications. Don't forget to check if the side members and wheel arches are parallel.
Using a straightening hammer, you can correct part of the wheel arch and other dents that appeared during work. The next step is to remove the old sealant coating by heating it with a gas torch. If during work small irregularities and surface roughness arise, then using a grinding machine you can get rid of them yourself. The final stage will be to prepare for painting the VAZ car, apply a new layer of sealant and primer, and after drying, paint. When the paint is completely dry, you can reassemble the body, installing the parts in the reverse order, as during disassembly.
If you are confident in your abilities, then you can safely get to work and pull out the spar on a VAZ car with your own hands, but if you have even the slightest doubt, then it is best to contact a qualified and experienced professional at a service station.
How to change the rear spar
Replacement of the rear side member of a VAZ 2110 is carried out in case of visible damage, as well as after an impact in the rear of the car. Of course, the old spar can be straightened or welded, however, after the rapid aging of the metal, it loses its load-bearing capabilities and driving becomes difficult. In addition, rubber wear increases due to body deformation and displacement of suspension parts.
Replacement procedure:
- Raise the rear of the car using jacks and place it on strong supports. Consider the location of the work site and do not place supports exactly there.
- Carry out work to correct the proportions of the body. To do this, hydraulic struts are installed under the bottom and support the spacer from the ceiling. Then use pressure to correct the bent body parts.
- Remove the rear fenders.
- Now you need to remove the rear suspension elements. To do this, you can place the car on its side and place tires under the part being laid. To prevent the vehicle from tipping over, install reliable supports. After completing dismantling, clean the surface of the part being replaced from dirt and debris.
- The old spar is removed as follows: holes are drilled along the lines of the weld seam (the diameter of the drill must correspond to the diameter of the welding point), the places that could not be drilled with a drill are cut off with a grinder, and all the rest are cut off with a chisel. After dismantling the spar, straighten the body defects using a mechanic's hammer and clean the area of the future spar with a grinding wheel.
- Try on the new part against the body, trim off the excess. Drill it in 3 places at the site of the future weld. Then secure it in place and tack it with 3 points in the pre-drilled holes. After this, weld metal plates on the outside and inside of the seams to strengthen the structure. After this, completely weld the new spar to the body.
- Clean the welding areas with a grinding wheel and treat the seams with epoxy resin.
- All metal parts must be coated with two layers of primer.
- Reassemble the rear suspension in the reverse order and install the car on the wheels.
This completes the replacement of the side members. If you decide to carry out such work yourself, be sure to study the welding manual, because an incorrectly welded spar may sooner or later come off and the structure will lose its reinforcing properties. Thus, the car may fall apart while driving, and this, at a minimum, is not safe.
Front spar VAZ 2109 and its replacement
The VAZ 2109 spars strengthen the car body, especially the floor and luggage compartment. They also act as shock absorbers, maintaining the front part of the body. The VAZ 2109 spars are mounted in such a place that they absorb deformation. Replacing the VAZ 2109 side members is necessary if they have become unusable. This publication will tell you how to replace the side members of a VAZ 2109.
If necessary, replacement of VAZ 2109 side members can be carried out only in some places. The manufacturer's instructions indicate where the spars can be cut. There are areas that are specifically designed to absorb shock.
Replacement of VAZ 2109 side members should be carried out with a significant degree and zone of deformation. If the deformation is small even along the entire length of the spar, then it will be sufficient to restore the previous geometry and position of the spar using a jack or square. This will preserve the characteristics of the spar.
Partial replacement of VAZ 2109 side members involves the use of a special coupling. When performing a partial replacement, there is no need to specifically strengthen the side members. They should act as shock absorbers, and reinforcement will increase the strength of the zone.
When the body collapses, the side members take the load upon themselves, and thus the rest of the body suffers less.
Methods for replacing the spar
To replace the spar with your own hands, you must first align it and only then remove it. This is done by cutting. Incisions are made only along clearly defined lines. After this, a new one is installed in place of the old spar. For this purpose, special spot welding is used.
Partial replacement
If there is no need for a complete replacement, then it is quite possible to do it partially. This refers to the renewal and improvement of weakened areas. Only those sections of the side members that do not bear the entire load can be replaced. Most often, through partial replacement with your own hands, the spars are given shock-absorbing properties, and this is done as follows:
- In the production process of stamping parts, special unique folds are provided. They are necessary so that in the event of an accident the spar does not deform, but simply folds into an accordion in a given place;
- installation in the main S-shaped building;
- installation in a housing of variable cross-section, as well as special holes and chamfers.
Do-it-yourself partial replacement has its positive sides. No coupling or specific type of welding is required. This part is installed very easily, and after all the work is done, it is adjusted to the required dimensions and installed back.
Complete replacement of the rear spar
If the spar is severely deformed or does not fulfill its main shock-absorbing tasks and does not fully provide the strength of the body, then its complete replacement will be required. To make the operation easier, the machine is driven onto an overpass or inspection pit. In cases where this is not possible, a regular jack will come to the rescue.
You should start by dismantling the parts attached to the spar, after which pulling is carried out. It is clear that it will not be possible to give it its original shape, but it is worth trying to get closer to this. Afterwards the protective coating is removed, and only then the spar itself is removed, that is, cut off from the fastenings.
If the spar has been successfully removed, it is time to prepare a grinder for further work, on which a special type of stone is mounted. Using this device, all welding residues are removed, and areas where corrosion processes have begun are also removed.
Upon completion of these works, the wheel arch is prepared, which is connected to it. Installation of the spar is carried out in the reverse order and is secured using welding. After installation, a thorough check. To do this, use the chiseled method.
Using a grinder, you need to refine all the places where the welding joint was made. To do this, the welding is removed using a grinder, and then these places are covered with a special sealant.
The process of replacing the front spar is carried out using a similar method.
Partial replacement
The spar can also be partially replaced. In other words, give it more shock-absorbing properties and thus modernize it. But this must be done in places where the maximum load would not be placed on the structure and this area would not be designed to absorb shock and subsequent crushing.
It is customary to give shock-absorbing properties to spars as follows:
- in the process of stamping parts, peculiar folds are made in order to crush the spar into an accordion in the event of an accident;
- manufacturing an S-shaped element;
- use of stamped profiles;
- punching holes and through slots in the spar;
- use of variable cross-section in the design.
Partial replacement of an element has many advantages. Thus, there will be no need to use a coupling and it will be enough to use gas-shielded arc welding. As for the process of installing the spar, it happens as follows: the part is cut half a millimeter in front of the apron and mounted after the fitting is completed.
It is recommended to carry out the test on a control and measuring stand, where a movable prism is used as a rigidity element. Using arc welding, the new spar is butt welded. Then, using spot welding, using extended electrode grips, the part is connected to the wheel mudguard.
Body geometry
VAZ 2110 rear spar
A spar that has become unusable disrupts the proportions of the body. Repairs must begin with correcting body parameters:
- The car is lifted on a rack lift; if there is no such thing, lift the rear of the car with jacks.
- Place it on reliable supports, taking into account the availability of work on replacing parts and straightening the body (see Repairing a VAZ body - from a car repairman’s textbook).
Note. Before editing the body, it is necessary to apply markings along which the damaged parts will be cut off. Spacers for straightening the body are installed under the bottom, and are pushed out from the ceiling with hydraulic struts. Then the bent body element is aligned under pressure. The proportion of straightened structures, rear pillars, door and trunk gaps are checked.
- After completing work to correct the geometry of the body, the rear wings are removed.
Removing the spar
VAZ 2110 rear spar
Dismantling begins with the following:
- One side is hung on the jack to relieve stress on the metal.
Note. To facilitate access to dismantling repair work, the machine can be placed on its side. First lay the old tires under the side to be laid, place reliable supports under the raised part of the body, preventing the lifted car from returning.
- The rear suspension is removed to facilitate the work of cutting the spar.
- Parts are cleaned of debris and dirt.
Note. It is advisable to wash the entire rear body area with a stream of water under pressure. Use a metal brush to remove mastic and paint from all parts down to the metal. Wait for the underbody to dry and clean the area where the repair work is being carried out again.
Rear spar VAZ 2110
In the factory, on the assembly line, the old spar is attached to the body by spot welding. The fastening points are drilled out with a drill, using a drill according to the diameter of the spot welding. A grinder with a metal disc is used to cut off welding points that could not be drilled out. The part is cut strictly along a line perpendicular to the longitudinal axis of the body. In places where it was not possible to cut off the weld points with a grinder, it is necessary to cut them off by hitting a chisel with a hammer. By removing the spar using this method, there is free access to the remaining parts of the rear body. With the help of a mechanic's hammer, the identified defects are corrected, the cut areas are cleaned with a grinder with a grinding wheel on to bare metal.
Installation
Installation
Having dismantled the old spar, the new one is tried on. If necessary, you need to trim the part to length. Drill the new spar at the attachment point by welding in three places with a pitch of 3 mm. It is recommended to try on the spar very carefully so as not to spoil the part. So:
- The finished part is secured in its original position using clamps, without violating the linear dimensions according to pre-applied marks.
- Then carefully, using a semi-automatic welding machine, it is tacked in three places along the previously drilled holes.
- Having installed the first spar, carry out the same work relative to the second.
- Checking their installation along the longitudinal lines of the body, we study the manual on carrying out body welding work.
- Additional metal plates are applied to the bottom and inside and welded to strengthen the structure.
- After finishing the welding work, carefully use a grinder with a grinding disc to clean the welding areas.
Replacing the front spar
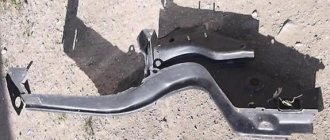
Beam for front side members of VAZ 2110
To fully replace the side members, the following tools and spare parts are required. Without them, you can get yourself into trouble in the form of the inability to dismantle the old part and install a new one:
- Wing;
- Bolts for fastening the steering gearbox, if it is on the left side, or for fastening the pendulum, if it is on the right.
- Bolts, washers and nuts of the steering gear, three pieces each;
- Bolts responsible for fastening the beam;
- Bolts for attaching the upper arm;
Read more: Replacing the spectrum cue pump
VAZ 2110 front side members
- Bracket with number 2121-2904242;
- Nuts required to fasten the beam;
- The spar itself and the mudguard;
- Ball joint fasteners (set).
VAZ 2110 front spar
You can purchase the spar and mudguard as a set or individually for each part. When trying to save money, they often decide to purchase separately and cook it themselves. This results in wasted time during installation and welding.
Left front side member of VAZ 2110
To clearly understand further actions, you need to examine the engine shield. This is that part of the car, or rather its body, that separates the engine compartment from the interior. It is to the engine shield that the engine splash guard must be attached. If it is in a condition that does not evoke positive emotions, it will not be possible to weld the mudguard, which will significantly affect the rigidity of the body.
Front right side member VAZ 2110
Small corrosions that do not have a significant effect on the condition of the engine shield are not scary. To bring it into proper condition, you can use patches. They are made of metal, which you will also have on hand. In order to unscrew the upper ball joint, which simply needs to be dismantled, it is advisable to purchase fasteners for this ball joint. If the bolts are in poor condition, a lot of time will be lost. Tools that should be:
- Grinder (angle grinder)
- Impact screwdriver
- Regular screwdriver
- Chisel
- Welding
- Ties (needed to compress the spring)
The process of replacing the spar begins with removing the door (see Repairing VAZ doors: how to do it correctly) using an impact screwdriver and removing it until the process is completed. Next you need:
- Raise the mats
- Remove noise and thermal insulation from the work area
- In the area of the engine splash guard and its connection to the shield, clear the surfaces of flammable products and those that are prone to smoldering
- Remove the wing
- Fix the front part of the VAZ using adjustable stands
- Fix the front axle beam well to avoid displacement
- Tighten the springs
- Unscrew the 3 bolts from the upper ball joint
- Remove the upper arm
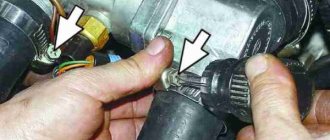
- If the bolts connecting the spar and the bridge beam are jammed, cut them off with a grinder or remove them in any other way.
- Unscrew the brace that secures the spar and beam
- Cut off the mudguard
- Divide the spar into two parts
- Separate from the body by first sawing behind the beam
- Thoroughly clean the fastening points and install a new spar
- It is necessary to carefully tighten the two bolts protruding from it on the new spar
- Weld the bottom part
- Weld the engine splash guard to the engine shield
Read more: Opel Astra knocking when starting the engine
The front spar of the VAZ 2110 burst
Unfortunately, it is not possible to bring in a new spar in its pure form. The reason is the welded front panel into which it must be inserted. To eliminate this discrepancy, you need to saw off the tip of the spar. Having installed the spar in place, the tip is inserted into the front panel, and then welded with a continuous seam, which restores the integrity of the part. So:
Reassembling the front suspension in reverse order
- The cavities are filled and coated with an anti-corrosion agent
- Wing being mounted
- The door is mounted
- The brakes are being pumped
For those who have a desire to repair and transform a car with their own hands, the step-by-step instructions given above will be an excellent assistant in their work. The cost of parts is not high, and you can save a lot on repairs without resorting to expensive services. Photos will help you better understand the location of each detail, and the detailed video, which is located here, will be a clear example for anyone who has decided to act.
You can also find out about replacing the rear spar on our resource.
Catalog number: 2110-8403281
Standard price:
900.00 rub. Your price
Price For registered:
830.00 rub.
Before visiting the store, check product availability!
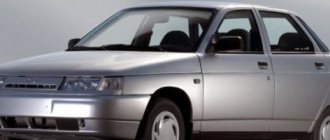
The left front side member of the VAZ 2110 is a power component of the body. Applicable for models VAZ 2110, VAZ 2111, VAZ 2112 and later modifications of Lada Priora VAZ 2170, VAZ 2171, VAZ 2172. The front spars of the VAZ 2110 are distinguished by left and right sides.
Tools and materials
Replacing the spar (VAZ 2110) requires the following consumables:
- bolts that secure the steering mechanism (left) or pendulum (right);
- fasteners for the steering gearbox (3 pieces each);
- fasteners for beams (bolts and nuts);
- fasteners for the lever on top;
- bracket for longitudinal beam;
- splash guard;
- set of fasteners for ball joint;
- spar (VAZ 2110). It is sold separately or together with the mudguard. Experts advise buying a kit and not wasting time on welding. This ensures that a secure fastening is created. Please note that a separate purchase of the longitudinal beam will entail the need to purchase the necessary parts.
If damage is noticed in time, it can be repaired by welding with penetration into the inner part of the spar.
Replacing the front spar of a VAZ 2110 requires an examination of the engine shield - the part of the car body that separates the engine compartment from the car interior. The mudguard is attached there.
If there is corrosion on the surface, treat it with anti-corrosion agent, sand it and apply a patch.
To unscrew the ball joint, special fasteners are required. Of the tools you should have:
- grinder;
- impact and standard screwdrivers;
- chisel;
- welding machine;
- ties that compress springs.
There is no need to draw, we need to repair
To approach and crawl up to the “dead” spar, you need to remove all obstacles from the car, namely, body parts located on the way to it. Remove all vehicle wiring and any electrical devices from the area being repaired. Did you find the spar? Now try to stretch it out, at the same time and if possible giving it its original shape. Naturally, you won’t achieve anything perfect yet. But. Secure the car with chains on the stand and use a grinder to cut off the parts of the spar that cannot be restored. After pulling and cutting, check how the car doors close. Then, using a gas torch, remove the old layer of sealant and primer by simply heating it. The geometric control points of the spar must be checked according to the repair table, and the notches of these points can be made with ordinary colored tape. Then pull the spar to the marks that coincide with those indicated in the table. To smooth out any rough spots, use a sander, and be sure to check the exact parallelism between the side members and the wheel arches. Use a straightening hammer to fix any damaged parts of the wheel arches. Then apply a new coat of sealant and primer and get ready to paint. After painting, you can reassemble the previously removed body parts in the reverse order, naturally, after the paint has dried.
Replacing the spar
VAZ 2110 spar burst
To replace the spar you will need:
- standard set of wrenches;
- grinder with multiple disc variations;
- drill with drills;
- sledgehammer;
- file;
- chisel.
Spar repair options
The spar is made of an extremely strong steel alloy, which is almost impossible to deform; its strength is incredibly high. However, as everyone knows from junior school physics classes: force is speed multiplied by mass. For example, a light car collided with a KAMAZ, as a result the passenger car was completely deformed, and the body of the KAMAZ was only partially, but still deformed. It should be objectively understood that even a very strong material can be deformed, it all depends on the force that acts on it. The point of direction of the force, as well as the degree of its application, determine the nature of the damage. Any significant traffic accident almost always damages the spar, sometimes completely. In this case, you have to completely replace it.
Note. If there is no confidence in the objectivity of the assessment of the exact nature and extent of damage to the car, then the most rational option would be to seek help from a car maintenance service.
The spar in the VAZ 2110 burst
If the spar is only partially damaged, for example, in the form of a crack, then you can try to eliminate this defect by welding. However, it is also necessary to objectively understand that not every defect can be eliminated by using welding. For example, if the attachment of the spar to the body of the vase is damaged, then most likely welding will be ineffective. The only way to eliminate the defect is to make a complete replacement.
What is better to eliminate the existing spar defect or completely replace it?
Of course, the best option would be to weld a new spar instead of the old one, and also pre-strengthen the body. However, it all depends on the repair budget; the more financial resources are invested, the more effective the repair will be. Each motorist has different financial capabilities, so this nuance must be taken into account objectively. Therefore, the option of repairing the spar cannot be immediately discarded.
Note. If a motorist is not sure that he is able to do everything on his own, then it is better not to take risks and resort to the services of a car service. Observe the work of the car service employees and the next time replace the spar yourself.
The right side member of a VAZ 2110 burst
If there is a need to use welding, then it is best to use a semi-automatic machine with carbon dioxide. Also, when replacing the spar, it may become deformed, so be sure to first install spacers under the side members. Additionally, it is imperative to take into account the condition of the case, since sometimes its integrity is under very significant doubt.
Note. To reliably repair the spar, you need to make sure that the body itself does not have any defects, otherwise you will have to spend even more money on repeated repairs.
Also, do not forget about the well-known axiom that with each welding, the strength of the metal decreases, and this must always be taken into account without fail. If you do not pay attention to this technical nuance in time, an unpleasant cascade of negative consequences may occur:
- wheel alignment, and subsequently their complete collapse;
- the rate of tire wear will increase significantly;
- the car will not spontaneously constantly partially change its given motion vector;
- the transmission will begin to fail too prematurely and without any obvious external reasons;
- extremely rapid deformation of the body, literally within a few weeks, etc.
The cost of performing body welding work in technical maintenance services is on average 4,500 rubles. Additionally, you will need to purchase a certain set of parts. However, there is a very real opportunity to do everything yourself, the main thing is to have a little knowledge about the structure of the body and a little experience in using welding. A crack after an accident can be welded, but the main thing is that the metal is strong enough.
What is a spar and why are they needed?
The functions of the frame are made by the body in the form of spars
The main task of the side members is to take on all loads, both internal (car components, passengers, additional cargo, etc.) and external (vibrations transmitted from the wheels).
The spar is a simple pipe of rectangular cross-section. Moreover, in different places this cross-section can change in order to ensure the required rigidity of the body. There are technological holes made in them, with the help of which the components of the car are fastened and installed, and ventilation is performed so that moisture does not accumulate in them, which is a catalyst for the formation of corrosion processes.
But unlike a frame structure, where the frame is an entirely separate element of the car, in cars the side members are integrated into the body, in other words, they are an integral part of it and many body elements are attached to them by welding.
What is a spar?
A spar is a part of the body designed to strengthen the structure of a car. Suspension parts or beams are attached to the spar. The side members are located on the sides of the car, front and rear, and they bear the entire main body load of the car.
Initially, a spar was a name given to a reinforcing part of a car’s frame, since the frame was the supporting structure of the first cars. Gradually this part moved to the car body and became part of it.
Among the failures of the side members, it is necessary to note the appearance of cracks or corrosion of the metal. If small cracks appear, the spar can be repaired using a welding machine. However, if a strong split in the structure is noticed, then the spar must be replaced and this work should be entrusted, best of all, to professionals.
If cracks on the side members or traces of corrosion are not detected in a timely manner, it is recommended to take urgent measures to eliminate this malfunction, since these problems can lead to the fact that the car may simply fall apart on the road and then it will become very difficult not to get into an accident.
Functions performed by the structure
We have already found out where the spar is and even know what it is. But what it is needed for is not yet entirely clear. The spar is the most durable part of any car. Such a margin of safety is necessary to withstand the load exerted by the body, engine, luggage and driver with passengers.
This part also serves as a shock absorber for the front part of the body, absorbing impacts and preventing deformation. The body cannot be made very rigid and durable, since it will not be able to absorb the impact energy and most of it will be transferred to the passengers. This situation is unacceptable, because the body on the passenger side is minimally deformable and has the ability to absorb impact energy.
It is the side members that bear the greatest impact force. In this situation, they are often subject to deformation. But passenger safety increases significantly. Therefore, the sacrifice of the spar turns out to be justified.
Also, this part is subject to loads carried by surrounding working units, parts and mechanisms. Even the force from the wheelbase is absorbed by these robust structures.
How to choose a part: average prices
To weld the bottom of a car at a car service center, the minimum price is 25,000 rubles. This applies to minor floor defects in all customer materials. A complete overhaul and update can cost up to half the cost of a car. Considering that the price of a VAZ is minimal, such repairs are not profitable for most drivers.
Many people prefer to carry out repairs and replacements on their own, buying a solid bottom. The repair kit is produced by AvtoVAZ, the element is suitable for models 2110, 2111, 2112, 2170, 2171, 2172. The cost does not exceed 4,000 rubles. Cold-rolled steel 0.8 mm thick is used in production.
There are options on the market to buy bottom elements: panels, amplifiers, connectors and cross members. The cost of each element is from 900 rubles. Parts of the bottom are chosen instead of metal patches if local repairs are necessary without welding out the entire bottom.
About this article
wikiHow works like a wiki, which means that many of our articles are written by multiple authors. During the creation of this article, 12 people, including anonymously, worked to edit and improve it. This article has had 72,196 views.
Categories: Driving vehicles
Español:encender un carro manual
Italiano:Avviare un'Auto con il Cambio Manuale
Português:Iniciar um Carro de Transmissão Manual
Deutsch:Ein Auto mit Schaltgetriebe starten
Français:conduire une voiture avec une boite de vitesses manuelle
Nederlands:Een handgeschakelde auto starten
Bahasa Indonesia:Menghidupkan Mobil Manual
Čeština:Jak nastartovat auto s manuální převodovkou
العربية:تشغيل سيارة مانيوال
日本語:マニュアル車の発進
Start a Manual Car)
Tiếng Việt:Khởi động xe ô tô số sàn
Seal
The procedure for carrying out repair work
All work is conventionally divided into 3 stages: preparation of the bottom, replacement of the entire element or re-welding of individual parts, reassembly of the dismantled parts.
Tools and materials for work
Work is carried out after changing into dry clothes suitable for welding work. Before starting, prepare tools (grinder, welding machine, drill) and consumables. You will need new soundproofing sheets, as well as:
- mastic;
- primer;
- sandpaper;
- protective enamel.
After disassembly, it will become clear whether the repair will include additional metal parts, or whether the entire bottom of the VAZ 2112 will need to be welded.
Safety precautions
Since the work involves welding, fire safety of the work must be ensured. To carry out proper repairs, you should turn off the power to the car and drain all the fuel from the tank. For convenience, the doors in the cabin are dismantled, having previously de-energized the windows. In order to preserve the geometry of the body, after removing the doors, the openings are strengthened by installing spacer elements.
Which gear oil composition to choose?
On the Russian market, transmission oils are divided into three types according to their chemical composition:
- synthetic;
- semi-synthetic;
- mineral.
From the factory, as we have already said, Magnum 300 from TNK is poured. In terms of its composition, it belongs to. But less than 5% of Lada Kalina owners use this type.
The most preferred type of lubricant is semi-synthetic. This type is chosen by 50% of drivers, and we recommend it. And 45% of car owners buy fully synthetic fluids. What kind of oil you put into your manual transmission depends entirely on you.
Preparing to replace the spar:
- As mentioned above, to correctly replace the spar, it is necessary to have data on the distances between the control points of the body. Such data can be found in the repair manual for a specific car model. You can see symmetrical points on the whole spar from the opposite side (see details about measuring body geometry). A ruler for measuring body geometry, a measuring tape and a level should also be available.
- It is necessary to jack up the car before replacing the side member, remove the wheels for easier access and level them exactly on the stops (or on the slipway).
- Before replacing the side member, if necessary, the engine and suspension components must be removed. In some cases, when a partial spar replacement is performed, engine removal can be avoided.
- Before replacement, the spar must be pulled out as far as possible.
- Turn off the airbag systems (SIR).
- Remove and insulate the negative terminal of the battery.
- The arc welding process produces electromagnetic fields and heat that can damage the vehicle's electronic parts. There should be no electronic modules within a perimeter of 30 cm from the welding zone.
- Remove all panels and components adjacent to the side member.
Spars are an important component of the body
Note. In a neglected state, the part cannot be repaired and requires replacement. If damage is noticed in time, it can be repaired by welding into the inside of the spar.
Replacing the front side members of a VAZ 2110
When actively using the car or traveling on roads with harsh driving conditions, cracks appear in the side members, which are detected only during diagnostics of the chassis (see Repairing the chassis on your own). If you do not notice them for a long time or do not take the necessary actions, the part is destroyed and, subsequently, cannot be repaired. The causes of failure are usually:
- Poor quality road surface
- Driving over uneven surfaces at high speed
- Loosening fasteners
Front spar VAZ 2110
Due to the weakening of the rigidity of the steering mechanism fastening, a crack appears near the bottom bolt, followed by play in the body and, as a result, the wheels of the car become misaligned.