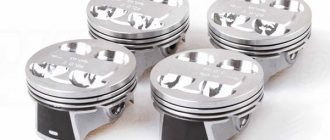
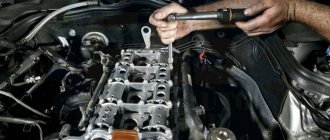
Engine piston rings
In an internal combustion engine (ICE), piston rings (PR) serve as a seal between the cylinder walls (liners) and the piston, due to which compression is created in the cylinders. If you forget to put the PC into the engine during assembly, the engine will not start, since the necessary compression of the working air-fuel mixture will not be ensured.
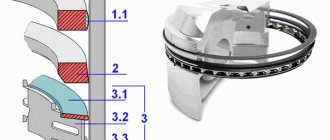
In passenger cars, three rings are standardly installed on each piston - two compression rings and one oil scraper ring, and oil scraper rings can be stacked, that is, consist of several elements. Compression piston rings (CPRs) are used to create compression in the cylinders and are always made of high-strength cast iron with various additives. The upper CPC has the greatest strength, since it operates in the most severe temperature conditions and experiences maximum loads.
Engine oil piston rings (OPRs) are needed to drain oil from the cylinder walls; if the rings do not perform their function, the engine will consume oil. MPKs can be either cast iron or steel, and cast iron PCs are almost always made in one piece, but steel oil scraper rings can only be assembled (composite). Steel MPC for one cylinder consists of:
- two spring steel rings;
- axial expander;
- radial expander.
Sequence of installation of rings on the piston
The order in which the rings are assembled must be observed. First of all, you need to install the oil scraper ring, then the second, then the first compression ring.
When installing the master, I recommend paying attention to the inscription TOP - this part will be turned upward in the combustion chamber. When there is no TOP designation, then you need to insert the ring with the name at the top.
TOP does not mean that it refers to the first compression ring of the piston. Make sure that the piston rings can rotate in the bores without interference. It is checked whether the entire ring has gone into the channel along the entire circle, and the working plane of the ring cannot look beyond the edges of the piston.
Thermal clearance of piston rings
PCs are spring discs with one cut - when installed on the piston, they expand, and in the sleeve they are pressed tightly against its walls. In order to achieve maximum compression of the working mixture, the cylinder walls must be as smooth as possible (without defects), and the shape of the internal cavity must be perfectly round. On the piston, the PCs are placed in special grooves, moreover, they are not seated tightly, and on a cold piston they move freely in the grooves.
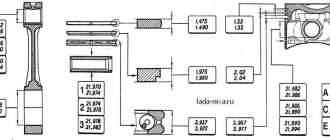
Piston rings have thermal clearances:
The clearances must be certain; if they are larger or smaller than the required value, the piston group will quickly fail. One should take into account the fact that when heated, the metal expands, and if the thermal gap of the PC is too small, the piston group will begin to overheat. With large gaps, tightness is not ensured and power losses occur.
For passenger cars, as a rule, the following clearances are established:
- between the grooves and the PDA - from 0.02 to 0.08 mm (for the upper ring the gap should be slightly larger);
- between grooves and MPC – from 0.05 to 0.06 mm;
- at the junction - from 0.25 to 0.5 mm.
As wear occurs, the gaps in the PC increase, and they should not exceed:
- between the ring and the groove – 0.15 mm;
- at the junction – 1.0 mm.
VAZ piston rings
The Volzhsky Automobile Plant produces engines for front-wheel drive and rear-wheel drive cars; piston rings for VAZ engines were originally supplied by the Michurinsky plant. The Michurins produced a lot of defects in their products, and since 1986, their own production was established in Tolyatti. Currently, there are many different manufacturers that produce PCs for VAZ engines, in particular, these are:
- AVTOVAZ (Tolyatti);
- STK (Samara);
- GOETZE (Germany);
- MAHLE (Germany);
- NPR EUROPE (formerly SM, Japan).
Signs and causes of wear (breakage) of piston rings
On VAZ cars, the engine wears out during operation, and the PCs also fail. Rings can:
- break into two or more parts;
- wear out in thickness;
- have general wear and tear.
Parts often break down due to overheating of the internal combustion engine; in this case, compression in the cylinders decreases and the engine loses power. Signs of a faulty PC are:
- bluish smoke from the muffler pipe, especially often it appears after a long period of idling when the gas pedal is sharply pressed;
- increased engine oil consumption;
- drop in power, the motor stops pulling;
- coking of spark plugs.
If there are signs of a malfunction in the piston group, the piston rings are replaced first. But replacing a PC does not always give the desired effect; often after repair the engine continues to smoke and consume oil. The reason for this is simple - there is wear in the cylinders themselves. In the block, the liners usually wear out unevenly - they take on an oval shape; due to wear, the piston rings do not fit tightly to the cylinder walls and do not provide a tight seal.
Checking the performance and running in the engine
After the engine is assembled, you need to make sure it is working. It must be started and allowed to idle for some time. If it works steadily, we can consider the work completed successfully. It should be remembered that new parts need running-in, and the more carefully it is done, the longer the repaired power unit will last.
Run-in lasts 2–3 thousand kilometers. To ensure that the replacement does not go in vain, the following rules must be observed during break-in:
- the motor should not be overloaded;
- If possible, fully loading the vehicle should be avoided (ideally the driver should drive alone);
- It is not advisable to overcome long climbs;
- It is absolutely forbidden, especially during the first thousand kilometers, to raise the crankshaft speed above three thousand;
- The engine needs to be warmed up before driving.
Passenger cars are equipped with different types of engines; power units may differ in volume, power, and design.
If oil consumption in an engine increases, the most common reason for this is worn or broken piston rings; replacing them is quite labor-intensive work, and also requires certain plumbing skills.
Replacing piston rings
On VAZ cars, as well as on all other models of passenger cars, it is advisable to change only the piston rings only if:
- there is no exhaust in the cylinders;
- there are no signs of damage to their inner surface.
If the liners are significantly worn, they need to be bored, and if the last size was already used before, the cylinder block needs to be relined. You can replace the PC on any VAZ engine without removing the internal combustion engine; this will require removing the cylinder head and oil sump. PCs are replaced if the gap at the joints does not exceed 1 mm.
For example, let's consider replacing piston rings on a VAZ-2114 car with an 8-valve internal combustion engine; such work must be carried out on a pit or a car lift:
- turn off the ignition, put the gearbox in neutral, disconnect the negative terminal from the battery;
- drain the antifreeze, remove the air filter housing along with the pipe (injector corrugation);
- remove the valve cover, camshaft, loosen the timing belt and move it to the side;
- disconnect the wires and cooling system pipes from the cylinder head, unscrew the head bolts;
- unscrew the nuts of the exhaust pipe of the muffler;
- We completely free the cylinder head from all fasteners that prevent it from being removed, and we remove the cylinder head;
- if there is protection under the engine, remove it;
- place a container under the engine sump, unscrew the plug on the crankcase, drain the oil;
- remove the lower hatch of the gearbox housing (three bolts);
- Using a 10 mm wrench or a socket wrench, unscrew all the oil pan bolts;
- dismantle the pan, remove the oil receiver;
- Unscrew the connecting rod nuts, remove the lower connecting rod caps, and carefully knock the pistons and connecting rods upward. Pistons should be knocked out through a soft metal drift or through a wooden block. First, you need to carefully knock out the connecting rod bolt without damaging the threads on it, then place the drift on the end of the connecting rod - in no case should you hit the bearings or the seat underneath them;
- It is recommended to remove the connecting rods one at a time, and immediately attach the caps to them; the caps should not be confused with each other, they are placed back strictly in their places, and a lock to the lock is required;
- remove the PC from the pistons, use a piece of the old ring to clean the piston grooves to bare metal. Be sure to check the cleanliness of the groove all around; there should be no coke left in it;
- We install new rings in the grooves, start with the lower MPC, then install the middle compression PK, and lastly the upper one. For installation, you can use a special device, but it is still more convenient to install the rings by hand. If the MPCs are cast iron, they cannot be bent along their axis, they can only be carefully moved apart. Compression rings also need to be bent carefully, to a minimum;
- we install the piston in place using a special mandrel, hammer it in with a wooden hammer handle or a brass or bronze drift;
- We install one piston-rod at a time, and immediately attach a connecting rod cap to each one. The connecting rod nuts should be tightened with a torque wrench, force - from 4.5 to 5.5 kg;
- then we put everything in place - the oil receiver, the engine sump, the cylinder head. We fill the radiator with antifreeze, oil into the crankcase, and start the engine to check. After replacing the PC, the internal combustion engine may initially smoke and consume oil - the engine needs to be run in for approximately 2 thousand km. It happens that despite the seemingly normal condition of the liners, the internal combustion engine continues to smoke even after replacing the rings after break-in. In this case, you will have to bore the cylinders and install a repair piston group.
Decarbonization of piston rings
If the engine starts to smoke, there is a possibility that there are rings stuck in the piston grooves. Nowadays, there are many different modern means for decarbonizing piston rings, and many drivers use them to restore engine performance. Among the most popular compositions are:
- Nitrox Power;
- LAVR ML-202;
- Titanium;
- LIQUI MOLY;
- WYNN'S.
Motorists believe that if the engine starts smoking, you need to use a decarbonizer, and the engine will work as before, without oil consumption and without smoke. Indeed, sometimes these remedies help, but only in cases where the motor has stood motionless for a long time (for example, after winter), and moisture has accumulated in it. If the car is subject to long-term preservation (put in a garage for winter storage), you should remove the spark plugs and pour oil into the cylinders, and plug the spark plug holes with plugs. With such prevention, the spark plugs will not become damp and rust will not accumulate on the sleeves.
But if, after all, a forgetful car owner has not taken preventive measures, you can use a decarbonizer. We get rid of rust in cylinders as follows:
- pull off high-voltage wires;
- unscrew all spark plugs;
- rotate the crankshaft so that all pistons are in the middle position;
- pour 45 ml of liquid into each cylinder, install spark plugs;
- leave the cylinders to “soak” for 6-7 hours;
- why do we turn out the spark plugs, turn the starter a few revolutions so that all the dirt flies out of the engine;
- We put the removed parts back in place and start the engine. At first it may smoke a lot, but then the smoke will go away.
Before installing new rings
Before you start work, you need to get everything you need. The operation will require wrenches, sockets, preferably with a ratchet, a torque wrench and a piston ring puller.
When choosing a new set at an auto parts store, you should pay attention to both the appearance of the packaging and the rings themselves.
The packaging must contain complete information about them, namely: who the manufacturer is, what they are made of, etc. The rings must also have markings indicating the top side, they themselves must not have any flaws, in addition, there must be There should be instructions that describe the correct installation of the piston rings.
If the seller claims that small defects will rub off, he is openly lying, trying to sell substandard goods, it is better to refuse such a purchase, since the money will be wasted.
Carrying out compression measurements in cylinders
Let's look at an example of working on classic VAZ models. It is necessary to measure compression on a warm engine. Readings from a cold engine can distort the picture. For measurements, you will need a special pressure gauge equipped with a threaded tip. It can be bought at any auto store.
Compressometer appearance
The check begins by unscrewing all the candles from their sockets. Then the central cable from the ignition coil is disconnected. We set the gear to neutral and turn the throttle valve to the maximum opening. After this, screw the compression gauge into one of the spark plug holes. At this time, an assistant must turn the starter handle. Two or three pumps will be enough.
The readings are considered normal if the data on the device is 12-13 ks/cm2.
Level 10 to 12 is also acceptable. But if the numbers are below 10 kg/cm2, then this indicates low compression. If compression still reaches a satisfactory level, but a little late, then the valves may be responsible.
To clarify, you can pour about 20 ml of oil into the disputed chamber and crank the starter again, taking a measurement. When normal compression is established at 12 kg/cm 2, the reason lies in the rings. Correct installation of the piston rings can solve this problem. If the pressure remains low, then the valves are the cause of the decrease.
Installation using a mandrel
Preparatory stage
First of all, you need to disconnect the battery. After this, you will need to drain the coolant from the cooling system and the engine oil from the oil pan. Replacing piston rings is possible in two ways: with or without removing the engine from the car. A check will help determine whether the engine needs to be removed: you need to remove the cylinder head and visually assess the condition of the liners.
If there are no exhausts, new ones can be installed without removing the engine from the car. The work steps for replacing piston rings, with the exception of dismantling the engine for restoration work, are the same.
Replacing piston rings
The replacement process begins with removing the oil pan. Additionally, it is advisable to remove the oil pump and check how much it is worn. Then you need to unscrew the connecting rod caps and push the connecting rods and pistons up. It is important to remember that the connecting rod caps cannot be swapped; each one must subsequently be screwed to its own connecting rod.
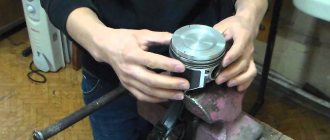
The next stage is the actual replacement of the piston rings. The easiest way to replace it is if you have a piston ring remover. It is a forceps that opens rings. The main thing is not to overdo it and not to squeeze it too hard, as they may simply break. If there is nowhere to get a device for installing piston rings, you can get by with a thin flat-blade screwdriver. The task, of course, will become more difficult, but it can be overcome. They must be installed with care so as not to scratch the pistons with a screwdriver.
After removing the old rings, you need to remove carbon deposits from the grooves, which will interfere with the installation of the new set. The ideal tool for this procedure is a piece of an old ring, so one of them needs to be broken. Also, carbon deposits must be cleaned from the bottom of the pistons, if there is any there. To make the task easier, you can moisten the surface with kerosene. Again, you need to act carefully so as not to leave scratches.
The installation order is as follows: the oil scraper ring is installed first, then the second and first compression rings. Due to the fact that the second compression and oil control rings operate under less severe conditions than the first compression ring, less stringent requirements are imposed on the metal from which they are made, so the rings are more fragile. Particular care should be taken when installing them. It is almost impossible to accidentally break the first compression ring.
The next important stage of work is installing the pistons back into the cylinders. To put the pistons in place, you will need a piston ring mandrel, otherwise they will prevent the pistons from entering the cylinders. It can be either universal, designed for pistons of different diameters from 50 to 150 mm, or made specifically for a specific size. Using this device, the piston rings are crimped, after which the piston is driven into a cylinder lubricated with engine oil by gently tapping the bottom with some non-metallic object.
The structure of the rings on the piston
The primary ring - responsible for compression, is made from high-quality and durable raw materials, it tolerates high temperatures and does not expand very much when heated.
A special coating on the element reduces friction and protects against rust. A ring in the form of an arc with a gap at the end. This is required so that after installation the part is tightly adjacent to the piston.
Another compression ring is also tightly adjacent to the piston and allows excess lubricant to be removed. It does not come into direct contact with high temperatures, so it is produced from raw materials that are not so strong. The different construction of products is explained by different actions.
The oil removal ring is located lower than the others. It removes excess material, stretching the thinnest film, which reduces the friction force of compression and extends their period of action. Replacing the piston elements allows the engine to regain its original qualities.
When is it time to change rings?
There are three piston rings on the VAZ 2108-2109. They are not closed rims that are located on the outer wall of the cylinder in special grooves. These parts serve to seal the combustion chamber, regulate oil flow and improve heat transfer through the cylinder wall. Two compression valves prevent gases from the combustion chamber from entering the crankcase, and an oil scraper valve removes oil from the cylinder walls and prevents it from entering the combustion chamber.
Wear of piston group parts occurs after approximately 150 thousand kilometers due to the action of gases and friction of metal parts. They need to be changed if the following symptoms are present:
- compression drop;
- increased fuel consumption;
- the appearance of bluish smoke in the exhaust gases;
- increased oil consumption.
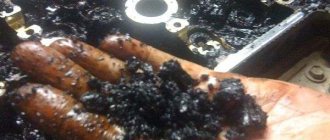
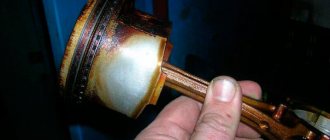
The cause of deterioration in engine performance may be coking of the piston and stuck rings. This happens when using low-quality fuels and lubricants that do not meet the manufacturers’ recommendations. During long-term operation, carbon deposits form, which covers the combustion chamber and its parts. Piston rings covered with carbon deposits “stick” and cannot perform their functions properly. In this case, they should be changed or decarbonized.
Step-by-step replacement instructions
Piston repair work must be performed on an inspection ditch, lift or overpass.
What will you need?
To repair a VAZ 2109 engine with your own hands, you need the following tools:
- a set of keys;
- set of heads;
- funnels;
- extension cords;
- torque wrench;
- set of probes;
Set of gap gauges
- mandrel for pressing products on the piston;
- hammer;
- needle file;
- new repair kit.
New consumables for piston VAZ 2109
When purchasing piston rings for the VAZ 2109, you should take into account the material of manufacture and their width. It is better to purchase original products to avoid fakes.
Installing oil scraper rings
The installation of oil scraper rings containing 2 parts deserves special attention; it is worth taking a closer look at the location of the expander spring. Its edges must certainly be opposite the joint of the piston ring.
The correct location of the expansion spring is a required condition for the oil film removal functionality. All connections of the oil removable ring on the piston, containing 3 parts (2 steel plates and an expansion spring), must be mounted with an offset of 120 degrees in placement one to another. They contribute to the operation of the piston during the initial start of the engine.
Stages
- First of all, you need to dismantle the cylinder head with your own hands.
- Then you need to remove the engine oil pan.
- After rotating the crankshaft, install it so that the connecting rod mounting nuts extend as far as possible.
- After unscrewing the fastening nuts, remove the connecting rod caps.
- Using a hammer, tapping lightly, remove the piston with connecting rod from the cylinder.
- Having opened the gap with your fingers, you need to remove all three products from the groove in turn and dismantle them from the piston. Together with the oil scraper, its expander is removed.
Use your fingers to widen the gap
- Using old products, you should clean the grooves from carbon deposits.
- Removed products must be checked for suitability. To do this, they must be inserted into the cylinder and the gap measured using a feeler gauge. It should be in the range of 0.25 - 0.45 mm. A gap of up to 1 mm is allowed. If the value is greater, then the part must be urgently replaced. If the gap is larger, then the product needs to be sharpened using a needle file.
- Before installing new products on VAZ 2109 pistons, they should be run in the grooves. If biting is detected, the part must be ground in using fine-grained sandpaper.
The table shows the maximum values of the gaps between the part being replaced and the groove walls.
| Type of ring | Gap value, mm |
| Upper compression | 0,04 — 0,075 |
| Lower compression | 0,03 — 0,065 |
| Oil scraper | 0,02 — 0,055 |
- When installing, all parts should be thoroughly lubricated with oil.
- Installation of products begins with the oil scraper. First, the expander is installed - a special spring with a lock. Then the product itself is put on her. The expander lock and the oil scraper ring gap must be opposite each other.
- The lower compression ring has a groove and a tooth. When installed, they should be at the bottom of the part. On the upper surface there is usually an inscription “vas” or “tor”.
- The upper compression ring is installed in the same way - with the lettering facing up.
- The sequence of putting on the parts is as follows:
- first, the lock is released so that the part can easily fit onto the piston;
- then the lock itself starts;
- the remaining part is installed.
After installation on the piston, all parts need to be oriented. The installation axis of the piston pin should be 45 degrees with the lock of the upper compression ring. The lock of the next product should be at an angle of 180 degrees with respect to the previous one. Thus, the angle between the oil control valve and the upper compression valve will be 90 degrees. Then the pistons and rings are pressed out with a special mandrel and inserted into the cylinders from which they were removed. Next, we perform the reverse assembly with our own hands.
After replacement, the VAZ 2109 piston rings must be run-in. In this case, you should not load the engine, drive on roads with long ascents, and change gears correctly.
Video “Installing piston rings”
This video shows the process of installing piston parts: how to install and what to pay attention to.
If you find an error, please select a piece of text and press Ctrl+Enter.
Gap in the lock
The slot in the piston ring is usually called a lock. This gap is necessary, but it also creates an obvious problem - at this point gases from the cylinder can easily penetrate into the crankcase. Therefore, it must have a minimum width during assembly, but not zero - due to the uneven thermal expansion of the cylinder, ring and piston, the lock may collapse, after which the ring will break.
For each specific engine, based on both the materials and the operating temperature range, the minimum thermal gap in the lock is set - when assembling the motor, we check the gap in the lock so that it is not less than the lower threshold of the rating.
Wear of the ring and cylinder leads to the fact that the ring “diverges”, the gap in the lock increases, as pressure losses increase and oil penetrates into the combustion chamber. Based on this, the maximum gap size is set, if exceeded, the ring is replaced with a new one.
Let's compare the nominal clearance values for different engines:
- VAZ-2108: 0.25-0.45 mm;
- GAZ-24: 0.25-0.6 mm;
- Honda CR-V (K20A4 engine): 0.2-0.35 mm.
What do these numbers tell us? The minimum gap limit in the new ring lock for domestic engines is close, but the maximum is higher in an engine with a lower degree of boost: the pressure loss remains tolerable. For the Japanese motor, the materials are better selected, the cooling of the upper ring is more efficient, so the minimum size is reduced, and fewer “liberties” are allowed during assembly. The maximum limit for troubleshooting is different - on VAZ engines it is 1 mm, GAZ - 1.2 mm, while on a Honda the upper compression ring is considered worn out already at a gap of 0.6 mm, with which it would still be possible to assemble a new twenty-four engine "Volga".
We recommend: What are the markings for xenon and halogen headlights?
The gap in the lock is an important indicator when troubleshooting a motor. By moving the ring to different heights, where the cylinder wears out differently, you can find out the degree of wear without a bore gauge: at the top, where the ring does not come into contact with the walls, the cylinder retains its nominal diameter, and it is in this place that the gap in the lock reflects the wear of the ring. Going lower, the ring widens, indicating an increase in the diameter of the cylinder closer to the middle, then narrows again. Roughly, but quite indicatively, we calculate the difference in cylinder diameters at different heights, starting from the measured gap.
Suppose the nominal diameter of the cylinder is 78 mm, which corresponds to a circumference of 122.522 mm. The measured gap in the lock when installing the ring at the top is 0.4 mm, the length of the ring itself is 122.122 mm. Now we lower it to the center of the cylinder and measure the gap of 0.8 mm - from a circle of 122.922 mm we get a diameter of 78.25 mm. This method does not take into account the fact that the cylinder becomes barrel-shaped or ovoid, and in the middle the ring is not adjacent to the walls with its entire surface. However, the change in the gap in the lock indicates to us that the engine problem is not wear of the rings, which are easy to replace: the cylinders will need to be bored.
