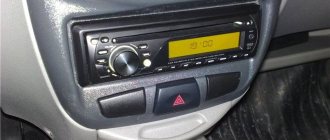
Replacing head lamps
Each lamp has its own resource, the value of which depends on many factors.
Over time, devices break down and require replacement. And then the question arises: how to disassemble the headlight? Dimensions Kalina
Fog lights Kalina
Wiper size for Kalina
The replacement procedure is simple, but before that you need to choose the right lighting devices from the mass of products offered on today's market. Although sometimes all you need is to replace the headlight glass.
So, if the headlights are purchased, then we change:
- Remove the protective cover from the headlight housing. It's rubber, so it's easy to pull off if you pull on one of the three tags.
- Disconnect the power connector.
- Release the spring clip.
- How to remove the headlight? We take out the lamp and install a new element in its place.
Attention! When replacing a halogen lamp, avoid touching the bulb with your hands. This may damage the device. Over time, greasy fingerprints will cause the glass to darken, causing the lamp to overheat and eventually burn out.
- If contact occurs, it is necessary to wipe the surface of the flask with a cloth moistened with alcohol.
- Changing side lamps
- We also remove the cover and disconnect the corresponding cartridge from the on-board network.
- We remove the lamp and install a new one in its place.
How to disassemble the headlight on a Lada Granta, Kalina 2 (replace glass, mask)
05 October 2022 Lada.Online 19 486
Granta and Kalina headlights are considered non-separable. If a crack appears on the glass, the headlight unit is replaced as an assembly. However, with a strong desire, it is still possible to disassemble it. Let's look at how to remove the glass and headlight mask with your own hands. The process is shown using the example of a Lada Granta headlight. On the Lada Kalina 2 headlight, all actions are performed in the same way.
You will need: remove the headlight, prepare a Dremel (disc diameter 20 mm), sharp knife.
Headlight glass mounting diagram:
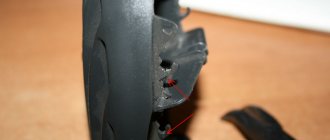
The sealant that holds the original headlight glass in place is heat resistant. That is, you won’t be able to loosen its “grip” by heating it with a hairdryer or in the oven. In addition, there are four fastening brackets on the edge:
How to replace headlight glass:
- Seal the glass with masking tape to prevent damage during work.
- We cut off about 7 mm of the U-shaped fastening (using a Dremel), and then remove the remaining sealant (photo No. 1).
- We cut off about 2 mm of the sealant between the glass and the plastic using a Dremel (photo No. 2, color green).
- We remove the remaining sealant using an L-shaped blade (you can bend an ordinary knife after heating), photo No. 3.
When reassembling, we use a transparent glass sealant (for example, ABRO).
What it looks like in practice:
The process is also shown in the video:
How to remove the mask from the headlight:
- The inner mask is attached using a spring mechanism, which is connected to a hydraulic corrector.
- The outer mask is held in place by 4 Torx screws.
Now it becomes possible to install powerful LED or flexible DRLs. Have you ever had to disassemble the headlights on a Grant or Kalina yourself? How did you manage to do this?
Photo: wowic87 logbook
Keywords: headlights Lada Granta | headlights Lada Kalina | turn signals Lada Granta | turn signals Lada Kalina
1
3
Found an error? Select it and press Ctrl Enter..
- How much will you have to pay extra for Lada Largus Cross Quest
- AvtoVAZ instructions for eliminating the squeaking of the Lada Granta parking brake cable
- Where is the VIN code and engine number for Lada XRAY
- How to get rid of knocking calipers on front-wheel drive LADAs
Technological process of removing headlights on Grant
Many car owners are wondering: how to remove the headlight of a Lada Grant? Easier than it seems. To begin with, you will need two keys from the tool - 8 and 10. And now you can go directly to the process itself:
- To begin with, we remove the “negative terminal” from the battery so as not to accidentally short-circuit anything.
- We are dismantling the front bumper, since it is impossible to get to the lower mount otherwise.
We removed the bumper and took out the headlight (I ran a little ahead)
It is worth remembering that when the lower mounts are removed, the optics should be held so that the upper “ears” do not crack under load when dismantling occurs.
Lighting system design
Optics for Kalina are manufactured at two factories:
Both types of optics have excellent characteristics and provide high-quality illumination of the road. You can recognize Bosch products by the missing cap on the lamp in the near module, as well as by the AL code on the glass.
The headlight design of the Lada Kalina is no different from most cars. The flashlight has low and high beam modules, blocks with turn signals and side lights. In the new Kalina body, the dimensions also play the role of running lights.
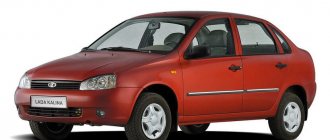
New Lada: Lada Kalina 2 station wagon or VAZ 2194 (2013 - 2018) |
The following lamps are used in Kalina optics:
- low – H7, 55W;
- long range – H1, 55W;
- direction indicators – PY21W, 21W;
- Dimensions – W5W, 5W.
Light elements from the dimensions fit into the license plate lighting module on the trunk lid. Since 2022, modernized optics have been installed in Kalina, where part W21/5W is responsible for the clearance and daytime light. The fog lamps are equipped with H11 lamps with a power of 55W.
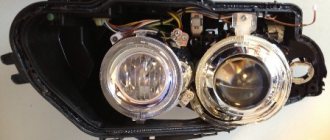
Headlight design for Lada Kalina
Headlight unit installed on a car
Like most new generation cars, VAZ 1117-1119 models are equipped with headlights of a simple design. Let's look at what elements are included in this node:
- Outer glass that protects the light bulbs and prevents water and dirt from getting inside.
- A plastic case to which all the main elements are attached.
- The rubber seal between the glass and the body provides good water and dirt resistance.
- Lamps for signaling turns, as well as low and high beam.
- There is a plastic reflector installed inside the case, which has a mirror surface and reflects the light of the bulbs.
Each headlight unit is equipped with light bulbs, which are well, one might say tightly, fixed in the housing, which ensures their resistance to vibration.
Headlight diagram with explanation
There is a lot of detail in this material about installing fog lights (fog lights) on the Lada Kalina!
How to deal with foggy headlights
To prevent the glass from fogging up from the inside, it must be completely sealed. Violation of the seal occurs due to cracks in the glass itself, the case or damage to the sealant. All these faults can be eliminated only by replacing the product, but there is another problem - clogged drainage pipes.
Any headlight is equipped with drainage tubes that help eliminate moisture that has somehow entered the housing, for example, due to temperature changes. If the drainage is dirty, then the moisture will not be discharged into the atmosphere, but will settle in the form of fogging on the inside of the glass.
The best way to get rid of it is to remove the product and dry it well, blowing it with compressed air and heating it with a hairdryer.
About the design and purpose of headlights
In Lada Kalina 2, the headlights are endowed with their own design features. Each headlight unit contains three sections that perform the following functions:
- road lighting in low beam mode;
- the same, only in long-range mode;
- dimensions lighting;
- direction indicators.
Headlights must be adjusted correctly, otherwise they can cause not only the driver, but also other traffic participants a lot of inconvenience. Correctly adjusted optics will allow you to confidently illuminate the side of the road and will not dazzle oncoming drivers.
By activating a special switch in the interior of the Lada Kalina 2, the driver turns on the low beam mode. If the same handle is switched to the high beam mode, then in parallel with the switching on of the corresponding lamps, the lighting devices responsible for the low beam also remain active.
The turn signal lamps have bright orange bulbs, and the section housings have transparent lenses.
In Lada Kalina, the headlight units are equipped with electromechanical drives, which makes it easy to adjust the light beam depending on the load on the body and the road situation. A special regulator is located on the panel in the cabin, and the drive mechanism is in the headlight.
When assembling the Lada Kalina body, the manufacturer uses headlights from such well-known manufacturers as Bosch and Avtosvet. To find out which brand produced the headlight for a particular car, you should carefully examine the body of this optics. The “AL” symbol will indicate that the headlight was produced in “Bosch” (Russia).
Avtosvet products are also made of polycarbonate, but the design already includes the specified cap.
Having disassembled the headlight, the owner of the Lada Kalina can discover the presence of many parts and other elements in it, including:
- wiring;
- lamps and reflectors;
- glass;
- fastening brackets and plugs;
- drive mechanism, etc.
Thanks to the active work of the manufacturer's engineering corps, the headlight design is constantly being improved. This is how neon headlights appeared in the Lada Kalina arsenal. Although their light transmittance is slightly lower compared to standard options, however, during testing, this modification of optics demonstrated enviable results.
Next, we will tell you how to remove the headlight and replace it.
Types of headlights
When listing the types of Lada Granta headlights, you should definitely mention the original parts and their analogues, usually used as an alternative or tuning optics. When dismantling and installing these headlights, the car owner will not need to redo the fastenings. Here are their descriptions with catalog numbers:
- Let's start with the original headlight, listed in catalogs under number 21900-3711010-00. It does not cause any difficulties during removal and installation, and its price can range from 1000 rubles and above.
- An analogue of the original headlight with xenon lenses is the headlight produced by the Volzhsky Automobile Plant, which has catalog number 21901-3711010-90. Such headlights are not widely used; in their design they differ little from the original, representing the same original part, but designed and intended for the installation of xenon. Their cost exceeds the cost of the original headlight by about 15%.
- The third type includes models used for tuning optics. So, two analogues of the original were released at once, one of which has built-in LED indicators and is listed in catalogs under the number DM-171052, and the other is equipped with different types of lenses for high and low beam and LED-backlit edging. The catalog number of the second model is DM-171118.
Headlight design features
In 2004, Lada-Kalina cars received new headlights, the design of which is called a block. Unlike the previous, standard ones, they combine lamps that provide low and high beam; lighting (side lights), turn signal lamps.
Another feature is that the new headlights have an electric remote light control. It allows the driver, while driving, to adjust the light output in height and direction. It should be emphasized that such a function was a relative rarity at the beginning of the 2000s.
Like any component, mechanism, part of a vehicle, headlights, including Lada-Kalinas, sometimes require preventive maintenance or repair. To do this, they need to be removed from the car. The purpose of such an operation may be the need for adjustment, improvement of decorative properties, or replacement of old equipment.
New Lada: Lamps used on cars | Operating instructions for AVTOVAZ Lada Kalina | Page 90 / 96
Those who often perform many works on the car themselves, before removing the headlights, are recommended to find out which company manufactured them. This is not difficult to do, you just need to look at the glass. The AL symbols indicate that the lighting unit is manufactured by Bosch.
During the production of Lada-1118 (Kalina), basic lights are mounted on the products: Kirzhach JSC Avtosvet and Bosch. It's hard to make a mistake. You can determine the manufacturer by the characteristics of some elements. So, if there is a cap on the low beam lamp, then it is made.
To begin the operation of “removing a headlight on a Kalina,” it is advisable to at least become familiar with how this unit works. It has three sections. As already mentioned - low and high beams, side lights, turn signal.
The road is illuminated with 55-watt incandescent lamps. To prevent dazzling of drivers of oncoming cars, special lenses are mounted on the front of the vehicle. The turn signal lamps, like the side lights, have a power of 20 watts. At the same time, the turn signals provide orange light.
There is a special corrector for adjusting the headlights. It has an electromechanical drive. Control is carried out from the cabin, where there is a special device on the dashboard. To adjust the corrector if it is not working correctly, you need to completely disassemble the headlight. But such disassembly may be required in other cases. This is, for example, tuning or installing new lighting elements.
Parsing headlight Kalina 1
How it all started: I decided one month ago, namely on June 26, to reseal the housings and, at the same time, paint the headlight masks - the reason for which was the constantly fogging up left glass.
Well, actually, I quickly took everything off, I thought I’d take it apart right away, paint it and assemble it the next day. (Yeah, yeah)
Turning the headlight in my hands, I saw the screws on the body, unscrewing which, I thought that the glass would come off (naive little guy), the screws turned out to be difficult, but torx, so I bought a screwdriver with a set of bits to disassemble the headlight.
After 3 screws on each headlight were removed, to my regret, the glass did not want to give up, after reading the Kalino forums, I made sure that, in my case, the headlight was not removable (Kirzhach with polycarbonate glass). After listening to a lot of advice about how the headlight should be “ bake" in the oven - it was sent there for 10 minutes at 180 degrees.
From that moment on, the most interesting thing began... I regretted 10 times that I took on this idea.
After the headlight had warmed up, I pulled it out and, I thought, well, that’s it, now I’ll work with a screwdriver for 5 minutes and the glass will separate... Here I was very wrong. Having started this work at 10 pm, I disassembled the headlight only at 4 am... I heated it in the oven once 10, as a result, the entire rim is deformed, because the sealant did not soften, only the plastic (I pricked the glass with great effort until the plastic hardened and went back into the oven), but even worse, the headlight mount melted... well, what can you do.
On this note, I went to bed at dawn and the next weekend I was disassembling the second headlight, I decided to just pry it off with a screwdriver first, without resorting to the oven. To my great surprise, the sealant was not pressed against the headlight body at all, naturally the glass snapped off instantly - it was the left headlight, which I disassembled in 5 minutes, unlike the first one (I spent 6 hours fiddling with it).
What conclusions did I draw at this stage?
: 1.
Never, ever undertake to disassemble a Kirzhach headlight on a viburnum (it’s easier to throw it away and buy new ones) , but since you are as desperate as I am, then God help you. 2. The reason for the fogging of the left headlight is a defect from the factory (the sealant was not pressed in)
, and the car was like that for four years with a whiny little eye... 3.
Heating the headlight in the oven is a very bad idea - the sealant on this headlight, like rubber, does not respond to temperature at all
(it is necessary solder or saw the outer edge to separate the glass, and then build it up again)
The next stage was painting the headlight masks, well, there’s nothing to tell here, just appreciate the abundance for creativity (by the way, there is material here not only for the headlights - keep an eye on the bulletin board) I painted it with heat-resistant KUDO in two layers, without primer, having previously removed the chrome using Pemolux and brushes and degreasing the surface.
Then I bought a hot air gun, I thought I would assemble the headlights (I first straightened the edges on the deformed headlight with it), because it was no longer possible to ride such a tramp for more than a week
BUT, remembering how hard it took me to disassemble the headlights
,HERE I WENT PSYCHANIC!
This idea actually delayed the assembly time for another 3 weeks.
I just didn’t expect that the viburnum headlight was so tight... This lens is universal (it is screwed with a nut through the adapter into the reflector) and fits even into the 2113 headlight without any modifications.
The headlight is a source of directional lighting on the Lada 1118. It is installed in front of the car, illuminating the road surface and the surrounding area. Due to the huge range of lighting systems to choose from, the elements of which can be installed on the Kalina, lights are often the subject of replacement or modification. To replace the Kalina headlight unit, it is worth first considering its structure. On this model, the car manufacturer installs 2 headlights equipped with 3 sections:
- low beam;
- side and main beam;
- turn signals.
Block headlight of Lada Kalina
When you turn on the low beam, only the low beam lights come on, and when you turn on the high beam on the 1118 model, the low and high beam complex with a power of 55 W each starts to burn. The sections of the front indicators have transparent light diffusers. The 21 W turning lights have an orange glow.
To be able to adjust the headlights on the Lada 1118, the package includes a headlight leveler with an electromechanical drive. The adjustment system has a device that is installed on the dashboard, as well as a connection wire and electric drives pre-installed in the lights.
The plant where Kalina is produced provides for installed lights from two manufacturers:
- Bosch;
- Avtosvet CJSC (Kirzhach).
The procedure for dismantling the lights
You should know that the Lada Kalina 1118 flashlight system consists of:
- housings;
- glass (polycarbonate);
- lamps;
- reflector;
- wiring;
- lamp plugs;
- decorative inserts (masks).
As for the ease of removal and subsequent replacement of the lamp on the 1118 model, the process usually involves removing the front bumper. After this, the screws on the top and bottom of the lighting fasteners become accessible. After dismantling them, you can immediately remove the headlight unit, not forgetting to first remove the blocks with wires.
Removing the front optics
However, not all car enthusiasts have a lot of time to replace the lighting system or experience in removing the bumper. For this reason, a more popular method is to change the Kalina headlight without removing the bumper.
To do this you will need to use:
- key for 8 and 10;
- a set of screwdrivers (flat and Phillips);
- new lighting system component.
A set of tools
in order to adjust the block lighting on the Lada. You will need to complete the following steps:
- Remove the air filter housing, as well as the coolant unit.
- Remove the PTF plug using a screwdriver.
- Unscrew the bolt on the lower fastener of the lighting component using a 10mm wrench. Insert your hand into the PTF hole.
- Remove the bolts located on the upper fastener of the light block component. They are located closer to the radiator. Use the key at 8.
- Unscrew the screw securing the product to the car fender using a large Phillips screwdriver.
- Expand the Lada Kalina headlamp so as to move the part closest to the radiator closer to the car engine. This measure will allow you to remove the lower fasteners from the seat.
- Remove the lower iron fasteners of the headlight. To do this, you will need to remove a couple of bolts with a short head.
Removing the headlight on Kalina
- Remove the car light by moving towards you. At the same time, try not to damage the paint layer, since during dismantling the lamp will be located as close as possible to the bumper and fender.
After this, you can install a similar device in reverse order.
Types of materials for gluing
To glue the headlight, glue is most often used. The following basic substances are used to glue car headlights:
- Terostat - 8600 2K;
- Terostat - 8599, 8597, 8596
- Terodicht - Black;
- Terodicht - Elastik;
- Permatex;
- Abro;
- Body.
Adhesive sealant for glasses and headlights PERMATEX 65 AR Silicone Glass Sealer
The second way to glue cracks in car headlights is with butyl tape. According to the manufacturers, it has enough advantages:
- ensures durability and reliability of fasteners;
- resistant to significant temperature changes;
- quickly sets to the surface;
- seals glass.
Butyl tape for gluing car optics
Sealed adhesive for repairing car headlights is made in the form of pastes or liquid mass. After that, it is packaged in jars, tubes or other containers. The tubes are equipped with dispensers, which helps to accurately direct the substance to hard-to-reach places.
There are 2 types of sealed glue:
Reasons and methods for replacing light elements on viburnum
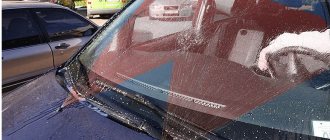
You may need to replace the headlight on a car of this model for a number of reasons. Impacts to the body from other drivers or animals, careless driving on uneven roads, rough repairs of parts under the hood can damage the integrity of the fasteners. Light elements become loose and can fall out at the most unsafe moment on the road. Headlights that do not fit well in the grooves must be replaced.
New Lada: Conceptual Diagram of Kalina -
Replacement is a simple process if you approach it responsibly and without nerves. For an experienced master, this operation takes about 3 hours. But even if you have never encountered such a situation before, these instructions will help you replace the headlight without any problems.
The entire process of removing the Kalina headlight can be divided into 5 main stages:
- unscrewing the bolts from the crankcase protection;
- removing the license plate (will allow you to get to the lower radiator grille);
- removing the lower and upper radiator grilles;
- unscrewing the front bumper (you will have to remove a large number of bolts and screws);
- removing the bumper amplifier (it interferes with dismantling and putting back the headlight).
When the screws holding the headlight on top and bottom are unscrewed, you should remove its housing, first carefully clamping all the wires. During repairs, it is recommended to inspect the inside of the bumper and the metal underneath for signs of corrosion. If such formations exist, you need to clean them and coat them with a rust converter.
After carrying out these operations, reassembly follows. During the process, you need to monitor the position of the rear, front, left and right illuminator - the headlight should fit into the connector without effort.
Technology and sequence of headlight removal
A considerable number of car owners are asking a burning question for them - how to remove the headlights on a Grant correctly and in the right sequence? Before proceeding directly to dismantling, take two keys - 10 and 8, and then proceed to remove the headlights. The process itself consists of several stages, which we will now list:
- First you need to remove the negative terminal from the battery (then nothing will suddenly short out);
- Remove the front bumper, otherwise you simply will not get to the mount located below;
- The next step is to disconnect the lamp clamps at the turn signal and running lights;
- After dismantling the main light cover, this operation will give you access directly to the headlight;
- Remove the clips that hold the low and high beam wires;
- This will be followed by dismantling the headlight hydraulic corrector;
- Next, you must unscrew the four bolts that secure the headlight and carefully remove it.
Do not forget that the optics must be held while removing the lower mounts, otherwise the “ears” located at the top may crack during dismantling.
As can be seen from the above, the technology for dismantling Lada Granta headlights is a fairly simple procedure; even an inexperienced car enthusiast who has never previously engaged in repair work can carry it out without causing serious problems.
Disassembling the headlights of the Lada Kalina (Kirzhach)
You will need: hair dryer, utility knife, flat screwdriver.
Removing the glass of these headlights without breaking it is not an easy task, requiring time (sometimes up to 6 hours) and patience. The difficulty of disassembly is that the sealant in this case is more “difficult”. Often, heating it with a hairdryer causes the plastic of the headlight housing to melt faster, so many people resort to other disassembly methods.
If you don’t have a hairdryer at hand, then a regular oven may come in handy. Turn it on at 150-160C and wait 5 minutes. Then put the headlight in the oven on a wooden board and bake it for about 15 minutes. Then, wearing gloves, we pull out the headlight with a slightly softened sealant, and using slotted screwdrivers of different sizes, we pry the glass around the entire perimeter of the headlight. The black plastic that runs along the perimeter will change its original shape, you should not be afraid of this, since it will then level out. After about 10 minutes, the sealant will begin to harden, so we work quickly. Did not have time ? Not then we take the headlight into the oven again (this procedure can continue up to 10 times).
We remove the mask (backing) of the headlight by unscrewing all the adjusting bolts (asterisk) from the outside. After disassembly, you can begin tuning Kalina's headlights.
Removing the headlight, replacing lamps VAZ (lada) kalina 1117 2004 - 2020
Tools:
- Medium Phillips screwdriver
- Small flat screwdriver
- Driver for socket attachment
- 8mm wrench attachment
Parts and consumables:
- Turn signal lamp
- Low beam lamp H7
- Side light bulb W5W
- High beam lamp H1
- Headlight glass
- Rags
- Alcohol
Note:
The operation is shown on the right headlight unit. The work of replacing lamps and removing the left headlight unit is similar. You can replace the lamps without removing the headlight from the car.
1. Disconnect the wire terminal from the negative terminal of the battery.
2. For clarity, the work is shown with the headlight removed. Turn the turn signal socket counterclockwise 45°.
3. Remove the cartridge from the headlight housing.