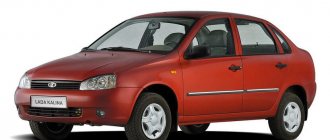
First steps when repairing a car. instructions on how to remove the standard radio on a Lada Kalina
To change the standard radio on a Lada Kalina you need
Remove the removable top panel from the radio;
Remove the plastic frame;
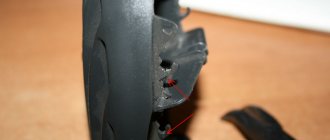
We take two keys that come with the car. We insert them on the sides of the radio between the radio itself and the tunnel. We lift them up and pull them towards us;
Thus, we take out the radio from the tunnel;
Next, disconnect the two connectors with wires and the antenna connector;
At this point, you have completely removed the Lada Kalina radio and can replace it with a better one.
When choosing a new radio, there are several factors to consider. To begin, select a radio of the appropriate size. For all VAZ cars this is a 1DIN radio. The connector is supposed to be standard ISO. The standard number of connected speakers for a cheap radio is 4 pcs. In terms of functionality, you can choose any radio to suit your taste. Currently, radios that read CDs have begun to lose popularity. At the moment, it is absolutely enough to have a USB connector or a slot for an SD memory card. In addition, there will also be an FM receiver as standard. For owners of mobile phones with Bluetooth, it would be useful to have such a module in the radio for making hands-free calls or listening to music from the phone. The presence of an AUX jack is also starting to fall out of favor.
Next, you need to pay attention to the output power of the amplifier of such a radio. Typically, for a 1DIN radio, the manufacturer claims a power of about 50 watts per channel. Those who believed in this figure will be upset, because the real power of such an amplifier is from 15 to 22 watts per channel. To make sure of this, read the specification of the power amplifier chip installed in the radio.
If the speakers installed in your car are powerful enough (usually this can be said about all speakers, not counting the standard ones), in other words, it makes sense to install a separate power amplifier. Then it seems like it makes sense to install a subwoofer as well. And by the way, when choosing a radio, pay attention to the presence of an output for connecting a subwoofer. If you decide to install it in the future, you will not have to change the radio a second time.
Fortune on the roads and all the best.
Technical characteristics of the radio
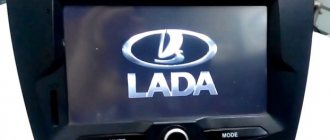
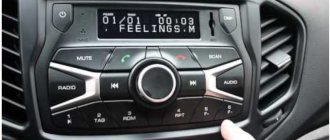
Kalina's standard audio system
Technical characteristics of the standard radio in the Kalina “Lux” configuration:
- 2DIN touch screen;
- presence of stereophonic radio;
- ability to play multimedia files;
- ability to synchronize with a cell phone;
- work with bluetooth.
Device development - WindowsCE 6.0. RAM - 128 MB. Fifth generation central processing chip. These characteristics cannot but please fans of AvtoVAZ products, because now the car has become much more pleasant to drive.
Radio tape recorder Kalina: technical characteristics in the “Norma” configuration differ from the “luxury” one in the absence of a touch screen, Bluetooth connection and synchronization with a cell phone. The size of the radio is 1DIN, removable panel. Some configurations have 4 speakers and an antenna. The radio receives wide range radio waves, can play discs of different formats, and work with USB drives and SD cards.
It is also good that cars with radios have passed all special tests before being released to the masses. They were tested at extremely low and extremely high temperatures, electromagnetic compatibility was checked with modeling of the radio interference spectrum.
Benefits of new technologies
MMC Lada Kalina 2 is characterized by a simplified control system. Now all the necessary options can be obtained with 1-2 taps on the screen. The system is equipped with a more functional resistive screen. Unlike the standard Kalina radio with a capacitive version, the resistant screen has improved performance characteristics. The device is able to operate without failures in any temperature conditions.
Lada owners often complained that in sunny weather it became impossible to use the car radio. This is due to the numerous glares that make the characters on capacitive screens almost unreadable. The designers, when developing the second version of the radio, took this drawback into account.
If desired, the car owner can choose a model with a mini-visor that protects from glare.
The maximum display area of MMS Kalina 2 is 7 inches. Its operation is based on the Windows CE 6 operating system. The version developed specifically for radio tape recorders has characteristics close to optimal. It takes a few seconds to turn on the device. The amount of RAM ranges from 128 to 256 MB. Firmware for the Kalina 2 radio has significantly improved the technical capabilities of the equipment. Now they are as follows:
- support for wav, wma, mp3 formats;
- 6 programmed shades of music playback;
- the display of the Lada Kalina 2 radio shows information about the song and album during playback;
- there is the ability to play video in wmv format;
- the multimedia system supports maximum video resolution at 320*240 pixels;
- it is possible to play video files of other formats, but for this you will have to use a convector;
- availability of FM radio;
- micro SD card support;
- Lada radio firmware makes it possible to view images saved in bmp, gif, jpe, jpg, jpeg formats;
- The maximum photo size is not limited, but if it exceeds 2 MB, then the Kalina multimedia firmware will open it from 2 to 10 seconds.
Rules for choosing an audio system
Before you begin installing the radio on Kalina, you should select it at a car dealership or hardware store. The choice should be approached carefully and carefully. And before going to the store, it is better to decide on your desires and capabilities.
When choosing a radio for your car, you should decide which music media will be used as the main one. This will help you save some money. If, for example, a car owner is sure that he will not need a CD or cassette player, then why should he overpay for a radio with these functions.
For those choosing CD players, there is one minor drawback that manufacturers are trying to combat - the loss of music fragments due to shaking during a trip. But progress does not stand still, and the mechanics are improving. The presence of ISO in the car and, accordingly, in the audio device will simplify the connection. The presence of a USB adapter will allow you to play music from various media.
Pioneer model range
When choosing a car radio, you should pay attention to the power ratings. They have a maximum and minimum threshold. Maximum power is rarely used, except in extreme situations. The choice should be made according to the rated power, that is, the one that is used most often. Manufacturers often indicate only maximum values on packages, so when choosing, you need to carefully study the instructions (passport), and not the box.
Other possible contacts
You may also encounter other markings on the product, so it will be useful to know them:
- AMP – contact responsible for turning on the power to the external amplifier;
- DATA IN/OUT – data input/output;
- LINE IN/OUT – linear input/output;
- ACP+/- – bus lines (most often used in Ford cars);
- AUDIO/R/L COM – common wire (ground), responsible for input/output for preamplifiers;
- SEC IN – additional input;
- ALARM – used to connect an alarm system (very often present in PIONEER radios);
- D2B-/D2B+ - optical communication lines.
Stages of dismantling the Kalina radio
Car owners do not always install a radio in an empty place. Often, before installing a new audio system, you have to dismantle the standard one. Many drivers are not satisfied with its quality and characteristics. In addition, according to reviews from car owners, the standard radio very quickly begins to “freeze”, “slow down” and “glitch”. That is why the owner of a Lada Kalina car first has to remove the existing audio system, and only then install a new one, chosen independently.
Stages of removing the original Kalina radio:
- dismantle the top removable panel;
- remove the plastic frame;
- using the keys included with the standard radio, remove the system from the tunnel: insert the keys into the sides of the radio and pull it towards you;
- disconnect the connectors with wires and the antenna.
You can install the radio with the help of specialists in a specialized center. But it’s realistic to do everything yourself, because there’s nothing complicated about it. The procedure takes no more than two hours, it all depends on skill and experience.
Car enthusiasts can give their stock radio another chance by tuning it. Reflashing the software settings will make the interface more convenient, the performance and service life of the device will increase.
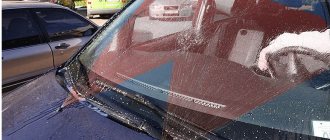
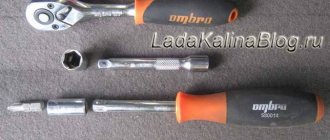
Removal process using plates
Before you start removing the radio, you need to prepare tools that will help you in this matter. You won't need very many of them. Basically you will need special plates that have hooks on their ends. Often such plates are included with the factory radio, but if they are not available, then do not be upset. After all, such devices can be made with your own hands and in a short time. They are made from frame windshield wipers, and you can simply ask for them at any auto store.
How to remove a radio without keys
The following steps of the procedure:
- To begin, insert the first plate into the slot, right under the “Search” button on the radio;
- Then we insert the second plate on the other side of the car radio;
- Then we pull the radio towards ourselves so that the hooks at the ends of the plate can better catch on to the body itself;
- Then we bring both plates to the center of the radio, and at the same moment you need to pull the device towards you.
Often, due to inexperience, there are cases when one or both plates slip off at once. Don't panic, nothing bad happened, you just need to repeat the whole procedure again.
Nuances of installing an audio system
Dismantling of the standard audio system is completed
Without knowing all the intricacies of connecting the radio, it will be impossible to carry out the installation correctly, as a result this will lead to rapid discharge of the battery.
Connect the radio in parallel sequence with the red and yellow wires. This connection allows the system to be turned on and off only using a button on the panel of the device itself. Sometimes the radio circuit is specially designed so that the amplifier is powered in standby mode. Such a system consumes more energy, so the battery drains quickly.
What is the correct installation of a radio? To begin with, you should highlight 4 main wires, each of which has its own color and performs a specific function. The black wire goes to ground, the yellow one provides power to the memory and the audio system itself, the red one provides a signal to turn on the MMC, and the blue one turns on the antenna and other possible devices.
Before connecting, professionals recommend assembling a simple circuit that will allow you to connect the radio through the ignition, due to which the battery will be charged much longer. When working with wires and circuits, you will need to pinout the connector. This will make the circuit easier to work with and understand.
The circuit is assembled in the following order:
- two diodes are soldered onto the board - VD1 and VD2;
- the red wire is soldered to the VD1 anode;
- another red wire is soldered to the cathode of VD1 and VD2;
- both blue wires are connected to the VD2 anode.
The joints can be protected with special cambrics - this will avoid breakdowns.
Before connecting the circuit, you will have to remove the radio and the slide; it is not necessary to remove the console.
All wires must be connected in the correct order:
- wire No. 1 is connected to the contact from the rear window heating button;
- The 2nd wire is connected to the multimedia system;
- wire No. 3 is soldered to blue, which is responsible for turning on the antenna;
- The 4th wire is soldered to the blue antenna wire.
The previously assembled board can be secured inside the torpedo with a fixed tie. When connecting all contacts, only the soldering method, insulated with heat shrink, is used. Screwing of wires is excluded. Before starting work, be sure to disconnect the battery.
With this connection, the radio will turn on only when the ignition is turned on, but if it is turned off, it will continue to work until the driver turns it off. Restarting is possible when the car is started again.
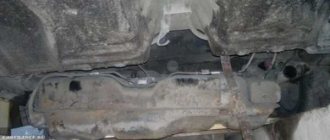
Dismantling the console containing the stove control unit
As you know, some trim levels of the Kalina-2 car do not have climate control. Here the driver can only control the operation of the stove. The stove control panel is held in place by 4 clips. In general, the mount used here is the same as in versions with climate control, but you won’t be able to remove the control unit panel unless you first remove the three control knobs.
Let's say we managed to dismantle the stove control unit panel. Then, all that remains is to remove the top flap, which is adjacent to the air ducts. This part itself needs to be pulled towards you from below, but first you need to unscrew two screws (they are circled in the figure).
Any device of standard size 1 DIN can be installed in the compartment intended for the radio. You don't need to dismantle anything to do this. It is difficult to imagine a situation in which it is really necessary to remove the center console panels, if we consider the “Normal” or “Standard” equipment.
on MMC 2190 with Grants-Lux. As was already written on the drive, the most difficult thing was to remove the climate panel... it didn’t want to come off the latches. But still, I managed to first snap it off with a plastic card from below, and then it all gave up)) The main thing here Don't rush, or you'll scratch the panel!
Well, then it’s a matter of technique. We unscrew a couple of screws on the air duct trim, carefully remove the panel itself, then the four screws of the radio and.
.Stop! I almost forgot about the antenna! We are looking for the antenna plug; I found it right under the glove compartment.
Then loosen the wire and carefully pull the radio towards you,
then we snap off a couple of connectors and voila!
Now we take our MMC from Granta, stretch the antenna to our plug under the glove compartment, immediately pull the USB connector into place, only in the reverse order. We insert it into its original place in the glove compartment
and pull to MMS. We snap the speaker and power connectors into place. We connect the MMC to the CAN bus. Since I’m going to install a rear view camera a little later, I immediately connected the adapter with a tulip to the rear view camera. It’s worth getting a little distracted here... Since I didn’t have connectors for connecting a camera and a CAN bus, and ordering it would take a long time, it’s expensive and I’m too lazy... I did it , as advised here on the drive, (many thanks to whoever came up with this!) took the connectors from the computer’s power supply, cut off the wires with the necessary contacts, after first removing the contacts themselves from the connectors.
I put heat shrink on the contacts for insulation and carefully inserted it into the MMC connector on the required contacts. I soldered a tulip for the video camera to the opposite end (I pulled it under the glove compartment so as not to remove the MMC again later). I did not connect the camera control, the Crosses already have a signal on the connector power supply when reverse gear is engaged. Next, we put our MMC in place.
New Lada: