string(10) “error stat”
If a rotating shaft comes out of the body of a mechanical device, it is necessary to ensure the tightness of the joint, because the moving parts “float” in the liquid lubricant that fills the body. A cuff is used to prevent leakage.
For the manufacture of modern O-rings, special types of rubber, rubber or silicone are used. The outer side of the diameter does not bear friction loads, is intended for fixation in the hole, and can be hermetically attached to a metal mounting ring (glass).
But there are special requirements for the internal side. The rear axle gear oil seal operates under difficult conditions. High temperature, continuous rotation, exposure to reagents from the road surface. All these factors accelerate rubber wear, so replacing the oil seal is a regular routine procedure.
How often is the gearbox seal replaced?
The frequency of standard replacement is indicated in the manual. Over time, rubber loses its elasticity, oil begins to leak, and the cuff cannot be restored. In addition, it makes sense to change the oil seal when repairing and servicing the gearbox itself. Even if it is in good condition, you will definitely damage the material when removing the shank.
If, when the season changes (from summer to winter), the bushing “snotty”, that is, the surface around the shaft axis becomes oily, it’s time to replace the gearbox seal. Soon he will lose weight completely.
And, of course, if there is a rupture and loss of tightness, it is necessary to stop using the vehicle and change the cuff. Otherwise, saving on matches will cost you expensive gearbox repairs.
List of required tools
You will need:
- Screwdriver Set
- Set of wrenches
- A socket wrench or a socket on “24” (a wrench will be useful for the head)
- Hammer
- Oil container
- Hex wrench (to unscrew the drain plug)
- Special two-jaw puller
- Torque wrench
- Syringe for filling grease
- Jack
- Supports (stands) for the body
Attention: Unskilled replacement of the oil seal in the rear axle gearbox can lead to disassembly and repair of the entire axle gearbox, which is only possible in a workshop; the cost of the issue increases many times over. If you don’t know how to do it yourself, use the advice and help of a familiar specialist, or go straight to a service station.
Why does the gearbox seal fail?
- The gearbox breather is clogged. When heated during movement, air pressure squeezes out the oil seal, it becomes deformed, and the internal stiffener wears out;
- Incorrect tightening torque of the propeller shaft flange nut on the gearbox leads to rapid wear of the oil seal;
- A low-quality cuff is installed, its service life is unpredictable;
- Contact with a hard object - a broken tooth from a gear, a piece of a broken retaining ring;
- Aggressive additives in gear oil;
- Chemical effects of reagents on road surfaces;
- Failure to change the oil in a timely manner leads to overheating of the gearbox; the oil seal cannot withstand too high a temperature.
Crankshaft structure
The crankshaft is installed in the lower part of the engine directly above the oil sump and consists of:
- main journal - the supporting part of the part on which the main bearing of the engine crankcase is installed;
- connecting rod journal - stops for connecting rods;
- cheeks - connect all the connecting rod journals with the main ones;
- toe – the output part of the crankshaft on which the timing gear drive pulley is fixed;
- shank - the opposite part of the shaft to which the flywheel is attached, driving the gears of the gearbox, and the starter is also connected to it;
- counterweights - serve to maintain balance during the reciprocating movements of the piston group and relieve the load of centrifugal force.
The axis of the crankshaft is the main journals, and the connecting rod journals are always alternately shifted in the opposite direction from each other. These elements have holes for supplying oil to the bearings.
The crankshaft crank is an assembly consisting of two crankpins and one crankpin.
Previously, prefabricated crank modifications were installed in cars. Today all engines are equipped with solid crankshafts. They are made from high-strength steel by forging and then turning on lathes. Less expensive options are made from cast iron using casting.
Here is an example of creating a steel crankshaft:
Step-by-step instructions for DIY replacement
After installing the vehicle on the inspection hole, it is secured using anti-recoil devices. It is recommended to disable the handbrake first. To remove the old seal, you must first disassemble the rear hub assembly and remove the axle shaft.
The unit must be disassembled in strict accordance with the instructions:
- The wheel nuts are loosening. After this, jack up the car and remove the wheel.
- There may be rust on the rear axle shoulder that extends past the brake drum that needs to be removed. The part is additionally treated with lubricant.
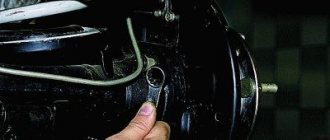
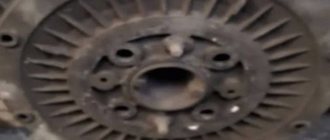
- There are two fastening bolts on the drum, to unscrew them you will need a 12 mm wrench. The drum is gently tapped with a hammer, which allows it to move.
- You can use 2 methods to remove the drum. It is squeezed out using bolts that are provided for fastening. The drum is knocked down with a hammer. The procedure is performed as carefully as possible to avoid damage to the edges.
- The axle shaft seat is cleaned, which will ensure easy removal of the drum in the future.
The next step is to remove the axle shaft. The Chevrolet Niva has 4 bolts designed to secure the axle. The shock absorber is held in place by a bracket located on the other side of the axle shaft. Once all the bolts are removed, the shock absorber will not hold the rear axle, which is pushed down by the spring.
If oil leaks, you need to jack up the vehicle higher and place a container to collect the fluid under the work area. If the rear axle stocking rests in an inclined position in the other direction, this will eliminate the oil leak.
If the shock absorber is attached to the spring cup, there is no need to unscrew it. In this case, do not use a stand. To unscrew the 4 bolts that secure the rear axle shaft, you must use a 17 mm wrench
When performing the procedure, pay attention to the growers, which should not be in the rear mechanism. If the old groover gets lost and the mechanic installs a new part, it will get caught in the space between the drum and the shoe, causing the wheel to jam in the vehicle. After unscrewing the bolts, the axle shaft is removed with a sharp movement along with the bearing
If you can’t pull it out of the holder, it is recommended to secure the wheel to the stud with three nuts and pull it firmly. At home, you can tie the wheel to the garage door with a rope. They knock on the gate with a hammer and the axle shaft comes out of the cage
After unscrewing the bolts, the axle shaft is removed with a sharp movement along with the bearing. If you can’t pull it out of the holder, it is recommended to secure the wheel to the stud with three nuts and pull it firmly. At home, you can tie the wheel to the garage door with a rope. They knock on the gate with a hammer and the axle shaft comes out of the cage.
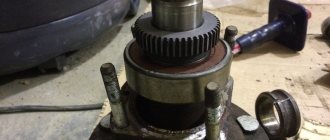
After dismantling the axle shaft, the technician will have access to the metal shield intended for attaching the brake pads. It is fixed with two upper bolts, which are inserted into the holes. The remaining actions are performed in accordance with the instructions:
- There is a thick rubber lining on the rear axle flange, which is recommended to be removed.
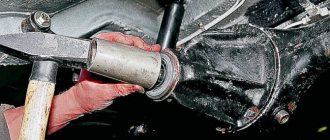
- The old oil seal is pryed off with pliers or a screwdriver and removed from its installation location, which must be cleaned and wiped with a rag.
- Apply a small amount of transmission oil to the new seal. It is installed in a seat in a level position.
- The oil seal is pressed with a round attachment, which is made from a pipe. To avoid damage to the rubber gasket, it is recommended to use the old oil seal during pressing.
After replacing the oil seal, all parts are cleaned of oil - pads, brake cylinder, metal shield and drum. Before assembling the axle shaft, it is recommended to inspect its bearing. If there is no lubrication, the part is processed. If signs of bearing wear are observed, it is replaced with a new part. The need for replacement is determined by sticking or slight noise or difficulty rotating. If malfunctions are observed, then the axle shaft should be taken to a service center, since the bearing can only be replaced with special equipment.
Upon completion of the oil seal replacement work, the oil in the rear axle gearbox is checked. To do this, unscrew the filler plug from the gearbox casing and visually determine the amount of fluid. If there is not enough oil, it is added through a hose that is inserted into the filler neck.
Purpose of the rear axle gearbox
Rear axle gearbox
It is impossible to directly apply torque from the engine to the drive wheels: they will rotate too quickly and it will be impossible to control the car. Some kind of intermediate link is needed between the engine and the wheels. Such an intermediate link is the rear axle gearbox. Its task is to receive torque from the engine and apply it to the drive wheels, having previously distributed it depending on the distance traveled by the wheels.
Surgery or therapy?
So, our “wounded” axle is leaking oil around the drive gear flange, and we are ready to save it. But first, as is usual with serious doctors, you need to figure out the cause of the “disease.” How does an appointment with a local therapist usually begin? Of course, from measuring temperature and pressure. You may be surprised, but when starting to repair a bridge, we should also remember these physical characteristics. And that's why. During operation, the drive axle gets quite hot - the temperature in the crankcase can reach 80 degrees Celsius. And since, ideally, the axle housing is a sealed container, along with heating in a confined space, the pressure also increases. This is the law of physics. The increased pressure additionally loads all the seals and gaskets of the bridge, breaking out where, for some reason, there is less resistance. This is often the drive gear seal, which is subject to the most intense friction. To reduce pressure, a valve (breather) is installed on the axle housing, which releases excess pressure. Therefore, the first thing you need to start diagnosing a leak is by checking the functionality and cleaning the breather from dirt. The valve cap should rotate freely. When you lightly press the cap from above, it should move freely and return to its original state when the load is removed.
If cleaning the breather does not help, and the leak continues, it’s time to prepare “surgical instruments”. In our case, a regular plumbing kit will be enough, although it would be nice to grab another skein of thread and a hand balance scale (dynamometer) with a good scale.
Replacement sequence
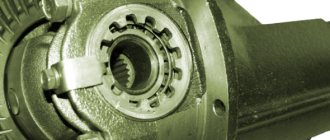
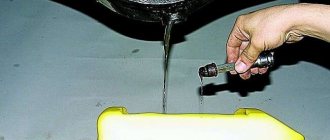
- The car is installed above the inspection hole. The plug on the rear axle is unscrewed, and the oil from the gearbox is drained into a previously prepared container. The cylindrical flange of the gearbox is wrapped with nylon thread, which is then attached to the dynamometer. The dynamometer is pulled down until the flange begins to rotate. The value observed on the dynamometer at the moment the rotation begins is stored or recorded.
This force is measured using a dynamometer
For this operation it is convenient to use a 27mm spanner.
The flange has been removed from the shank
This operation requires a tube and a hammer.
The flange is tightened with a torque wrench
Video: How to carry out work on a VAZ 2107
How to turn on the front axle on a UAZ
Engaging the front gear may be necessary if it is necessary to turn from an asphalt road surface onto a country road or terrain with potholes and mud. In the new conditions, rear-wheel drive will not cope with difficulties. Engaged front-wheel drive is a means of solving the problem.
System startup sequence:
- Stop the car and check the operation of the front wheel quick release clutch. It is turned on by turning the wheels clockwise until they stop.
- Move the rightmost lever forward to switch the front wheels to driving status. Now their rotation will be equivalent to the rear.
If the road condition worsens while driving, it becomes more and more difficult to continue driving, the engine stalls, you need to stop the vehicle and engage a lower gear. To do this, you will need to move the middle lever back. In low gear, all 4 speeds are available, and driving becomes easy and smooth again.
After overcoming off-road conditions, it is immediately better to put the middle lever in its original position and move the transfer gearbox to a higher level. On the highway, it is recommended to stop the front-wheel drive and quick-release clutches to save 2 liters of fuel. The measures help reduce noise levels while driving.
Maintenance Recommendations
Carry out an inspection of the technical equipment strictly in accordance with the developed schedule, provided that the car is under warranty service. After the expiration of the period, you need to individually agree on a new schedule at the auto repair shop where you plan to get serviced. Eliminate wheel slipping from your driving style.
In order for the seal material to be elastic for a long time, it is necessary to fill the hydraulic base with the required marking. It can be either a synthetic or semi-synthetic base. It is better not to use mineral for a car of this class.
How to identify faults and repair the front axle of a UAZ
UAZ is a common car on Russian roads. Its design features allow you to move without problems on paved areas, as well as off-road. Repairing the front axle of a UAZ is impossible without knowing the diagram of the wheel gearbox, the design of which is similar to a similar part of the rear axle. The key difference is the peculiarity of fastening and installation of the main gear, the design parameters of the ball bearing located in a special compartment-cup.
Basic driveshaft faults
Defects that occur in the cardan may have various external signs. Among the most characteristic are shocks under the bottom of the car, vibration and hum, especially strong during acceleration. The nature of the symptoms can tell you a lot about which parts will need to be replaced.
A number of simple faults can be easily repaired with your own hands. To successfully complete the procedure, you must have at least minimal knowledge of the HF device, as well as have a set of tools. If the problem is serious, then it is better to entrust its solution to professional services. Independent intervention in this case can lead the cardan to a condition beyond repair.
1. Blows, kicks when turning on the gearbox
If starting from a stop is accompanied by metallic impacts, and vibration is felt during acceleration:
- The first thing you need to do is inspect the crosspiece on the driveshaft. It is very likely that it collapsed. And the blows are a consequence of play in the needle bearing. In this case, it is necessary to replace the part.
- It is also necessary to check the tightness of the propeller shaft bolts
- The movable splines also wear out with the formation of backlash. If a defect is detected, the splines must be replaced.
- Shocks can be caused by play in the stationary splines of the outboard bearing. This malfunction can also be eliminated only by replacing parts.
- Possible play in the CV joint of the cardan. In some cases, it is enough to rebuild the joint and replace the lubricant. If, as a result of these actions, the malfunction does not go away, you need to change the CV joint.
2. Constant or periodic creaking
When you press the accelerator pedal, a squeaking or squeaking noise may occur. It is recommended to carefully study its features, first of all, determine whether the extraneous sound occurs constantly or periodically. For example, when the car warms up, the squeak goes away or remains.
- Jamming of the cardan cross, which is also manifested by vibration. A clear sign of such a defect is rusty smudges from the needle bearing seal. You will have to spend money on replacing the crosspiece, since the old one is already damaged by the needle bearing.
- The intermediate support bearing of the propeller shaft is worn. This diagnostic result entails the replacement of the faulty element. The defect often appears at low temperatures.
3. Constant hum, howl or whistle, increasing with speed
A hum, noise or whistle of a constant nature, only increasing as the car accelerates, indicates a malfunction of the intermediate support bearing. This means that the lubricant in it has already dried out, and moisture has penetrated into it, causing corrosion.
In this case, it is impossible to do without a thorough diagnosis of the intermediate support. If the results confirm that the bearing is faulty, it must be replaced with a new part as soon as possible.
A situation is likely when the bearing jams. In this case, it rotates in the seat where it is pressed into at the factory. If this happens, then simply replacing the bearing cannot solve the problem. It is necessary to either restore the seating surface or replace this part as well.
We recommend
“Diagnostics of automatic transmission: to prevent serious damage to the car” More details
4. Oil leaks at the junction of the cardan with the gearbox
- Where the driveshaft and box connect, there is a receiving flange with an oil seal. Over time, this O-ring loses its elasticity and ability to provide a tight seal. Therefore, periodic replacement of the oil seal is necessary.
- If the design of the CV is such that the movable splines are connected to the gearbox, the spline bushing should be inspected. The formation of burrs and roughness on this element is likely. There are two possible ways to solve the problem. It’s good if you can remove these defects with sandpaper. If it doesn’t help, the only solution is to replace the splines.
5. Ringing in the cardan pipe
- The cover that prevents lubricant from entering the pipe may fall off. The problem is solved by cutting the CV and fixing the cover by welding.
- The lead core support has become detached or broken. There are no pipes with lead cores on sale, so you will have to replace the entire cardan.
- The scale formed during welding of the driveshaft may remain inside. Most often, the driver does not notice this at all. But there are times when especially large pieces of scale ring while driving. It is necessary to cut the cardan and remove them.
6. Ringing from the driveshaft
The most likely cause of the ringing is poor fastening of the intermediate support mud deflector. You need to position it in the center and weld it in four places.
7. Scraping or shuffling sound while driving
During rotation, the driveshaft touches parts of the car body. Most often, the driveshaft is interfered with by the gearbox housing or exhaust system parts.
Repair of Pajero II transfer case shank
One fine day I drove into a small hole, the car shook, and clicks began to be heard in the body, as if the cardan cross had “arrived.” When the speed decreased, the symptoms disappeared and only appeared at speeds of 20-50 km/h. with a successfully found hole. Since the crosspieces were checked a couple of weeks ago, and the transfer case shank was already on the verge (the fork play in it reached 5 mm), I decided that on some unpleasant bump the crosspiece came out at abnormal operating angles and jammed, and the cardan at these moments rotates radially. A council gathered, we went to torment the car, ride in the pits, etc... then in the pit, with a smart look, we took turns shaking the shank and decided that it was his fault
Video about the difference between RPM Shniva and VAZ 2121:
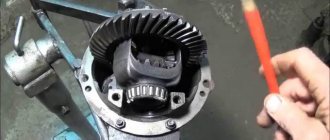
Knowing the reason for the gearbox wedge and knowing how to fix it, I went to a hardware store and bought 6 liters of kerosene. Kerosene turned out to be very expensive, 2 bottles of 3 liters cost me 700 rubles... I also went to Automaton in search of new bolts for the planetary gear, but found only ordinary ones, with a strength of 8.8... I bought a thread locker, sealant, a new spacer sleeve, oil seal and CV joint lube . Then I remembered that at my dacha I had the offal from a new factory gearbox, and from them I took the necessary bolts. I came home and started repairs. Using a Grover, I removed the roughness and burrs from the gearbox that arose from loose bolts. I took out the drive gear and washed its bearings in kerosene. I washed the pads on the self-block and the self-block itself, the main pair and also the gearbox housing itself. I put the spare parts under the battery to dry.
The stench from kerosene was all over the house, but there was nowhere to go... The next day, in order not to rush to the dacha, my friend and I moved the table with a vice to the house and we began assembling the gearbox. The old oil deflector washer was somehow all mangled, so I replaced it with a new one, and also installed a new oil seal, since the old one was torn.
Before screwing them into the GP driven gear, I lubricated all the bolts with blue thread locker.
Chevy Niva front axle structure:
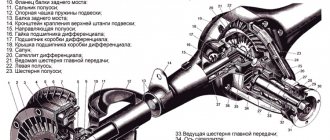
1 – mud deflector; 2 – lower cover of the gearbox housing; 3 – drive gear bearings; 4 – differential housing; 5 – drain plug; 6 – filler and control hole plug; 7 – bearing of the internal hinge housing; 8 – oil seal; 9 – housing of the internal wheel drive hinge; 10 – spring washer; 11 – retaining ring; 12 – bearing cover; 13 – adjusting nut; 14 – differential box bearing; 15 – bearing cover; 16 – cover fastening bolt; 17 – support washer; 18 – satellite; 19 – axle gear; 20 – gearbox housing; 21 – breather; 22 – bearing cover of the internal hinge; 23 – satellite axis; 24 – adjusting ring; 25 – drive gear; 26 – bearing spacer; 27 – drive gear oil seal; 28 – flange.
The front axle of the Niva Chevrolet consists of a main gear and a differential installed in one housing. The differential, final drive gears and gearbox bearings of the front and rear axles are the same. The front axle gear housing is cast, covered with covers at the front and bottom. The crankcase covers are sealed with gaskets.
About the consequences of untimely “treatment”
And just as a runny nose can lead to serious problems in the body, even some kind of meningitis, oil leaking from the bridge can lead to serious “diseases” of the drive axle: overheating and jamming of bearings, scuffing on the surface of the gear teeth of the main pair, their rapid wear, increased noise and other troubles, including jamming of the main gear itself. Therefore, if you discover severe oiling in the area of the drive flange, or, even worse, an oil stain on the ground under the gearbox, you should not delay the “operation”. However, if “well, I can’t go on sick leave right now,” then by regularly monitoring and replenishing the oil level in the gearbox, the car can be operated for some time without any special consequences for the health of the bridge.
