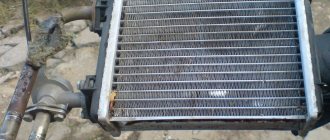
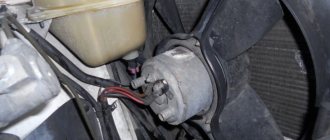
Removing a faulty radiator from its socket
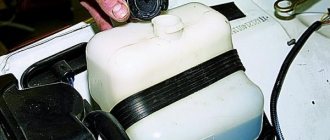
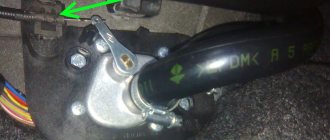
To avoid the formation of an air lock in the cooling system, remove the hose from the throttle body
Video: replacing the radiator of a VAZ 2114 stove
During the operation of a car, situations arise that any car enthusiast can resolve independently. Replacing a stove radiator is precisely this type of operation. As you can see from the article, doing this yourself is quite simple. The main thing is that after removing and installing the radiator, you do not have any unnecessary parts left, and all screws and clamps are tightly tightened. Good luck on the roads!
Instructions for replacing the cooling system pipes of the VAZ-2114
In cars of domestic manufacturers, engine cooling occurs using a cooling system; in the VAZ-2114, this task is performed by antifreeze. Only with the right choice of antifreeze can you ensure efficient operation of the cooling system:
- Factory antifreeze fluid is worse; due to the smaller amount of additives, the thermal protection of the vehicle suffers significantly. Antifreeze was developed specifically to cool vehicle parts and components, so it is exceptionally useful.
- Factory fluid has one big drawback - it quickly spoils the pipes, which in turn leads to fluid leakage and radiator defects.
Having convinced himself of how important it is to use high-quality antifreeze, the driver of the VAZ-2114 begins to replace the old fluid with a new one.
In this case, after a couple of weeks an antifreeze leak is detected, what’s the matter? The owner of the car did not take into account that along with the antifreeze, the pipes through which leaks occur must also be replaced. Experience shows that old hoses are absolutely unusable; antifreeze corrodes them very quickly. Therefore, it’s time to learn how to replace pipes, and finally close the question of the correct operation of the cooling system. Service station specialists will tell you how to implement your plan.
Subtleties of filling new antifreeze
Before you start filling in new coolant, you need to drain the old one, and also thoroughly clean the entire cooling system of contaminants. To do this, it is better to use a special cleaning agent that can be purchased at a car enthusiast store. Make sure that all taps and plugs of the VAZ-2114 are open. You can determine whether the system has been flushed or not based on the color of the antifreeze flowing out.
The plugs and tap are closed only when the product becomes transparent. If the manufacturer describes in the instructions the specifics of using the cleaning mass, follow these rules for effective cleaning. As for the level of antifreeze filling, some drivers prefer to fill to the limit mark, others deliberately do not top up, and later, after a successful test, add more fluid.
After the antifreeze has been replaced, all that remains is to close the expander and start the car engine. The motor should idle until the furnace fan starts running.
Replacing the stove tap
It often happens that a part such as a faucet breaks (it is worth noting that on the 2114 it is not very reliable). When replacing it, you should simultaneously replace the pipes, even if they are in good working order (the location of the pipes of the VAZ 2114 stove was described above).
All faucet replacements are performed in the following order:
- place the car in the pit and secure it;
- unscrew the screw plug and drain the coolant;
- using a screwdriver, loosen the clamps on the pipes located in the engine compartment, and then remove them;
- find the tap in the passenger compartment on the passenger side (located under the panel), loosen the clamps of the pipes suitable for it, and then remove them;
- Using a 10mm wrench, unscrew a pair of nuts screwed onto the studs and securing the valve body;
- from the interior side, pull out the tap and disconnect the control cable from it;
- install a new (similar) faucet in its original place;
- perform assembly in the same sequence, but in reverse order.
Before disconnecting the pipes (especially those located in the passenger compartment), you should place a cloth under them in case of coolant leakage.
Many car enthusiasts who carry out such a replacement are sometimes interested in how to properly connect the pipes to the VAZ 2114 stove? After all, by mistake or forgetfulness, you can connect them incorrectly, which will disrupt the normal circulation of coolant.
In order not to make a mistake, it is worth remembering that the connection diagram for the connection pipes of the VAZ 2114 stove is as follows: the pipes located in the engine compartment are connected: the first - from the tap (inlet) to the hole in the cylinder head, the second - from the tap (outlet) - to "saxophone". The connections in the cabin are connected: the first - from the tap to the thermostat, the second - from the tap to the pump inlet.
For even greater convenience, you can use the following general diagram of the heating system:
It is worth noting that the pipes located inside the cabin vary greatly in length, so it is extremely difficult to confuse their location.
Repair and replacement of faulty stove elements
It is completely impractical to change the VAZ 2113–15 stove. First of all, this is quite expensive - buying a new stove without a tap and pipes will cost 4-5 thousand rubles. Moreover, replacing the heater is very labor-intensive - you will need to completely remove and then reinstall the panel. The job may take a full day and will require an assistant. It is much easier to identify the faulty element and replace only it.
Restoring the stove radiator
If a stove radiator is clogged from the inside, you can try to clean it of scale and deposits with various household cleaning products, such as Comet, Krot, Silit, or other chemically active substances. Some car owners use Coca-Cola for this purpose.
It is better to carry out the flushing procedure with the radiator removed, but you can do without dismantling it. To do this, drain the coolant from the system, remove the pipes from the radiator and pour a cleaning agent inside. Then the engine starts, the heater turns on and runs for several hours. After this, the radiator is thoroughly washed by connecting a hose with running water to it and dried with compressed air.
In the event of a leak, restoring the radiator is much more difficult. This can be done by soldering. However, most radiators are made of aluminum, damage in which can only be soldered with a powerful soldering iron using special fluxes and solders. But even in this case, there will be no guarantee that the radiator will be fully operational. It is much easier to replace it - a new product for the VAZ 2113-15 costs about a thousand rubles.
Replacing a stove radiator without removing the panel
The VAZ 2113–15 instruction manual states that access to the radiator can only be achieved after dismantling the panel. However, craftsmen came up with an algorithm for replacing the radiator with only partial disconnection of the panel from the body. To do this you will need:
- crosshead screwdriver;
- keys for 7, 10 and 13;
- a container for draining coolant from the cooling system with a volume of at least 5 l;
- a wide and shallow container for draining liquid from the heater radiator;
- dry rags;
- oilcloth or thick polyethylene film.
The radiator is replaced as follows:
- We drive the car onto an overpass or inspection hole.
- Disconnect the negative terminal from the battery.
- Using a 10mm wrench, unscrew the bolts securing the engine protection and remove the protection.
- Place the container under the drain plug, unscrew it with a 13mm wrench and drain the coolant.
The self-tapping screw is closed with a plastic plug
The instrument panel is secured with four self-tapping screws
The steering column cover is secured with six self-tapping screws
When replacing the radiator, you need to remove the cigarette lighter and radio connectors.
Remove the plastic covers on the damper control levers
The upper part of the console is attached to the sides with two self-tapping screws
To remove the connector you need to unscrew two screws
Before removing the console, you must disconnect all electrical connectors.
The base of the panel is attached to the floor with two screws
On the sides the panel is attached to the body with self-tapping screws at the top and bottom
In the center the panel is attached to the base with self-tapping screws
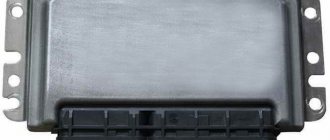
All connectors are disconnected from the control unit
The partially dismantled panel is pulled back and fixed
The pipes should be removed gradually, allowing the coolant to flow into the container without pressure.
The radiator is secured with four screws
Video: replacing the VAZ 2113–15 heater radiator without dismantling the panel
Replacing the heater tap
To replace the stove tap you will need:
- wrenches 10 (preferably socket) and 13;
- crosshead screwdriver;
- dry rags.
The algorithm of actions is as follows:
- We place the car on the inspection hole, unscrew the bolt plug and drain the coolant.
- In the cabin, unscrew the four screws securing the left panel cover.
- In the engine compartment we find pipes going from the engine to the tap. Use a screwdriver to loosen the clamps and remove the pipes.
The pipes are fixed with metal clamps
To dismantle the tap, you need to unscrew two nuts with a 10mm wrench
Before dismantling the tap, you need to disconnect the drive cable from it.
The process of replacing the VAZ 2113–15 heater tap is described in more detail here.
Replacing stove pipes
When replacing a heater radiator or heater tap, it is advisable to replace the pipes as well. To ensure access to them, you will need to perform the actions provided for in paragraphs 1–25 of the instructions for replacing the radiator. Then you need to loosen the clamps and remove the pipes from the stove tap from the passenger compartment. After this, the pipes going from the engine to the tap are disconnected from the engine compartment. All this is done using a Phillips screwdriver.
After installing new pipes, do not immediately tighten the clamps too much. First you need to assemble everything, add coolant, start and warm up the engine and check the connections for antifreeze leaks. When the rubber of the pipes warms up, the clamps can be tightened a little more.
Replacing the heater resistor
If the stove fan can only operate in one mode, regardless of the switch position, you need to check the resistor. To do this you will need:
- Phillips screwdriver;
- fine-grained sandpaper;
- multimeter
The work order is as follows:
- Disconnect the negative terminal from the battery.
- Using a screwdriver, unscrew the screws securing the right cover of the center console.
To remove the cover you need to unscrew four screws
The resistor is installed on the heater housing
To determine the health of the resistor, you need to measure the resistance of its windings
Replacing the heater switch
If, after replacing the resistor, the stove fan continues to operate in only one mode, you need to check the switch. To remove it you will need a Phillips screwdriver and tweezers or scissors.
The work is carried out in the following order:
- Disconnect the negative terminal from the battery.
- Unscrew the fastening screws and remove the right console cover.
- Pull out the switch handle.
How to remove the stove on a VAZ 2114
Let's start with the fact that on a VAZ 2114, replacing the heater radiator is fraught with some difficulties. In other words, in order for the replacement of the VAZ 2114 stove to be carried out efficiently, it is necessary to separately take into account certain subtleties and nuances.
To begin, you need to prepare:
- Screwdriver Set,
- spanners;
- coolant drain container
- new radiator, faucet, etc.
Before replacing the VAZ 2114 heater radiator, you need to drain the coolant (if the coolant has not been changed for a long time, then it is better to combine the heater repair with replacing the antifreeze or antifreeze).
- First, you will need to unscrew the self-tapping screw located under the plastic plug in the cabin, unscrew the fastenings of the instrument panel, and also loosen the fasteners of the instrument panel. The shield does not need to be removed.
- Next, unscrew the lower fasteners and remove the steering column cover. Then the connector for the cigarette lighter is removed, the radio is dismantled, etc.
- When removing connectors and plugs, it is better to sign or mark them so that there are no problems during reassembly.
- When all the elements are removed, access to the plastic console will open. The symmetrical screws on both sides should be unscrewed.
By the way, replacing the VAZ 2115 stove is carried out in a similar way. The main thing is to get to the heater radiator. Having gained access, through the gap you can remove the radiator, which is held in place by clamps. By removing the specified clamps, the remaining coolant is drained. Now you can replace the radiator with a new one, installing it in place of the old one and securing it securely.
VAZ (Lada) 2113/2114/2115 1997 - 2014
Tell me, when replacing the pipe that goes from the stove to the cylinder head, do you need to drain all the antifreeze? And how can I get to the stove myself to unscrew the clamp? VAZ 2115
- At idle, cold air from the heater, VAZ 2115 - 5 answers
- The engine does not heat up to operating temperature on a VAZ 2114 - 3 answers
- How to remove the stove on a VAZ 2114? – 2 answers
- The VAZ 2114 stove does not work - 1 answer
- How to replace the stove tap 2114? – 1 answer
Almost all of the antifreeze is drained; to get to the stove you have to kneel down and crawl under the panel.
From the cylinder head, pipes go to the faucet, and from there other pipes go to the stove.
Note, if you did not intend to change the coolant, but repair work involves draining the coolant. You will need a meter of PVC pipe (two pieces of half a meter each) with a diameter so that it can fit into the thick pipe of the expansion tank. We remove the pump from the washer reservoir (or buy a new one). We put tubes on the pump, insert one tube through the expander into the pipe as deep as possible, the second tube into the container, and power the pump. You can, of course, use the washer function, but then you will have to raise the brushes.
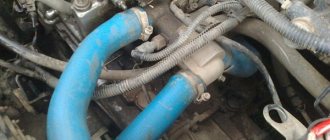
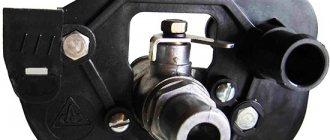
Attaching the inlet and outlet hoses to the tap pipes in the engine compartment.
Personally, I made it easier by unscrewing the pipe to heat the throttle. stuck the unit into the canister and started the cold car, but I bet not all the antifreeze was spat out, but the remainder was below the level of the heater radiator, so it didn’t interfere.
Subscribe
to our channel in
Index.Zen
Even more useful tips in a convenient format
How to remove the stove on a VAZ 2114?
The VAZ 2114 stove does not work
At idle, cold air from the stove, VAZ 2115
The engine does not heat up to operating temperature on a VAZ 2114
Purpose, location and design of the VAZ 2113–15 stove
Unlike classic Zhiguli models, the VAZ 2113–15 stove copes with its duties quite well. If it is in good working order, the inside of the car will always be warm. The air flow distribution system is also implemented quite well, so the windshield, even in severe frost, is completely cleared of ice in a few minutes.
Purpose of the heater
The main function of the stove is to heat the interior and windshield. Hot air supplied through the duct system to the windshield prevents it from freezing in winter. In the warm season, the stove is used for forced ventilation of the interior.
Location and design of the stove
The VAZ 2113–15 stove is located in the front part of the cabin under the center console of the dashboard. Only the heater controls and deflectors through which air flows are brought into the cabin.
The interior heater of the VAZ 2113–15 is closed by the center console
The stove consists of the following elements:
- casing;
- radiator;
- tap;
- inlet and outlet pipes;
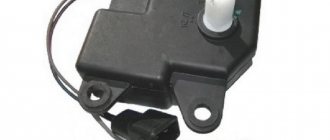
- electric motor with a cylindrical impeller;
- windshield defroster;
- control valve;
- foot air damper;
- control module (mode switch, resistor, damper control levers).
Operating principle of the stove
The operation of the stove is based on heat exchange between the heated coolant (coolant) and the air entering the cabin. The basis of the design is the radiator. It is a system of tubes within which heated coolant supplied from the power unit circulates. The tubes are equipped with thin lamellas, allowing for more efficient heat transfer to the air.
The radiator is covered by a casing, which is the body of the stove. On one side there is an electric fan that pumps air into the device. By varying the fan rotation speed with a switch that changes the resistance of a special resistor and located on the central panel, you can regulate the intensity of the air flow entering the cabin.
Circulating between the radiator lamellas, the air heats up and enters the passenger compartment through air ducts located in the front part of the heater. The distribution of flows is carried out using three dampers, one of which (control) regulates (opens or closes) the flow of air into the cabin, and the other two (air blowing for the legs and windshield) change its direction.
The basis of the design of the interior heater is the radiator
The stove can be completely disconnected from the engine cooling system using a tap that shuts off the coolant supply to the radiator of the heating system.
Replacement of VAZ-2114 heater valve, fan and radiator
We drive onto a pit or overpass. We put the car on the handbrake and first gear. Drain the coolant into the prepared container. To do this, first, with the expansion tank cap closed, unscrew the drain plug on the engine cylinder block (if the tank cap is sealed and tightly screwed, then antifreeze will hardly flow). Then, instead of the drain plug, we screw in a hose (from a mixer works well) and open the reservoir cap - the coolant flows neatly into the container with minimal losses and without getting dirty on the engine.
We loosen the clamps of the pipes going to the valve from the engine. From the engine side, use a metal brush to clean the threads of the 2 bolts securing the faucet to the engine compartment bulkhead. Then we conscientiously treat these threads with WD-40 or brake fluid. This is a mandatory condition, failure to comply with which can lead to serious difficulties when unscrewing the nuts. We leave the dirt and rust on the threads to “acidify” and do not tighten the nuts yet.
We remove the pipes. Let's go to the salon. We dismantle the side trim of the torpedo in the middle at the feet on the passenger side. Loosen the clamps of the pipes at the tap. We prepare a rag to collect a small amount of antifreeze that may leak onto the carpet when removing the pipes. Disconnect the pipes. We return under the car. Using a 10mm wrench (socket or socket), unscrew the nuts of the faucet mounting bolts.
In the cabin, pull the faucet towards you. Then we remove the control cable clamp from it, and then disconnect the cable itself. We install the new tap in the reverse order.
Tips for purchasing and replacing pipes on a VAZ2115
As with any car, a moment arises when it becomes necessary to replace the pipes of the ventilation and heating system of the car interior. Malfunction occurs for various reasons. Pipes get cracked due to frequent temperature changes. Sometimes the ingress of oils and gasoline also leads to malfunction. Usually cracks and holes form in the pipes under the fastening clamps. If the pipes are of poor quality, a sharp increase in pressure in the cooling system (ICE) of the car engine also leads to malfunction of the pipes.
Saving tip
There is a need to replace the pipes with new ones. You should not spend money on new pipes manufactured specifically for the cooling and ventilation system of the VAZ2115. In a year they will crack and tear. It is better to buy a heater hose from a gazelle car with a diameter of 16mm. A 3 meter long hose will be sufficient. According to the outer diameter of the hose, clamps are purchased for mounting on fittings.
Buying pipes from hand or on unverified Internet bulletin boards can result in untimely breakdown or bursting of the installed pipes, which in turn will make it impossible to cool the engine while running; the consequences can be the most dire. You should purchase original parts or analogues through trusted sellers; if there are none nearby, modern technologies allow you to find the necessary pipes and place an order via the Internet. The main sellers of spare parts for VAZ cars are stores such as Lada-Detal (lada-original.ru - original parts), zaphastivaz.ru (analogues and original), Exit (exist.ru original and analogues), lada-autodetal.ru and others online stores. Before purchasing online, you need to check the store’s reviews and legal details of the store.
To replace faulty pipes, the machine is placed on an overpass, in an inspection hole. The car engine must cool down for at least an hour.
Cooling system design
When the engine is running, a lot of heat is generated for removal, which is used by the car’s cooling system, consisting of the following components:
- 1 - Heater radiator.
- 2, 3 - Outlet, underwater pipes of the heater.
- 4 - Pump hose.
- 5 - Pipe coming from the expansion tank.
- 6, 12 - Steam removal hoses.
- 7 - Tank cover.
- 8 — Expansion tank.
- 9 - Thermostat.
- 10, 19 - Outlet pipes.
- 11, 13 - Supply pipes.
- 14 - Cooling radiator.
- 15 — Radiator drain plug.
- 16 — Radiator blower fan.
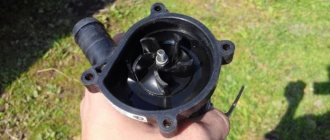
- 17 - Pump
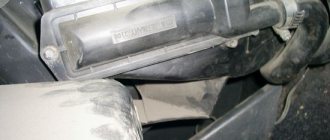
You need to drain the coolant from the system. Open the expansion tank cap. Remove the sides of the instrument panel in the cockpit. Open the liquid supply valve to the stove radiator. Drain the coolant into a 10-liter container by loosening the clamp on the liquid supply to the stove radiator and disconnecting the pipe itself. In this case, you need to be careful not to let the coolant get into your eyes. Direct the end of the pipe into the container, since the liquid from the container, after replacing the pipes, will need to be poured back into the cooling system. For ease of operation, remove the air filter.
First remove the external pipes, then the pipes from the stove radiator in the cabin. The heater hose is cut to fit the size of the nozzles. For ease of fitting onto the fittings, lightly lubricate the surface of the fittings with grease or lithol. First, attach the hose to the fittings of the stove radiator, then to the tap tubes, not forgetting to first put clamps on the hose. Clamps secure the hose to the fittings and tubes. The same actions are performed on the outside of the pipes and fittings. After assembly, check the tightness of the hose clamps on the tubes and fittings.
Pour coolant into the expansion tank, only up to the maximum mark, and replace the air filter. The expansion tank cap is closed. Start the car and warm it up until the cooling fan comes on. Check to see if there are any coolant leaks from the cooling system. With proper repair, there are no leaks. If necessary, add coolant to the reservoir until the average level between the minimum and maximum marks is reached.
What are the advantages of ordering pipes and other auto parts online?
First of all, I would like to note how convenient it is to sit on the couch at home and choose the necessary auto parts for your car. It doesn’t matter what the weather is like outside at that moment. In addition, using the Internet it is possible to buy parts for cars at work. This is explained by the fact that ordering goods online does not require much time. A few clicks of the mouse and products from the virtual car store will be ordered, all you have to do is wait for it to be delivered.
Replacing the stove tap
It often happens that a part such as a faucet breaks (it is worth noting that on the 2114 it is not very reliable). When replacing it, you should simultaneously replace the pipes, even if they are in good working order (the location of the pipes of the VAZ 2114 stove was described above).
All faucet replacements are performed in the following order:
- place the car in the pit and secure it;
- unscrew the screw plug and drain the coolant;
- using a screwdriver, loosen the clamps on the pipes located in the engine compartment, and then remove them;
- find the tap in the passenger compartment on the passenger side (located under the panel), loosen the clamps of the pipes suitable for it, and then remove them;
- Using a 10mm wrench, unscrew a pair of nuts screwed onto the studs and securing the valve body;
- from the interior side, pull out the tap and disconnect the control cable from it;
- install a new (similar) faucet in its original place;
- perform assembly in the same sequence, but in reverse order.
Before disconnecting the pipes (especially those located in the passenger compartment), you should place a cloth under them in case of coolant leakage.
Many car enthusiasts who carry out such a replacement are sometimes interested in how to properly connect the pipes to the VAZ 2114 stove? After all, by mistake or forgetfulness, you can connect them incorrectly, which will disrupt the normal circulation of coolant.
In order not to make a mistake, it is worth remembering that the connection diagram for the connection pipes of the VAZ 2114 stove is as follows: the pipes located in the engine compartment are connected: the first - from the tap (inlet) to the hole in the cylinder head, the second - from the tap (outlet) - to "saxophone". The connections in the cabin are connected: the first - from the tap to the thermostat, the second - from the tap to the pump inlet.
For even greater convenience, you can use the following general diagram of the heating system:
It is worth noting that the pipes located inside the cabin vary greatly in length, so it is extremely difficult to confuse their location.
HEATER RADIATOR IS LEAKING
It was said above that one of the reasons for the appearance of antifreeze in the car interior may be leakage from the heater radiator.
Important. If you discover that antifreeze is leaking into the interior of your car, under no circumstances leave repairs for later. Because ethylene glycol, which is part of most antifreezes, is very toxic. And breathing the vapors of this aggressive chemical is dangerous to your health.
Below you will learn how to replace a leaking heater radiator. First of all, of course, you need to drain the antifreeze. Then you get comfortable in the cabin and begin to disassemble the front panel: glove compartment, consoles, sides. Unscrew all the screws and screws. To avoid losing them, collect them on a magnet or in a small plastic cup. There is one hidden screw under the plug on the dashboard console, so be careful.
When you remove all the panels and access to the heater radiator opens, loosen the clamps on the pipes, release them, but do not forget to place a mug or other container under the hoses so as not to flood the interior with antifreeze residue. Now you have to remove the VAZ 2114 stove, or rather, the heating radiator.
Which heater tap to choose?
When an old part wears out, it is logical to purchase a modified version of it to prevent problems in the future. Regulator options with metal and ceramic parts are now available for sale. They are more durable and resistant to temperature. Let's consider several options:
- A modified spare part from AvtoVAZ with article number 21080-810115000 is available in stores at prices ranging from 180 to 250 rubles . Low price, presence of metal elements, average quality;
- A ceramic faucet from Luzar with article number 2108-8101150 is sold at a price of 300 to 500 rubles . High quality, ceramic elements, average price;
- The Tsn-Citron company, with article number 8.5.2, offers a budget option for 170 rubles. Medium quality. There are metal elements.
We recommend that you do not save on purchasing a new element of the heating system, because... its unexpected failure will bring a lot of problems.
Heater pipes reinforced rubber blue 21082 for VAZ 2108-21099, 2113-2115 injector
Pay for goods by credit card, using QIWI, Yandex.Money or WebMoney and save on your purchase from 4%, avoiding postal and bank commissions
This product was chosen by 88 customers
Set: 4 pipes.
Weight, kg: 0.6 Dimensions, cm: 38 x 11 x 8 Volume, m3: 0.00334
Instructions for replacing the cooling system pipes of the VAZ-2114
In cars of domestic manufacturers, engine cooling occurs using a cooling system; in the VAZ-2114, this task is performed by antifreeze. Only with the right choice of antifreeze can you ensure efficient operation of the cooling system:
- Factory antifreeze fluid is worse; due to the smaller amount of additives, the thermal protection of the vehicle suffers significantly. Antifreeze was developed specifically to cool vehicle parts and components, so it is exceptionally useful.
- Factory fluid has one big drawback - it quickly spoils the pipes, which in turn leads to fluid leakage and radiator defects.
Having convinced himself of how important it is to use high-quality antifreeze, the driver of the VAZ-2114 begins to replace the old fluid with a new one. In this case, after a couple of weeks an antifreeze leak is detected, what’s the matter? The owner of the car did not take into account that along with the antifreeze, the pipes through which leaks occur must also be replaced.
Experience shows that old hoses are absolutely unusable; antifreeze corrodes them very quickly. Therefore, it’s time to learn how to replace pipes, and finally close the question of the correct operation of the cooling system. Service station specialists will tell you how to implement your plans.
How to correctly replace pipes in a VAZ-2114
The first question that experts hear from car enthusiasts is which pipes should be purchased for the VAZ-2114? Products made from silicone are considered the most durable and at the same time ideally compatible with the cooling mechanism of the VAZ-2114. The diagram below shows the location of the pipes we are interested in:
- The short ones are mounted on the couplings of the thermostat and the pump pumping water.
- Next comes the conductive hose.
- The pipe located in the lower part is responsible for removing antifreeze from the radiator unit.
What set of tools will be needed to replace the VAZ-2114 pipes
- New hoses.
- Keys of different sizes.
- Screwdrivers of different formats.
- Silicone-based lubricant.
Now let’s talk about how the well-known antifreeze differs from antifreeze. The latter is produced by a domestic manufacturer, antifreeze is produced abroad, so the composition may differ.
Therefore, ask the seller about foreign-made coolant.
Instructions for replacing the cooling system pipes of the VAZ-2114
Step-by-step replacement of cooling system pipes in a VAZ-2114 car looks like this:
- Remove the battery cable that comes out of the negative socket.
- Carefully drain the old coolant, but wait until the engine has cooled completely before doing so. Otherwise, there is a risk of getting burns from the coolant.
- Remove the following components: set aside the upholstery that provides sound insulation, the fan, the trim going to the windshield frame, the facing material.
- Now your goal is to get to the air collector; to do this, unscrew the brackets in the form of springs and the screws responsible for fixing them. A screwdriver is ideal for spring clips; for screws, you need a wrench.
- To loosen the clamps, remove the front housing, and then remove the old hoses from the fittings.
- All that remains is to install new silicone hoses in a specially designated place; it is preferable that the parts are manufactured abroad - they will last longer.
- Reinstall the other components by following the reverse order of this step-by-step instruction.
Subtleties of filling new antifreeze
Before you start filling in new coolant, you need to drain the old one, and also thoroughly clean the entire cooling system of contaminants. To do this, it is better to use a special cleaning agent that can be purchased at a car enthusiast store. Make sure that all taps and plugs of the VAZ-2114 are open. You can determine whether the system has been flushed or not based on the color of the antifreeze flowing out.
The plugs and tap are closed only when the product becomes transparent. If the manufacturer describes in the instructions the specifics of using the cleaning mass, follow these rules for effective cleaning. As for the level of antifreeze filling, some drivers prefer to fill to the limit mark, others deliberately do not top up, and later, after a successful test, add more fluid.
After the antifreeze has been replaced, all that remains is to close the expander and start the car engine. The motor should idle until the furnace fan starts running.
Reviews of silicone pipes for the VAZ-2114 cooling system
Drivers of the VAZ-2114, who replaced the usual factory rubber pipes with silicone ones, note the following advantages of the new components:
- Long service life, and all thanks to the increased wall thickness and dense reinforcement, consisting of several layers of material.
- Silicone hoses work successfully and efficiently, regardless of the temperature and weather conditions outside.
- When the silicone pipe is tightened, a force is felt, so overtightening and damaging the hose, like a rubber one, will not work in any case.
- The engine compartment can be painted any color you like.
Among the disadvantages of silicone pipes built into the cooling system of domestically produced VAZ-2114 cars, drivers note:
- high cost of parts, one set is approximately 1.5-2 times more expensive than rubber analogues;
- the manufacturer does not provide any warranty, so if you bought a defective product, it is impossible to replace it and you will again have to spend money on a new set of hoses.
In order not to pay extra, VAZ-2114 owners prefer to order silicone pipes in online stores, where they are found in 2 types:
- with reinforced thread;
- Along with silicone there is a rubber component.
Despite the possible negative nuances of silicone hoses, the owners of the VAZ-2114, who took the time to modernize their car and changed the pipes in the vehicle’s cooling system, note that the modification is worth the money - the engine is cooled like clockwork, no major comments are made.
As for the service life of new hoses, on average it is 2 years longer than that of rubber pipes, but only when it comes to reinforced silicone components.
The following video clearly shows how to change antifreeze and flush the cooling system of a VAZ-2114: https://www.youtube.com/watch?v=CGGDk3F1hNY.
The difference between a rubber hose and a silicone hose is explained in the video:
How to correctly replace pipes in a VAZ-2114
The first question that experts hear from car enthusiasts is which pipes should be purchased for the VAZ-2114? Products made from silicone are considered the most durable and at the same time ideally compatible with the cooling mechanism of the VAZ-2114. The diagram below shows the location of the pipes we are interested in:
- The short ones are mounted on the couplings of the thermostat and the pump pumping water.
- Next comes the conductive hose.
- The pipe located in the lower part is responsible for removing antifreeze from the radiator unit.
Design and reasons for replacing the stove radiator
The VAZ 2114 stove radiator has a simple but durable design. Its core consists of two rows of aluminum tubes and transverse thin metal plates that form a honeycomb. This ensures heat accumulation in the core. The ends of the tubes are flared in end plates and sealed with special materials. This ensures a tight fit of the mating surfaces. Three plastic tanks are welded to the ends of the core. Two tanks on one side are connected to the cooling system, and the third - on the opposite side - circulates antifreeze in the radiator.
The service life of the heater radiator is noticeably less than the service life of the car. Usually tubes, pipes, tanks begin to leak, or the core becomes clogged. For the VAZ 2114, heater radiators manufactured by DAAZ, Luzar, Pramo, Fenox, etc. are suitable, each of which has its own advantages and disadvantages.
Product delivery options
Note! Below are the shipping methods available specifically for this product. Payment options may vary depending on the shipping method. Detailed information can be found on the “Delivery and Payment” page.
Parcel by Russian Post
Available payment methods:
- Cash on delivery (payment upon receipt)
- Using cards Sberbank, VTB, Post Bank, Tinkoff
- Yandex money
- QIWI
- ROBOKASSA
Shipping throughout Russia. Delivery time is from 5 to 12 days.
Parcel by Russian Post 1st class
Available payment methods:
- Cash on delivery (payment upon receipt)
- Using cards Sberbank, VTB, Post Bank, Tinkoff
- Yandex money
- QIWI
- ROBOKASSA
Shipping throughout Russia. Delivery time is from 2 to 5 days. More expensive than regular delivery by Russian Post, approximately 50%. Parcel weight up to 2.5 kg
Express Parcel EMS
Available payment methods:
- Cash on delivery (payment upon receipt)
- Using cards Sberbank, VTB, Post Bank, Tinkoff
- Yandex money
- QIWI
- ROBOKASSA
Shipping throughout Russia. Delivery time is from 3 to 7 days. More expensive than regular delivery by Russian Post, approximately 100%.
Transport companies
Available payment methods:
- Using cards Sberbank, VTB, Post Bank, Tinkoff
- Yandex money
- QIWI
- ROBOKASSA
Delivery is possible to any locality where there is a representative office of the transport company. Delivery time is from 2 to 10 days. Sending large parcels is approximately 50% more profitable than by Russian Post.
Courier delivery in Togliatti
Available payment methods:
- Cash upon receipt
- Using cards Sberbank, VTB, Post Bank, Tinkoff
- Yandex money
- QIWI
- ROBOKASSA
Delivery time from 1 to 12 hours.
Pickup from our warehouse
Available payment methods:
- Cash upon receipt
- Credit, installments
- Using cards Sberbank, VTB, Post Bank, Tinkoff
- Yandex money
- QIWI
- ROBOKASSA
Pickup times must coincide with store opening hours.
The operating principle of the power unit is based on the chemical reaction of the fuel supplied to the cylinder in a gaseous state and its ignition element. As a result of the correct relationship of all elements and the choice of ignition moment, the translational movement of the piston is carried out, which is converted through numerous components of the vehicle into linear movement of the VAZ 2108.
When burned, the fuel mixture produces enough heat, the release of which does not affect the overall level of functionality of the engine. But overheating of the VAZ 2109 engine, determined by the cloud of steam billowing from the hood, indicates problems with the cooling system, which are currently presented more dramatically for the car owner. The most obvious symptom is a violation of the integrity of the rubber pipes. Some cooling system problems can be identified by warning signs from foul smells and steam coming from under the hood. Correct operation of the engine depends entirely on the owner’s timely attention to these signs of possible malfunctions.
The removal of excess heat from the engine is carried out by cooling the coolant through a radiator. The connection between the power unit and the remote radiator is provided by rubber pipes that pass the coolant through the radiator tubes, where it is cooled, dissipating excess heat outside the vehicle. The heat exchange process is carried out on a continuous basis, allowing the engine to remain at the optimal temperature.
Carrying out tuning work on the VAZ 2114 requires careful attention to the cooling system, since increased speeds and harsh operating conditions of the engine require significantly maximum heat removal. A powerful power unit with a high level of functionality is equipped with modern, highly elastic rubber products that can withstand a wide temperature range. Rubber is characterized by high thermal stability, and the reinforcement of products with thread preserves their elasticity, increasing the strength of the installed elements.
Tools and materials
To replace the heater radiator in a VAZ-2114 you do not need expensive and complex tools or equipment. It is enough that almost every car enthusiast has a new spare part in his garage. To complete the job you will need:
- new heater radiator - aluminum or copper;
- a set of ring and open-end wrenches, you can use a set of sockets with a ratchet;
- curly screwdriver;
- set of hexagons;
- container for draining antifreeze;
- fresh coolant, no more than 4 liters.
Additionally, it is better to stock up on rags to wipe off antifreeze that has spilled into the cabin; in addition, you will need a stop for the torpedo - a wooden block of 50x50 mm, about 40 cm long, is perfect.
Work order
Replacing the radiator of a VAZ-2114 stove without removing the dashboard allows you to save time, and this does not require any special skills. Let’s immediately make a reservation that part of the torpedo will still have to be disassembled, but the center console will remain in place, and this is the most labor-intensive part of the operation. At the initial stage of work, the side part of the panel on the passenger side is removed; to do this, use a screwdriver to unscrew the screws securing it.
To drain the coolant, you need to unscrew the bolts of the front protection, which is located under the engine compartment. The antifreeze is drained through a special plug located in the cylinder block; to unscrew it, you will need a 13 mm spanner. To prevent it from spilling on the ground or the garage floor, a container is placed under the car. To increase the rate at which antifreeze flows out, you can open the cap of the expansion tank.
Using a hexagon on the passenger side, the torpedo mount is unscrewed, after which it can be easily bent.
Next, you need to unscrew another fastener, located on the passenger side under the lower part of the center console. After this, the torpedo can be easily raised so that it remains in the same position, a stop of suitable length can be installed under it; a block with a cross-section of 50x50 mm and a length of about 40 cm is enough.
In the opened space you can see the heater radiator, which is attached to three self-tapping screws. They must be unscrewed so that it can be safely removed from the socket. In this case, a problem will arise - another self-tapping screw is hidden behind the plastic body of the torpedo, which needs to be unscrewed. To get to it, it is advisable to drill a small hole in the plastic through which you can insert a screwdriver. To do this, you first need to remove the glove compartment. If you try to move the torpedo, you can break the plastic and then removing the heater radiator on a VAZ-2114 will turn into an expensive procedure.
Next, you can proceed directly to dismantling the heater radiator. To do this, remove the clamps and disconnect the pipes, under which it is better to place a small container or rag, since there is still antifreeze in the system, which will spill directly into the cabin. After this, the radiator is removed from the mounting socket without any effort. It is advisable to examine it to see where the damage was and where the antifreeze is leaking from; corrosion damage appears in this place and streaks are visible, which once again confirms that the stove radiator needs to be replaced.
The new heater core fits into place effortlessly and should not cause any problems. It is secured with self-tapping screws, including through a hole previously drilled in the dashboard. In this case, it is advisable to inspect the faucet, since this is another weak point of the heating system. It should be completely dry and the lever should be easy to turn. The glove compartment is installed in place, the dashboard and the removed side panel are screwed to the mounts.
Before adding coolant, you need to check whether the plug on the cylinder block is tightened so that the coolant does not spill out. Fresh antifreeze is poured into the expansion tank to the level; if during operation the level drops, it will have to be topped up.
To carry out the tests, you need to start the engine and, after waiting until it warms up, turn on the heater. It should heat well in different modes, and the interior should remain dry, without stains of spilling antifreeze with a characteristic odor. At first, it is recommended to periodically look at the floor to make sure that all connections are tight and the new radiator is not defective.